ECサイトを作成する フロントエンドを作成する
Kurocoを利用してECサイトを作成する方法を、具体的な手順で説明します。 サイト構築には大きく3つの作業・設定が必要です。
- 管理画面よりECの設定を行う
- ECサイト構築に必要なAPIの設定を行う
- フロントエンドを作成する(本ページ)
作成するフロントページ一覧
今回作成するファイルは下記です。
| 項目 | ファイル名 | 内容 |
|---|---|---|
| 商品一覧ページ | product_list.vue | 商品一覧の表示 カート内容表示 カートへの商品追加 |
| 商品購入ページ | purchase.vue | カート内容表示 注文者情報入力 支払い方法選択 購入 |
今回は商品一覧〜購入までのページのサンプルになりますが、実際にサイトを構築する際にはログインページ・会員登録ページなどが必要になります。 ログイン実装の説明については本チュートリアルでは省略しますので、KurocoとNuxt.jsで、ログイン画面を構築するにてご確認ください。
フロントエンド実装
Nuxtインストールディレクトリに、下記構造にてファイル作成します。
今回はpagesディレクトリ内にecディレクトリを作成し、その下に「product_list.vue」と「purchase.vue」ファイルを作成しました。
pages
 - ec
   - product_list.vue
   - purchase.vue
商品一覧ページの作成
まずは商品一覧ページを作成します。下記のように記載します。
<template>
<div>
<div>
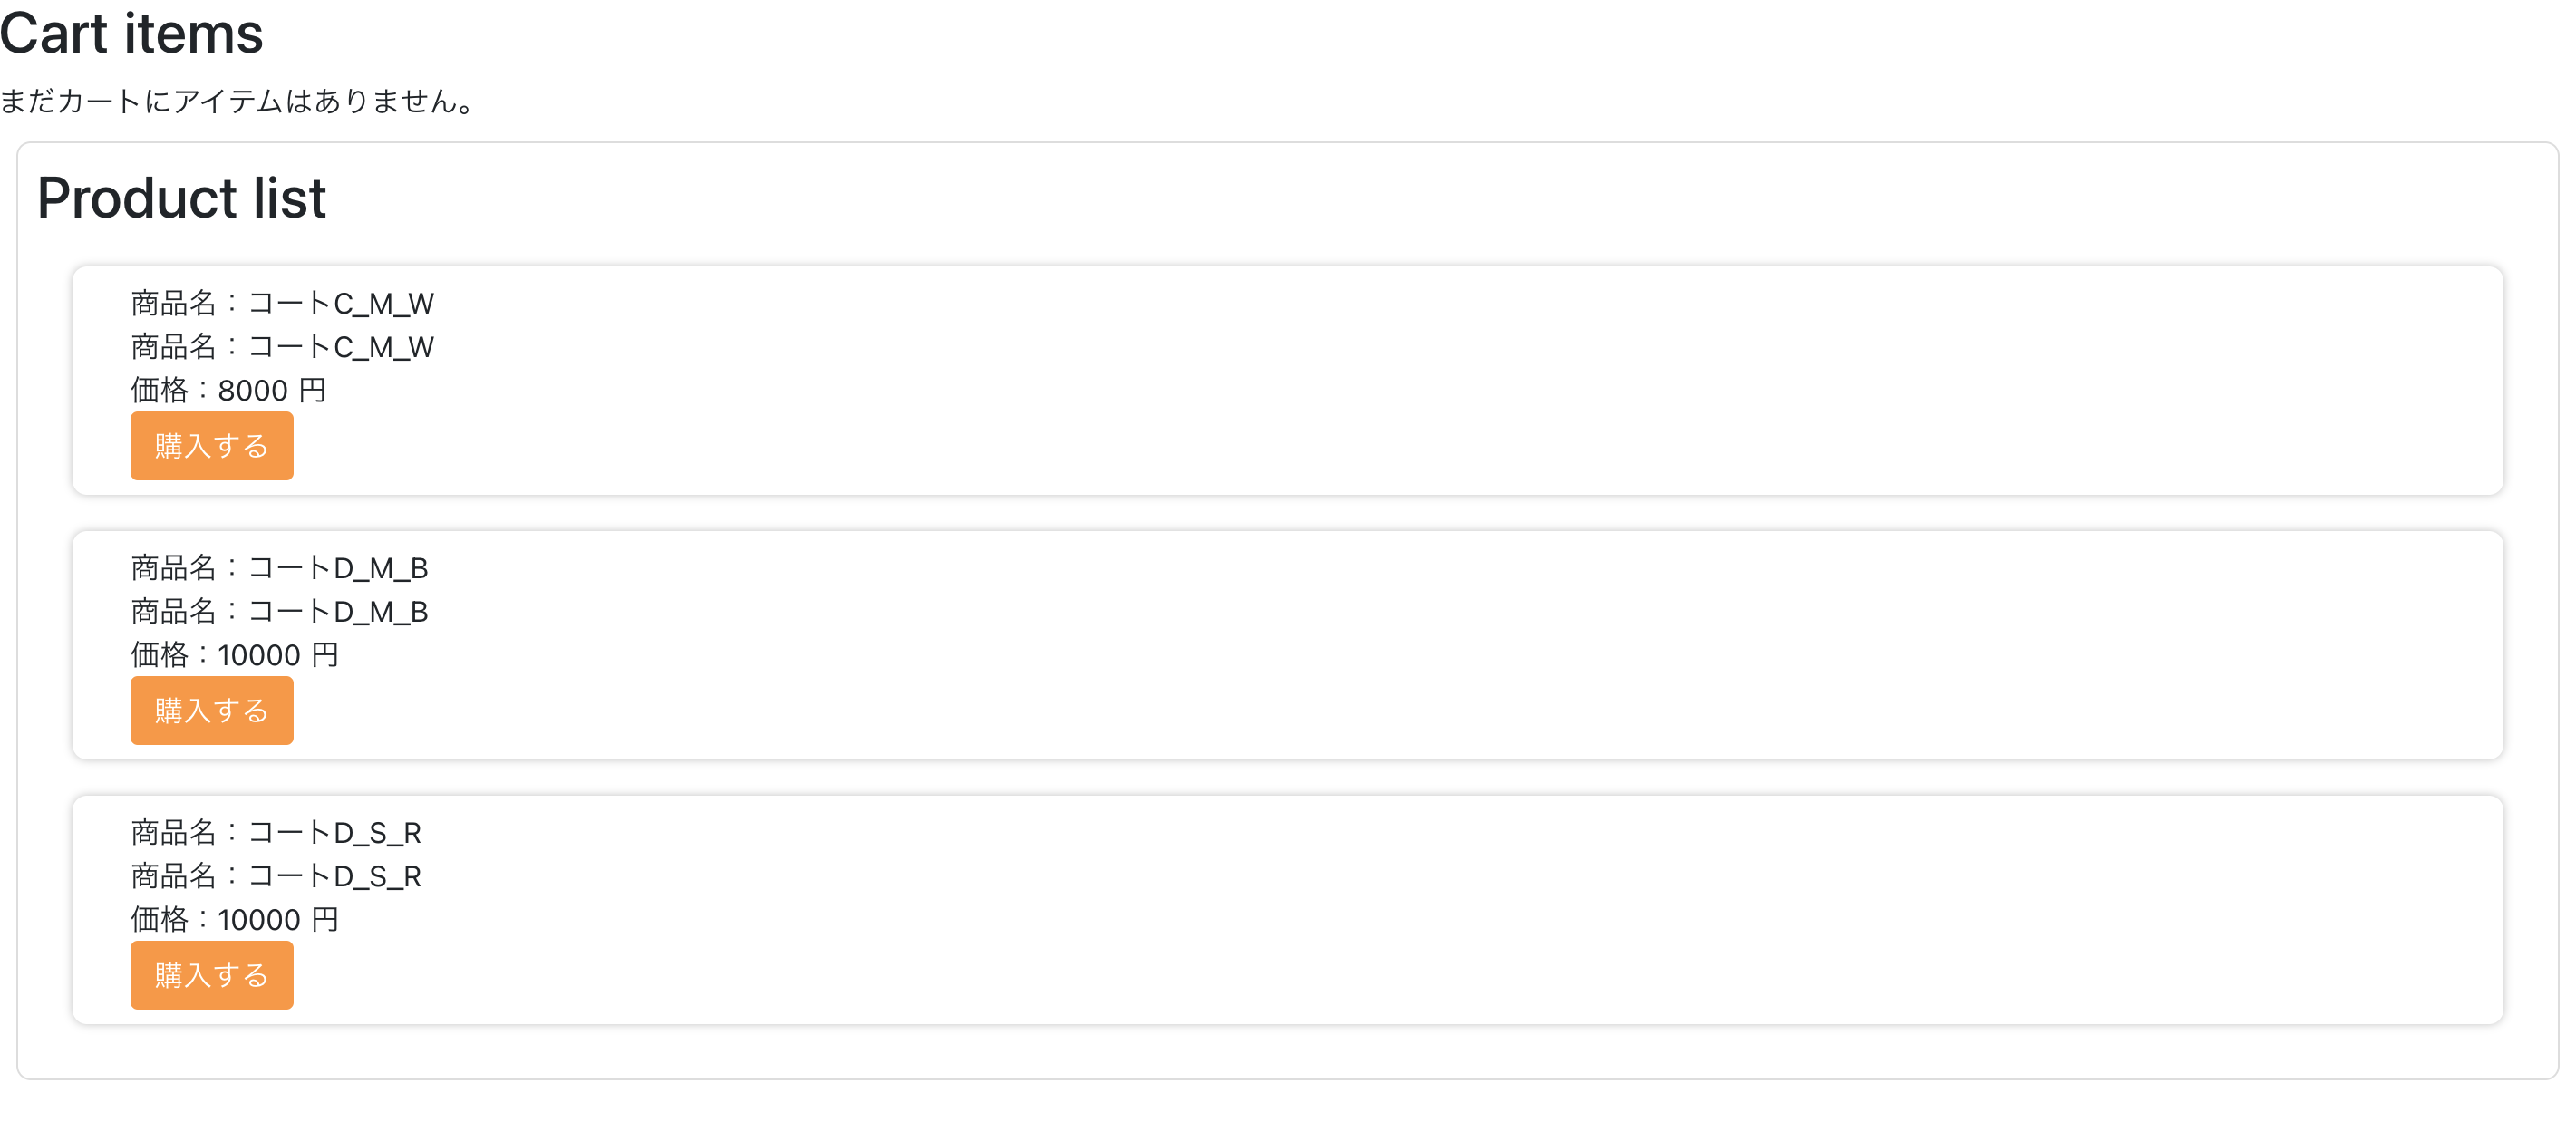
<h2 class="title">Cart items</h2>
<div v-if="cartItems" class="box">
<ul>
<h3>購入商品</h3>
<li class="cart-item" v-for="item in cartItems.items" :key="item.product_id">
<div class="product_id">ID: {{ item.product_id }}</div>
<div class="quantity">購入数: {{ item.quantity }}</div>
</li>
</ul>
<ul>
<h3>注文内容</h3>
<li>
<div>配送料: {{ cartItems.deliv_fee }}</div>
<div>商品の小計: {{ cartItems.subtotal }}</div>
<div>合計: {{ cartItems.total }}</div>
</li>
</ul>
<div>
<NuxtLink to="/ec/purchase" class="btn">カートに進む</NuxtLink>
</div>
</div>
<div v-else>まだカートにアイテムはありません。</div>
</div>
<div class="box">
<h2 class="title">Product list</h2>
<ul v-if="productList" class="ul">
<li class="list-item" v-for="item in productList" :key="item.product_id">
<div class="title">商品名:{{ item.subject }}</div>
<div class="title">商品名:{{ item.subject }}</div>
<div class="price">価格:{{ item.price_02 }} 円</div>
<div class="cart btn" @click="addCart(item.product_id)">購入する</div>
</li>
</ul>
</div>
</div>
</template>
<script>
export default {
auth: false,
async asyncData ({ $axios, params }) {
try {
const profile = await $axios.$get(process.env.BASE_URL + '/rcms-api/1/profile')
let cartItems = {
details: null
}
if (profile.ec_cart_id) {
cartItems = await $axios.$get(process.env.BASE_URL + '/rcms-api/1/cart-items/' + profile.ec_cart_id)
}
const productList = await $axios.$get(process.env.BASE_URL + '/rcms-api/1/product-list')
return {
'cartItems': cartItems.details,
'productList': productList.list
}
}catch (e) {
console.log(e.message)
}
},
data() {
return {
paymentId: {}
}
},
methods: {
async addCart(product_id) {
const profile = await this.$axios.$get(process.env.BASE_URL + '/rcms-api/1/profile')
const addItem = {
ec_cart_id: profile.ec_cart_id,
item: {
product_id: product_id,
quantity: 1
}
}
const addCartResp = await this.$axios.$post(process.env.BASE_URL + '/rcms-api/1/add-cart', addItem)
if (addCartResp.errors.length == 0) {
alert('Success add cart')
const cartListResp = await this.$axios.$get(process.env.BASE_URL + '/rcms-api/1/cart-items/' + profile.ec_cart_id)
this.cartItems = cartListResp.details
} else {
alert(addCartResp.errors[0].message)
}
}
}
}
</script>
<style scoped>
div.box{
border: solid 1px #ddd;
border-radius :8px;
padding: 10px;
margin:10px;
}
li {
border-radius :8px;
box-shadow :0px 0px 5px silver;
padding: 0.5em 0.5em 0.5em 2em;
margin: 20px;
}
.btn,
a.btn {
color: #fff;
background-color: #fd9535;
}
.btn:hover,
a.btn:hover {
color: #fff;
background: #fd9535;
}
a.btn--radius {
border-radius: 100vh;
}
</style>
上記サンプルコード内、「/rcms-api/1/…」の「1」にはご自身のAPIのIDをご記入ください。
商品購入ページ
次に商品購入ページを作成します。下記のように記載します。
<template>
<div>
<div class="box">
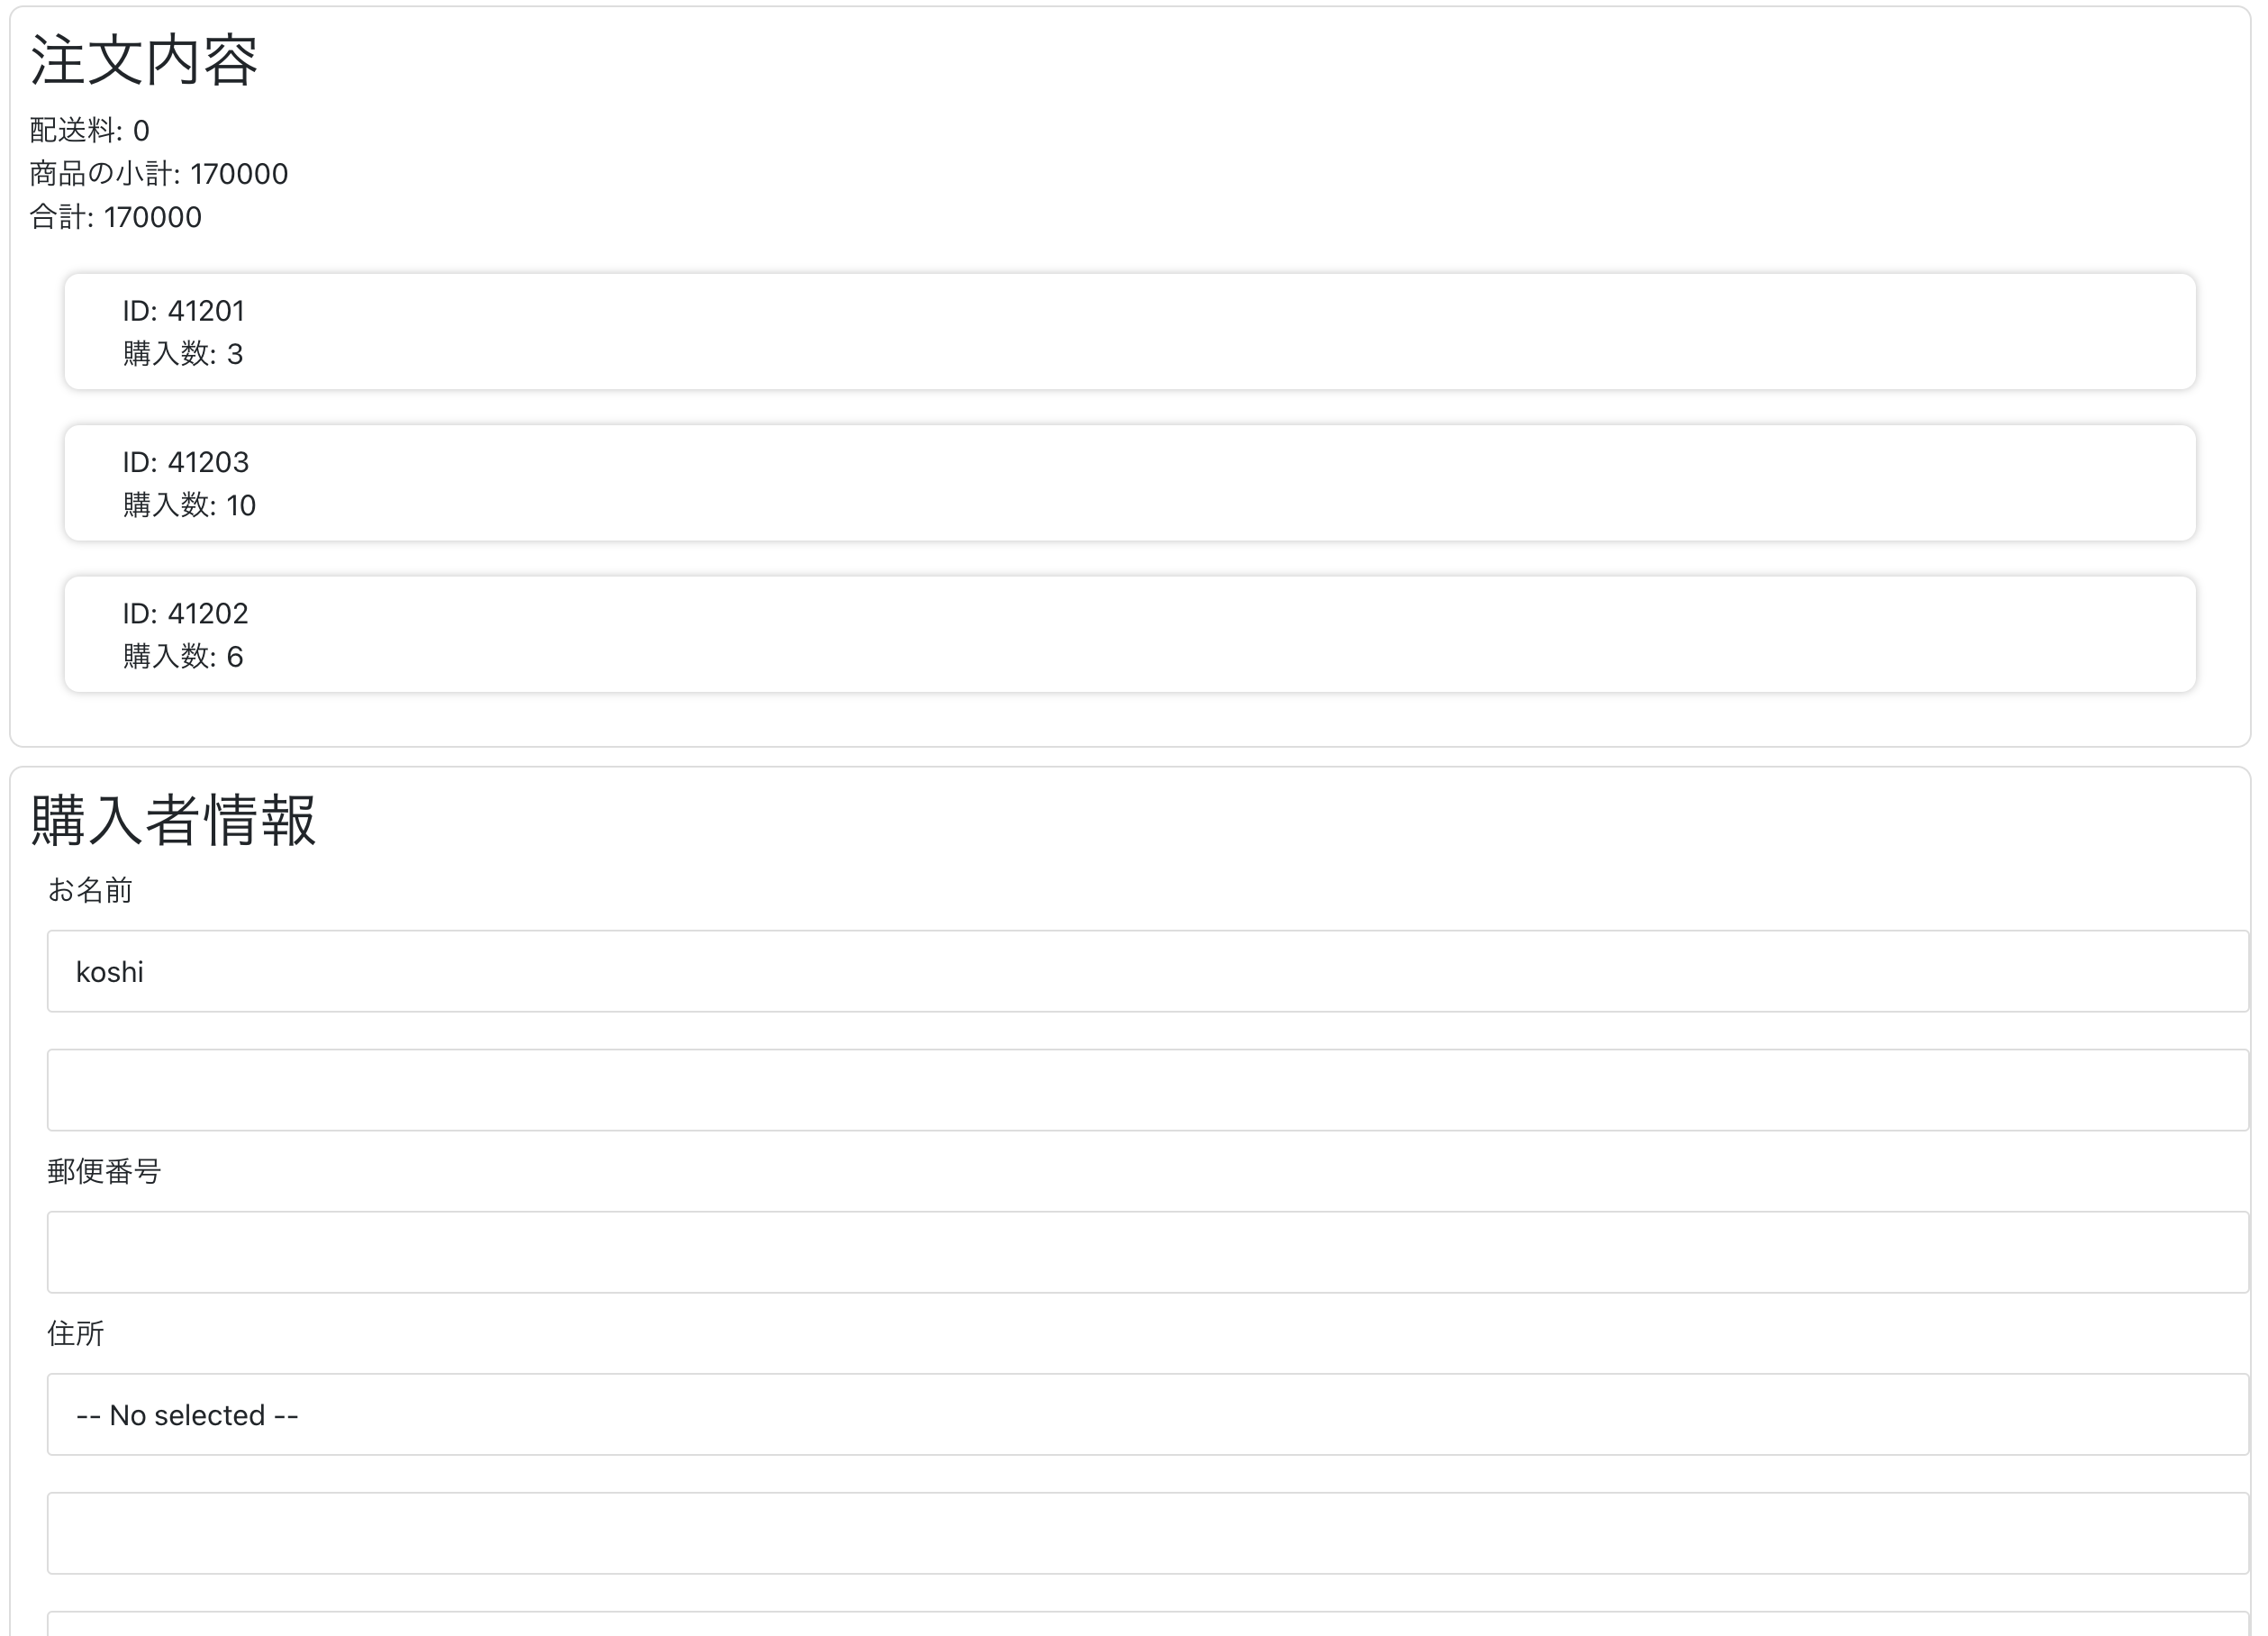
<h2 class="title">注文内容</h2>
<ul v-if="cartItems">
<div>配送料: {{ cartItems.deliv_fee }}</div>
<div>商品の小計: {{ cartItems.subtotal }}</div>
<div>合計: {{ cartItems.total }}</div>
<li class="cart-item" v-for="item in cartItems.items" :key="item.product_id">
<div class="product_id">ID: {{ item.product_id }}</div>
<div class="quantity">購入数: {{ item.quantity }}</div>
</li>
</ul>
</div>
<div class="box">
<h2 class="title">購入者情報</h2>
<label for="cheese">お名前</label>
<input name="name1" v-model="orderer.name1" /> <input name="name2" v-model="orderer.name2" /><br/>
<label for="cheese">郵便番号</label>
<input name="zip_code" v-model="orderer.zip_code" maxlength="7" minlength="7" /><br/>
<label for="cheese">住所</label>
<select name="tdfk_cd" v-model="orderer.tdfk_cd">
<option value="">-- No selected --</option>
<option value="01">北海道</option>
<!-- 省略 -->
<option value="13">東京都</option>
<!-- 省略 -->
<option value="47">沖縄県</option>
</select><br/>
<input name="address1" v-model="orderer.address1" /><br/>
<input name="address2" v-model="orderer.address2" /><br/>
<input name="address3" v-model="orderer.address3" /><br/>
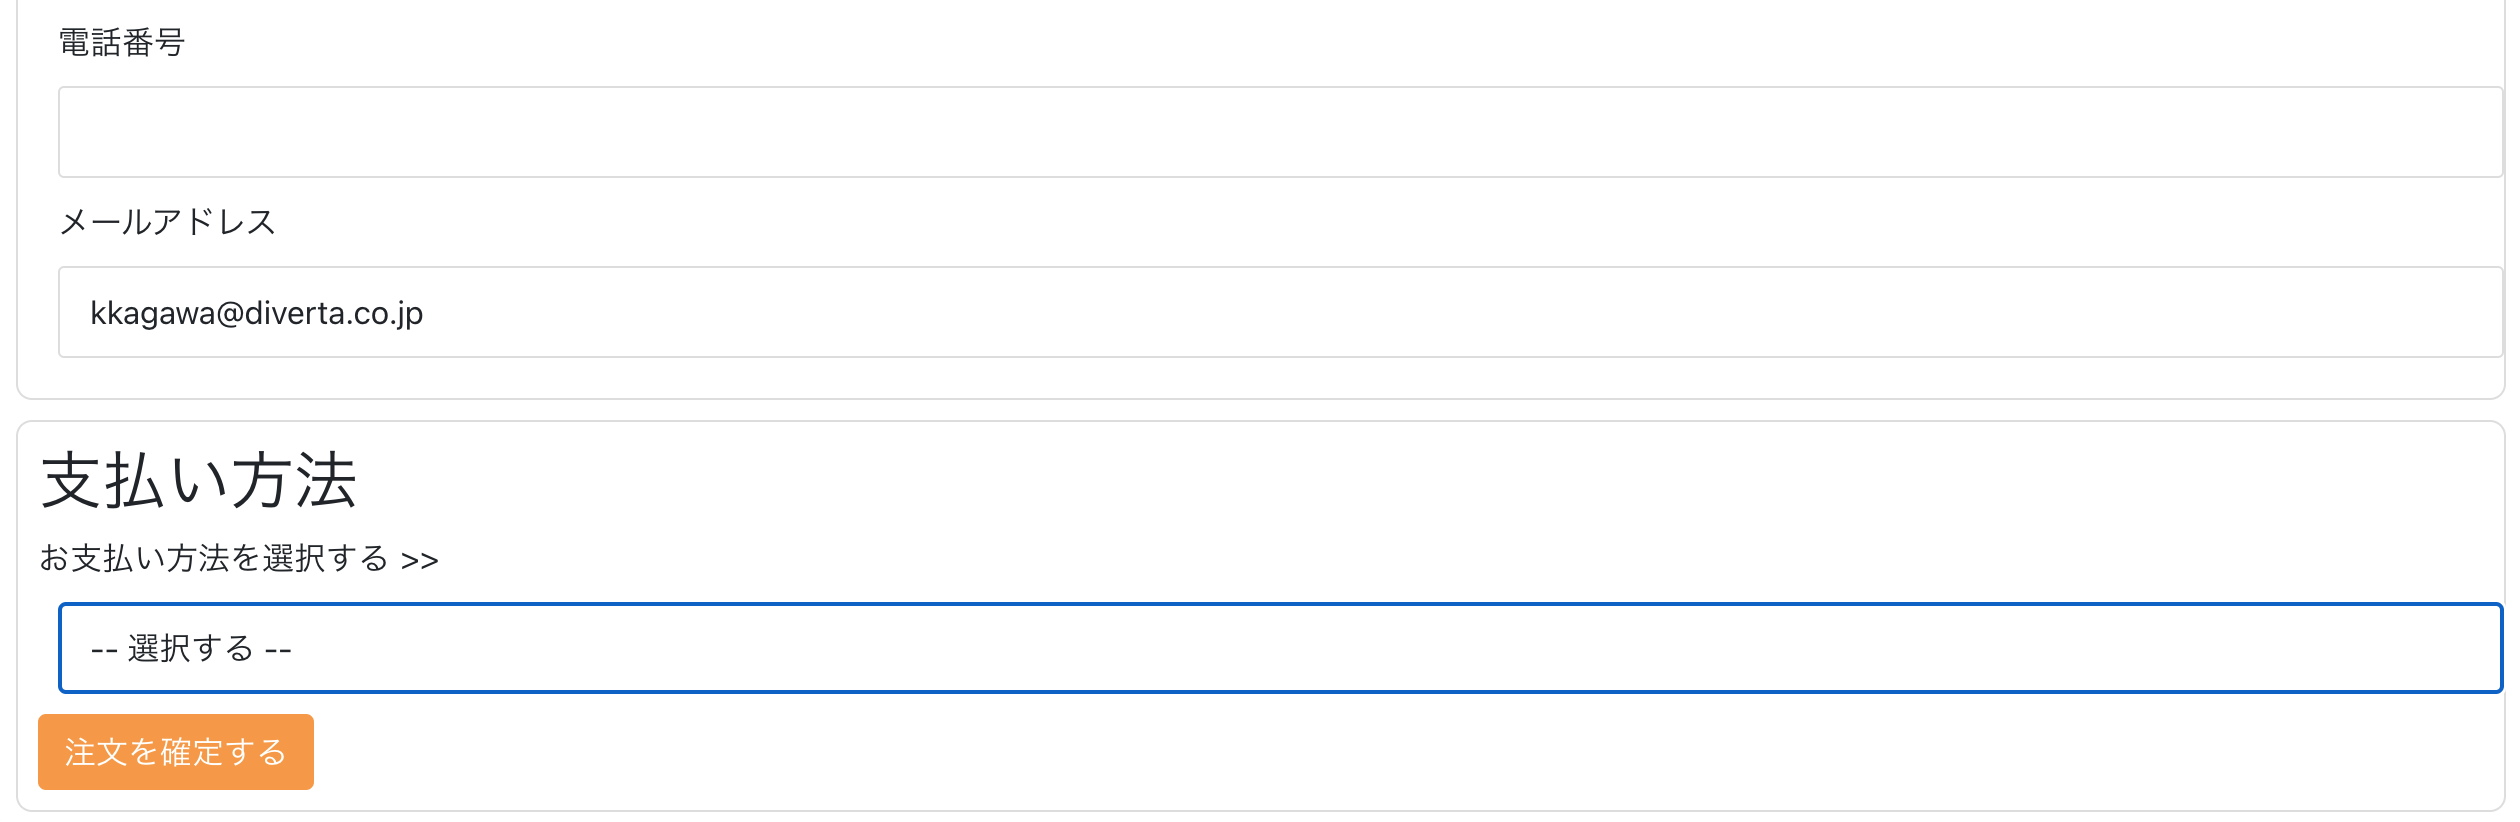
<label for="cheese">電話番号</label>
<input name="tel" v-model="orderer.tel" /><br/>
<label for="cheese">メールアドレス</label>
<input name="email" v-model="orderer.email" /><br/>
</div>
<div class="box">
<h2 class="title">支払い方法</h2>
<div class="payment" >
<span>お支払い方法を選択する >> </span>
<select v-model="paymentId">
<option value="0">-- 選択する --</option>
<option v-for="(paymment_info, payment_id) in paymentList" :key="payment_id"
:value="payment_id"
>{{ paymment_info.payment_type }}
</option>
</select>
</div>
<!-- Add credit card information entry forms, etc. as needed. -->
<!-- 必要に応じてクレジットカード情報入力フォームなどを追加 -->
<div @click="normalBuy()" class="cart btn">
注文を確定する
</div>
</div>
</div>
</template>
<script>
export default {
auth: false,
async asyncData ({ $axios, params }) {
try {
const profile = await $axios.$get(process.env.BASE_URL + '/rcms-api/1/profile')
/*const profile = await $axios.$get('/profile')*/
let cartItems = {
details: null
}
let orderer = {}
if (profile.ec_cart_id) {
cartItems = await $axios.$get(process.env.BASE_URL + '/rcms-api/1/cart-items/' + profile.ec_cart_id)
orderer.name1 = profile.name1
orderer.name1 = profile.name2
orderer.zip_code = profile.zip_code
orderer.tdfk_cd = profile.tdfk_cd
orderer.address1 = profile.address1
orderer.address2 = profile.address2
orderer.address3 = profile.address3
orderer.tel = profile.tel
orderer.email = profile.email
}
return {
'cartItems': cartItems.details,
'paymentList': cartItems.payment_list,
'orderer': orderer
}
}catch (e) {
console.log(e.message)
}
},
data() {
return {
paymentId: 0
}
},
methods: {
async normalBuy() {
if (!this.paymentId) {
alert('Please select payment')
return
}
const profile = await this.$axios.$get(process.env.BASE_URL + '/rcms-api/1/profile')
if (!profile.ec_cart_id) {
alert('No loggedin')
return
}
const order = {
ec_cart_id: profile.ec_cart_id,
ec_payment_id: parseInt(this.paymentId),
orderer: this.orderer
}
this.$axios.$post(process.env.BASE_URL + '/rcms-api/1/purchase ', order)
.then((response) => {
if (response.errors.length === 0) {
alert('Success purchase')
this.cartItems = null
}
})
.catch((error) => {
alert(error.response.data.errors[0].message)
})
}
},
}
</script>
<style scoped>
上記サンプルコード内、「/rcms-api/1/…」の「1」にはご自身のAPIのIDをご記入ください。
画面確認
ファイルを保存し、ec/product_listへアクセスすると下記のような画面が表示されます。
[購入する]をクリックすると、カートにアイテムが保存されます。
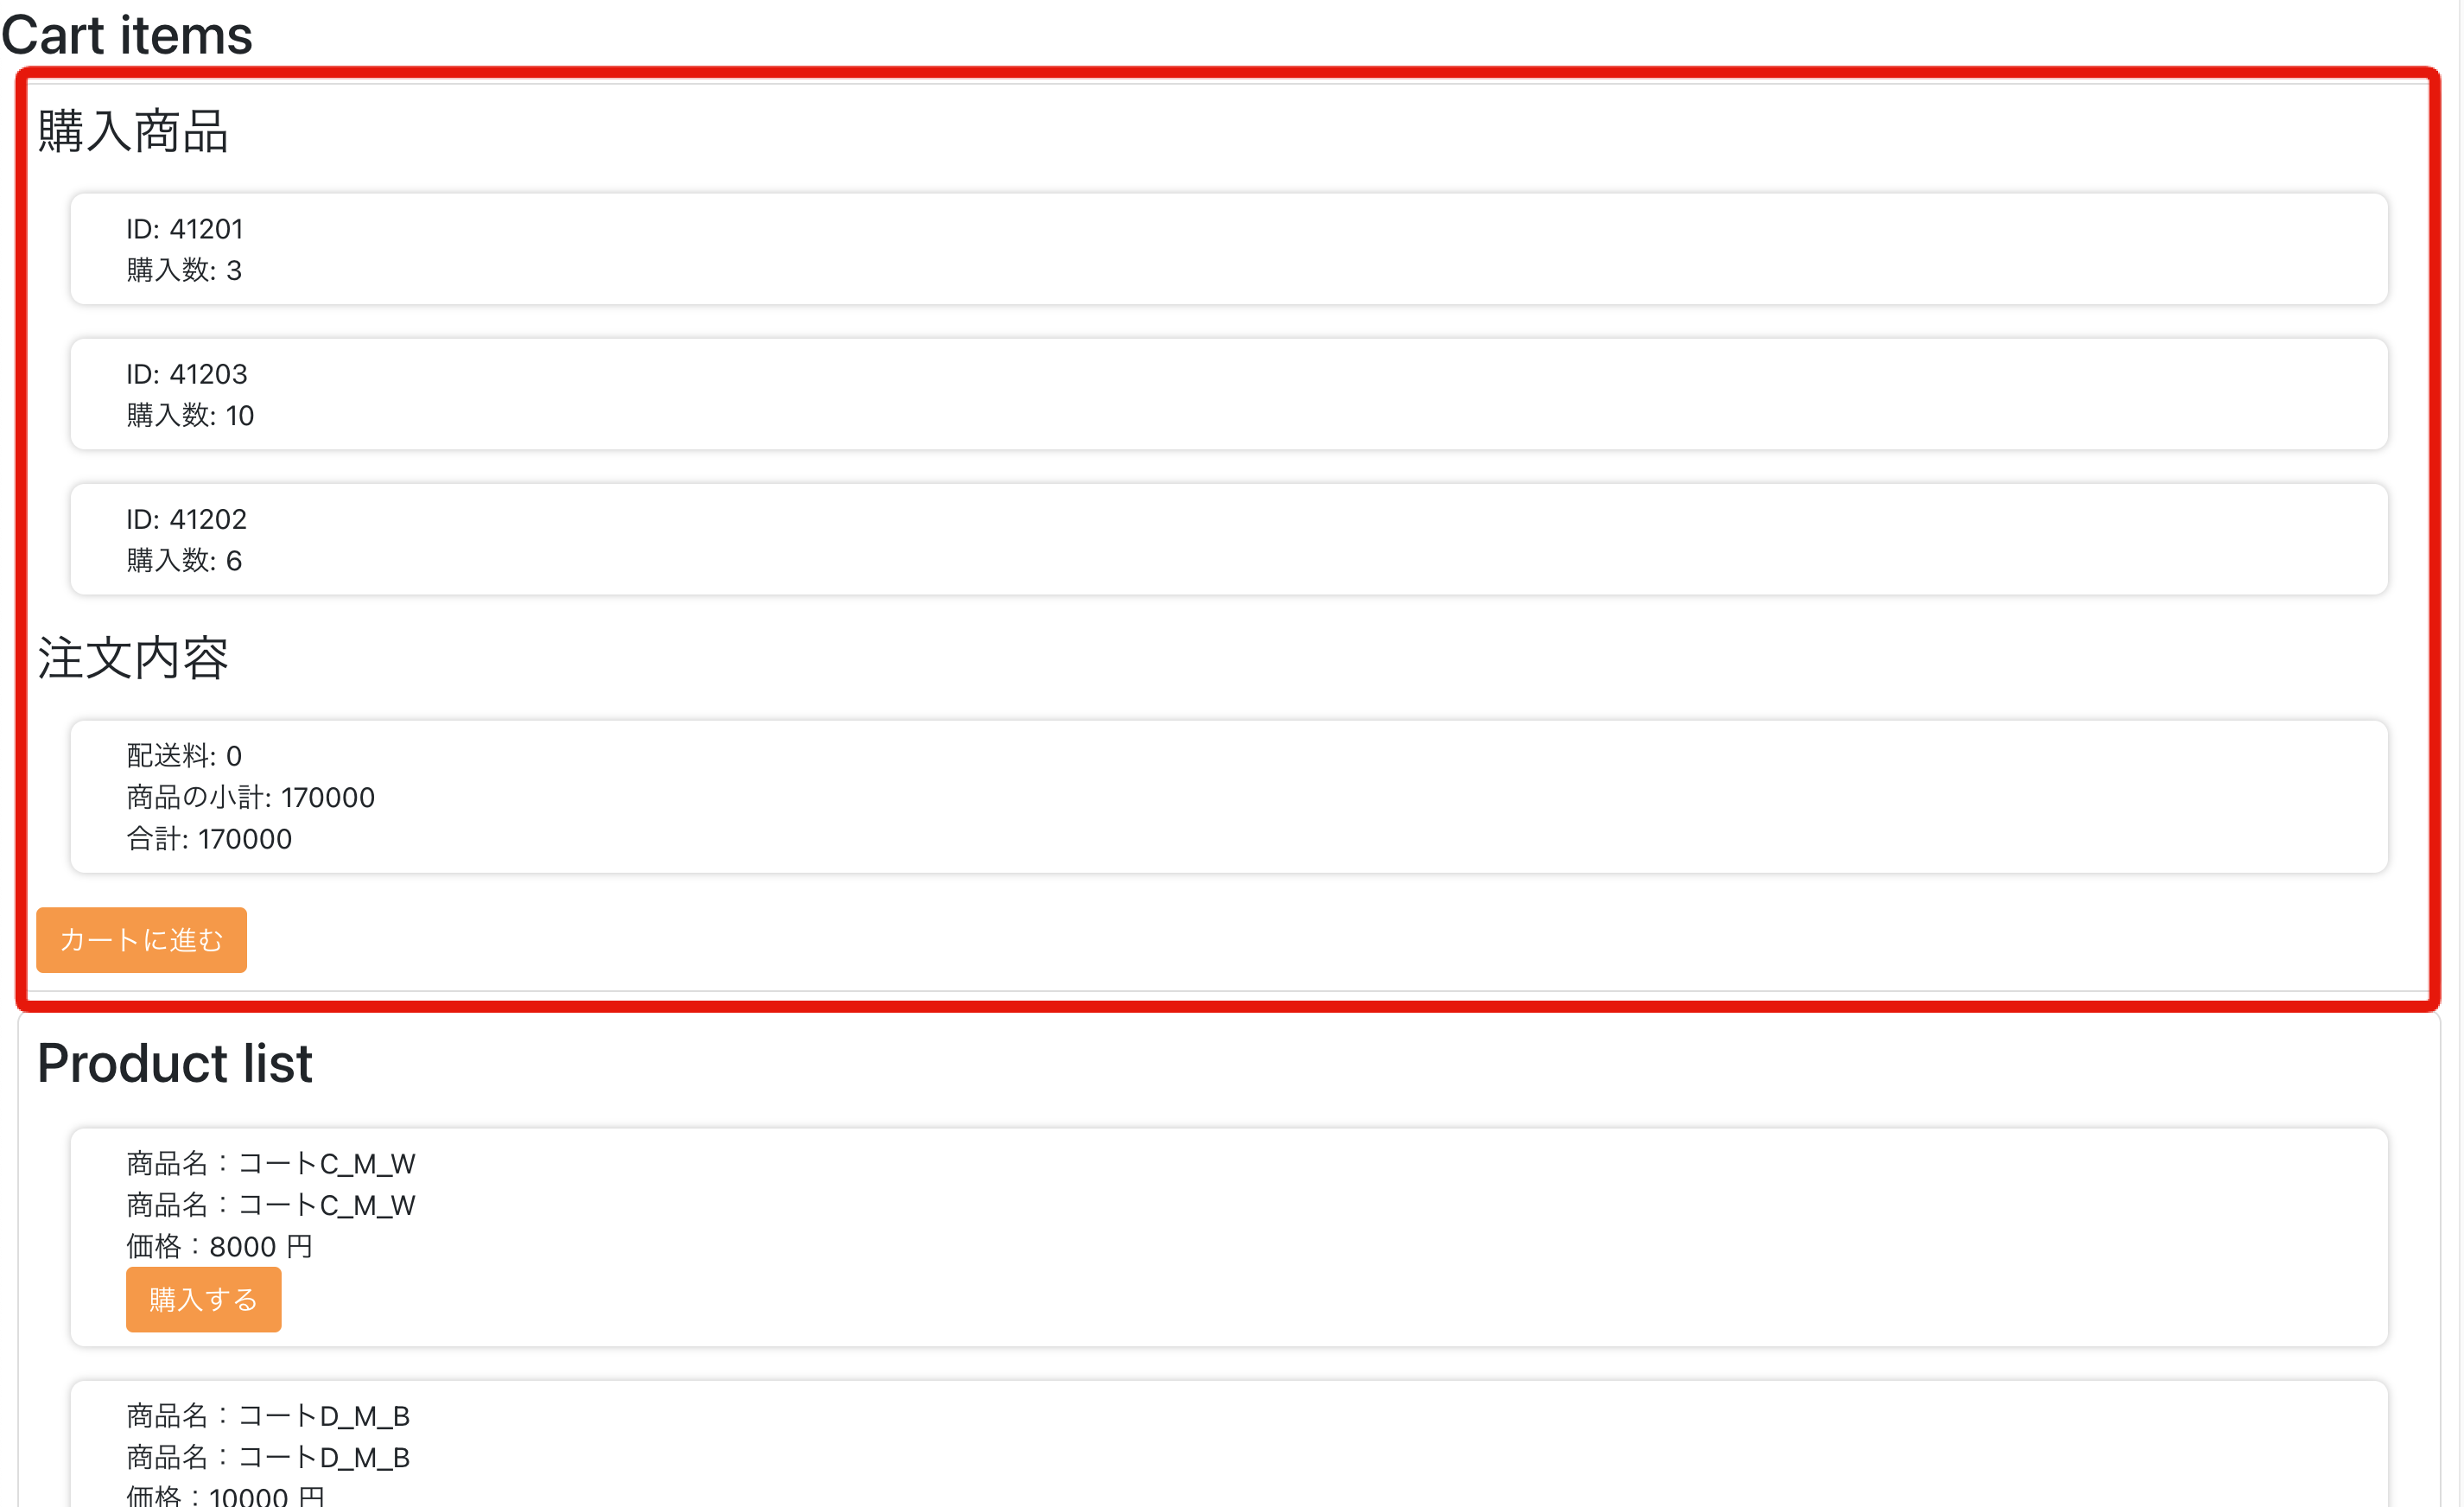
[カートに進む]をクリックすると、注文内容の確認と購入者情報、支払い方法の登録画面が表示されます。
[注文を確定する]をクリックして購入完了となります。
以上で、商品の表示から購入まで対応可能となります。 今回はECの全体的な構造の説明のため、詳細な説明は省略していますが、クレジットカード決済や定期購入等も可能となります。
参考情報
カートを利用せずに商品を購入する場合
今回のチュートリアルでは、銀行振込による決済、および商品の発送を伴う運用を想定していますのでカートに商品を追加し、購入というフローとなっていますが、有料会員の購入などカートを利用せずに商品を指定して購入処理を行いたい場合は『カートを利用せずに直接商品を指定して購入するには?』を参照してください
関連ドキュメント
サポート
お探しのページは見つかりましたか?解決しない場合は、問い合わせフォームからお問い合わせいただくか、Slackコミュニティにご参加ください。