Swagger UI
The Swagger UI screen lets you check the specification of the endpoints configured for an API, and run requests directly on the screen to verify their behavior. You can also issue and manage access tokens on this screen.
Accessing the Swagger UI screen
Click [API] and select the desired API, then click [Swagger UI] in the menu list.
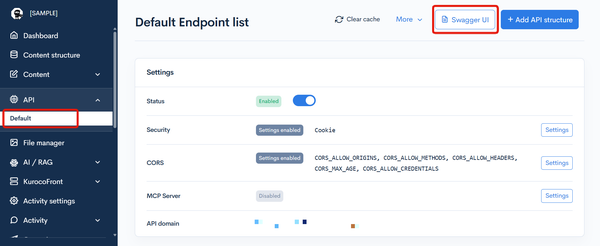
The "{API title} API information" screen is displayed.
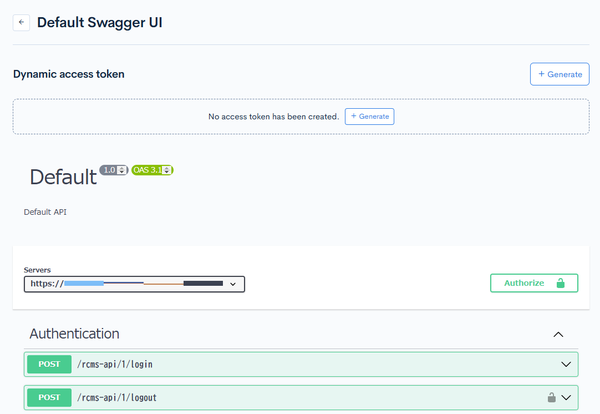
Viewing this screen requires the API's "View" permission.
Issuing and managing access tokens
When the API's Security is set to anything other than "None", a token panel corresponding to the security type (Static access token, Dynamic access token, Privileged static token, etc.) is displayed at the top of the screen.
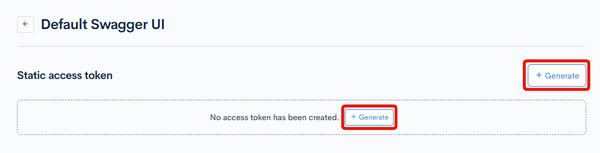
Viewing the token list requires the API's "View" permission; issuing, editing, and deleting tokens requires the API's "Update" permission (except for super users).
Issuing a token
Click [Generate] to open the "Generate access token" dialog.
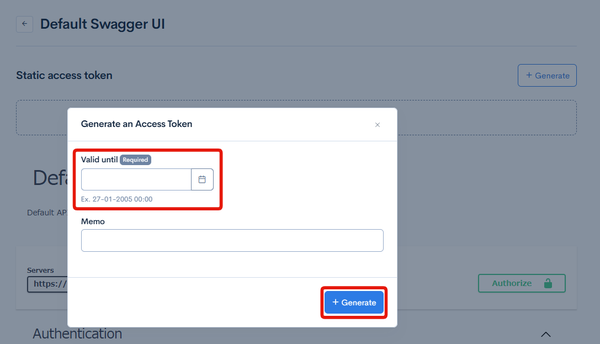
The displayed fields vary depending on the security type.
| Field | Description | Security types shown |
|---|---|---|
| Expiration | Specify the token's expiration date (required). | Static access token / Dynamic access token / Privileged static token |
| Memo | Enter an optional memo to identify the token. | Static access token / Privileged static token |
| Member ID | Specify the ID of the member to associate with the token (required). Only members holding the member "Update" and group "Update" permissions, or super users, can specify another member. | Dynamic access token / Cookie / Privileged static token |
Click [Generate] to issue the token. Copy and store the issued token value.
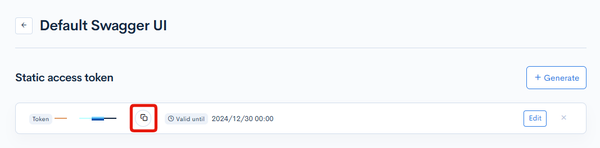
Issued token list
For "Static access token" and "Privileged static token", the issued tokens are displayed in a list.
| Field | Description |
|---|---|
| Token | Displays the issued token value. Use the button on the right to copy the value. |
| Expiration | Displays the token's expiration date. Expired tokens are shown as "Expired". |
| Member ID | For privileged static tokens, displays the ID of the member the token authenticates. Shown when you have permission to manage other members' tokens. |
| Memo | Displays the memo set when the token was issued. |
| [Edit] | Updates the memo. |
| × (Delete) | Deletes (revokes) the token individually. A deleted token can no longer be used to access the API. |
Note the following points about token management:
- Issuing a new token does not revoke previously issued tokens. Multiple tokens coexist.
- To revoke an issued token, delete it individually using the delete (×) button in the list.
- Changing the API's security setting invalidates all previously issued tokens. Although switching to another security type and back also revokes tokens, the API is temporarily exposed without authentication while the change is in progress. We do not recommend this operation for the purpose of revocation.
- Tokens can also be managed via the Admin MCP with
rcms_api_token-list(list) andrcms_api_token-delete(individual revocation). Use these for operations from AI agents or CI.
MCP server
When the API's "MCP server" setting is enabled, the MCP server URL and a [Tool list] button are displayed.

Clicking [Tool list] shows a list of the MCP tools published by the API and a panel for verifying the connection.
For details on the MCP server, see Integrating Kuroco with Model Context Protocol (MCP) and the MCP server reference.
Testing endpoints with Swagger UI
The lower part of the screen shows the list of endpoints configured for the API in Swagger UI format.
Select an endpoint and click [Try it out], specify the parameters, then click [Execute] to run an actual request and check the response code, response body, Curl, and Request URL.
Click [Authorize] to configure automatic attachment of an issued token to the request header (not shown when the security is "None" or "Cookie").
For detailed steps, see Using Swagger UI to check API security.
Related documents
Support
If you have any other questions, please contact us or check out Our Slack Community.