Content
On the content list screen, you can access, add to, and update the list of content you have created.
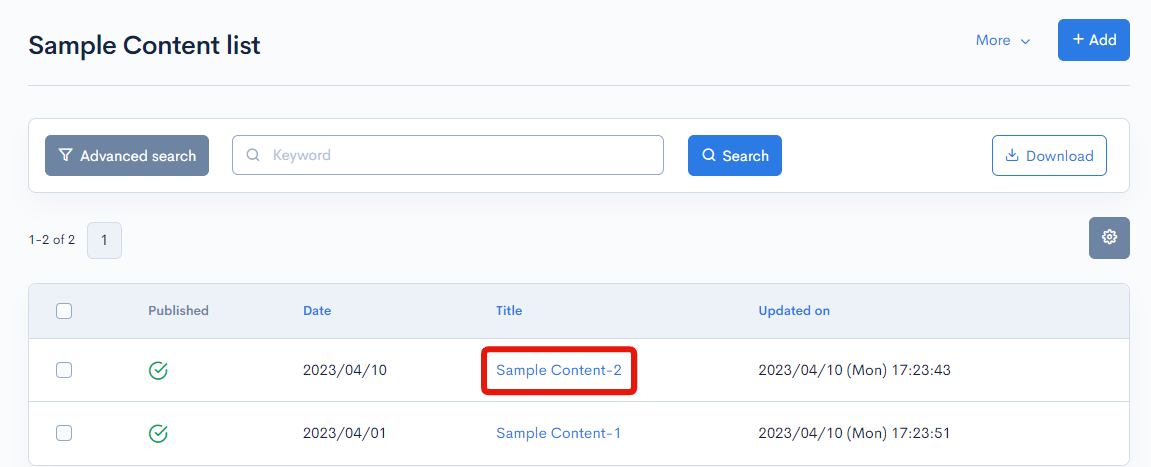
Content list
Accessing the screen
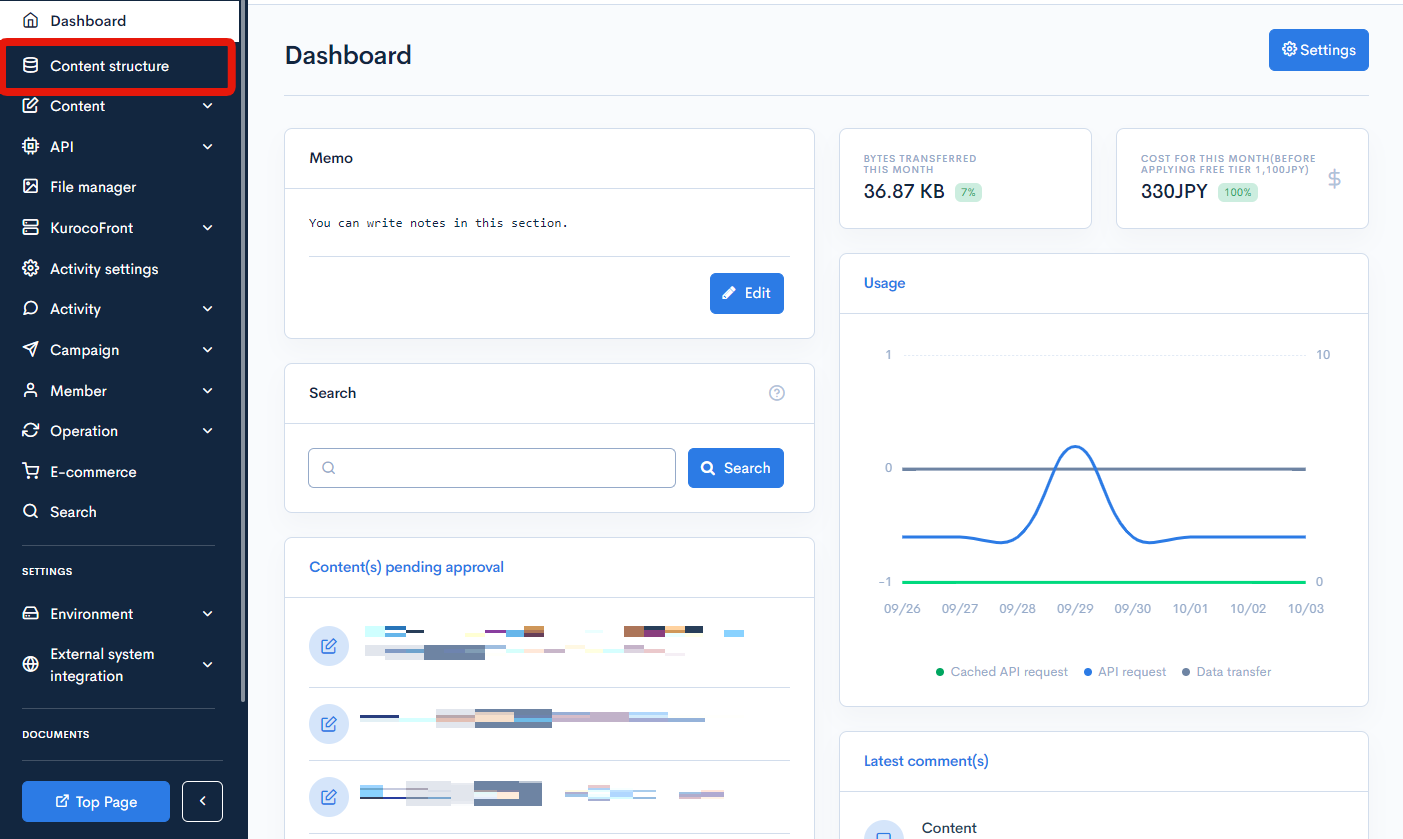
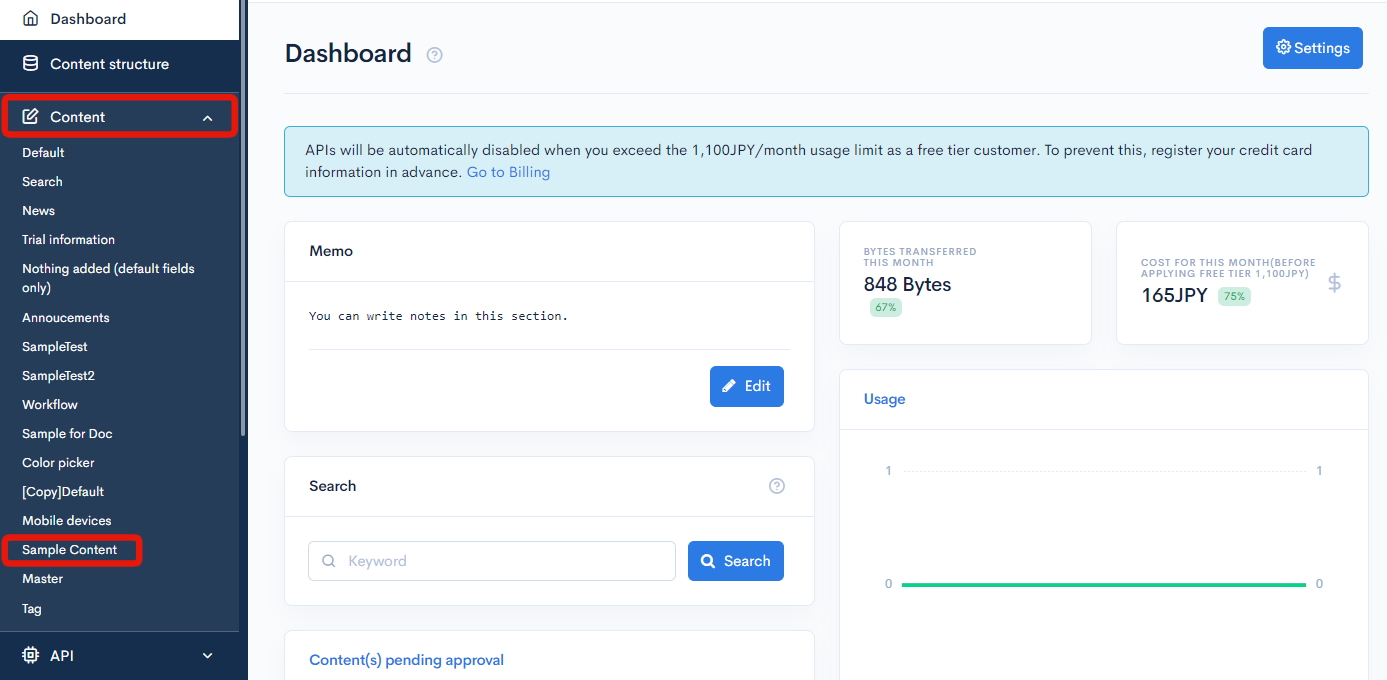
Click [Content structure] in the left sidebar menu.
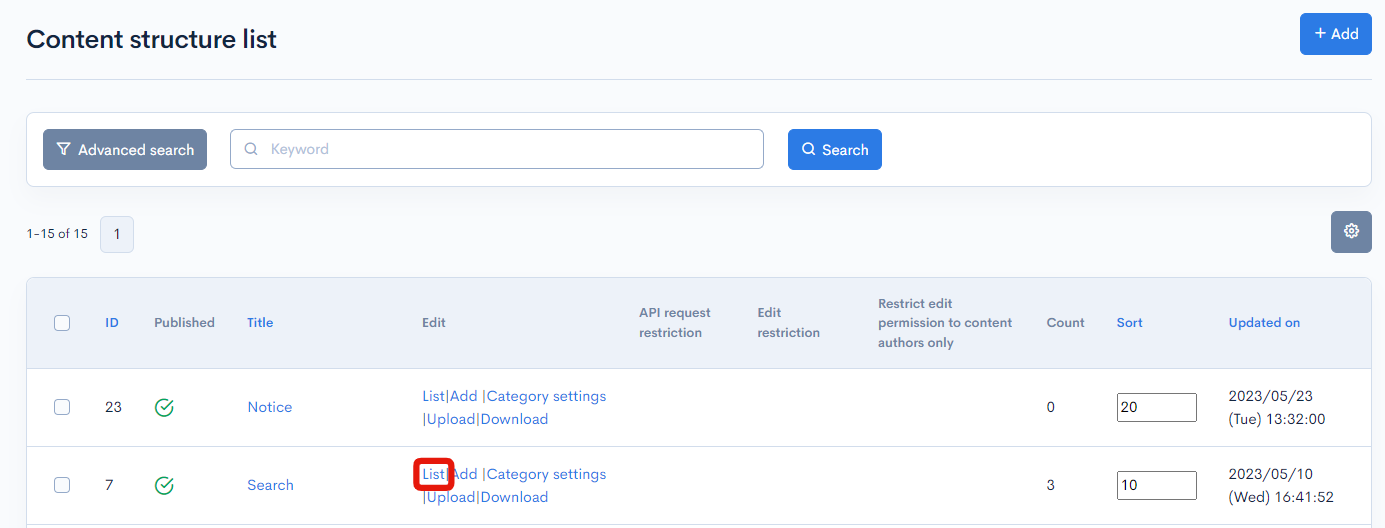
On the content structure screen, under the edit column, click [List] for the group you want to look at.
Advanced search
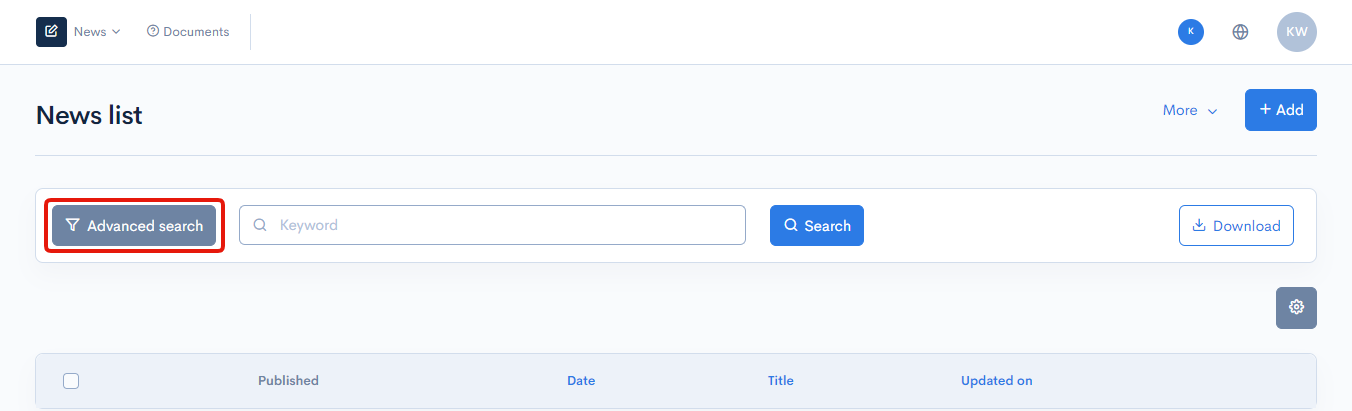
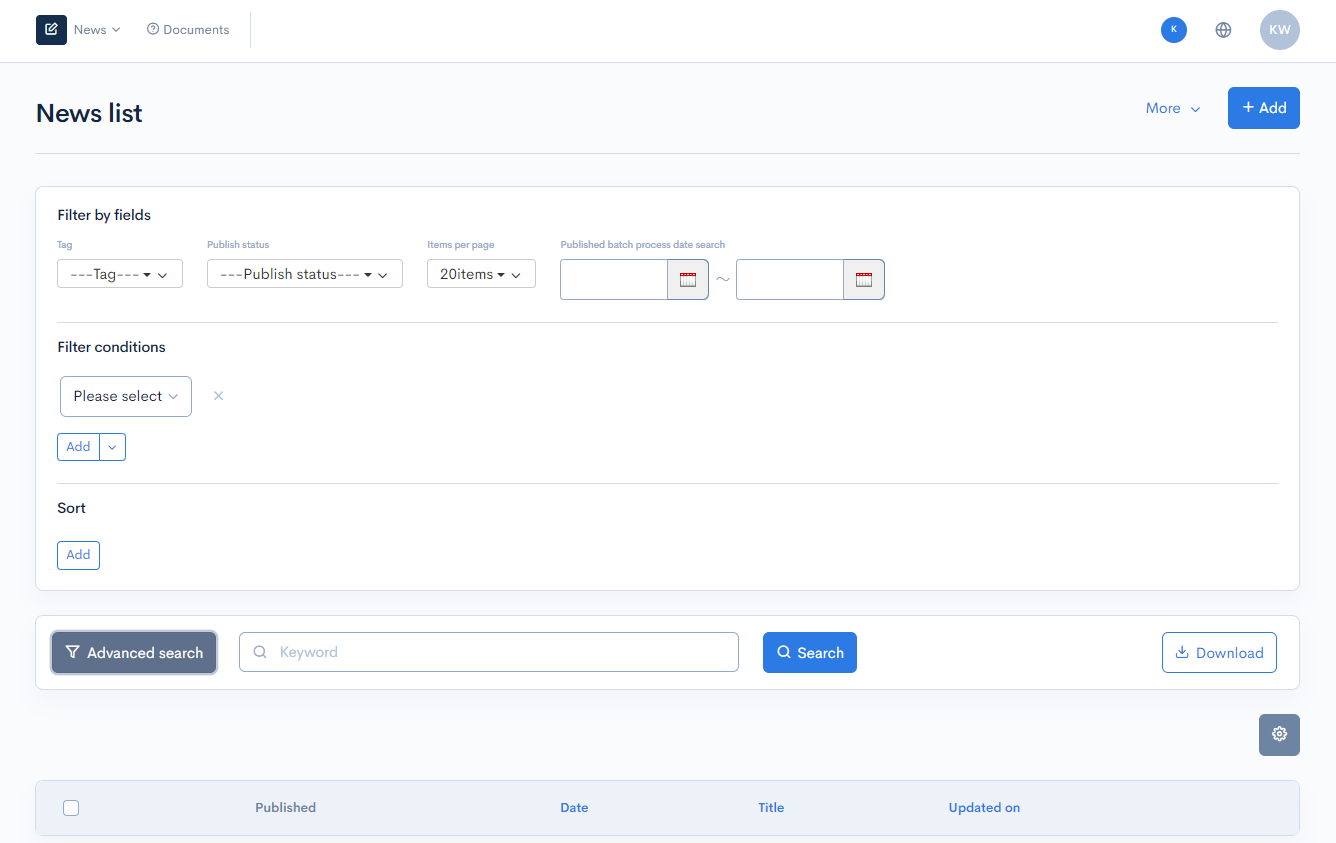
Click on the [Advanced search] button to open the advanced search panel.
You can set up the filter conditions and sorting criteria.
Display field settings
Click on the gear symbol in the top right-hand corner of the contents list to open the display field settings dialog.
You can set the fields to be displayed in the contents list.
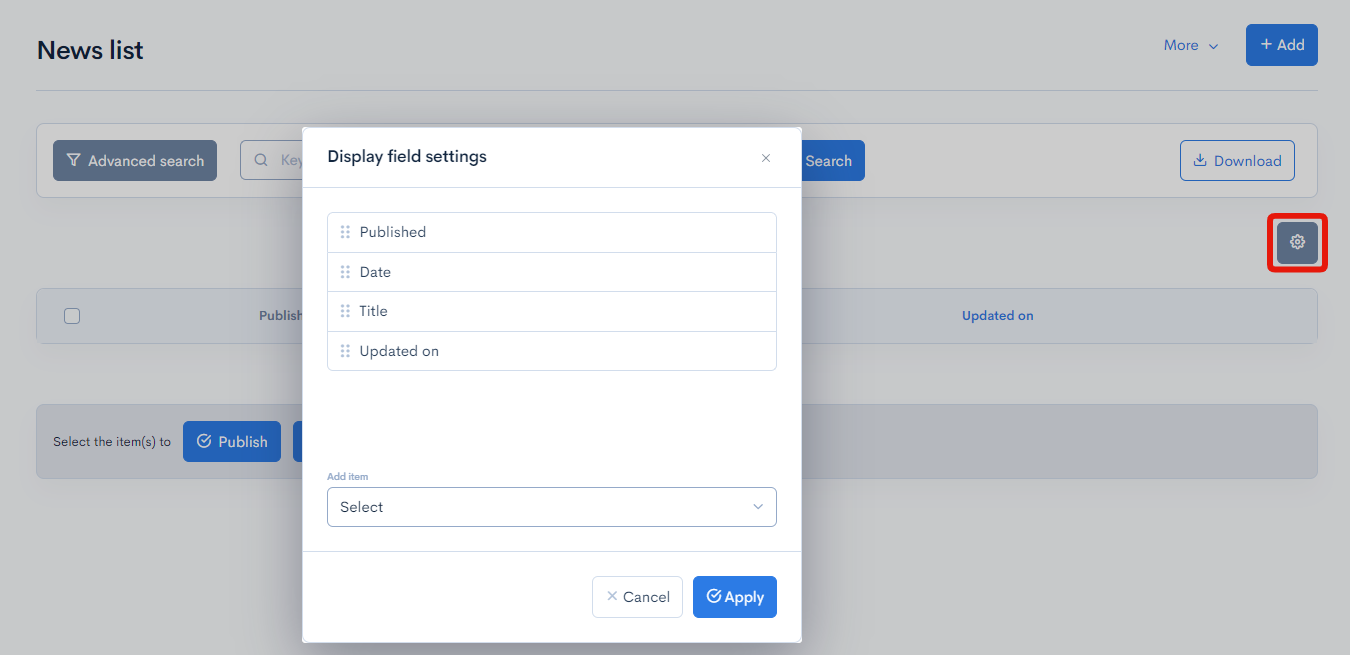
| Field | Description |
|---|---|
| Display field | Drop and drop the fields to rearrange the sort order. |
| Select | Select and add from a list of fields to be displayed in the content list. |
| Cancel | Cancel any changes made to the settings. |
| Apply | Apply the configured settings. |
Field settings
| Field | Description |
|---|---|
| Search | You can search the content in this list by applying different filters. |
| Download | Downloads the content data. |
| Display fields settings (gear icon) | You can configure the fields to be displayed in the content list. |
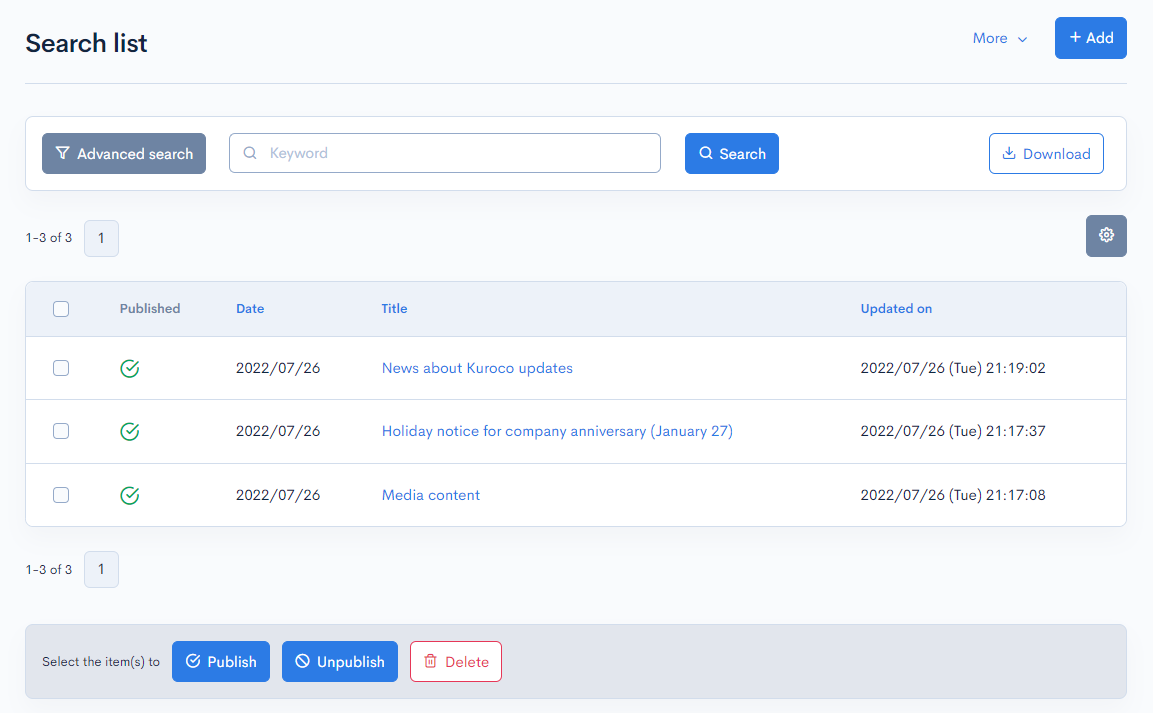
| Published | Publishing status of the topic list. : Published : Published : Restricted : Restricted : Unpublished : Unpublished |
| Date | The date that has been set for the topic. |
| Title | Title of the topic. |
| Update on | Date and time of the latest update of the topic. |
Batch actions
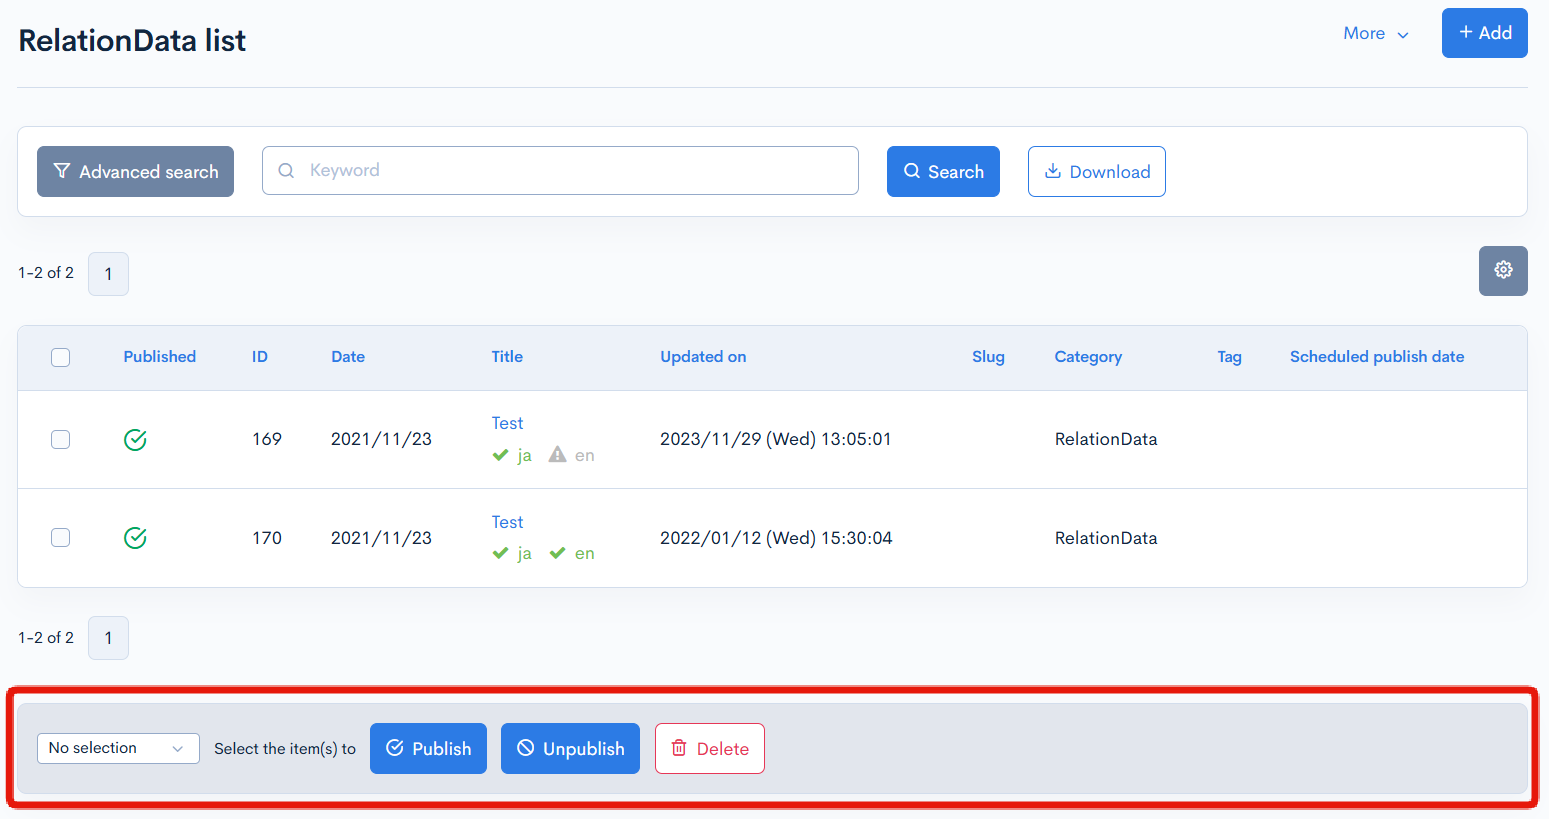
You can perform the following batch actions by selecting multiple topic groups using the checkboxes in the left-most column.
When the approval workflow is selected, a bulk request will be submitted to update the statuses.
| Field | Description |
|---|---|
| Publish | Publishes the selected entries. |
| Unpublish | Retracts any previously published entries selected. |
| Delete | Deletes the selected entries. |
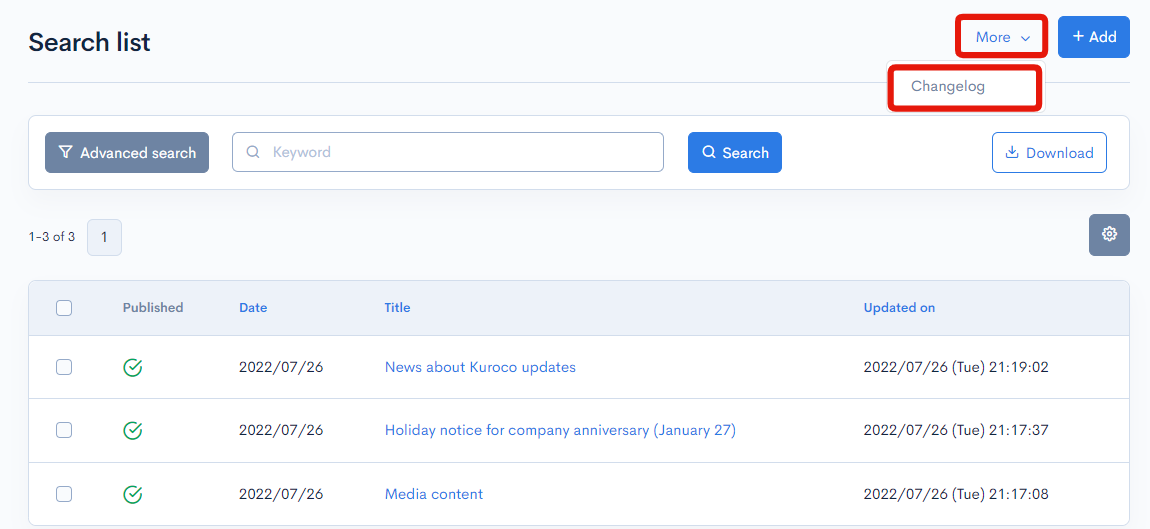
Changelog
Click the [More] in the upper right corner of the Content list screen, then click [Changelog] to see a list of the history of editing each content.
Changelog of the contents
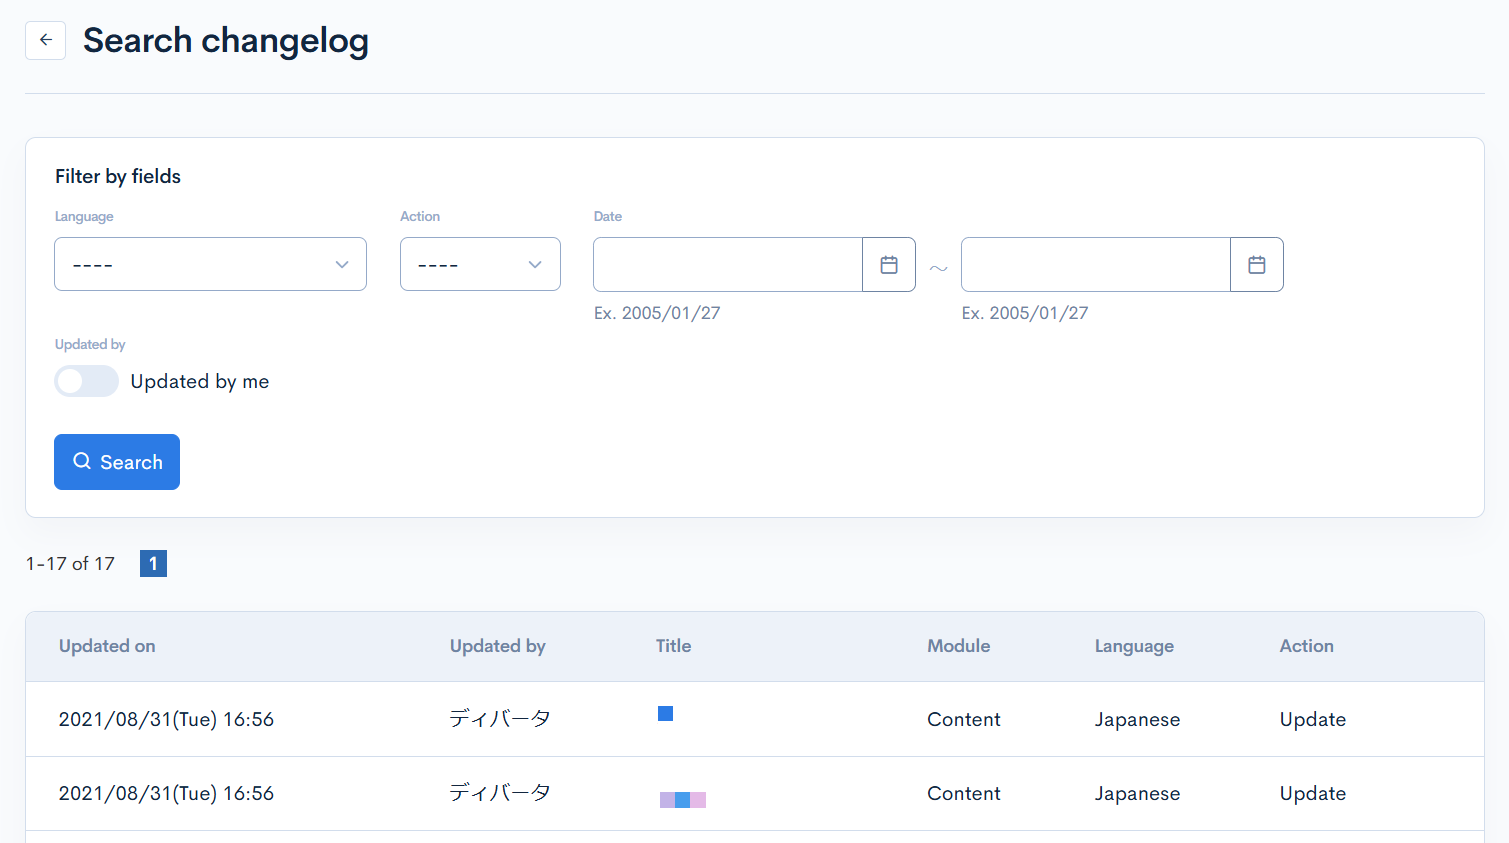
| Field | Description |
|---|---|
| Updated on | Displays the date and time the content was updated. |
| Updated by | Displays the name of the member who updated the content. |
| Title | Displays the comment title. |
| Module | Displays the module name of the content. |
| Language | Displays the comment language. |
| Action | Displays the type of processing performed. There are six types of statuses as follows
|
Content editor
Accessing the screen
In the left sidebar menu, click [Content] and select the title of the topic group you want to look at.
On the topic list screen, click the title of the topic you want to edit.
Field settings
| Field | Description |
|---|---|
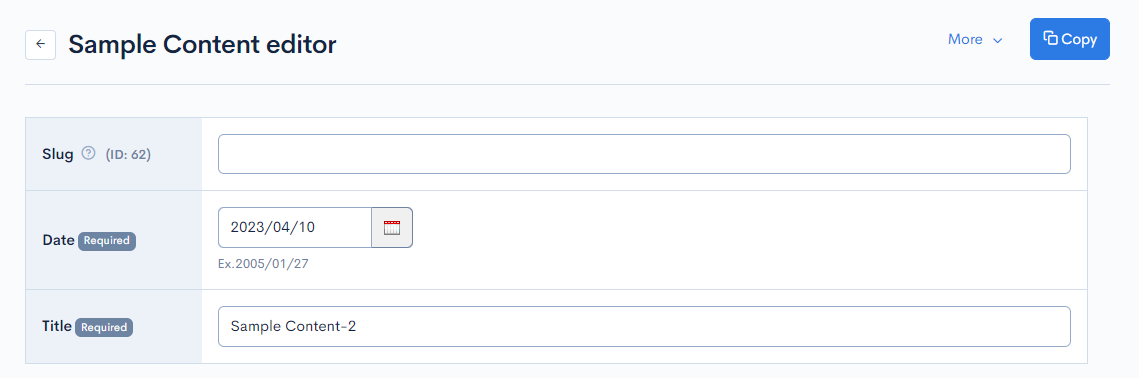
| Slug | Slug of the topic. The field name (ID:) displays the content ID that was automatically assigned when the content was newly created. The following characters can be used for Slugs:
|
| Date | Date and timestamp for the topic. |
| Title | Title of the topic. |
The contents of extension fields configured in the content structure editor are also displayed here.
If you have the permission to create a new API, the field name (the value of default "ext_x" or the Slug if it is set) will be displayed next to the additional extension fields that you have configured.

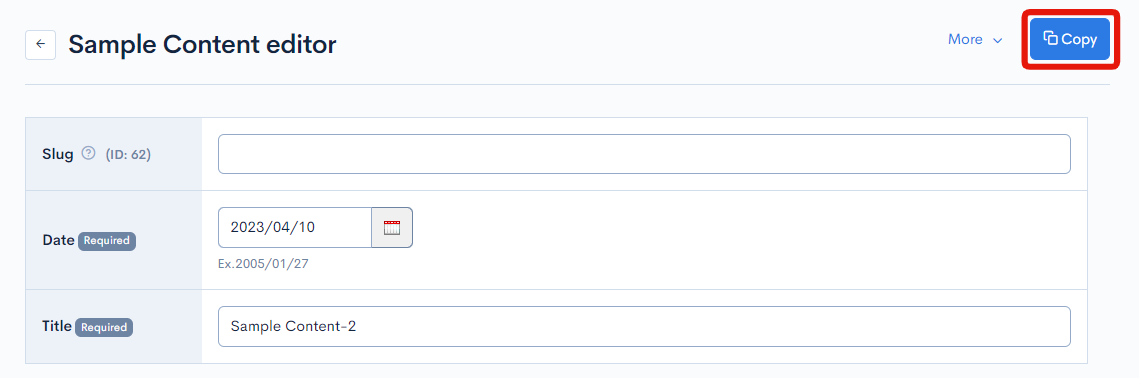
Copying Content
Click [Copy] in the upper right corner of the content editing screen to copy content and create new content.
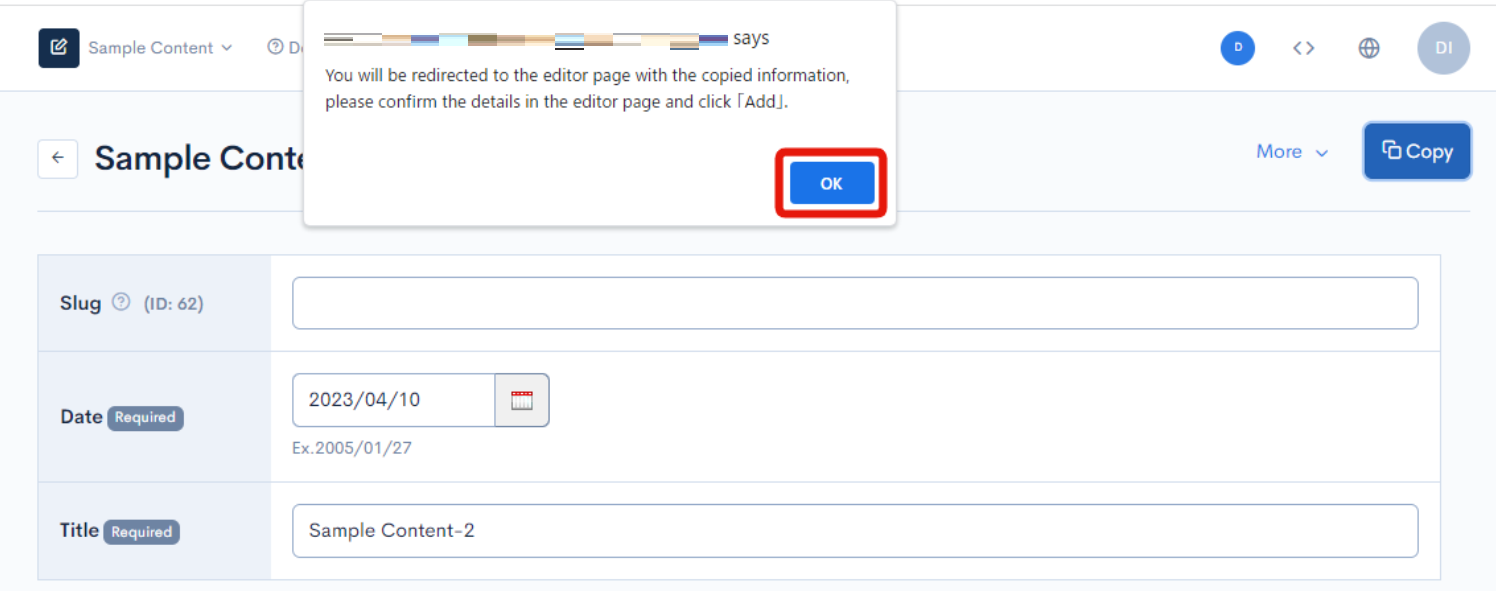
Click the [OK] button on the displayed message.
The editing screen for the newly copied content will open.
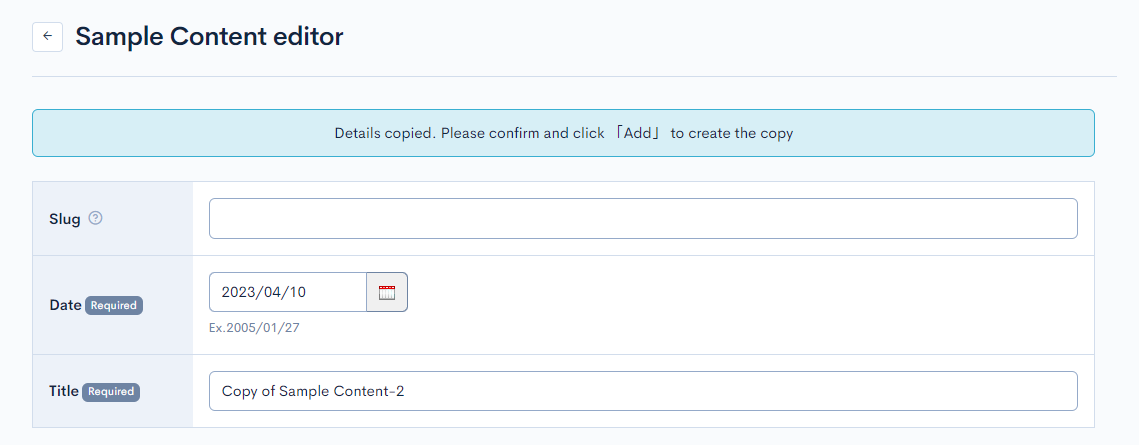
Click [Add] to save the content after editing the copied content.

Advanced settings

| Field | Description |
|---|---|
| Display in the list | Option to display this topic on the topic list screen. |
| Higher-ranked display | Option to display this topic as a higher-ranked item on the topic list screen. |
| API request restriction | Sets access restrictions based on custom member filter. |
Related tags

Configures the topic tags. Click on an existing tag to link it to the current topic, or add a new one by clicking [Add new tag].
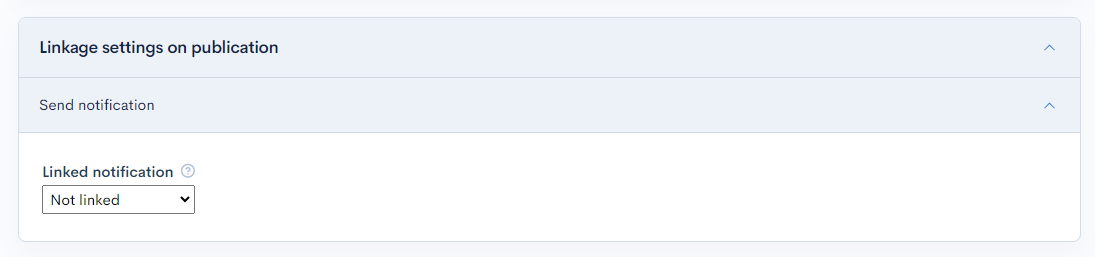
Linkage settings on publication
| Field | Description |
|---|---|
| Linked notification | Option to deliver e-mail notifications with the current topic. If you have linked notifications enabled, adding/updating content will redirect you to the notification editor screen . |
Publish settings
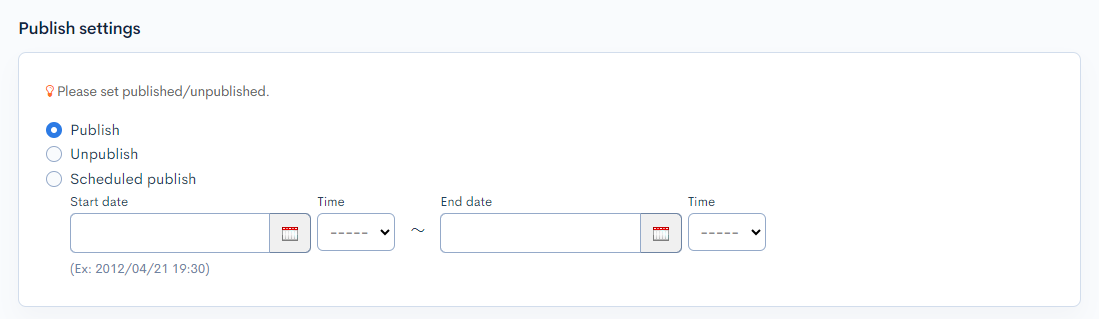
| Item | Description |
|---|---|
| Publish | Publishes the current content. |
| Unpublish | Retracts the current content. |
| Scheduled publishing | Specifies the start and end dates/times for publishing the current content. |
GitHub

| Field | Description |
|---|---|
| Workflow | Configures actions performed on the linked GitHub repository.
|
Approval workflow settings
It is displayed when specified as content to be approved in the approval workflow.
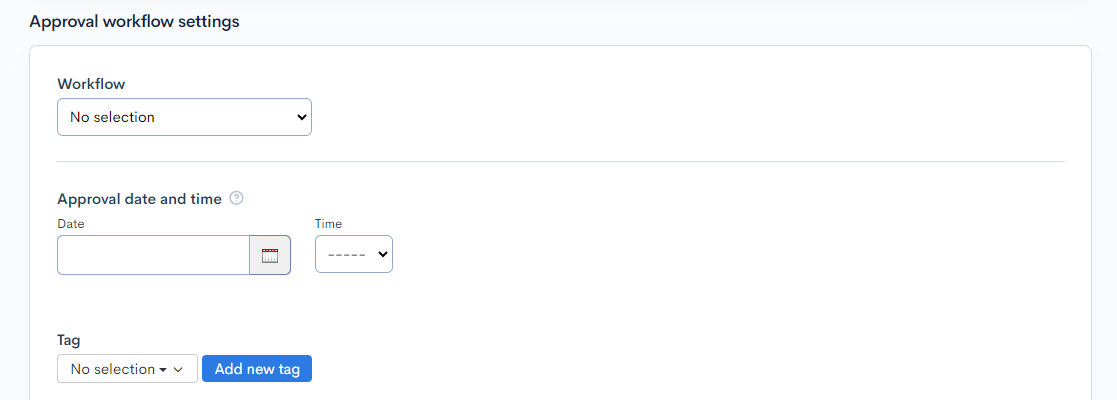
| Field | Description |
|---|---|
| Workflow | Select an approval workflow. |
| Approval date and time | Set the date and time when the approval will take effect. |
| Tag | Select tags. You can add using the [Add new tag] button, or add or delete on the Approval workflow tag List screen. |
Other actions

| Field | Description |
|---|---|
| Update | Applies any changes made in this editor. |
| Save draft | Saves any changes made in this editor. |
| Preview | Opens up the preview page. (See: Building a preview page with Kuroco and Nuxt.js on how to configure previews.) |
| Delete | Deletes the current content. |
| Update comment | Comment field for any changes made to the content. |
Changelog
Click the [More] in the upper right corner of the Content Edit screen, then click [Changelog] to see a list of the history of editing each content.
Changelog of the contents
A list of update histories will be displayed.
You can also select two different histories and click [Compare] to view the differences.
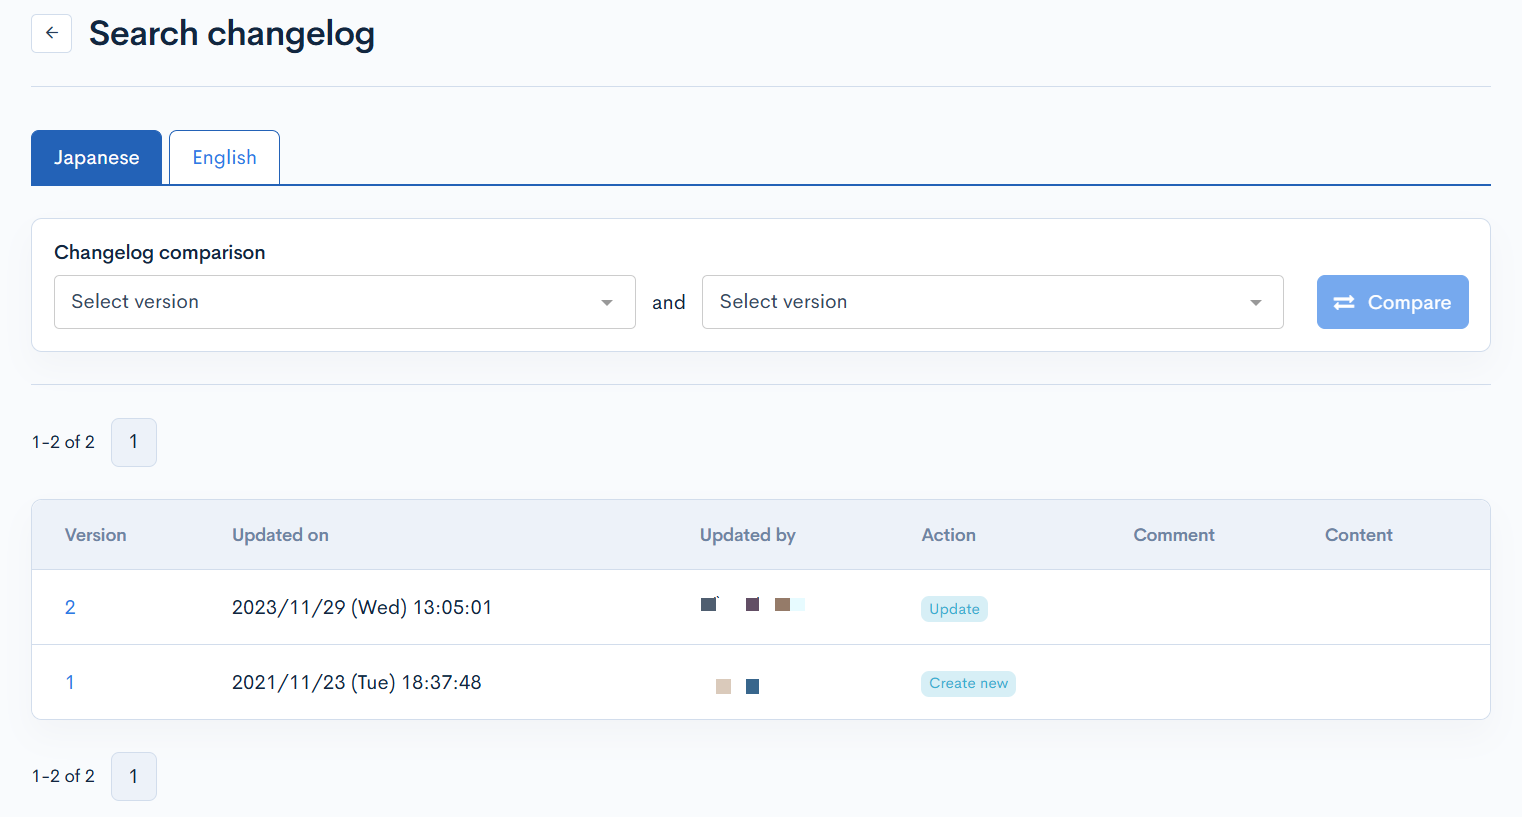
| Field | Description |
|---|---|
| Version | Displays the version. You can see the target version after clicking the version link. |
| Updated on | Displays the date and time the content was updated. |
| Updated by | Displays the name of the member who updated the content. |
| Action | Displays the type of processing performed. There are six types of statuses as follows
|
| Comment | Displays the comments at the time of update. |
| Content | Displays the updated contents. |
Related documents
- Changing the display of the content editor screen
- Scheduling updates for published contents
- Auto Executing Github Actions with update on Contents data
- How to use CKEditor Placeholder feature with API and Custom Function
- Implementing Custom Validation in Content Structure with Custom function
- Send automated notifications for new content using a custom function
- Prepare a keyword search string
- The WYSIWYG editor
- About the search function on the Kuroco Administration page
- Creating content page with Kuroco and Nuxt.js
- Splitting your contents list into multiple pages using Kuroco and Nuxt.js
- Integrating preview page with Kuroco and Nuxt.js
- How can I add all the information of the content selected in the relational data selection to the response?
- Can I change the time selection interval for the content publication date and time settings?
- How can I use custom templates?
- Can I modify the display of the content editor screen?
- Can I set my content publishing status to "Unpublish" by default?
Support
If you have any other questions, please contact us or check out Our Slack Community.