EC function - How to check the operation using API settings and Swagger UI
In this tutorial, we will explain the API settings required to build an e-commerce (EC) site and how to check the ordering procedure using Swagger UI.
For this procedure, it is assumed that the configuration from the tutorial of EC function - Configure shop and add products is already completed.
Create API
First, we will create an API for EC.
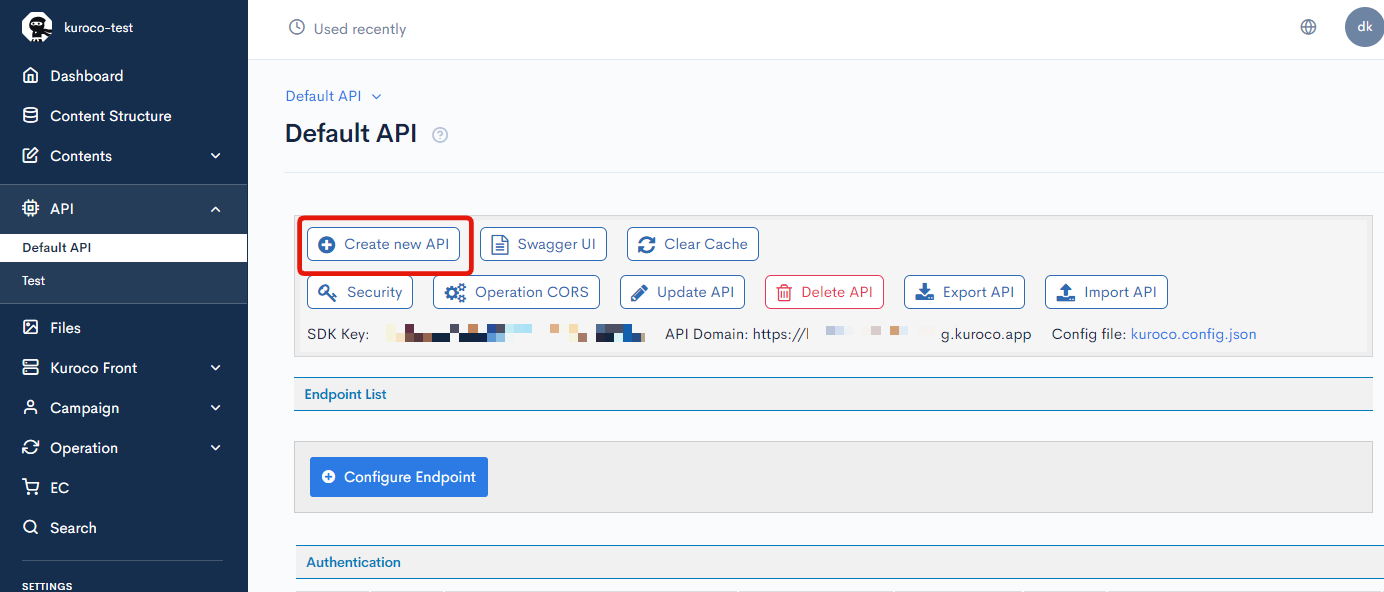
On the API list page, click [Create new API].
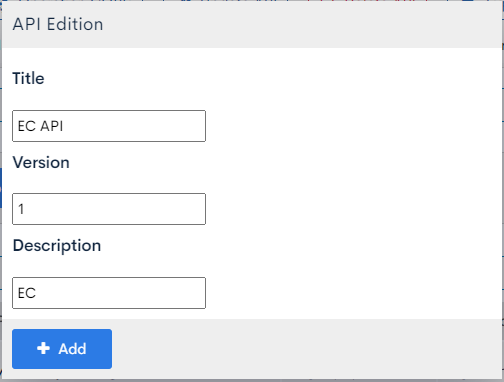
 Enter
Enter Title, Version and Description and click [Add].
For this tutorial, we'll enter:
| Field | Value |
|---|---|
| Title | EC API |
| Version | 1 |
| Description | EC |
 Next, let's configure the security.
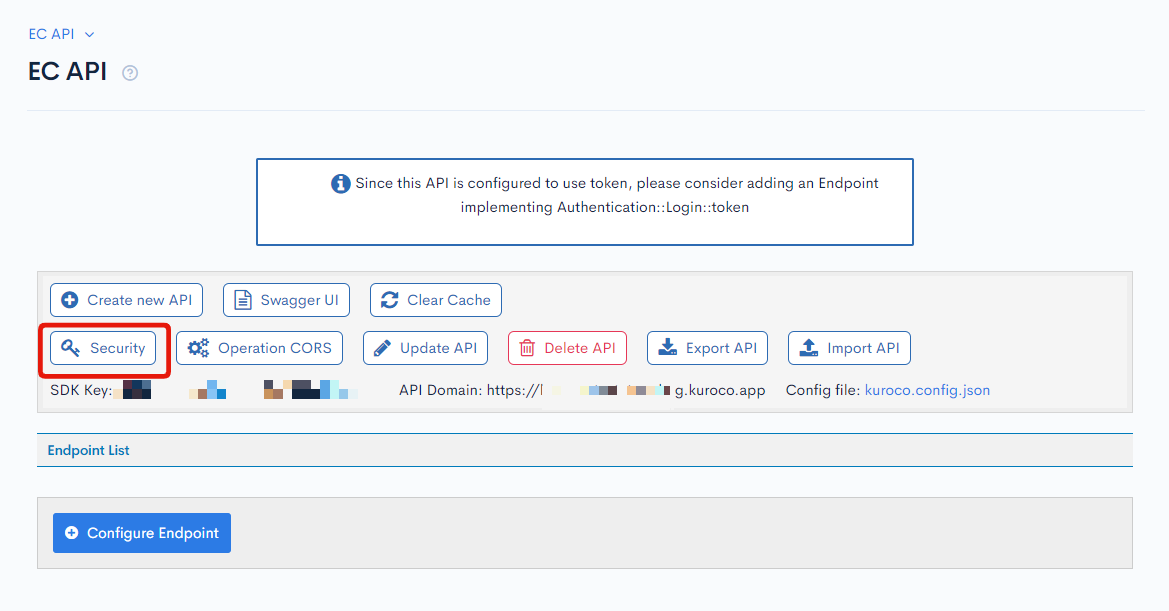
Click [Security] on the API page you have just created.
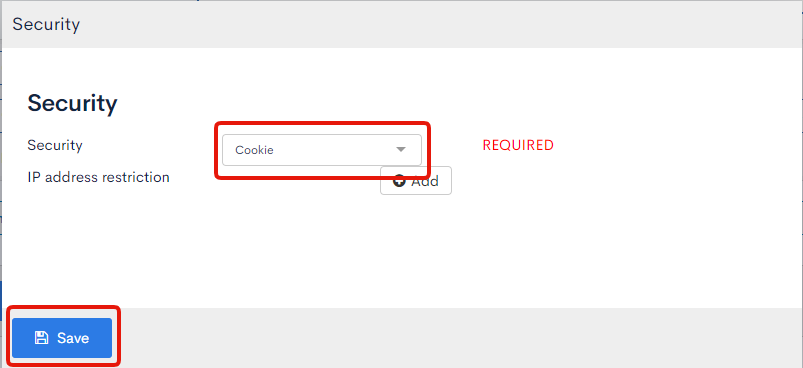
 Select
 Dynamic Token or Cookie for the security.
We'll use cookies for this tutorial, so select 'cookie' and click [Save].
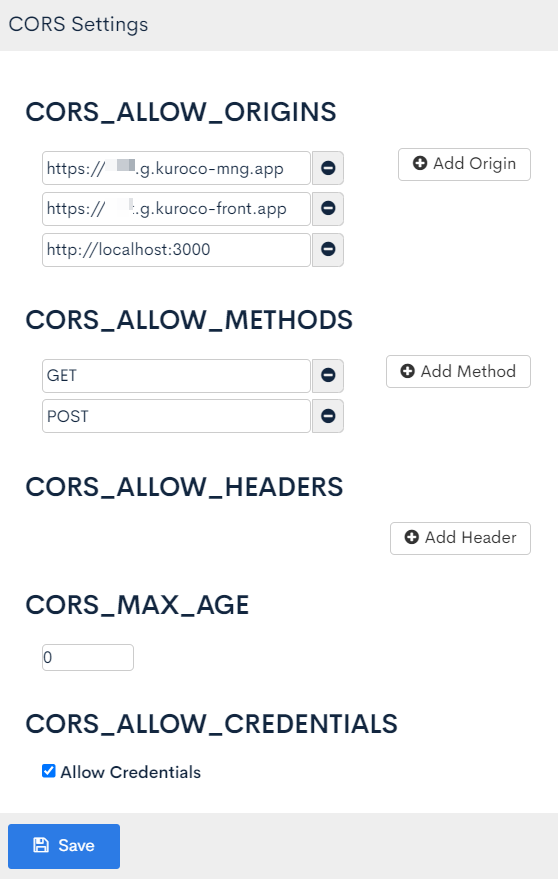
Next, let's configure CORS.
Click [Operation CORS] on the API page you have just created.
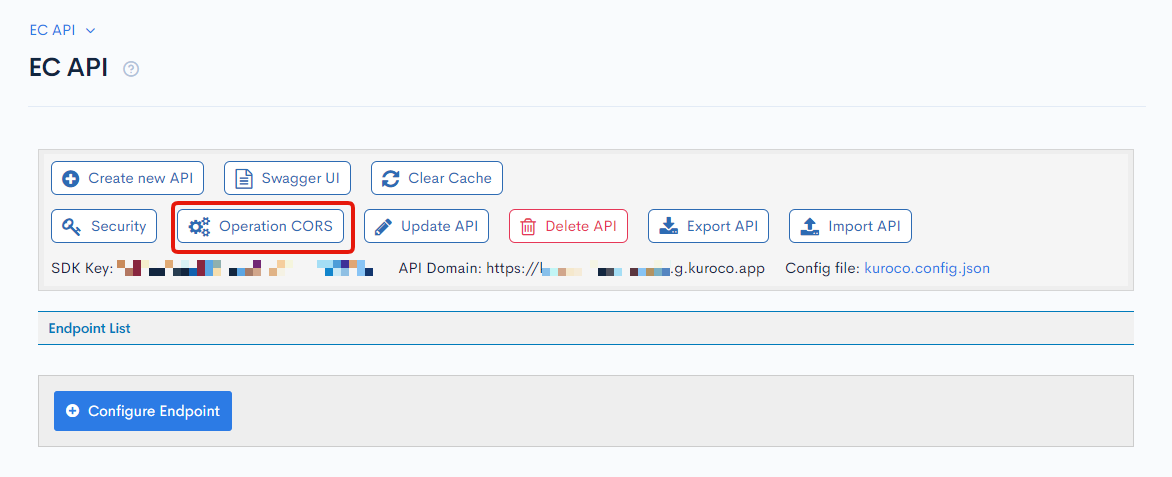 Set it up as follows and click [Save].
| Field | Value |
|---|---|
| CORS_ALLOW_ORIGINS | |
| CORS_ALLOW_METHODS |
Create an endpoint
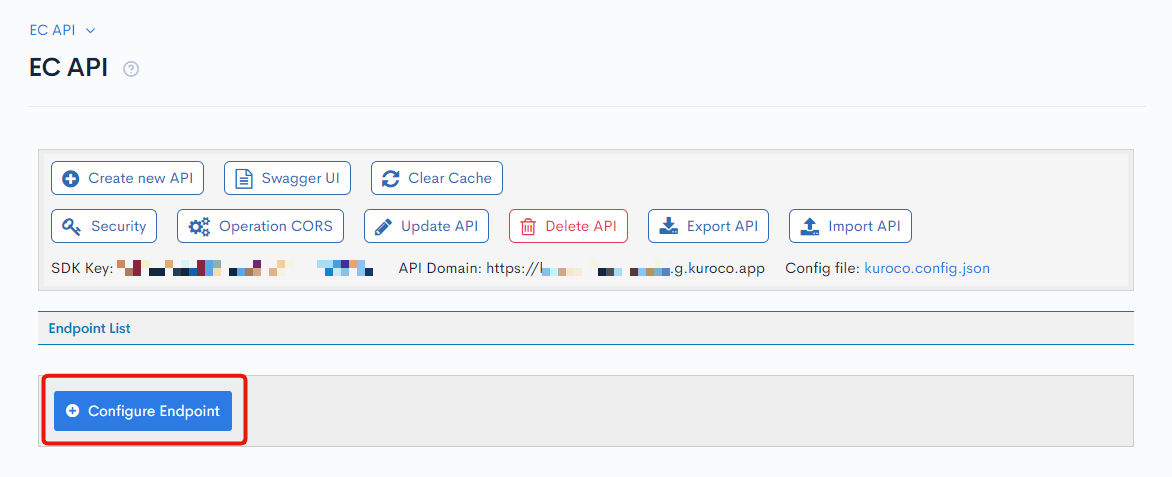
Next, let's create an endpoint.
Click [Configure Endpoint] on the API list page.
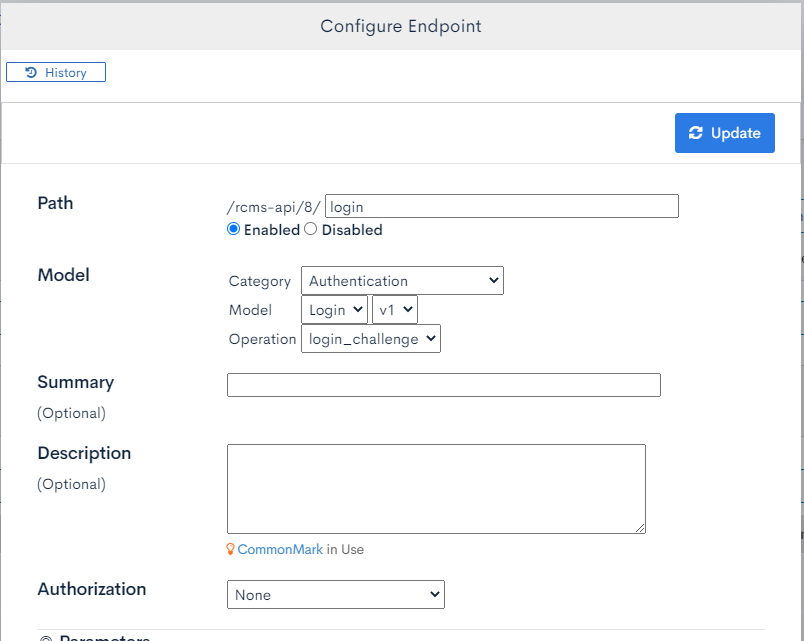
 Create the following endpoints which are required for EC.
Endpoint for login
| Field | Value | |
|---|---|---|
| Path | login | |
| Enabled/Disabled | Enabled | |
| Model | Category | Authentication |
| Model | Login | |
| Operation | Login_challenge |
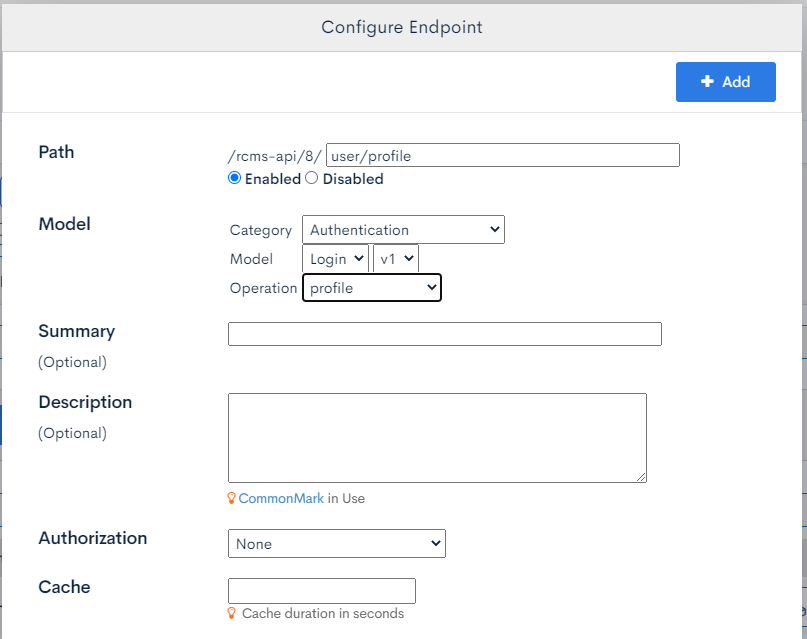
 Endpoint for fetching profile information
| Field | Value | |
|---|---|---|
| Path | user/profile | |
| Enabled/Disabled | Enabled | |
| Model | Category | Authentication |
| Model | Login | |
| Operation | profile |
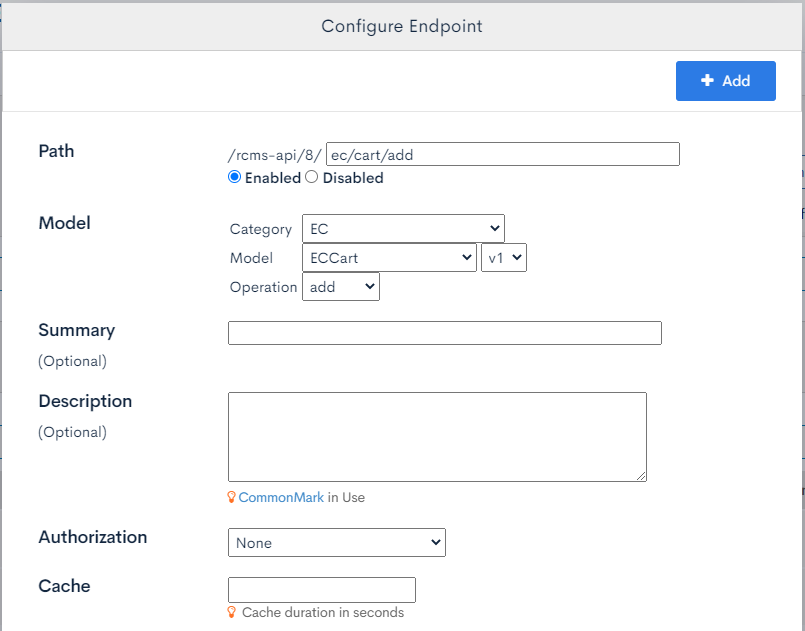
 Endpoint for adding products to the cart
| Field | Value | |
|---|---|---|
| Path | ec/cart/add | |
| Enabled/Disabled | Enabled | |
| Model | Category | EC |
| Model | ECCart | |
| Operation | add |
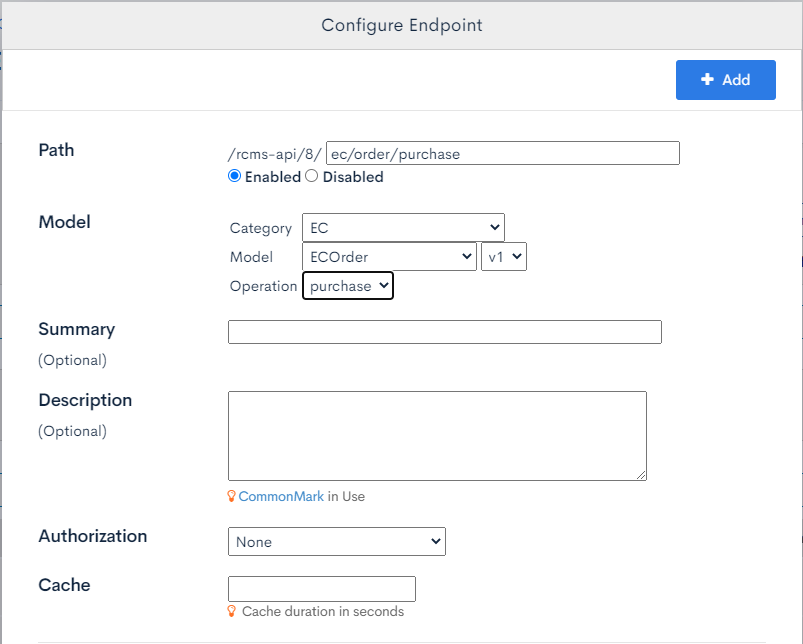
 Endpoint for order processing
| Field | Value | |
|---|---|---|
| Path | ec/order/purchase | |
| Enabled/Disabled | Enabled | |
| Model | Category | EC |
| Model | ECOrder | |
| Operation | purchase |
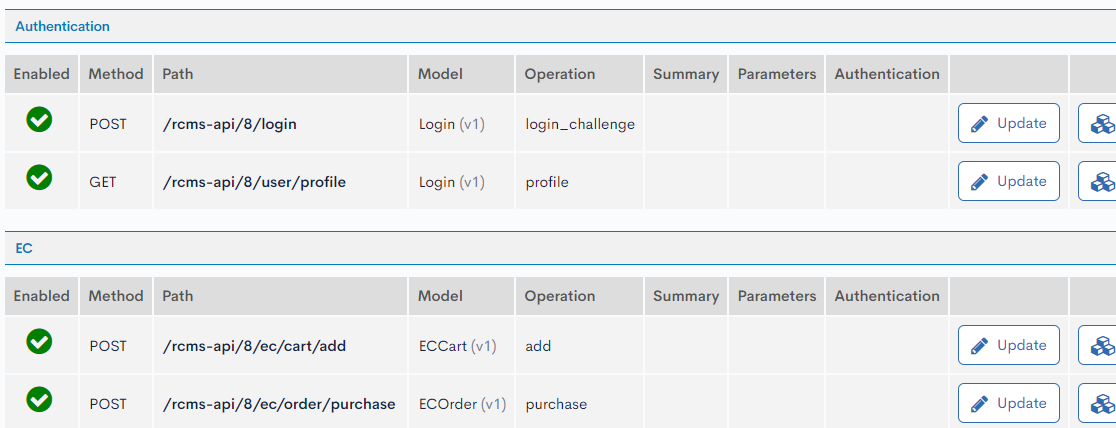
 We have created all the required endpoints for this tutorial, as shown below:
Check API's operation
After completing the endpoint configuration, we will check the API's operation on Swagger UI and confirm that users can purchase products properly.
Login
It's expected for the user making orders to be logged in, so it'll be necessary to log in from the Swagger UI screen.
Note: Register the address of the member used for login on the [Profile Information] page of [Edit Member] in advance since it will be used when ordering.
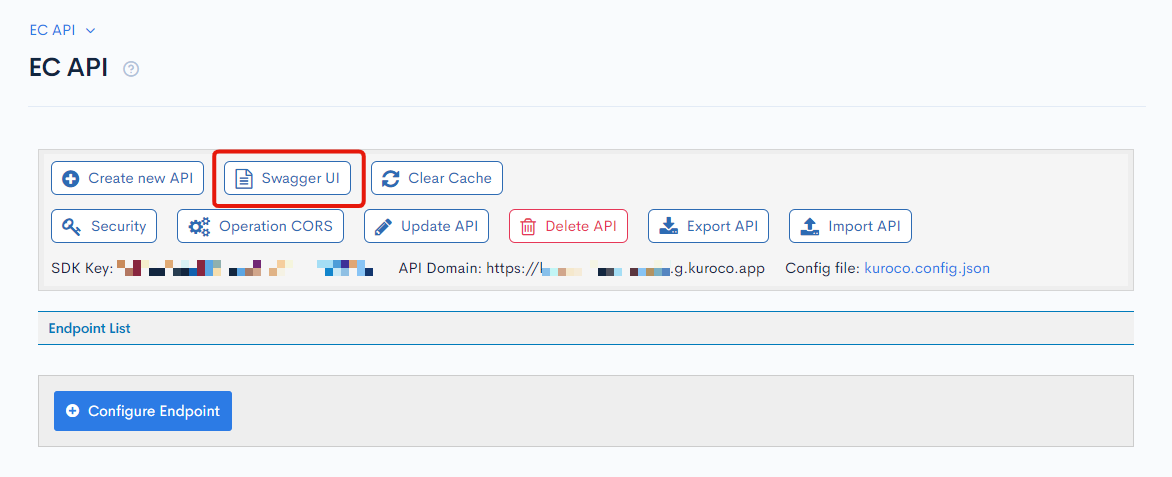
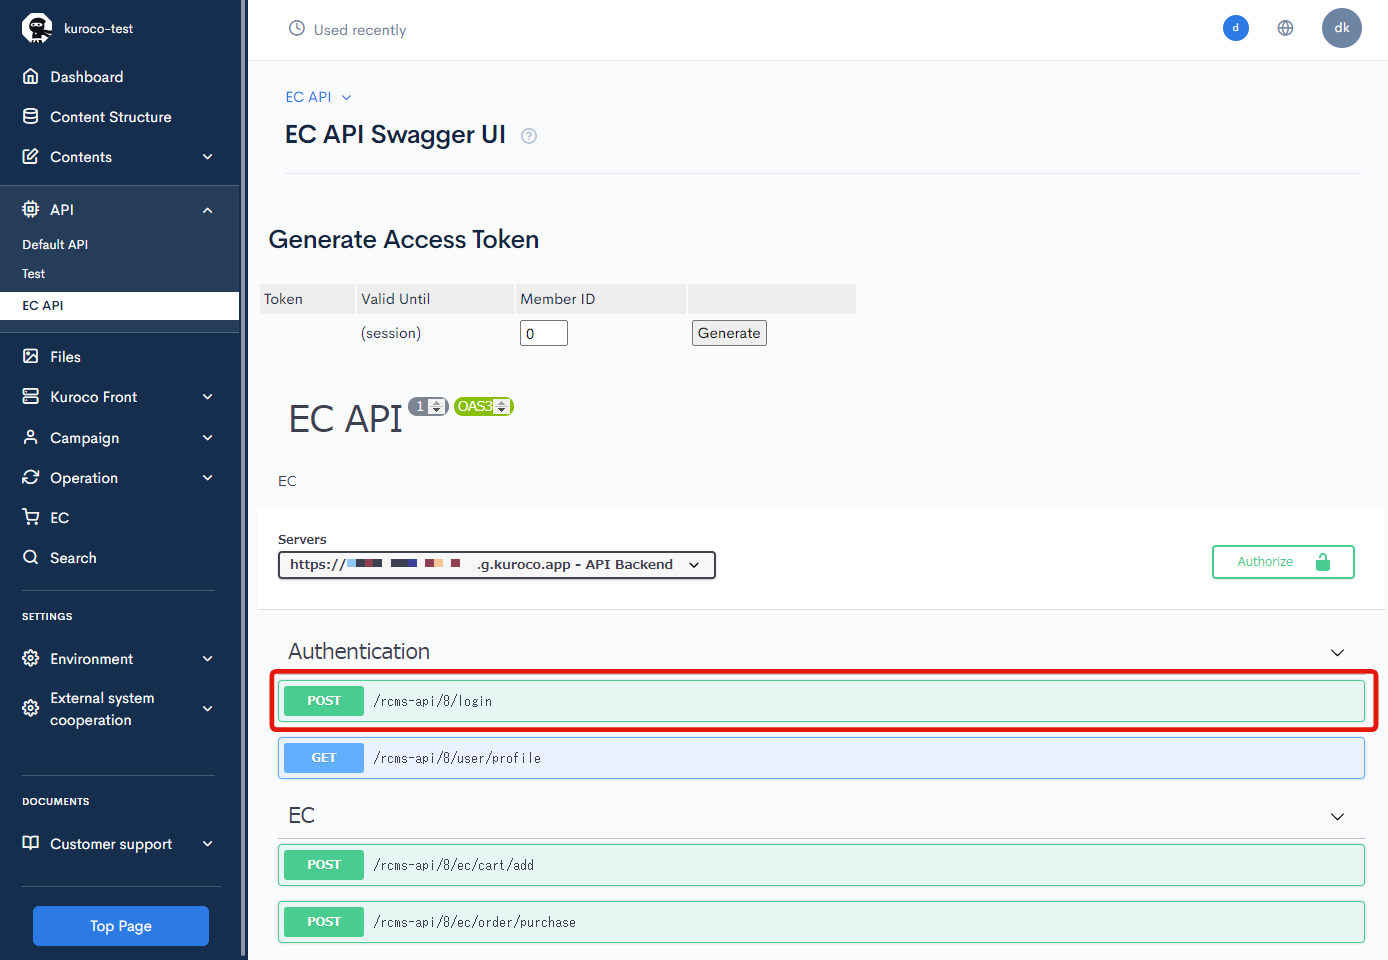
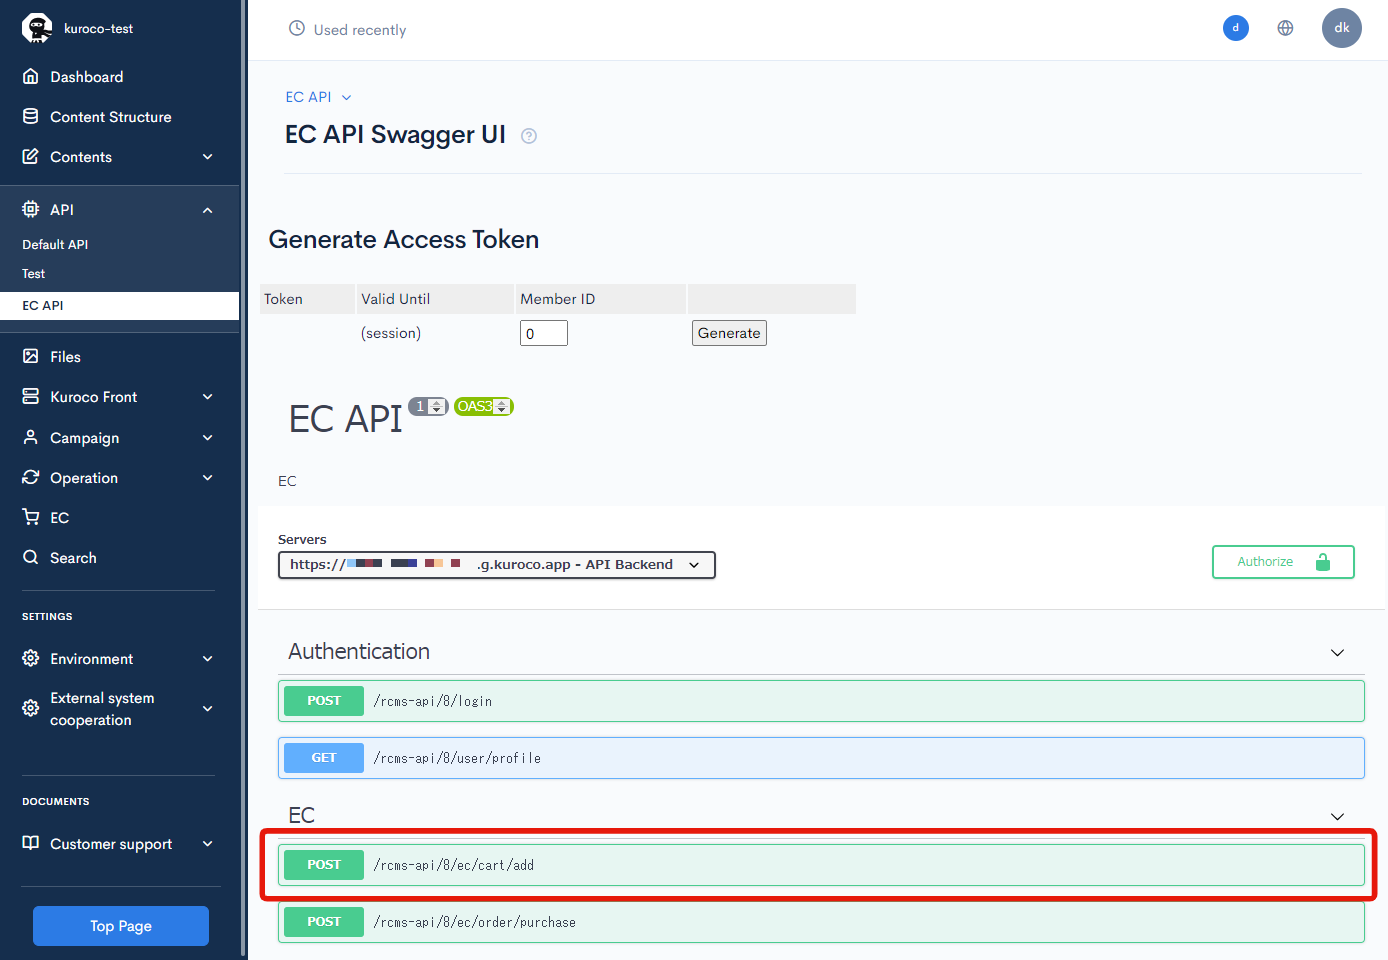
On the API list page, click [Swagger UI] to access the Swagger UI page.
 Click the endpoint of
 login.
 Click [Try it out].
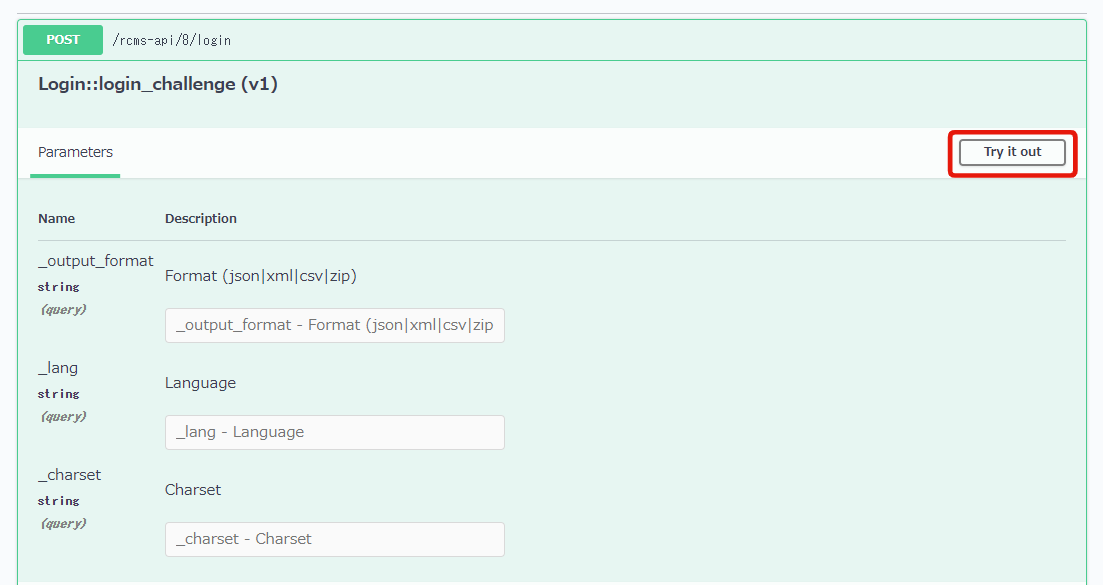 Enter your login information in the
 Request body as below and click [Execute].
{
  "email": "YOUR_MAIL_ADDRESS@example.com",
  "password": "PASSWORD",
  "login_save": 0
}
Note: replace YOUR_MAIL_ADDRESS@example.com and PASSWORD by your actual e-mail address and password.
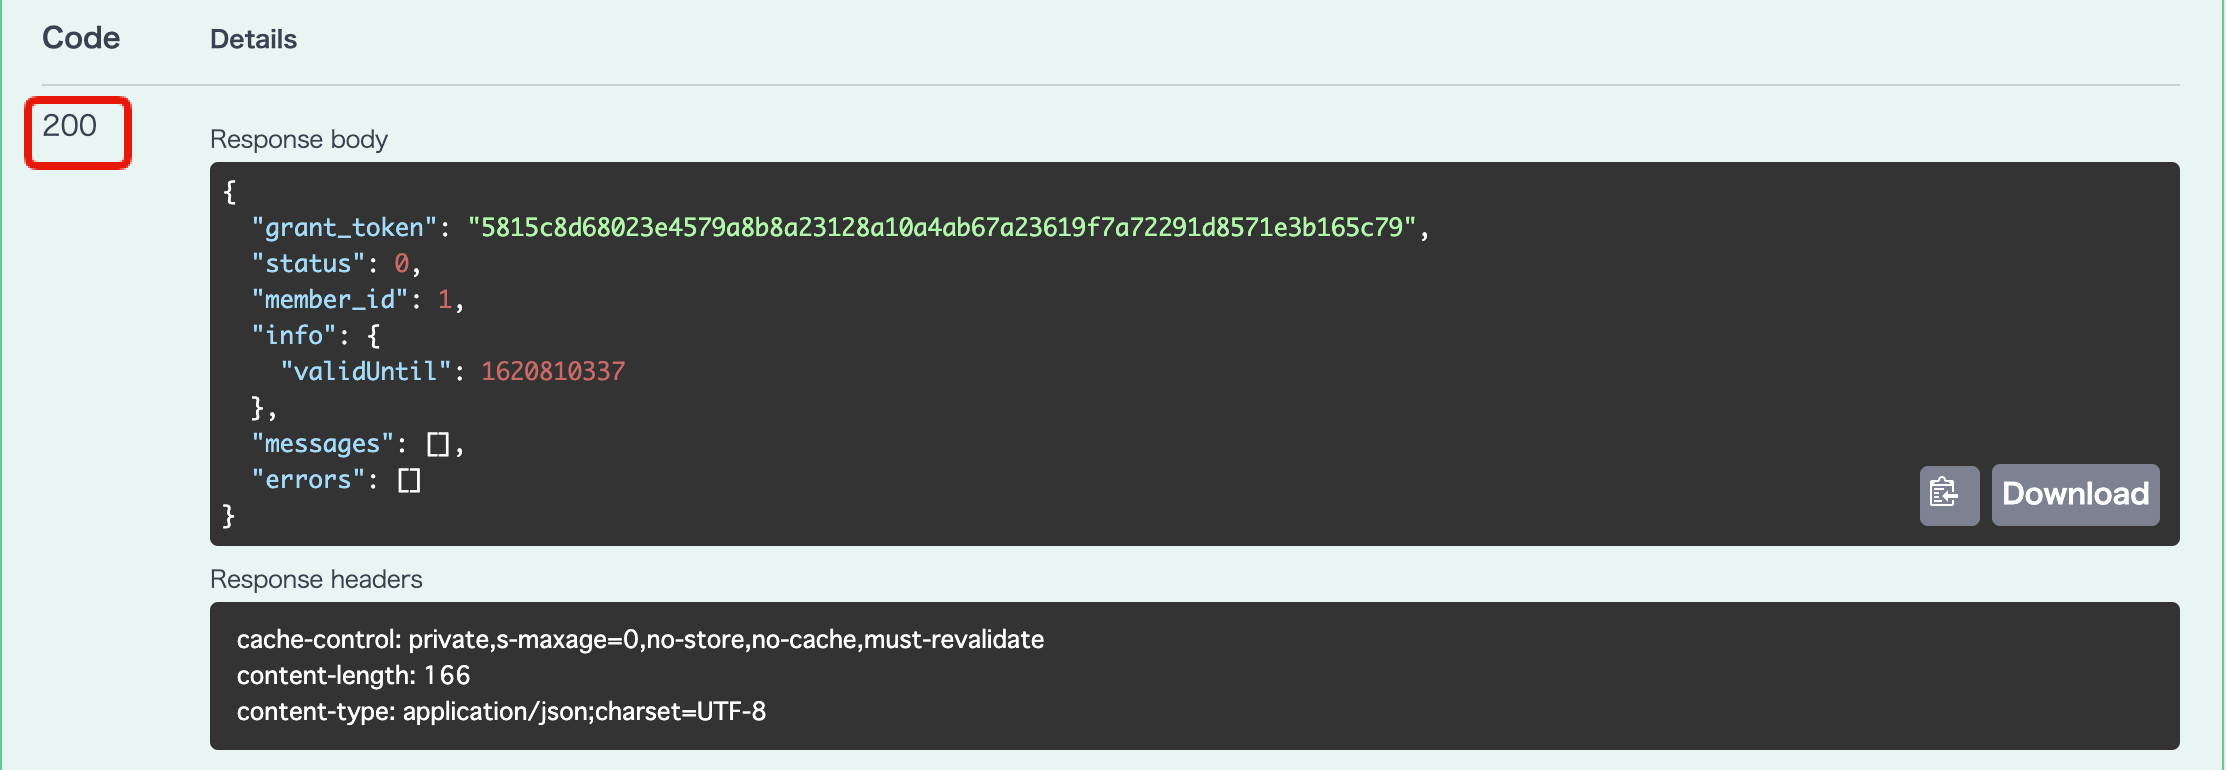
 If you log in successfully, you'll get response code: 200.
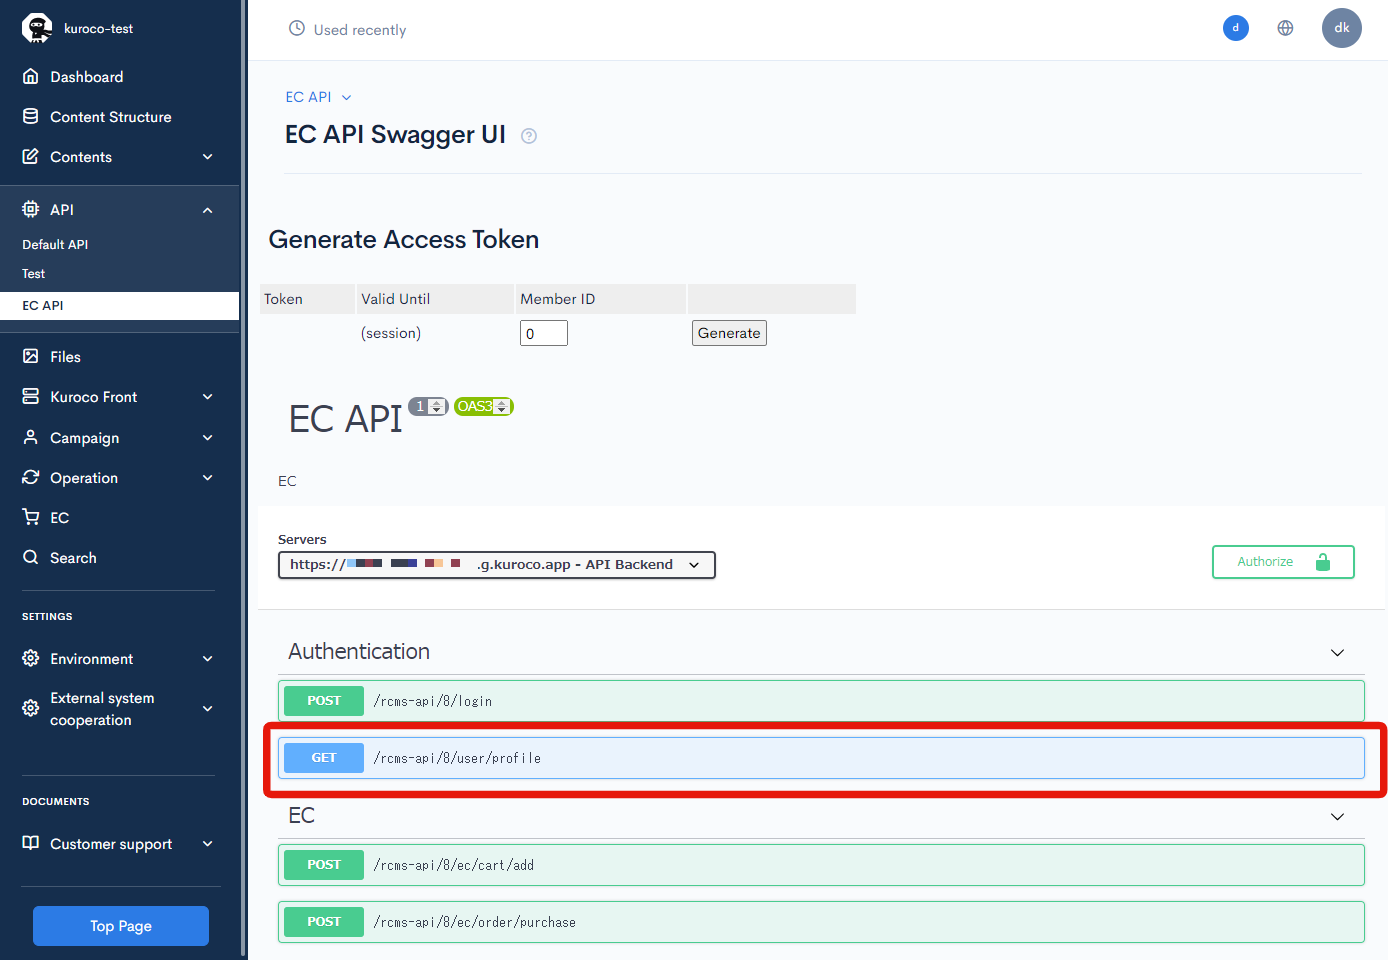
Fetching cart ID
After login, we will fetch the cart ID.
The cart ID is linked with the logged-in user's information, so you can fetch it from the profile endpoint.
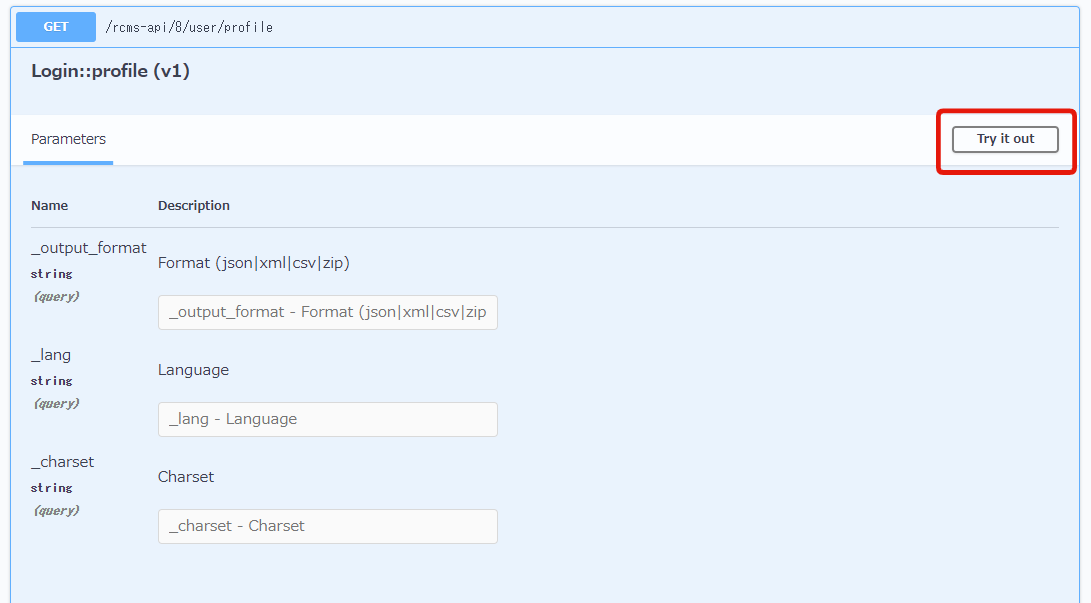
Click user/profile endpoint.
 Click [Try it out].
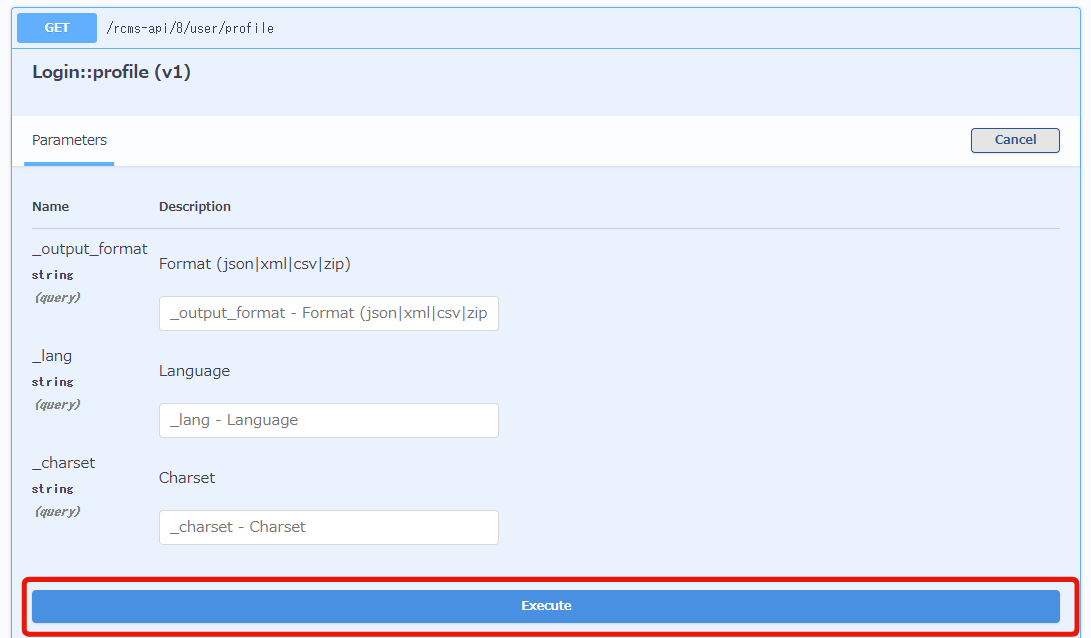
 Click [Execute].
 The data will get a response with the code: 200. Save the value of
 ec_cart_id.
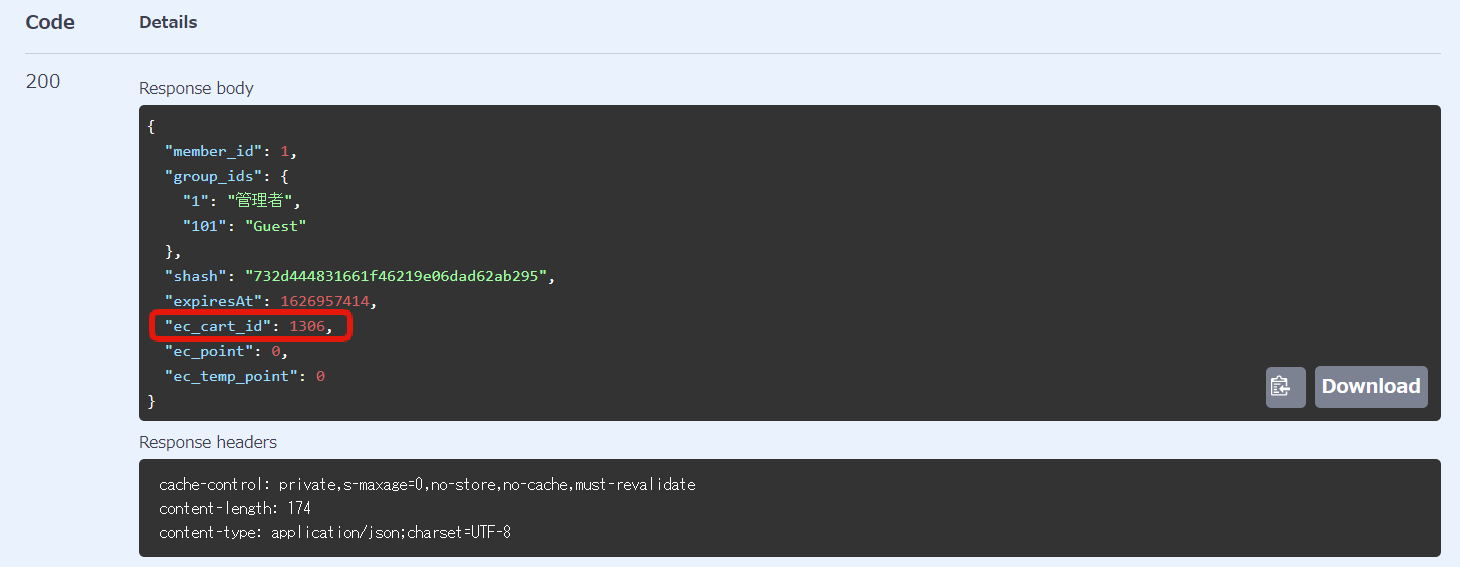 In the above case,
 1306 is the cart ID.
Add product to the cart
Let's check the desired Product ID, then add it to cart by specifying the ID.
First, check the product ID from product edit page.
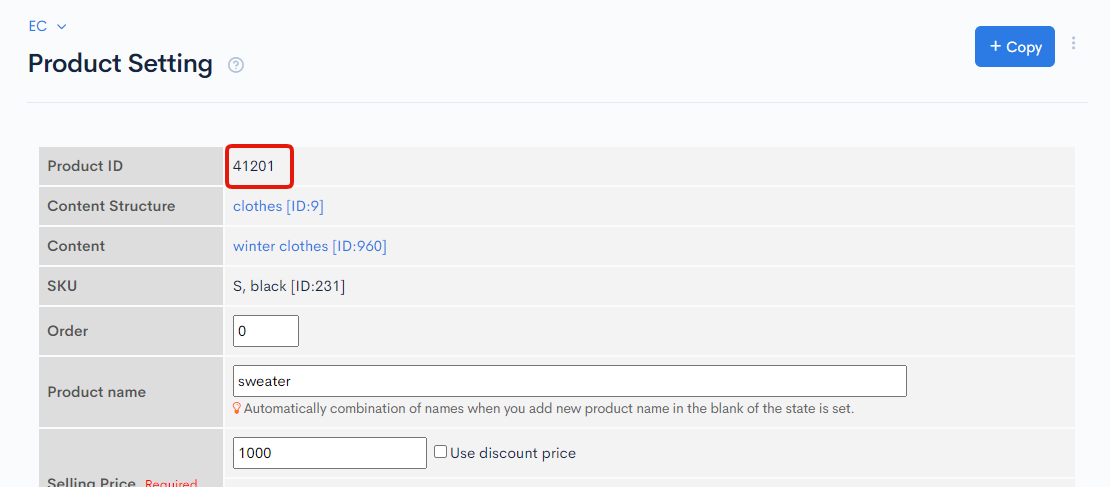 In the above case,
 41201 is a product ID.
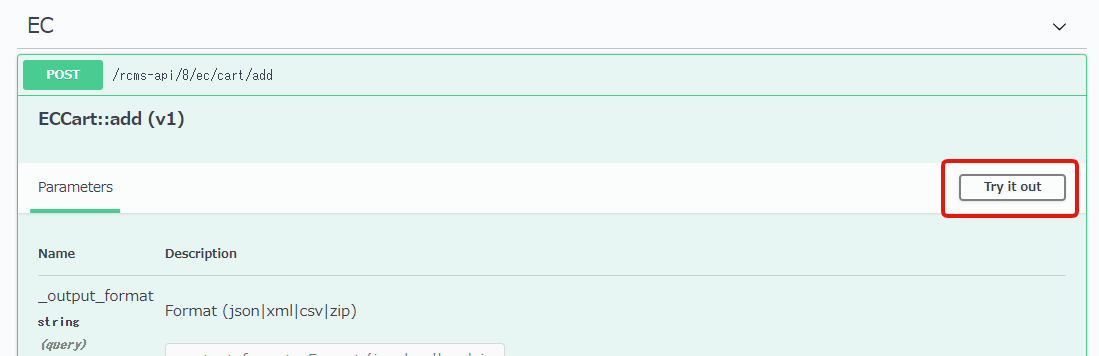
Go back to Swagger UI page and click /ec/cart/add endpoint.
 Click [Try it out].
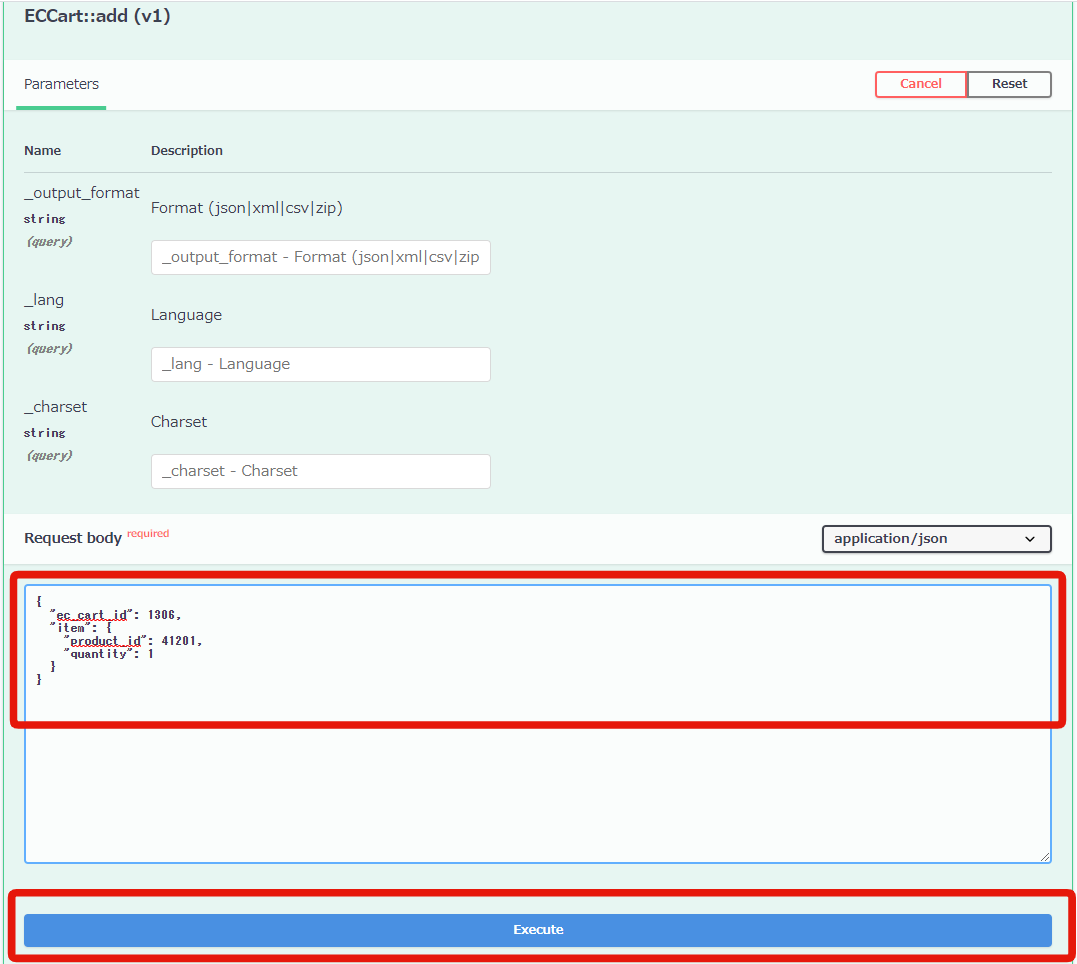
 Enter the cart ID and product information in the
 Request body as below and click [Execute].
The parameters you need to set are as follows:
ec_cart_id: cart ID (prepare in advance)product_id: ID of the product which you want to purchasequantity: purchasing quantity
For this tutorial, we'll enter:
| Parameter | Value |
|---|---|
| ec_cart_id | 1306 |
| product_id | 41211 |
| quantity | 1 |
{
  "ec_cart_id": 1306,
  "item": {
    "product_id": 41201,
    "quantity": 1
  }
}
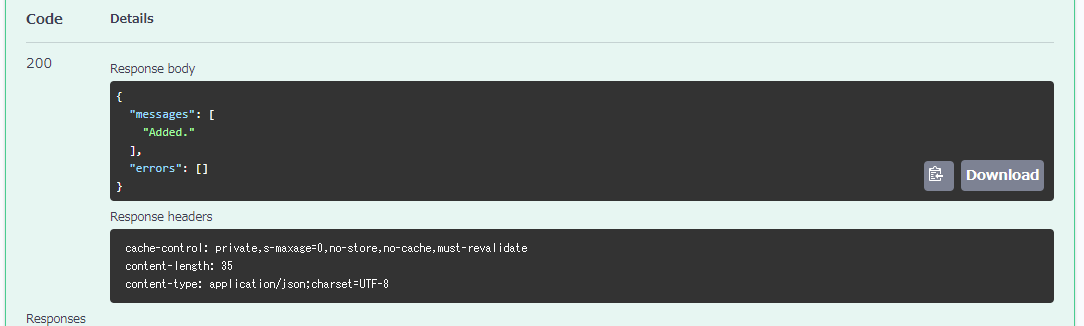
 Once the products are added successfully, the data will respond with code: 200, and "Added" will be displayed in
 messages.
Purchase products in the cart
You need to specify the payment method when purchasing products so check the payment method ID on [Payment method settings] page.
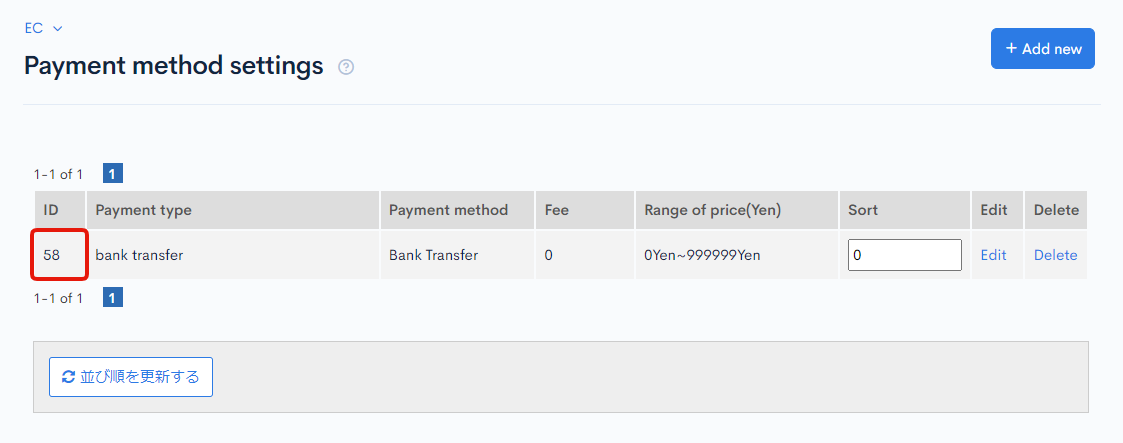 This time, we will proceed with ID
 58 which is "bank transfer".
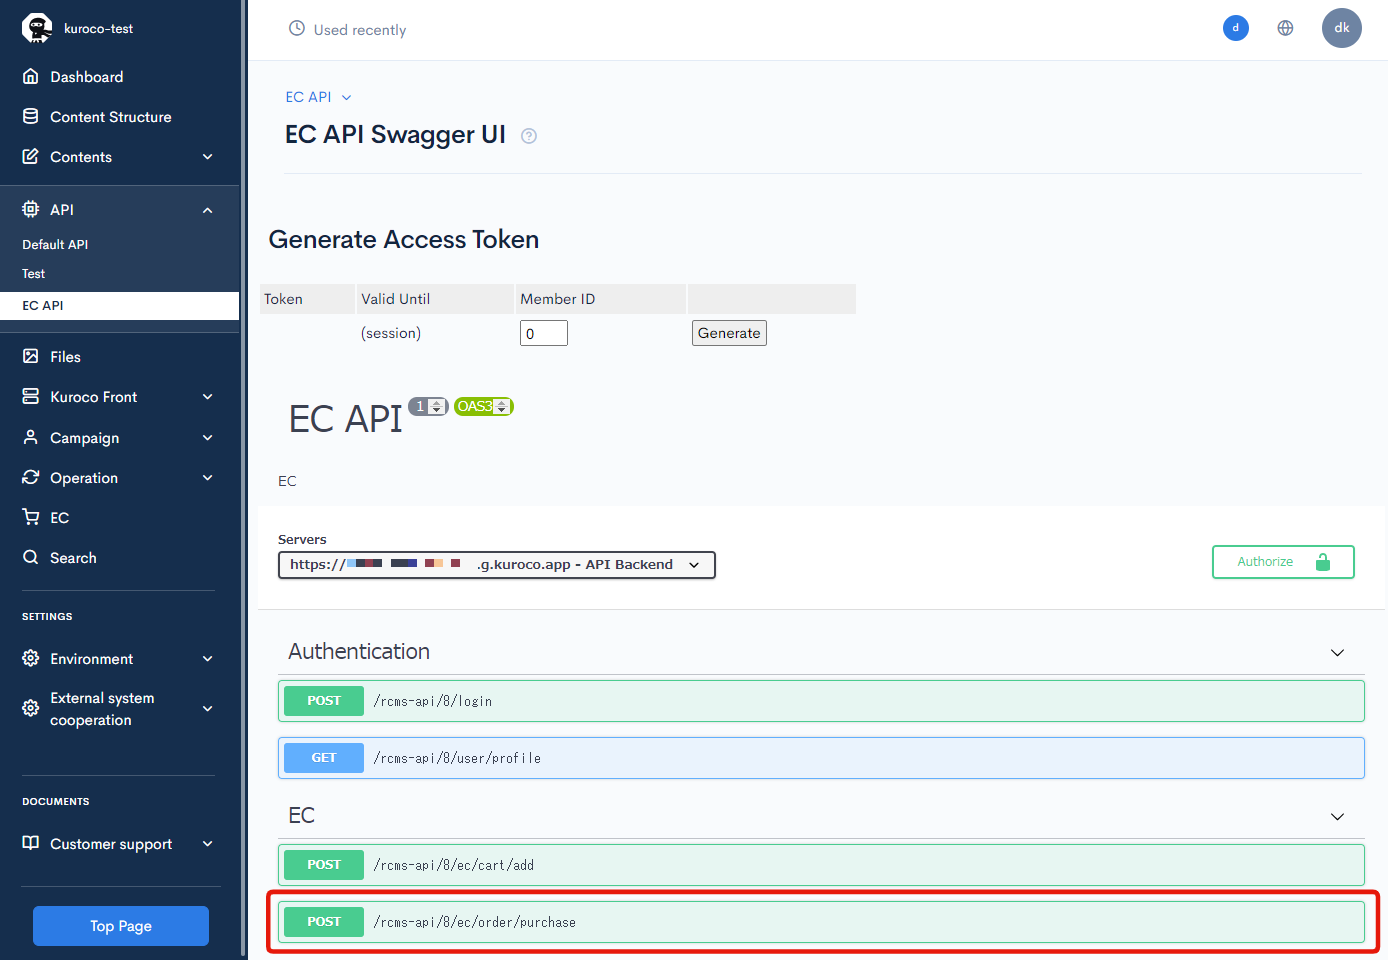
Go back to Swagger UI page and click /ec/order/purchase endpoint.
 Click [Try it out].
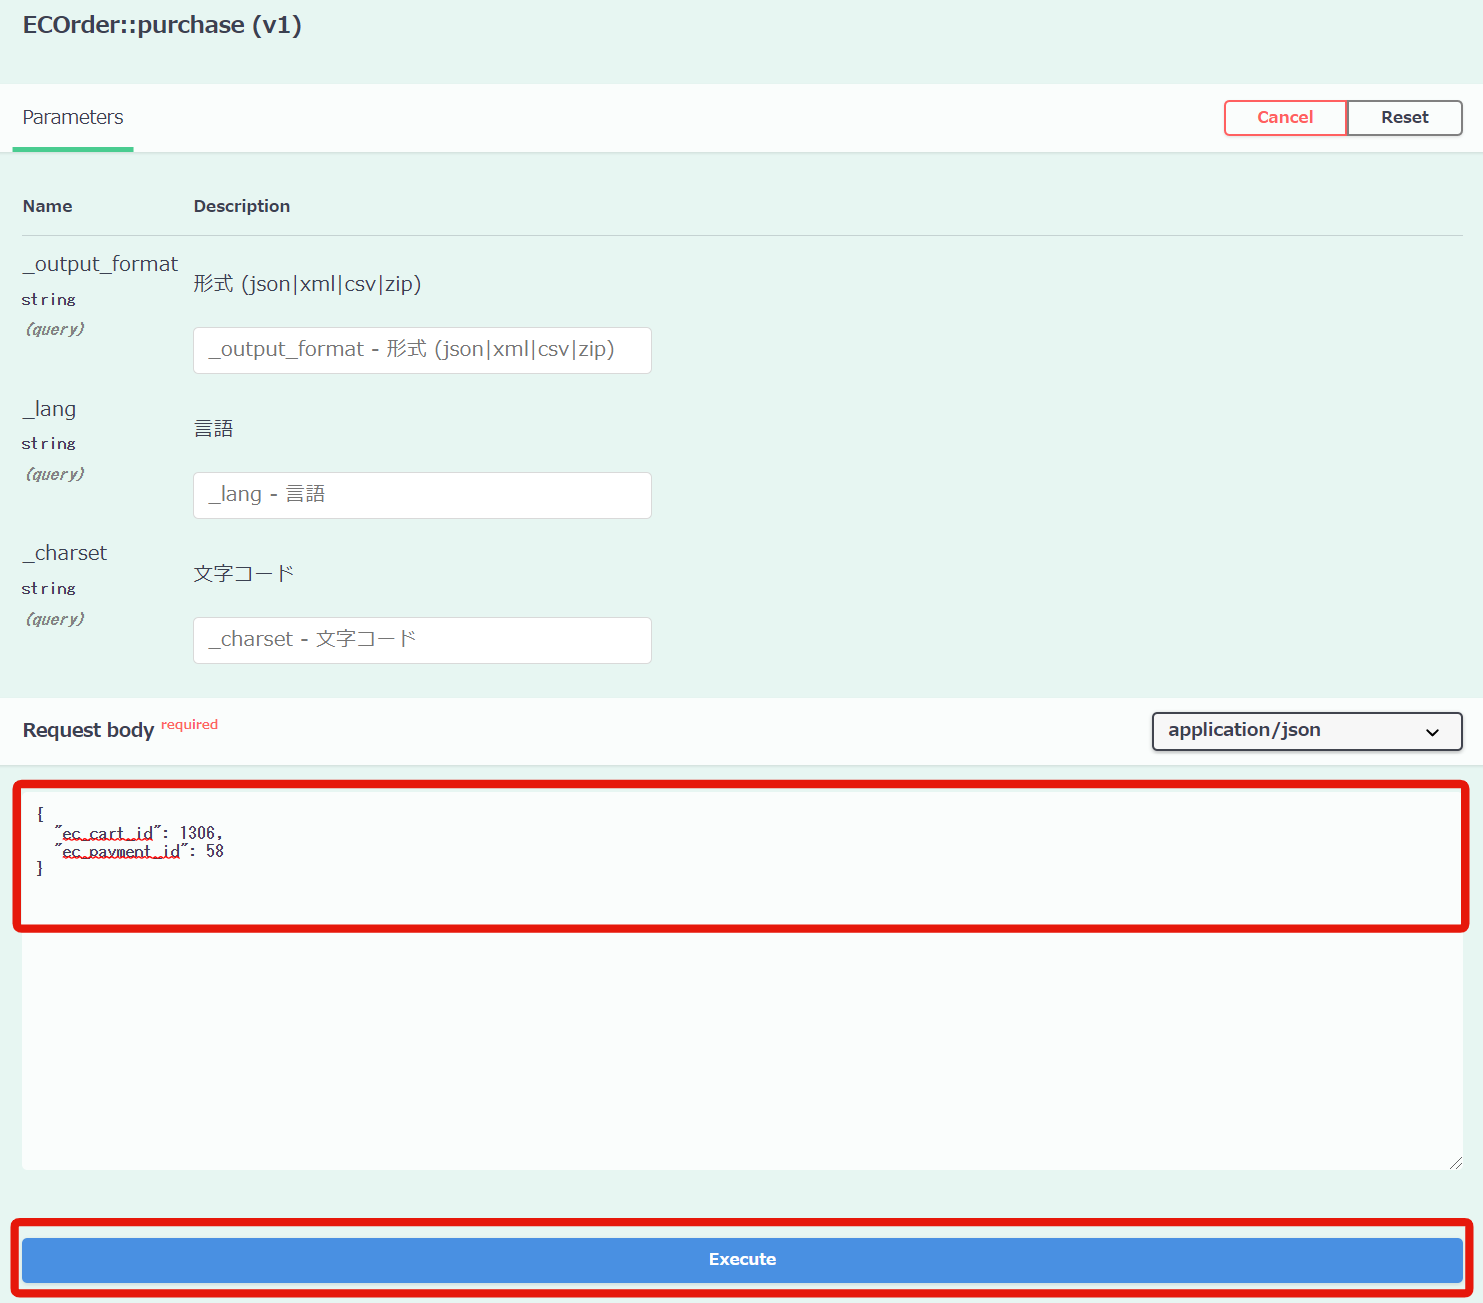
 Enter the cart ID and payment method ID in
 Request body and click [Execute].
The parameters you need to set are as follows:
Note: we'll proceed here with only the required parameters, but you can change optional ones if necessary.
ec_cart_id: cart ID you have checked in advance
-ec_payment_id: payment method ID
For this tutorial, we'll enter:
| Parameter | Value |
|---|---|
| ec_cart_id | 1306 |
| ec_payment_id | 58 |
{
  "ec_cart_id": 1306,
  "ec_payment_id": 58
}
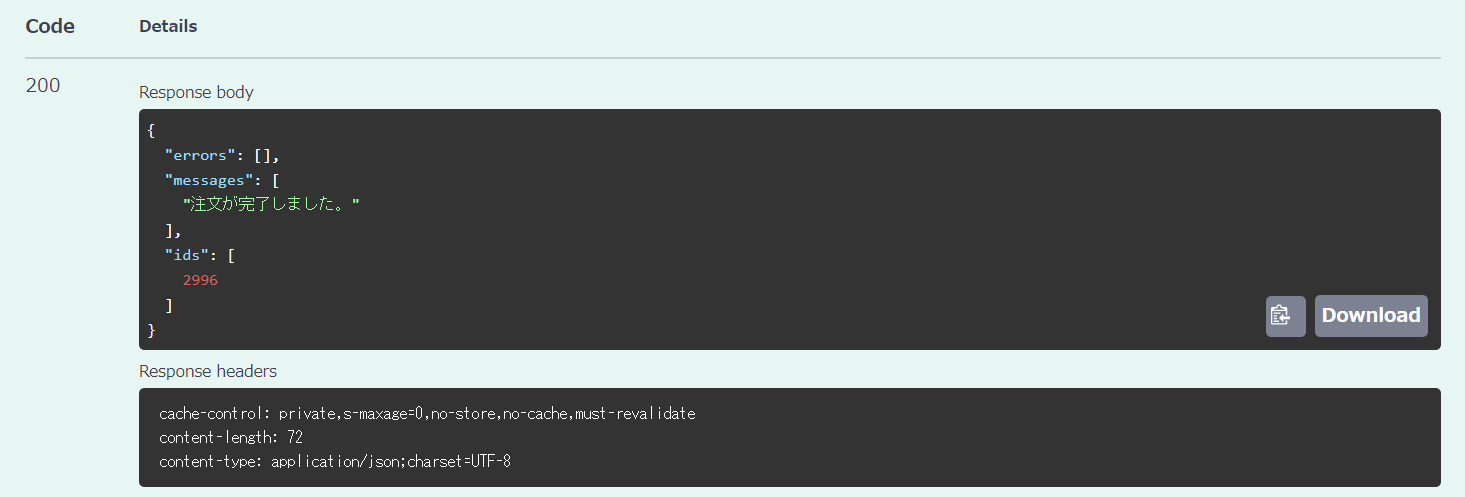
 Once the products are purchased successfully, the data will respond with code: 200.
 "Order has been completed" will be displayed in message and the Order ID will be returned in ids.
In addition, "Purchase completion notification" e-mail will be sent to the purchaser's e-mail address.
Orders may be divided into multiple units depending on the condition of the cart.
Checking the order information
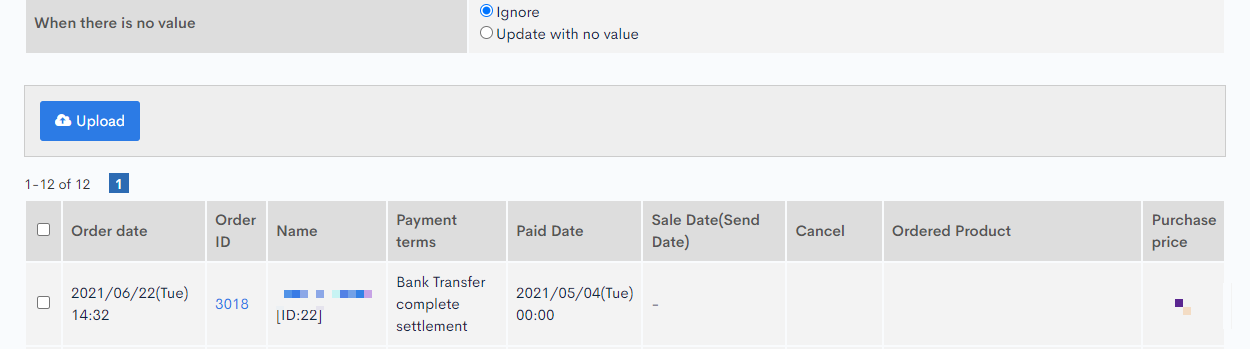
You can check the order you purchased earlier using Swagger UI earlier from [Order List]
 This concludes the explanation of the API settings required to build an EC site and how to check the ordering procedure using Swagger UI.
Related documents
Support
If you have any other questions, please contact us or check out Our Slack Community.