How to use batch process in Kuroco
What is batch process?
Batch process is an operation that gets executed at regular intervals.
Using Kuroco, you can run batch process every 15, 30, 60 minutes, or daily.
When to use?
It's recommended to run batch process at night or on holidays when there are few system users. This helps to reduce the load on the system and use free resources effectively.
Additionally, any processes that might increase the load abruptly when multiple users are operating simultaneously can be queued using batch process. The load will be reduced as these processes will be executed one by one.
For example, you can use it for the following processes:
- The process of generating CSV to connect with an external system
- The process of fetching data to Kuroco from an external system by file integration
- The process of updating various data in the system after the user withdraws
- The process of aggregating logs to calculate statistical data
How to create batch process
Let's create a batch process that outputs CSV files once a day.
1. Create new batch process.
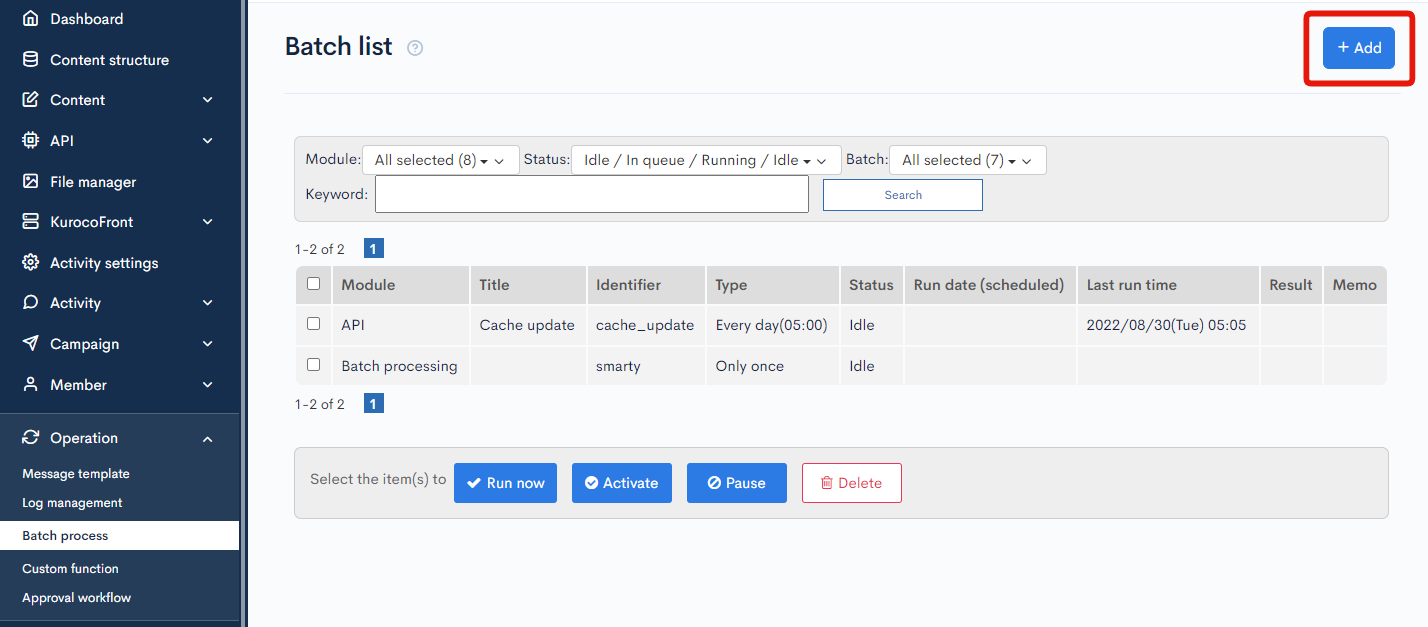
Click [Operation] -> [Batch process] on the side menu and access the batch process list page.
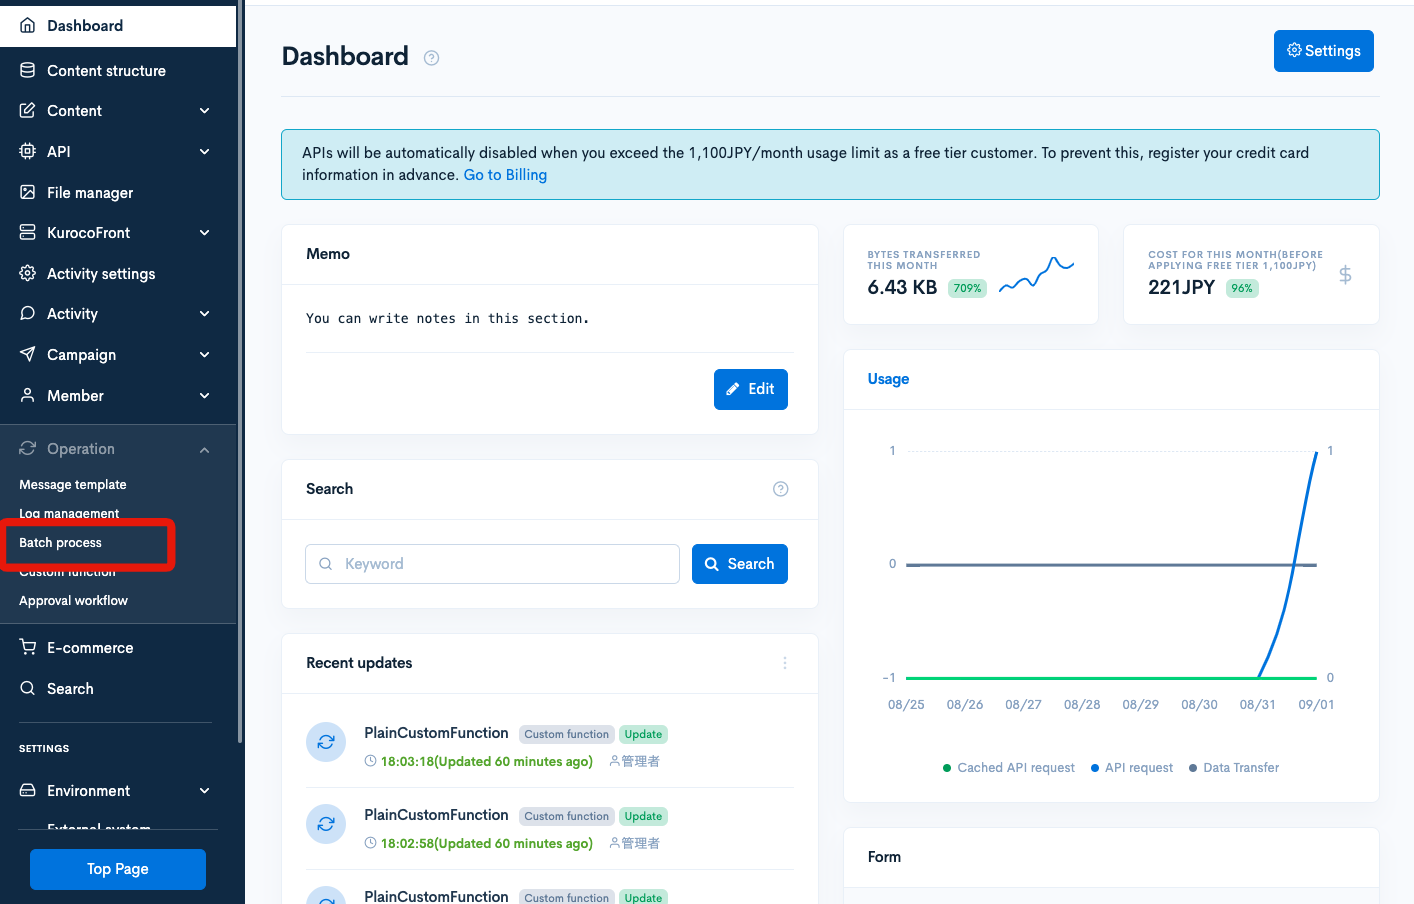
Click [+Add] button on the top right.
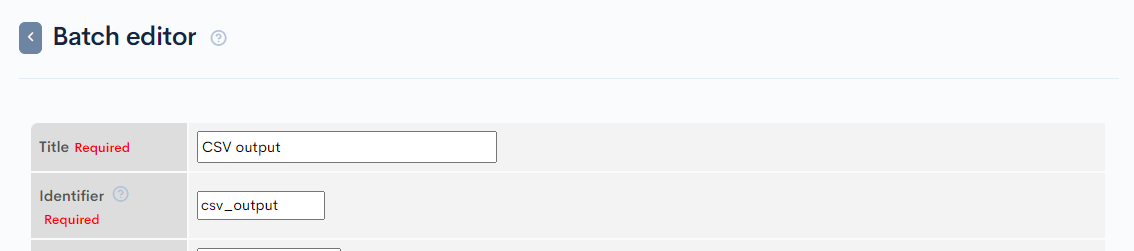
Input the name and slug of the batch process.
2. Specify the batch execution frequency.
Specify the batch execution frequency in the "Batch" field.
Kuroco allows the following options:
every 15 minevery 30 minevery 1 hevery day
We will set up daily execution at a specific time, so select "Every day" and select "05:00" for the time.

Now, the batch process which is executed at 5:00 every day has been created.
Note:
If you select "every day", the process cannot be executed within 23h from the previous execution time.
For example, even if you execute it "every 15 minutes" to check the operation and then change the settings to "every day" immediately after that, the previous execution time will be the time when it was executed "every 15 minutes".
Please note that if the specified time is within 23 hours from that point, the process will be skipped.
3. Implement the batch process.
Write the batch process with Smarty syntax in "Process" field.
First, output the header line on the temporary file.
{assign var="csv_header" value="Topic ID,category ID,category name, title, contents"} {* Note 1 *}
{write_file var=tmp_path value=$csv_header|cat:"\n"} {* Note 2 *}
Step 1) Use the assign function to save a comma-separated string that will be the CSV header line in a variable called $csv_header.
Step 2) Then save the variable to a temporary file and save the file name to a variable called $tmp_path. You can use the write_file function to automatically generate a unique file name and write characters to it.
Next, get the topic list using API.
{assign var=queries value=$dataSet.emptyArray} {* Step 3 *}
{append var=queries index=cnt value=0} {* Step 4 *}
{api_internal   endpoint='/rcms-api/1/topics-list'
                method='GET'
                member_id=1
                queries=$queries
                var='topics_list_response'
}
Step 3) Prepare an empty array by assigning $dataSet.emptyArray to the $queries variable. This variable is used as an API query variable.
Step 4) Next, assign 0 to the key cnt and make a request to the endpoint'/ rcms-api / 1 / topics-list' with the GET method.
'/ rcms-api / 1 / topics-list' is supposed to be an endpoint created in advance using the article list module.
If you pass cnt = 0 to the article list, all articles will be responded without page break. This is done here for simplicity, but actually, set an appropriate number to avoid memory errors.
If you pass 1 to the member_id attribute of the api_internal function, the API will be called with admin authorization.
The response is stored in a variable called $topics_list_response.
Next, add a response in the temporary file.
{foreach from=$topics_list_response.list item="topics"} {* Step 5 *}
  {assign var="row" value=$dataSet.emptyArray} {* Step 6 *}
  {append var="row" value=$topics.topics_id}{* topic ID *}
  {append var="row" value=$topics.contents_type}{* category ID *}
  {append var="row" value=$topics.contents_type_nm|escapeCSV:false:"UTF-8"}{* category name *} {* Step 7 *}
  {append var="row" value=$topics.subject|escapeCSV:false:"UTF-8"}{* title *}
  {append var="row" value=$topics.contents|escapeCSV:false:"UTF-8"}{* contents *}
  {assign var="row_str" value=","|implode:$row} {* Step 8 *}
  {write_file path=$tmp_path value=$row_str|cat:"\n" is_append=1} {* Step 9 *}
{/foreach}
Step 5) Since the topic data is stored as an array in $topics_list_response.list, it loops with each element of the array.
Step 6) Again, initialize the $row variable with $dataSet.emptyArray (empty array) and add the array elements in the order of the header rows.
Step 7) When adding multi-byte characters, use the escapeCSV qualifier to enclose them in double quotes and convert the character code to UTF-8. Note that: false after escapeCSV specifies whether to escape the line feed code.
Step 8) It concatenates the value saved in $row array to comma-separated string.
Step 9) Use the write_file function again to append the string + newline code from step 8 to the temporary file. If is_append = 1 is specified, the write_file function will be in append mode. At this time, you must specify the temporary file name using the path attribute, so specify the file name obtained in Step 2).
At last, upload the temporary file to the online storage.
{assign var=csv_path value='/path/to/topics_list.csv'} {* Step 10 *}
{assign var="tmp_abs_path" value=$smarty.const.TEMP_DIR2|cat:'/'|cat:$tmp_path} {* Step 11 *}
{put_file path=$csv_path tmp_path=$tmp_abs_path} {* Step 12 *}
Step 10) Specify the file name on the online storage by file path.
Step 11) Change the temporary file path to an absolute path. The temporary file is saved in the path called 'TEMP_DIR2'.
Step 12) Upload the temporary file on the online storage.
The complete script is as below:
{assign var="csv_header" value="topic ID,category ID,category name, title, contents"}
{write_file var=tmp_path value=$csv_header|cat:"\n"}

{assign var=queries value=$dataSet.emptyArray}
{append var=queries index=cnt value=0}
{api_internal   endpoint='/rcms-api/1/topics-list'
                method='GET'
                member_id=1
                queries=$queries
                var='topics_list_response'
}
{foreach from=$topics_list_response.list item="topics"}
  {assign var="row" value=$dataSet.emptyArray}
  {append var="row" value=$topics.topics_id}{* topic ID *}
  {append var="row" value=$topics.contents_type}{* category ID *}
  {append var="row" value=$topics.contents_type_nm|escapeCSV:false:"UTF-8"}{* category name*}
  {append var="row" value=$topics.subject|escapeCSV:false:"UTF-8"}{* title *}
  {append var="row" value=$topics.contents|escapeCSV:false:"UTF-8"}{* contents *}
  {assign var="row_str" value=","|implode:$row}
  {write_file path=$tmp_path value=$row_str|cat:"\n" is_append=1}
{/foreach}

{assign var=csv_path value='/path/to/topics_list.csv'}
{assign var="tmp_abs_path" value=$smarty.const.TEMP_DIR2|cat:'/'|cat:$tmp_path}
{put_file path=$csv_path tmp_path=$tmp_abs_path}
4. Update
After completing the above, click [Update] button and save the configuration. Then, wait until the fixed time 05:00.
After it is executed, the file is generated on the specified online storage path.
5.How to test
If you use the debug_print_var modifier, the contents of the variable will be printed on the batch edit screen.
Here, the first argument is the depth of the array to be displayed, and the second argument is the maximum character string length.
{$csv_header|@debug_print_var:0:1000}
By clicking [Test] button, you can execute the batch process without saving the changes.
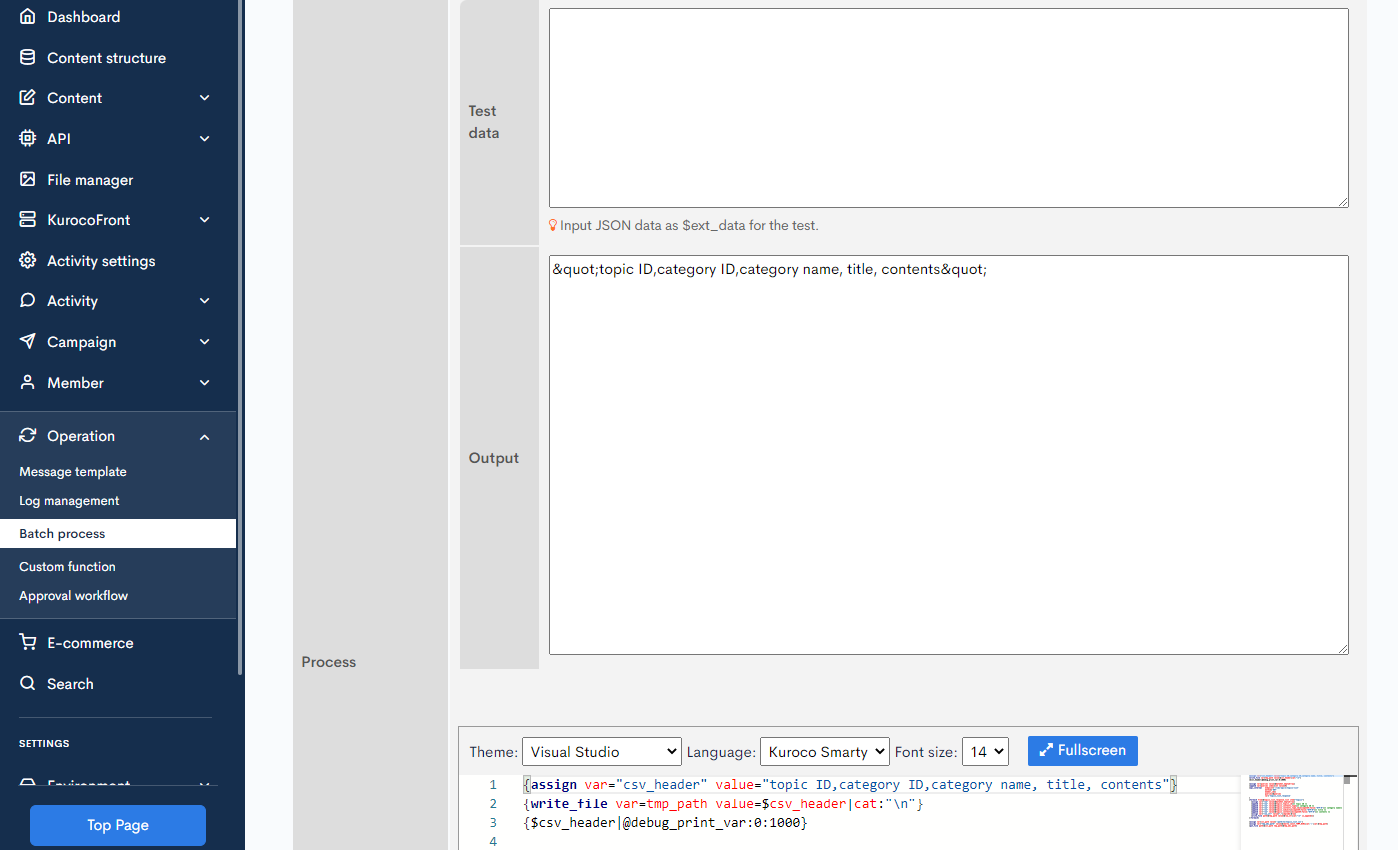
We can confirm that the header line was saved in $ csv_header.
After checking, delete the debug_print_var line.
Related documents
Support
If you have any other questions, please contact us or check out Our Slack Community.