Adding a Custom Page to Kuroco Management using Admin panel plugin
Overview
Use a admin panel plugin to add a custom page to the Kuroco management interface. Utilize this for implementing processes or displays that cannot be handled in the provided Kuroco management interface.
This tutorial explains the process from introducing a sample project to setting up in the Kuroco management interface.
What You Will Learn
In the following steps, you will add a custom page to the Kuroco management interface.
Prerequisites
To configure and develop Vue components for the Admin panel plugin, the following prerequisites are required:
- Understanding basic npm command operations
- Ability to develop components using Vue.js(v2.x)
Preparing Vue Plugin
Cloning the Sample Project
To quickly get started, the preparation of a sample project is available below.
Repository: https://github.com/diverta/management-vue-plugin-sample
Package: https://github.com/diverta/management-vue-plugin-sample/tree/master/packages/VueSample
First, clone this repository and navigate to the directory where the package for adding a custom page to the management interface is located.
git clone git@github.com:diverta/management-vue-plugin-sample.git
cd management-vue-plugin-sample/packages/VueSample
Run the following command to install dependencies.
npm install
Updating Project Pages
Next, adjust the content displayed on the Kuroco management interface.
Open /management-vue-plugin-sample/packages/VueSample/src/pages/VueSample.vue in the package and update it as follows.
<template>
    <div class="vue-sample">
        <h1>Vue Sample</h1>
        <ul>
            <li v-for="item in items" :key="item.topics_id">
                <a :href="`/management/topics/topics_edit/?topics_id=${item.topics_id}`">{{ item.subject }}</a>
            </li>
        </ul>
    </div>
</template>

<script>
import Vue from 'vue';
window.rcmsJS.vue.registerVM(Vue, rcms_js_config.publicPath); // eslint-disable-line
const axios = require('axios').default;

export default {
    components: {},
    props: {
        root_api_url: {
            type: String,
            default: '',
        },
        endpoint: {
            type: String,
            default: '',
        },
    },
    created: function() {},
    mounted: async function() {
        const resp = await axios.get(this.root_api_url + this.endpoint);
        this.items = resp.data.list ? resp.data.list : [];
    },
    data() {
        return {
            items: [],
        };
    },

    computed: {},
};
</script>

<style scoped>
.vue-sample h1 {
    font-size: 24px;
    color: #007bff;
    margin-bottom: 10px;
}
</style>
Building Components
When the update is complete, run the following commands to build the components:
npm run lint:fix
npm run build
After the build process is completed, the following files bundled by Webpack will be output in the /dist/ directory. The hash in the file names will have a different value each time it is built.
manifest.json
VueSample.e99068643c574d4f2040.css
vendors.43ede78aa5d8feb80b64.js
VueSample.a06fd9bd33de1d5ae13b.js
You can also run the build in the following ways:
Edit while running npm run watch: the source will be automatically built when it changes.
The preparation of the Vue plugin to be loaded into Kuroco is now complete.
Setting up the Kuroco Admin Panel
Preparing the API
The above Vue plugin sends a request to Kuroco's Topics::list endpoint to display a list of contents. If you do not have the endpoint ready for use in the Vue plugin, create the following endpoint:
For simplicity, we assume an endpoint without restrictions on API requests.
| Item | Setting |
|---|---|
| Security | Cookie |
| Path | topics |
| Category | Contents |
| Model | Topics |
| Operation | list |
| API Request Limit | No Limit |
| topics_group_id | Any content definition without API request restrictions |

Saving Files
Make the generated files accessible from external sources. You can use any hosting service or storage for file placement, but in this case, upload the files to the following directory in the file manager:
/files/user/mng_vue_components/vue-sample/
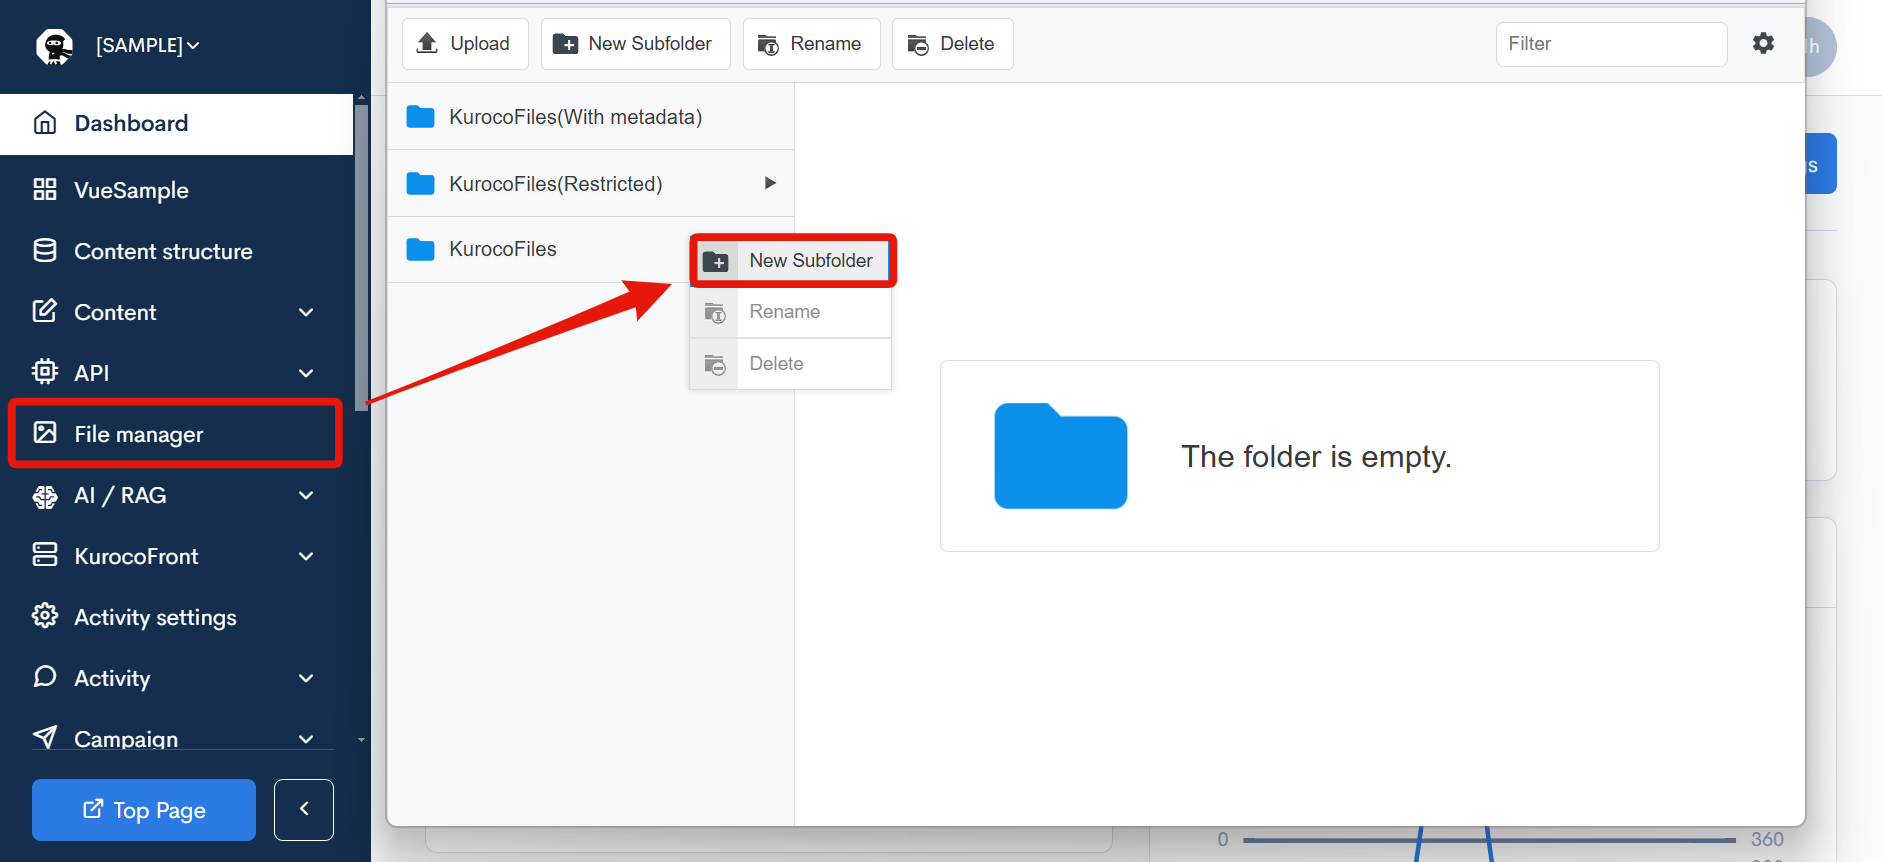
Open the [File Manager] from the side menu, right-click on [KurocoFiles], and select "Create a new folder".
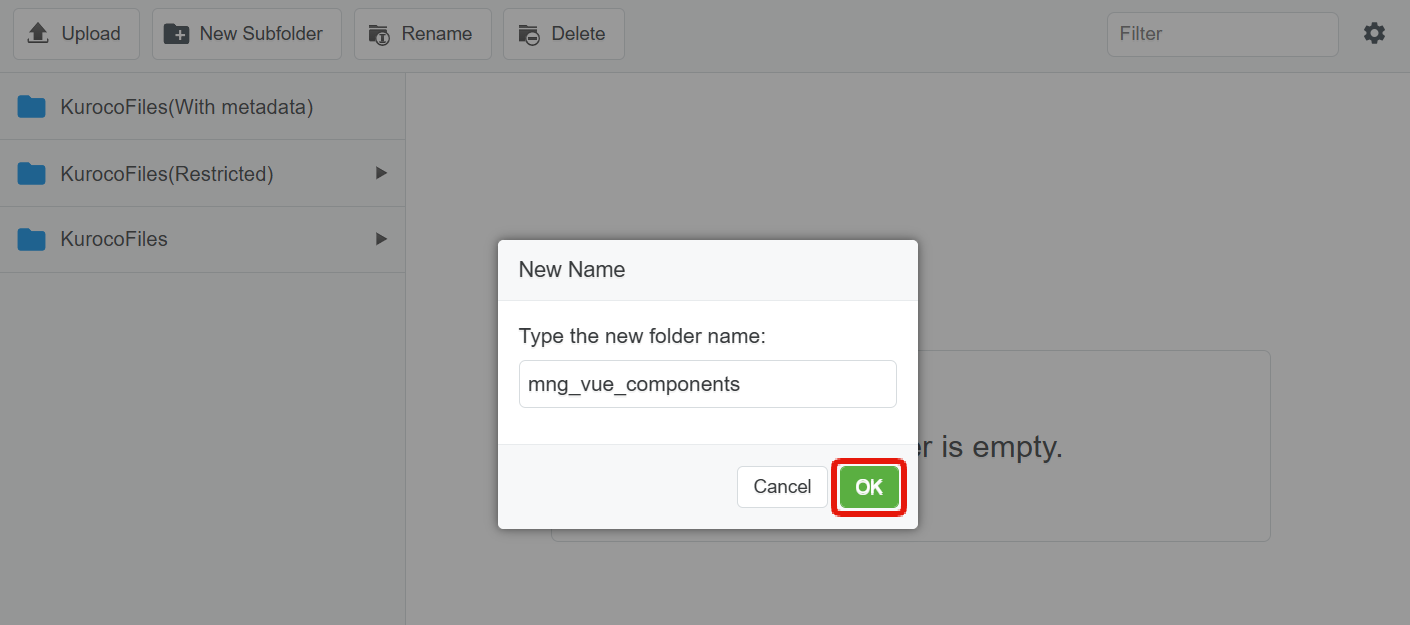
Enter mng_vue_components as the folder name and click [OK] to save.
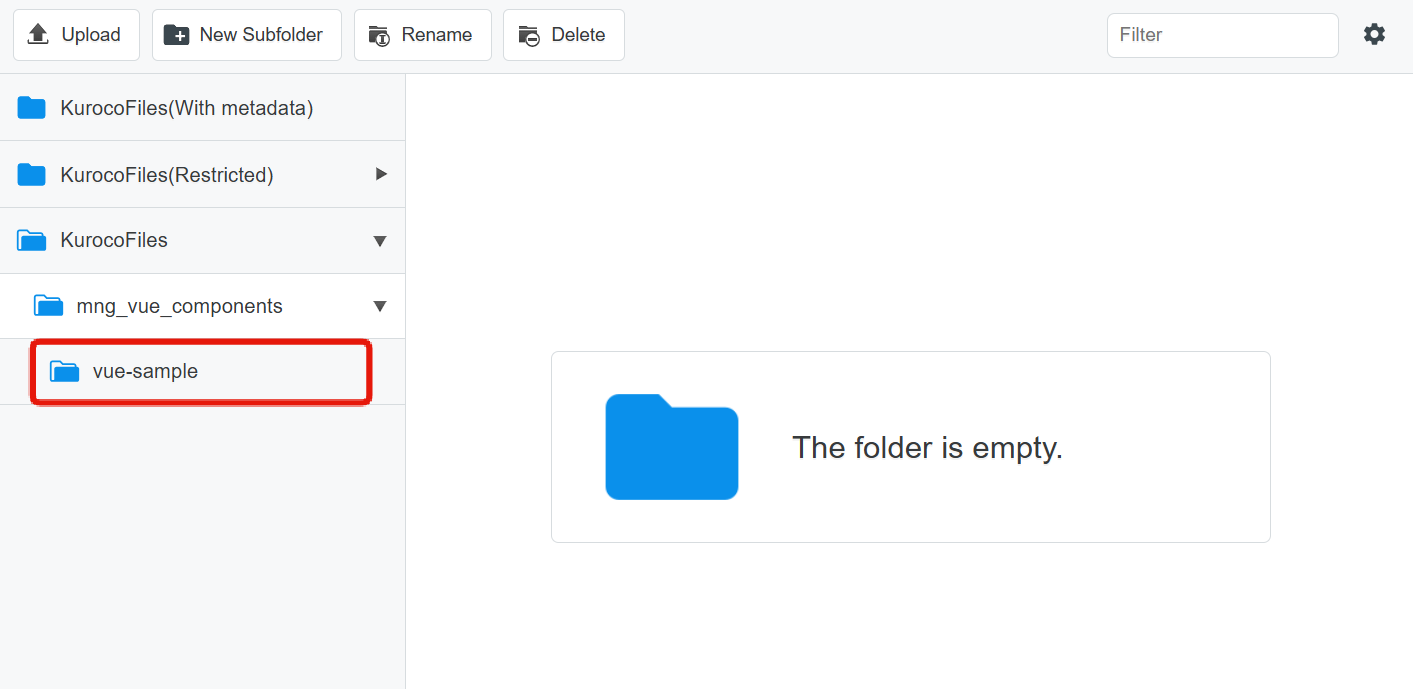
Similarly, create a folder vue-sample under mng_vue_components.
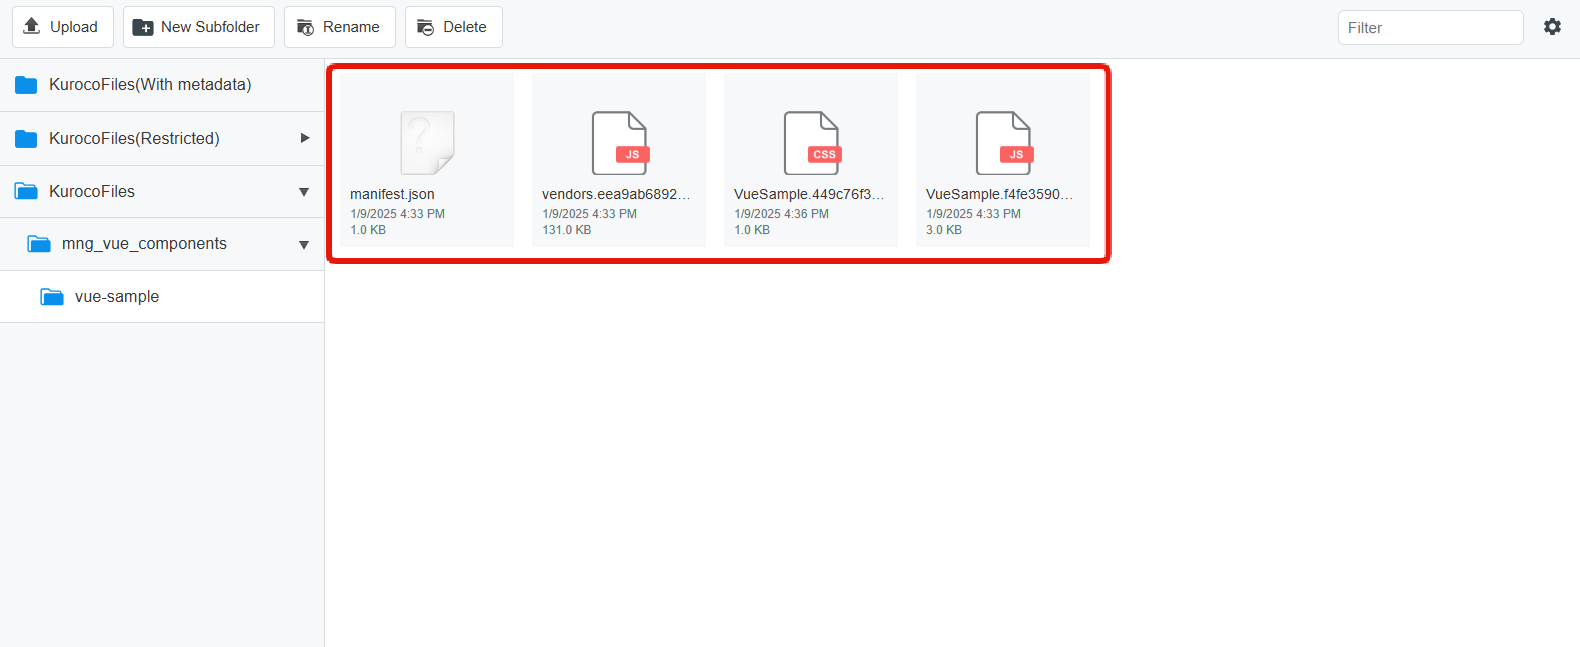
Save the 4 files created in Preparing the Vue Plugin in the vue-sample directory.
Configuring the Admin panel plugin
Configure the files placed in the file manager to be loaded on the admin panel.
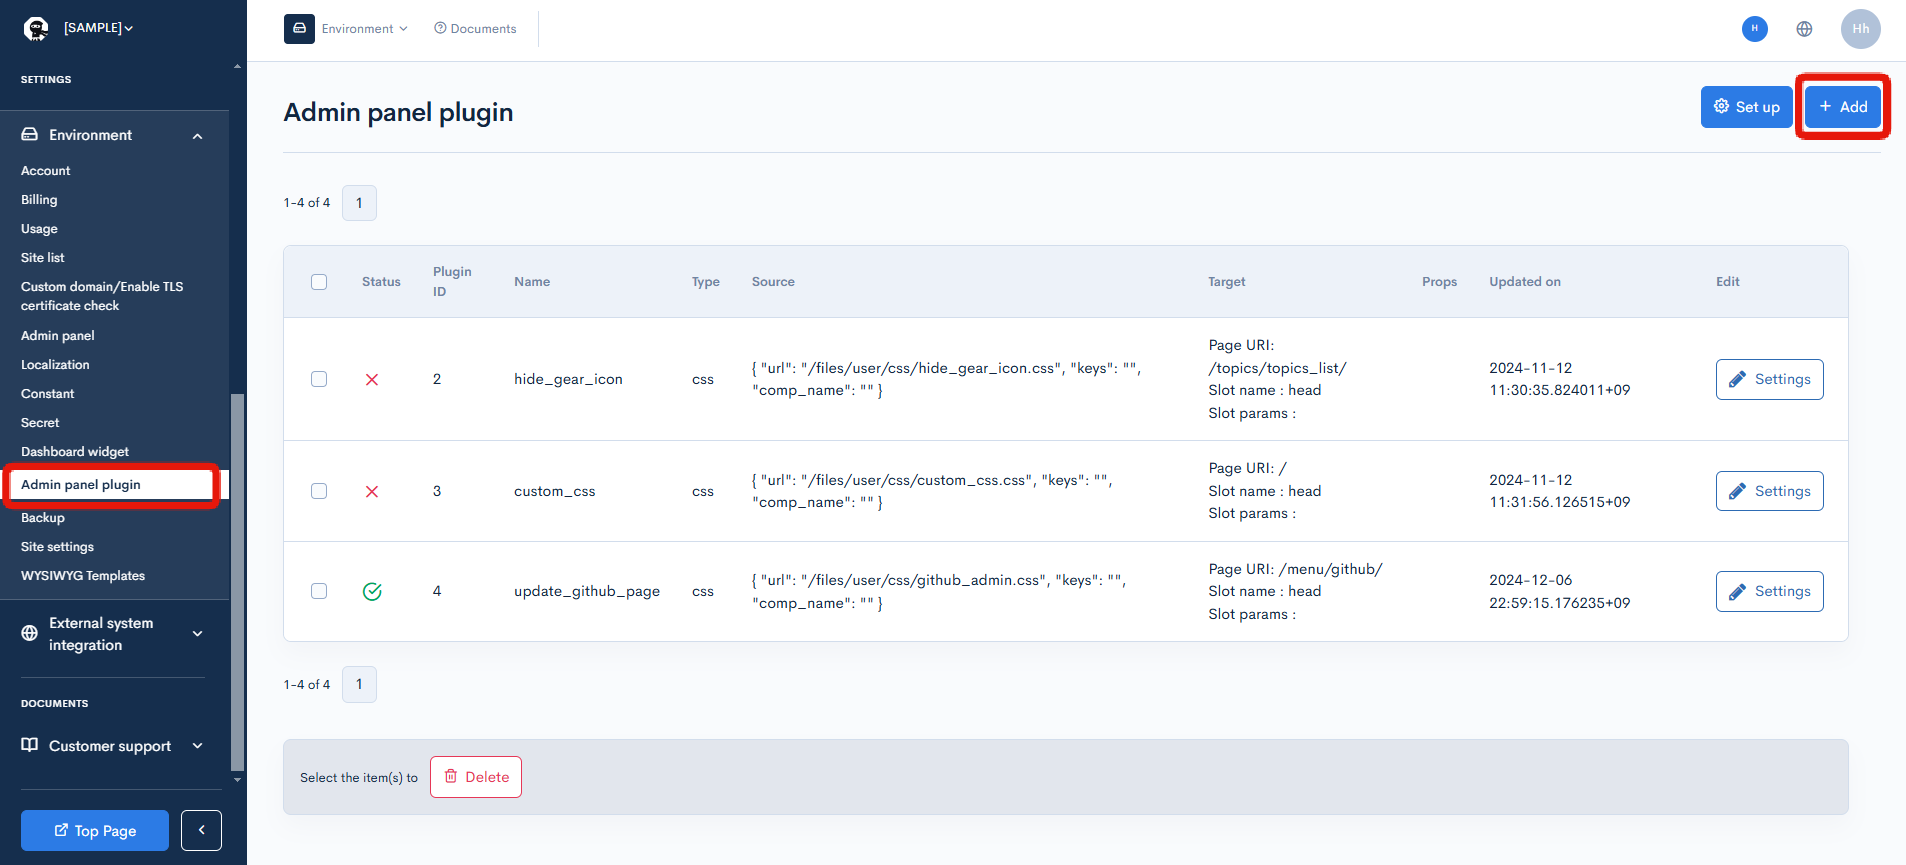
Click on [Environment Settings] -> [Admin Panel Plugins] to display the settings page.
Click [Add] to display the plugin editing modal.
Enter the information as shown below and click [Add].
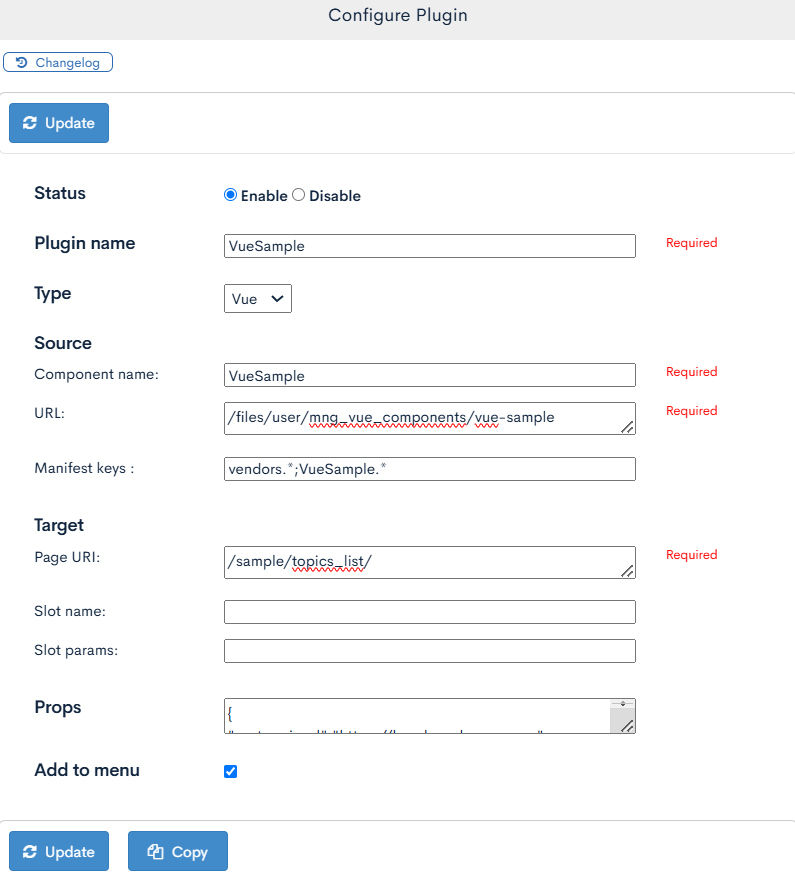
| Parent Item | Child Item | Value | Description |
|---|---|---|---|
| Status | - | Enabled | - |
| Plugin Name | - | Color Picker Input | Specify the name of the plugin. |
| Type | - | Vue | - |
| Source | Component Name | VueSample | Match the component name on the sample repository. |
| URL | /files/user/mng_vue_components/vue-sample | Enter the URL where the component is located. If you change the path, edit the publicPath in rcms-js.config.js and align it with this item and the configuration.If the file is located outside Kuroco, specify it in absolute URL format ( https://**). | |
| Manifest Key | vendors.*;VueSample.* | Specify the manifest.json key of the files to be loaded in the following format.vendors.*;ComponentName.* | |
| Target | Page URI | /sample/topics_list/ | Specify an arbitrary path of two or more levels. If only one level is specified, it will redirect to /menu/menu/, so please be careful. |
| Props | - | | Specify the props to pass to the component. Leave it blank if not needed. Here, set the API domain and the URL of the endpoint to be used. Please refer to List of Slots Available for Management Plugins for the props that can be passed to the management plugin. |
| Add to menu | - | Check the box | Specify an arbitrary path in the Page URI and check the box to add a link to the side menu. |
Confirmation of Display
Once the setup is complete, a link to the added Page URI will be displayed in the Kuroco admin panel's side menu.
Upon accessing it, a list of contents retrieved from the /rcms-api/1/topics endpoint and links to their editing screens will be displayed.
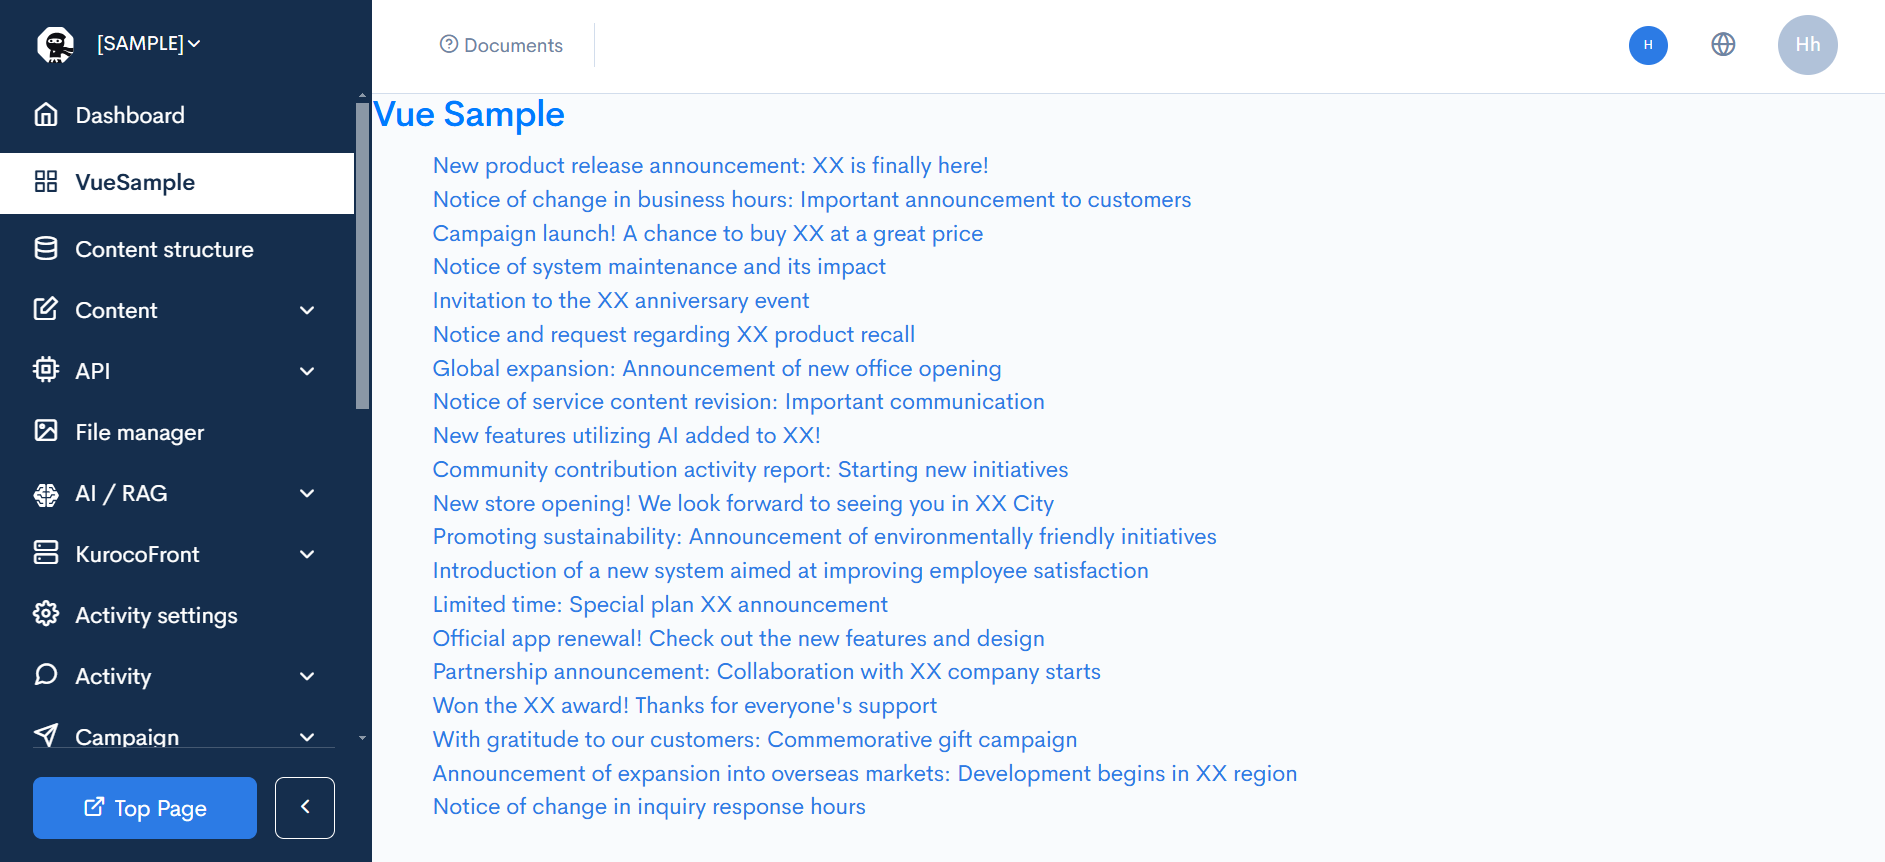
With this, you have successfully created an arbitrary page in the Kuroco admin panel.
Please implement any management screen based on this sample.
Related Documents
Support
If you have any other questions, please contact us or check out Our Slack Community.