Scheduled generation of screenshot PDFs of external sites
Overview
The generate_pdf plugin allows you to capture the screen of a specified URL and save the output as a PDF or an image.
You can call it anywhere Smarty syntax is allowed, such as in Custom function or Batch processing.
In this tutorial, we will create a batch process that takes a daily screenshot of an external site and saves it as a PDF in Kuroco.
Before you start
To use the plugin, you need to first integrate Firebase into your Kuroco admin panel.
For a detailed guide on how to perform this integration, see Tutorial: Cloud storage integration with Firebase.
Batch process creation
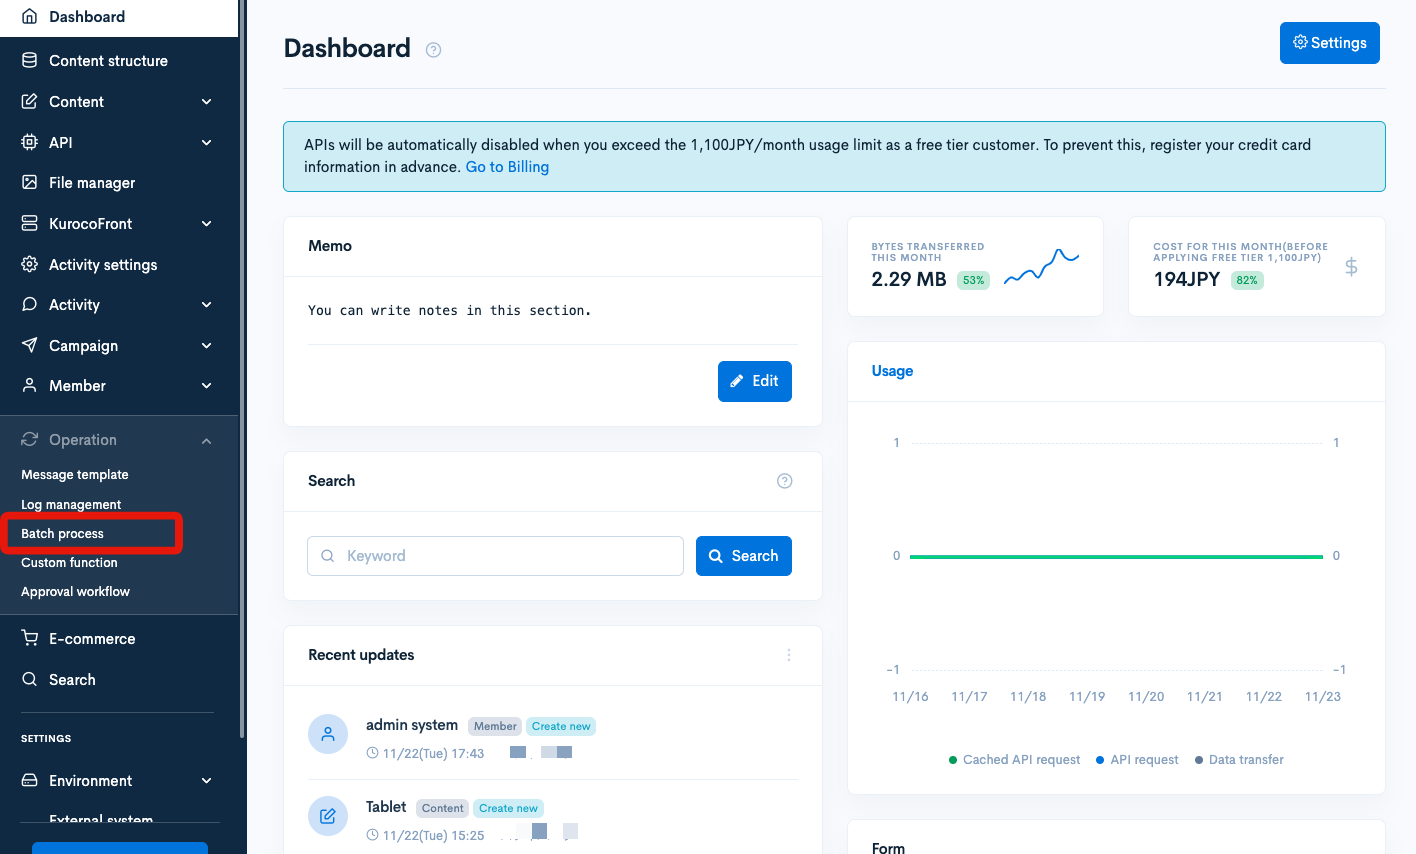
In the sidebar menu, select [Operation] -> [Batch process].

Click [Add] in the upper right corner.

Create a batch process with the following settings:
| Field | Value |
|---|---|
| Title | Daily screenshot taker |
| Identifier | daily_capture |
| Batch | Every day, 00:00 |
| Process | (Paste the code below into this field.) |
{assign var=date value=$smarty.now|date_format:'%Y%m%d'}
{assign var=path value='files/g/private/sample_'|cat:$date|cat:'.pdf'}
{generate_pdf url='https://www.diverta.co.jp' path=$path}


Click [Add] to save the process.
Batch process verification
In this example, the batch process will run at midnight every day, and the output PDF will be saved in KurocoFiles.
Alternatively, you can click [Run now] next to the process title to run it immediately.

You should see a success message at the top of the screen.

Next, check if the output file has been saved correctly.
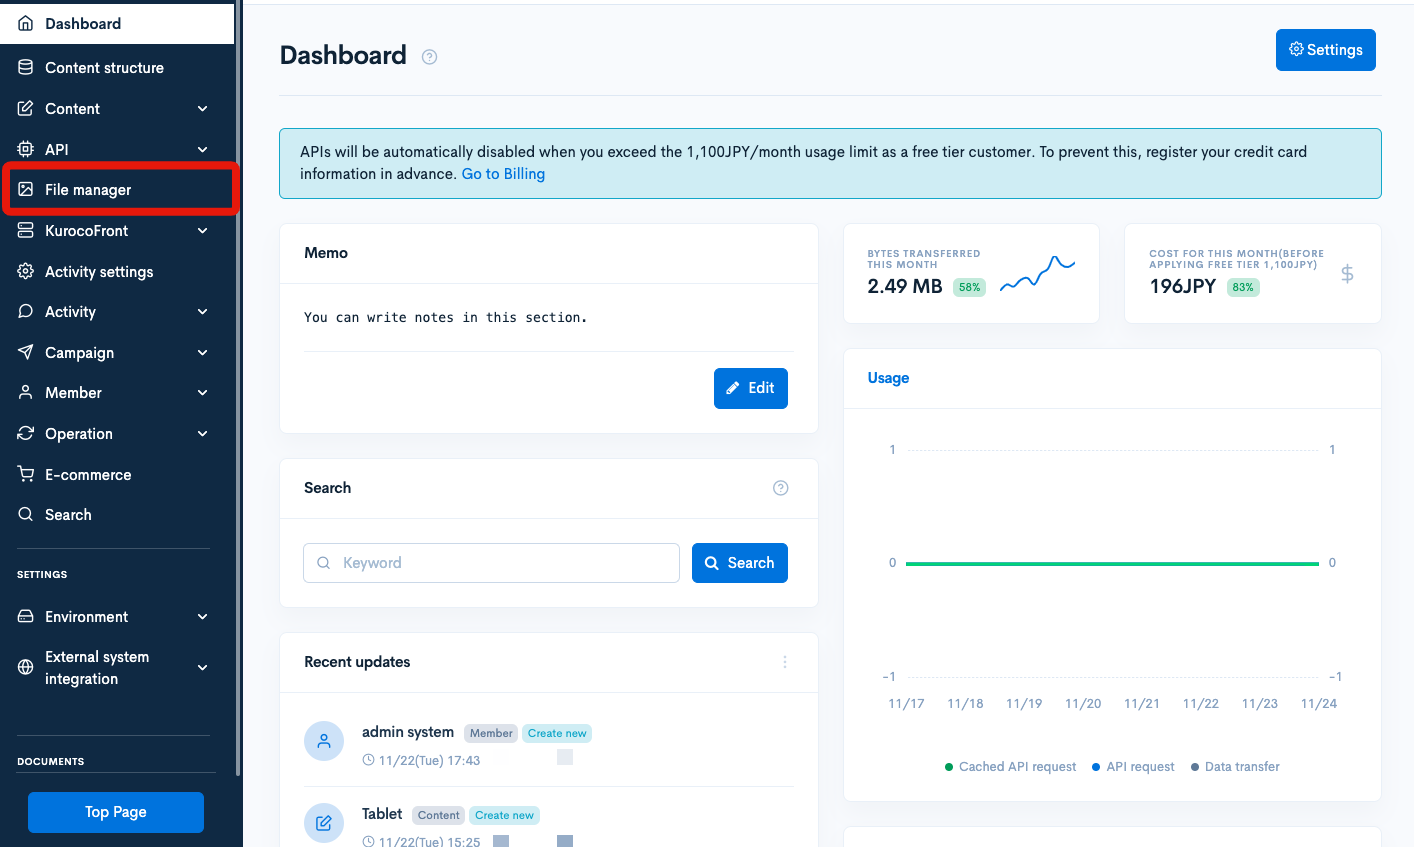
Click [File manager] in the side menu.

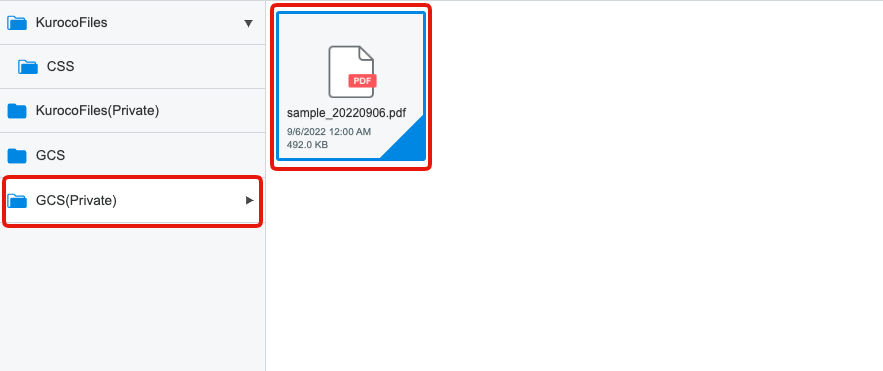
The file should appear in the GCS(Private) folder.

It may take up to several minutes for the file to be generated.
Related Documents
For more details about generate_pdf, please refer to Smarty Plugin -> generate_pdf.
Support
If you have any other questions, please contact us or check out Our Slack Community.