Using the Corporate Sample Site
We have released a Corporate Sample Site that can be used as a template for building Kuroco.
The Corporate Sample Site includes content display commonly used in corporate websites, as well as a login function as part of the template.
Please use it as a template when starting a project with Kuroco.
Demo Site

Demo Site URL: https://dev-nuxt-corporate.g.kuroco-front.app/
Repository: https://github.com/diverta/front_nuxt_corporate
List of Features
- Content Management
- Article list
- Article details
- Preview
- Displaying masters (used for archives)
- Filtering (by date)
- Contact Form
- Dynamic display of inquiries
- Form submission
- Membership Functionality
- Registration and cancellation
- Login and logout
- Updating member information
- Password reminder
- Displaying content based on member group
- Displaying selected member-exclusive content to non-logged-in users
- Automatic processing of requests for changing member group
*Added for demo purposes only. You can use it as a paid membership feature by removing the settings and manually processing it or integrating it with Stripe.
Concept
This sample site is created with the following concepts in mind:
- It is not a showcase of production examples for the purpose of introducing features, but rather a "template" site intended for users to edit and use.
- Prioritizing readable code over convenience, as it is essential for users to be able to edit the content.
- Minimizing the use of plugins, with users having the option to add desired plugins themselves.
- The template does not incorporate a CSS framework, allowing users to apply the one they are familiar with.
Prerequisites
The following are required before proceeding with this project.
This project uses Nuxt3. Please make sure that Nuxt is available in your environment in advance.
Reference: NuxtJS Installation Prerequisites
To deploy the project, push the source code to GitHub. Please create a GitHub account in advance.
Reference: GitHub Docs Quickstart
Preparing the Backend
Registering with Kuroco
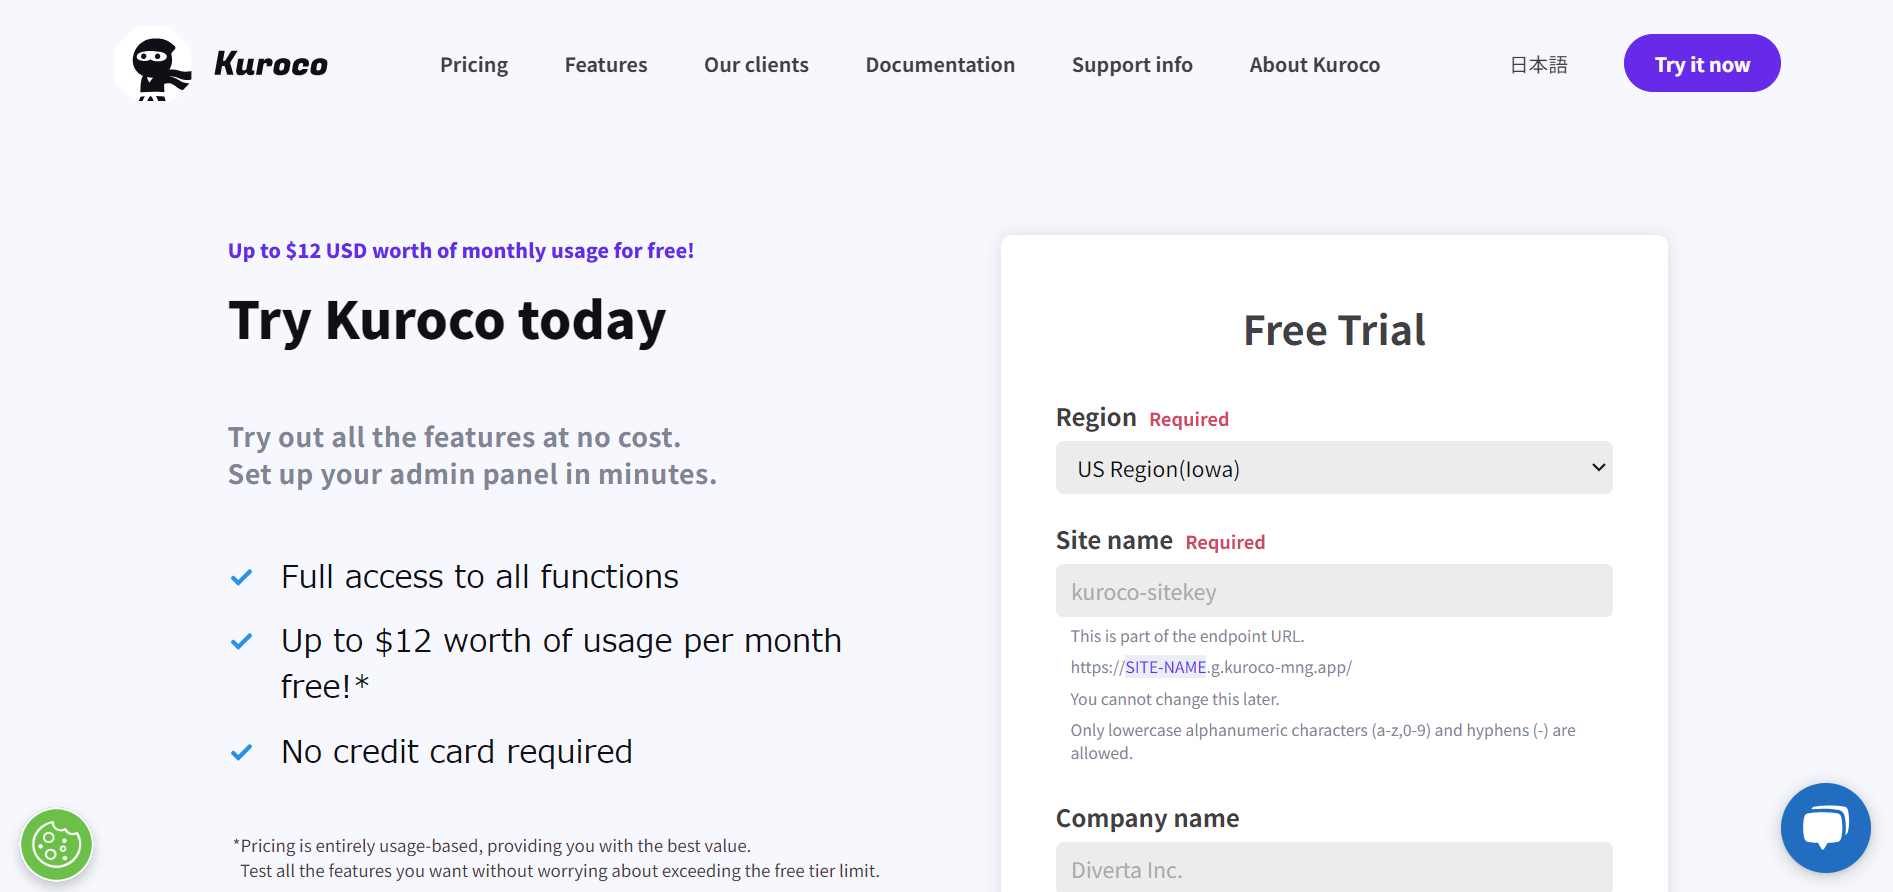
First, register for a Kuroco account. Fill in the required information from the Free Trial page and click "Register".
The Corporate Sample Site will be created as a sub-site.
Please prepare separate site keys for the main site and the sub-site.
The site key used to register the Kuroco account from the free trial will be the main site key.
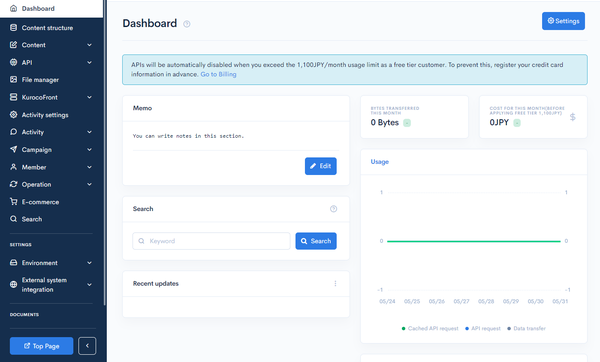
You will receive a registration confirmation email in the inbox of the registered email address. Click the management screen URL provided in the email to log in, and the following screen will be displayed.
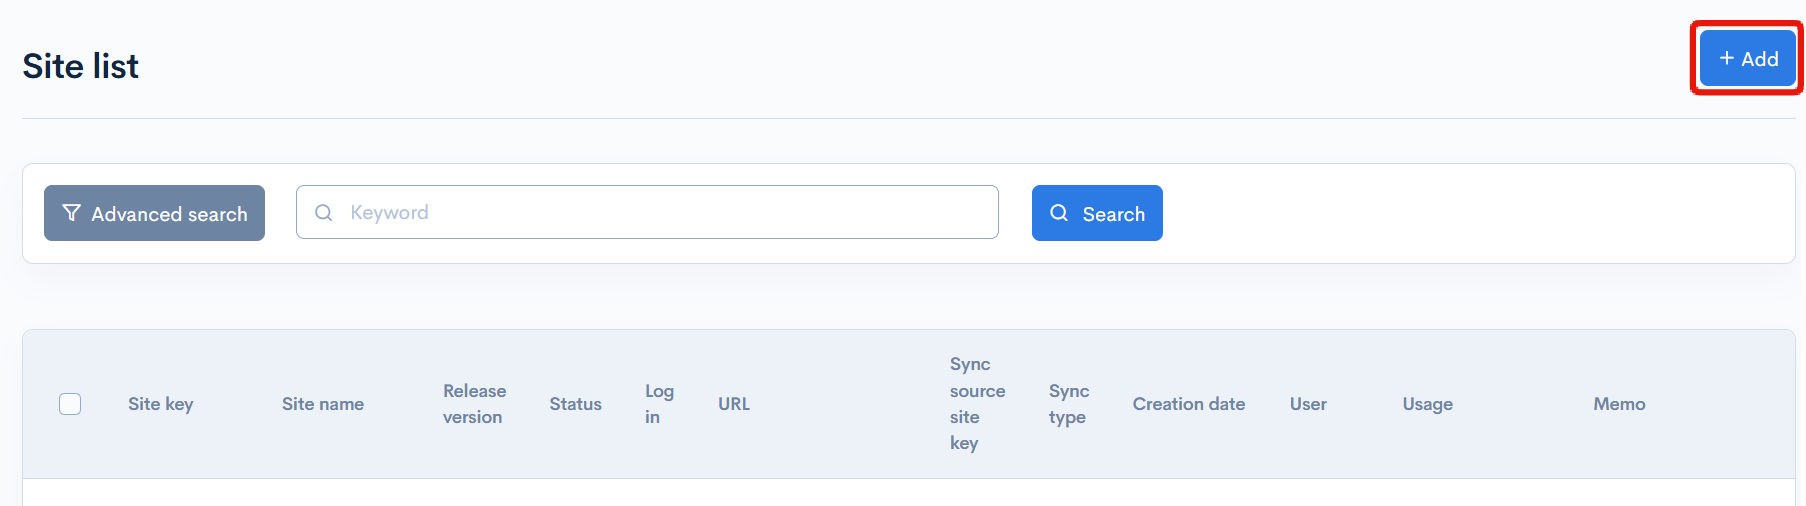
Adding a Sub-Site
Add a sub-site for the Corporate Sample Site from the site list.
The main site that you've registered via the free trial page is a membership sample site by default. For this exercise, we will not be using the frontend of the main site.
Register your credit card for payment on the main site and the costs, including the usage fee for the sub-site, will be billed to the main site.
Click [Environment Settings] -> [Site List].

Click [Add].
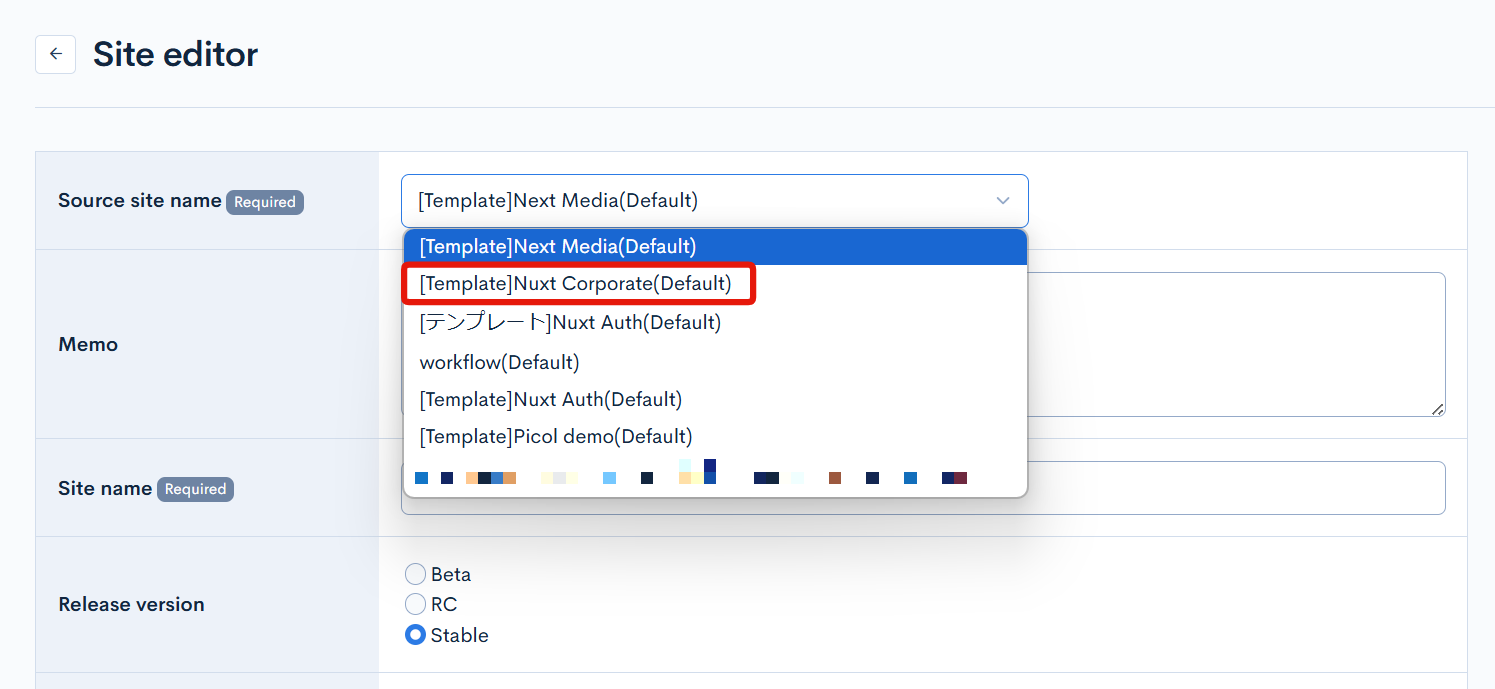
Set the copied site name as [Template]Nuxt Corporete(Default), fill in the required items, and click [Add].
After receiving the registration completion email for the sub-site, log in and check the content.
From now on, all explanations of the Kuroco management screen will be for the sub-site.
Setting CORS
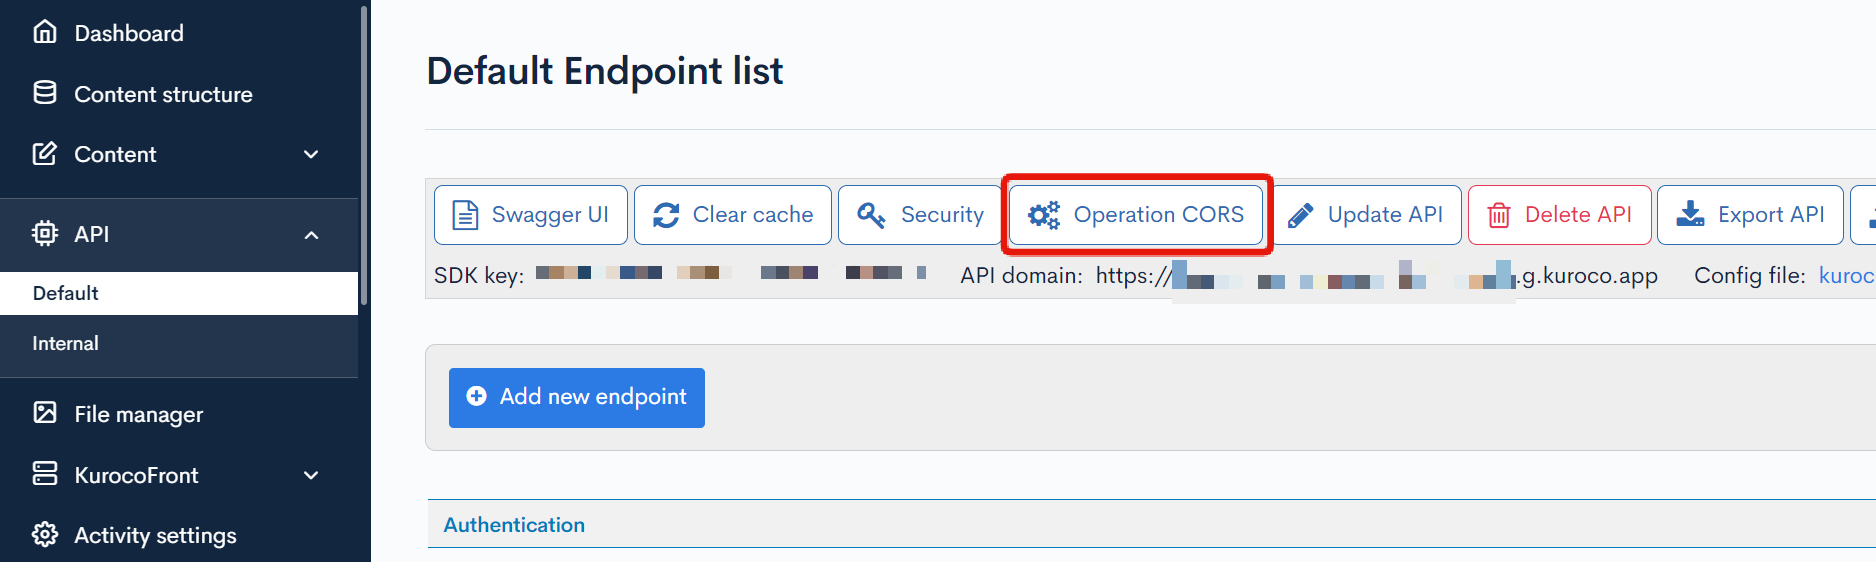
We will set the CORS in the API page.
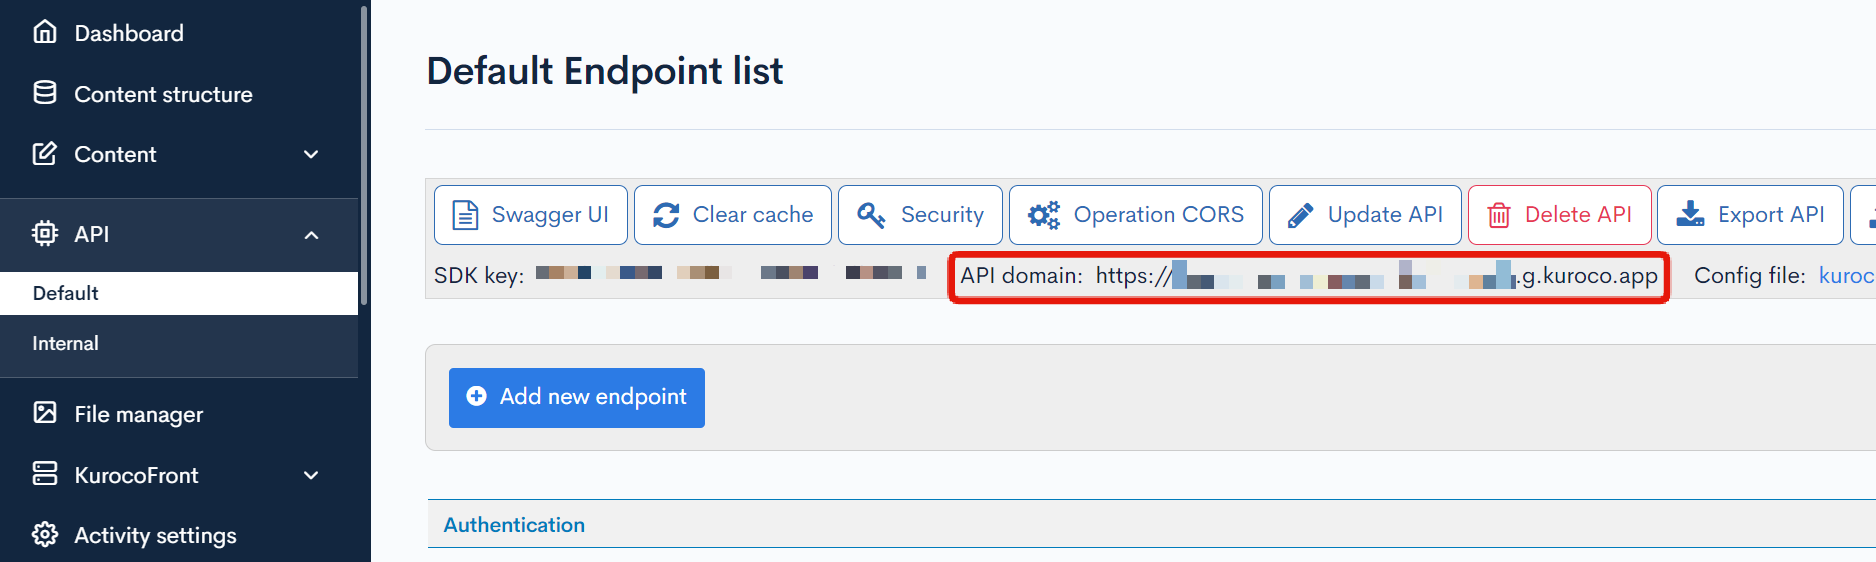
Click [API] -> [Default], then click "Operation CORS".
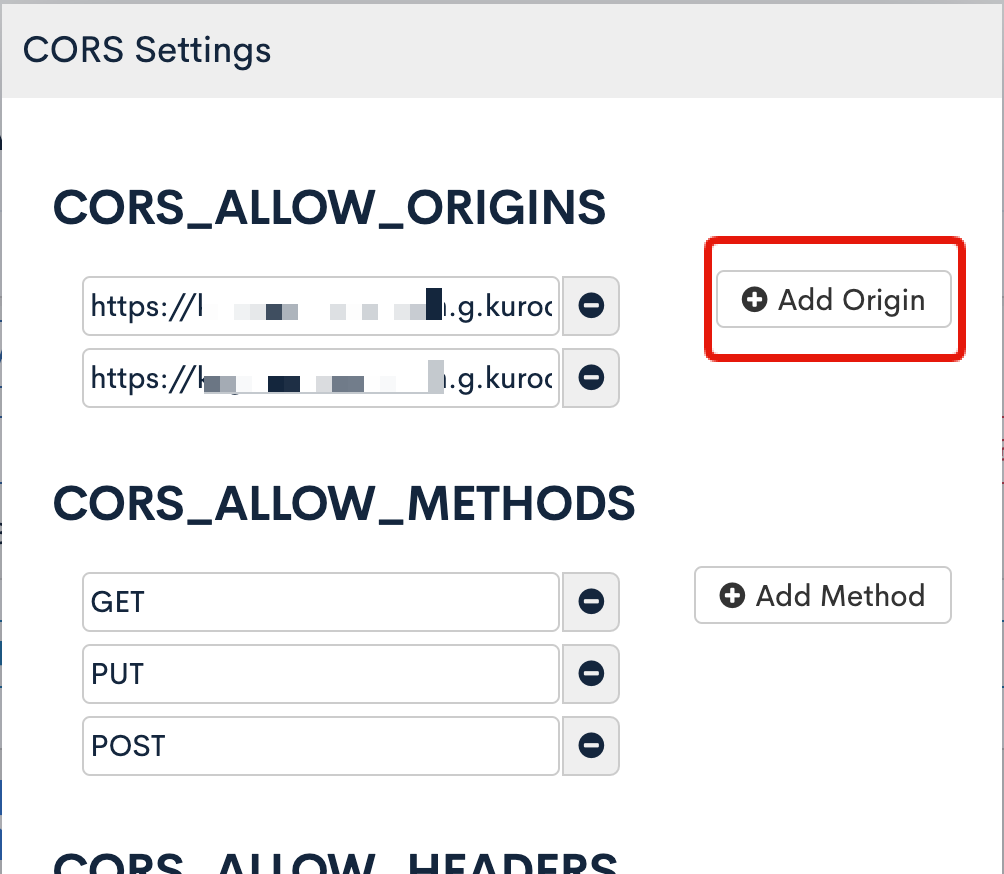
Click "Add Origin" for CORS_ALLOW_ORIGINS.
Set http://localhost:3000 in the new field and click "Save".
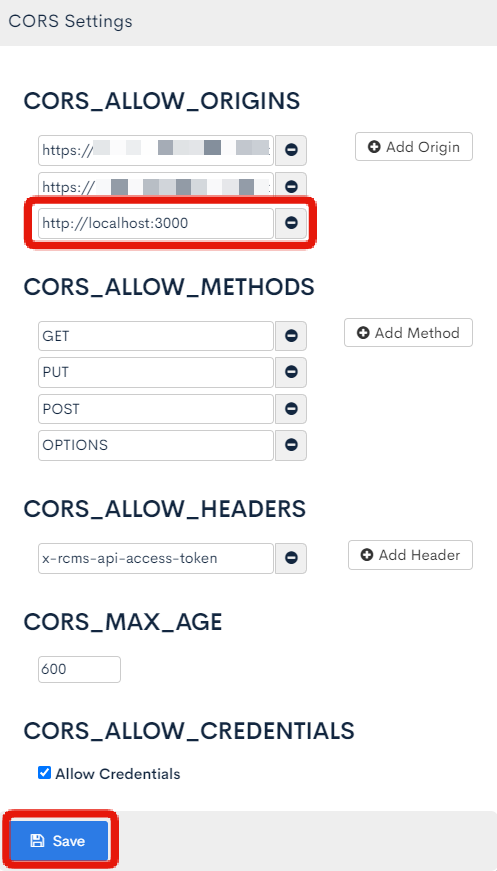
The CORS settings configurations are now done.
Prepare the frontend
Clone the corporate sample site repository
Clone the source code to your local directory from the GitHub repository. Execute the following command in the terminal.
git clone https://github.com/diverta/front_nuxt_corporate.git
After cloning, navigate to the front_nuxt_corporate directory and install the project.
cd front_nuxt_corporate
npm install
Next, open nuxt.config.ts and change the kurocoApiDomain in the runtimeconfig to your site's API domain.
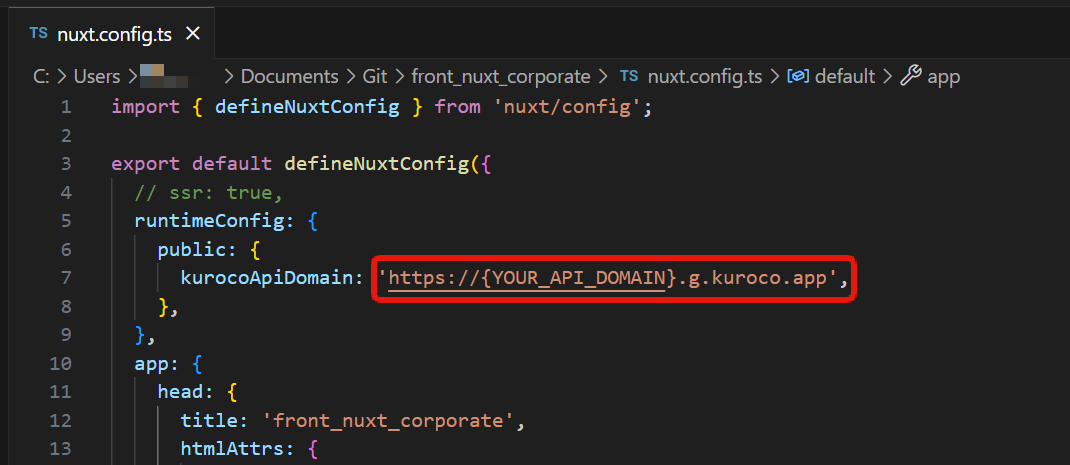
You can find the API domain in your account settings or on the endpoint list page.
Once you're ready, execute the following command in the command line to check the local display.
npm run dev
Access http://localhost:3000 to see the site.
Create a repository on GitHub and push the files
Next, push the cloned repository to your own repository.
Log in to GitHub and click [Repositories] -> [New].

The repository creation screen will appear, fill in the necessary information, and click "Create repository".
(In this case, I entered "kuroco_front_nuxt_corporate" for the "Repository name".)
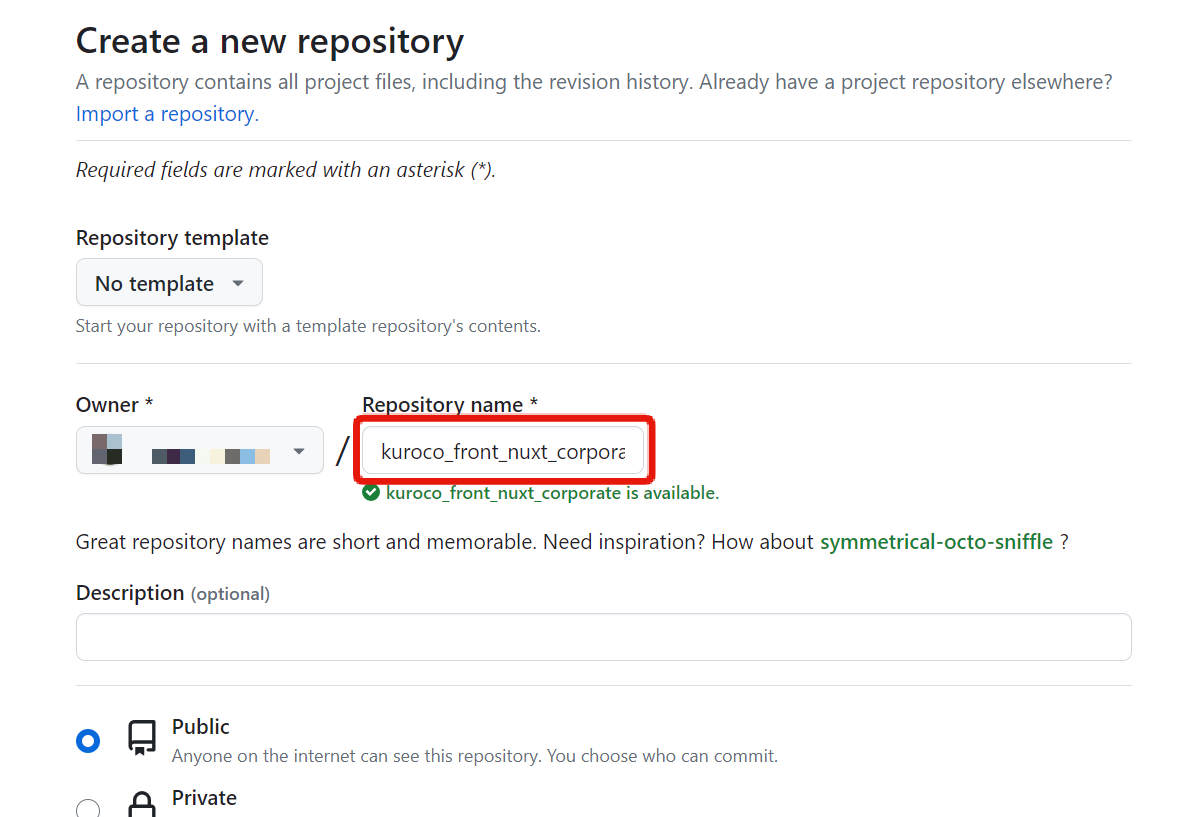
That completes the repository creation.
Now, push the files you cloned to this repository.
Currently, it is associated with https://github.com/diverta/front_nuxt_corporate.git, you will need to change it to the repository you created earlier.
Execute the following command in the command line.
git remote set-url origin https://github.com/YourGitHubAccount/kuroco_front_nuxt_corporate.git
Note: Please change the following two points according to your own account.
YourGitHubAccount: Your GitHub account namekuroco_front_nuxt_corporate: The repository name you created earlier
The remote repository has now been changed. Just to be sure, execute the following command in the command line.
git remote -v
You will see that the repository has been changed to the one you set.
origin  https://github.com/YourGitHubAccount/kuroco_front_nuxt_corporate.git (fetch)
origin  https://github.com/YourGitHubAccount/kuroco_front_nuxt_corporate.git (push)
Now, push the files to the GitHub repository you created. Please execute the following command.
git push -u origin main
When you check the GitHub repository, you will see that the files have been pushed.
Note: How to handle errors when pushing
In this sample site, there is a yml file for GitHub Actions in the repository.
Therefore, depending on the GitHub settings, an error may be displayed. If an error occurs, please refer to FAQ -> I get an error message when I push to the GitHub repository. How can I resolve it? for troubleshooting.
The frontend preparation is now complete. Next, we will explain how to connect to your Kuroco.
Connecting Kuroco and GitHub for deployment
KurocoFront configuration
Using KurocoFront, we will connect Kuroco with the GitHub repository that was cloned earlier.
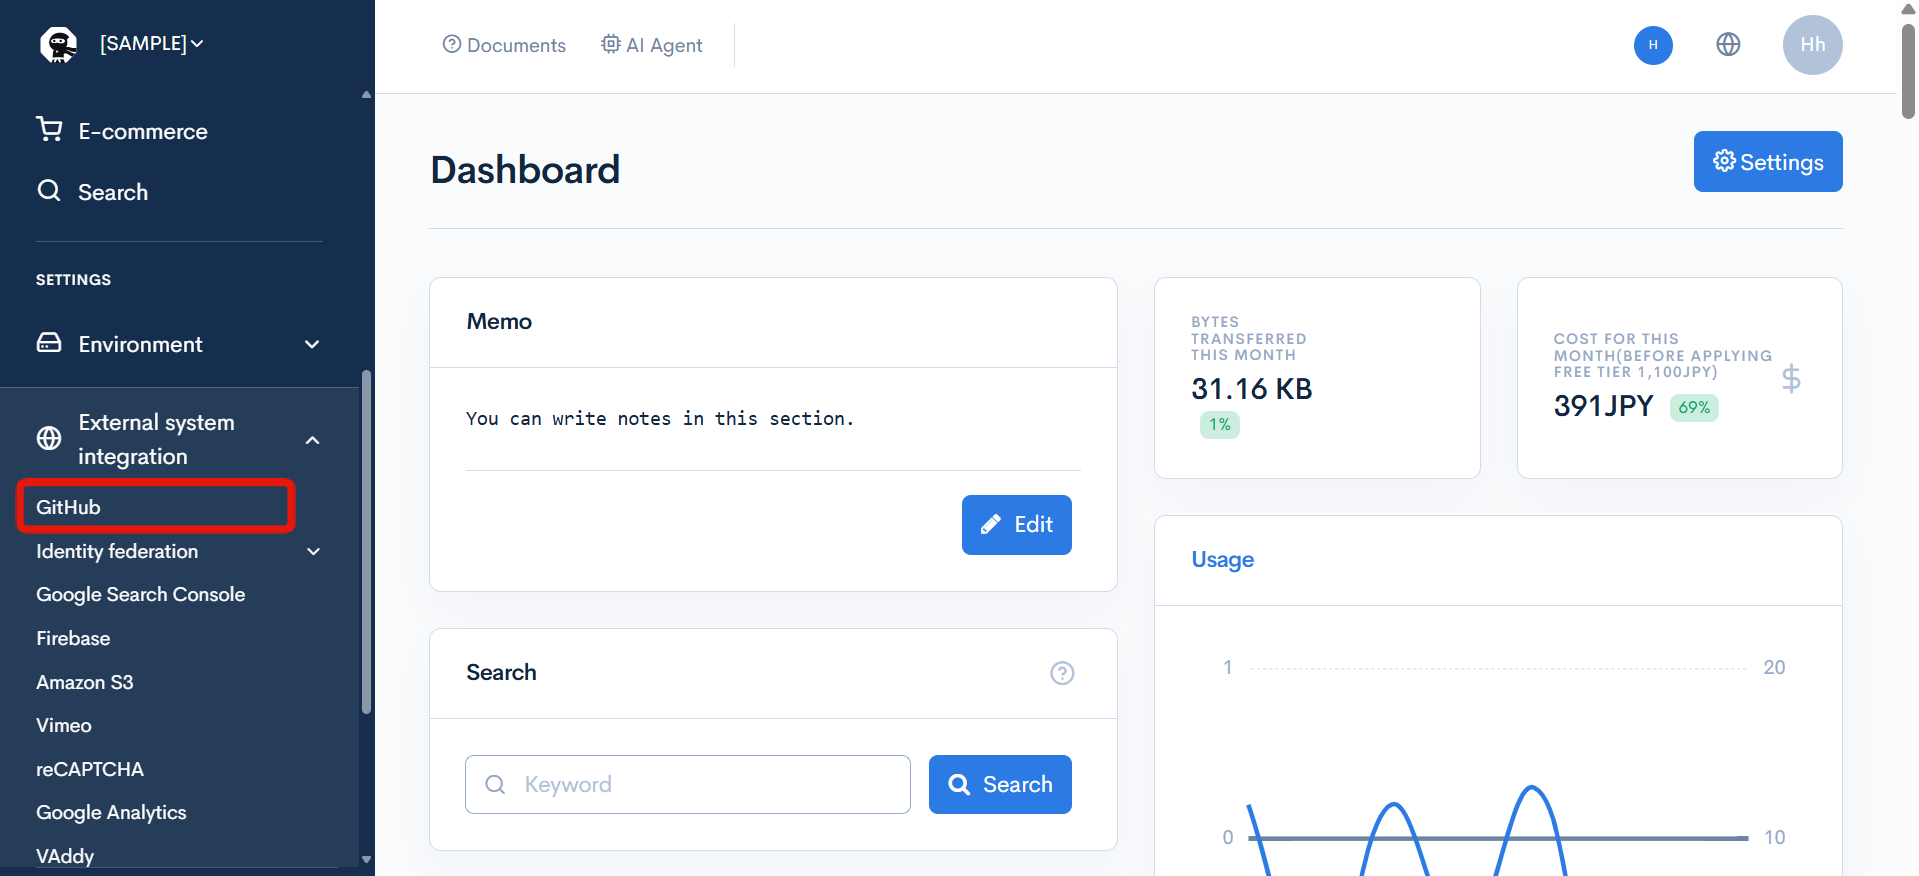
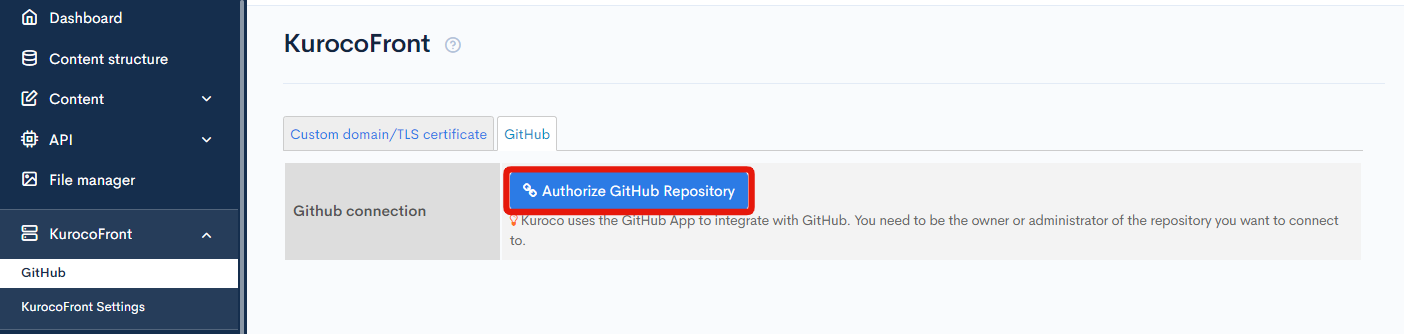
Click [External system integration] -> [GitHub] to display KurocoFront.
 Click "Authorize GitHub Repository".
 You will be prompted to log in to GitHub, so please log in.
 After logging in, the GitHub screen will be displayed.
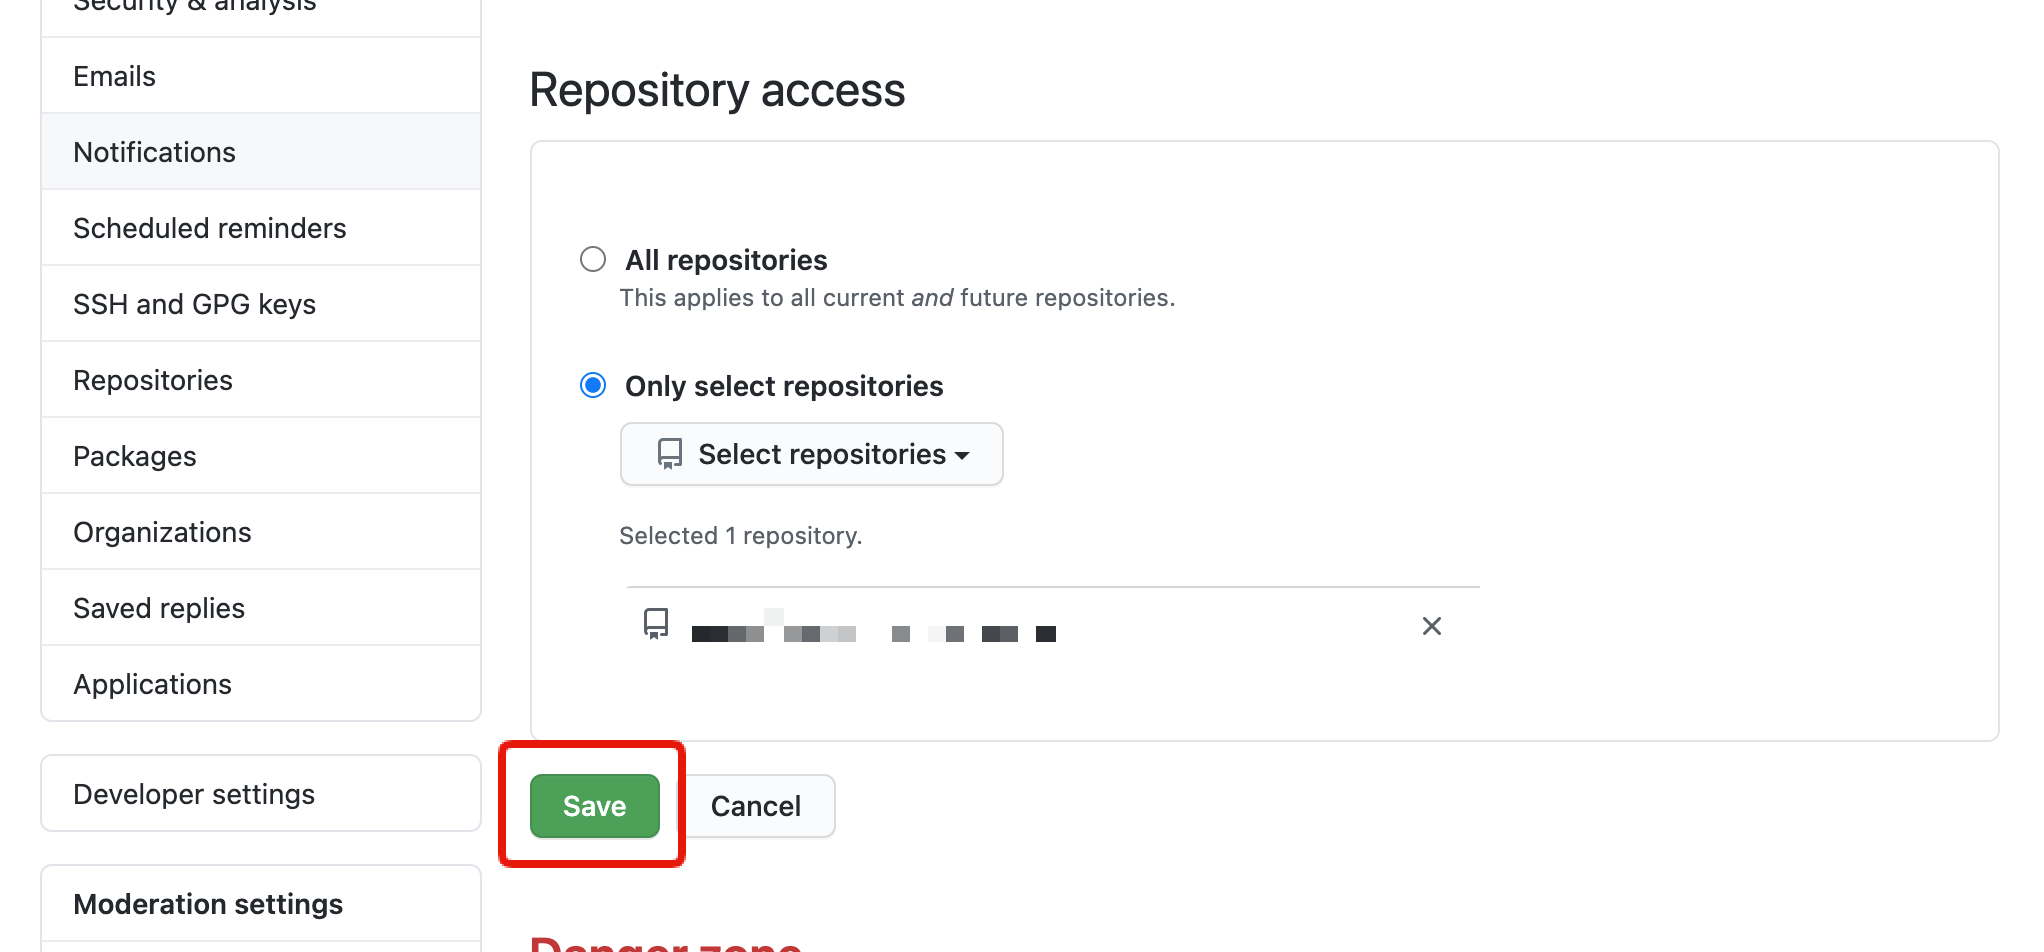
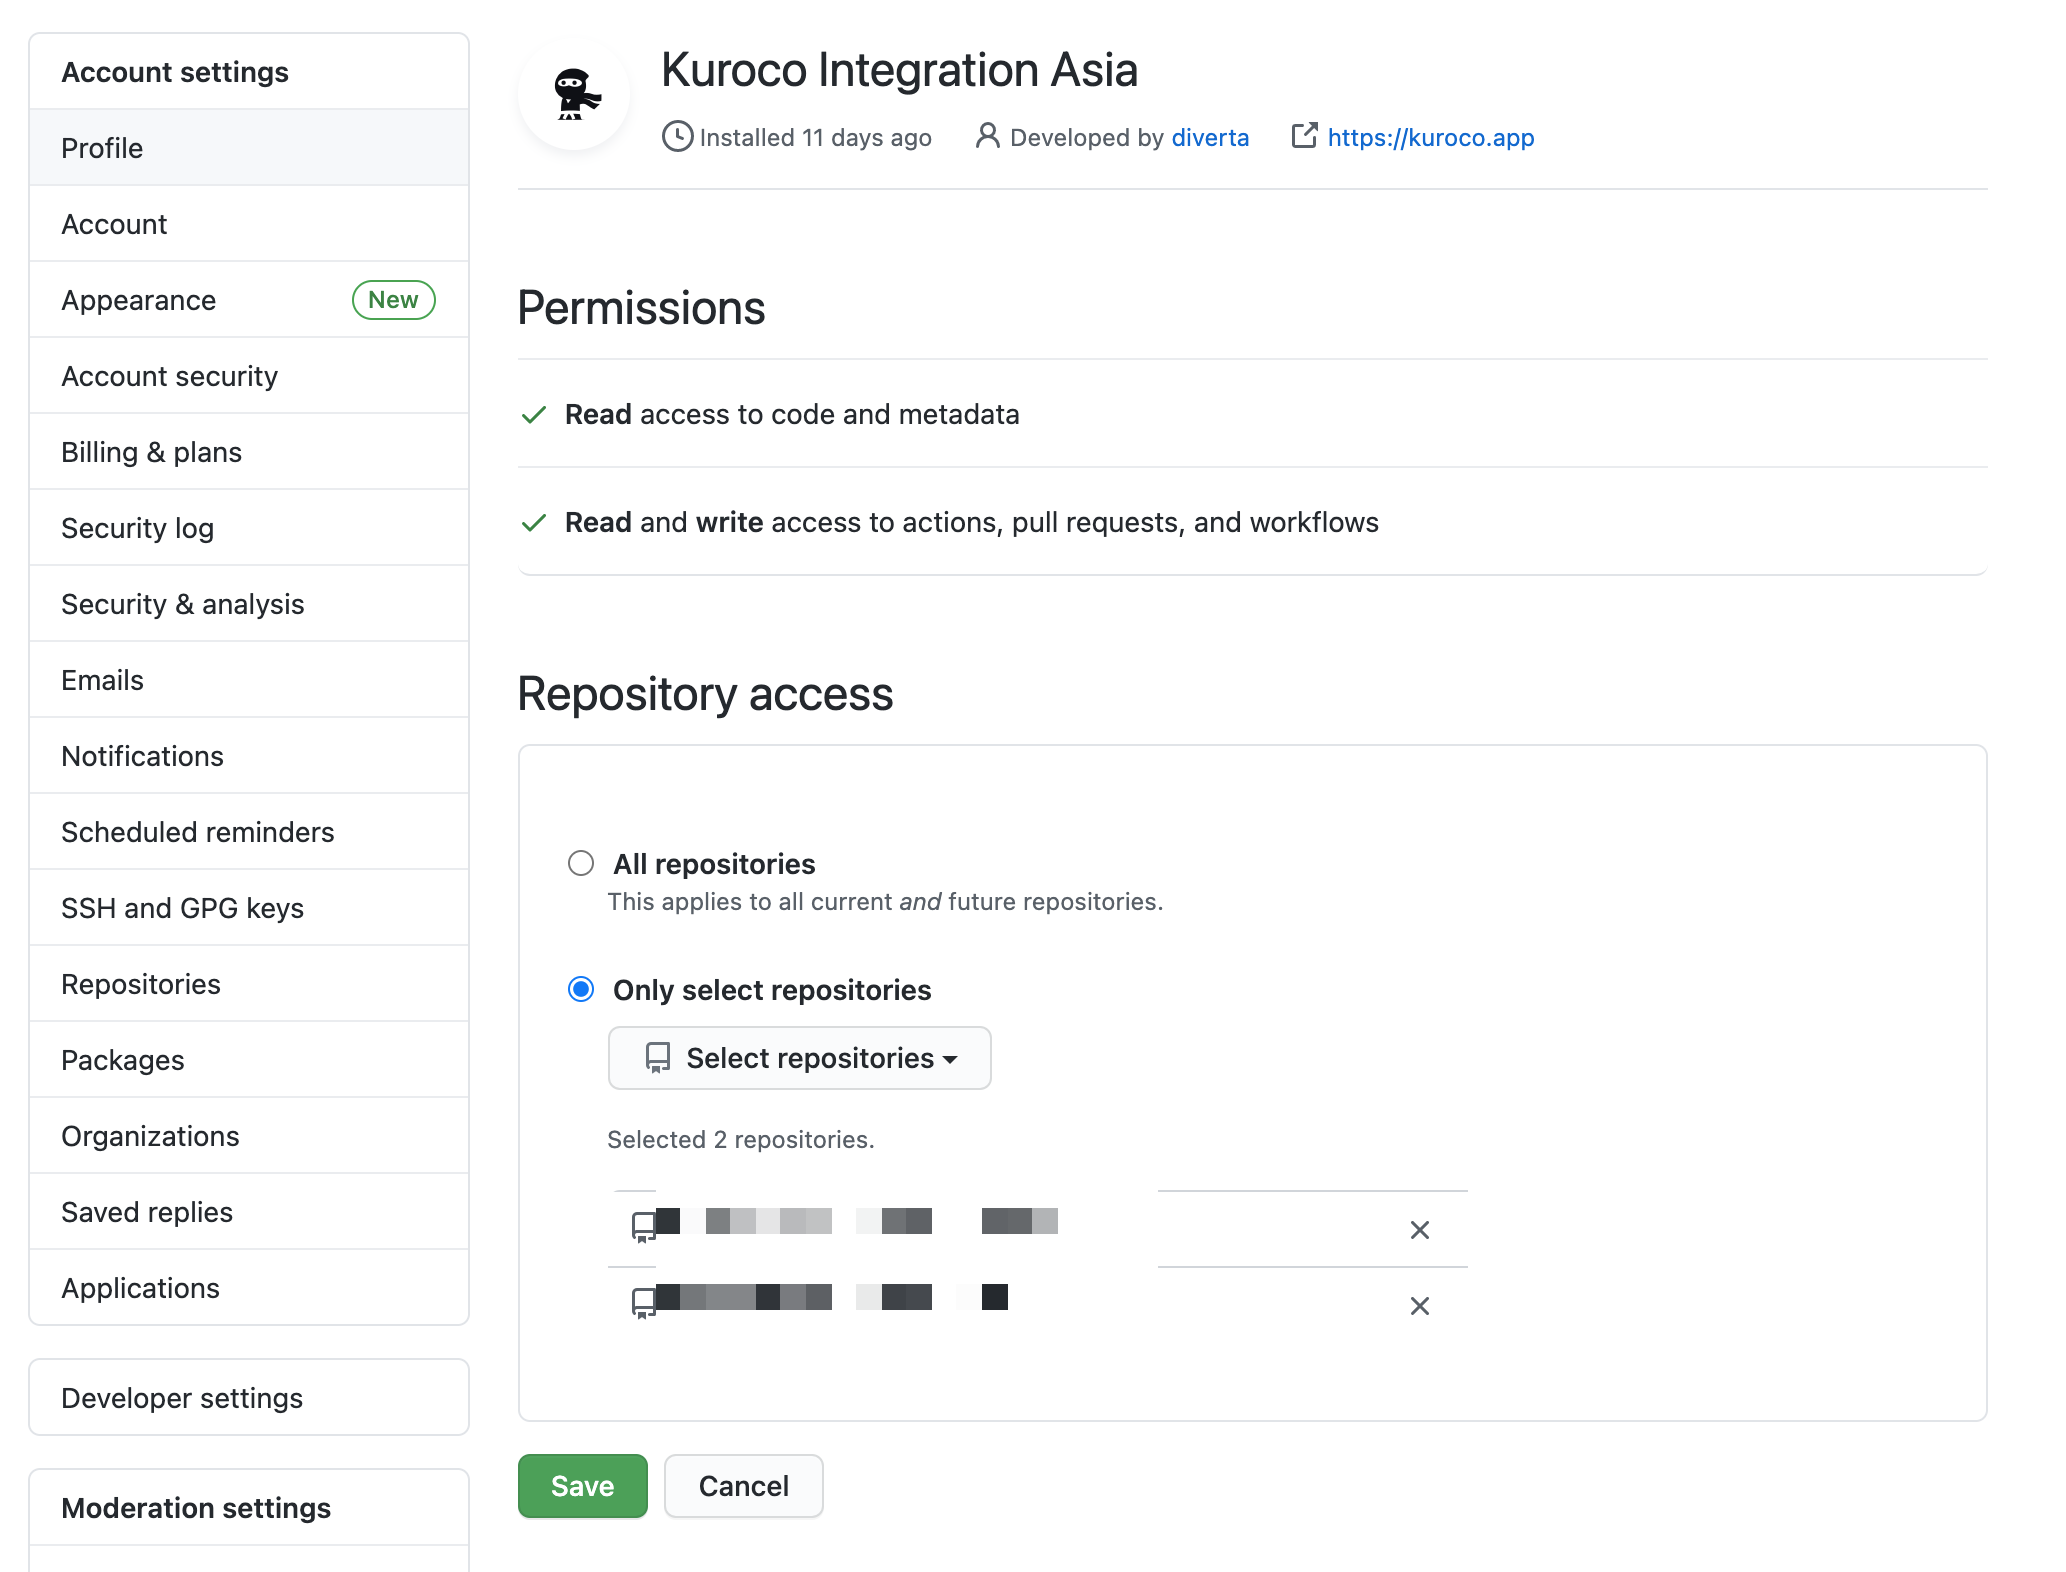 Select the repository to connect from "Repository access".
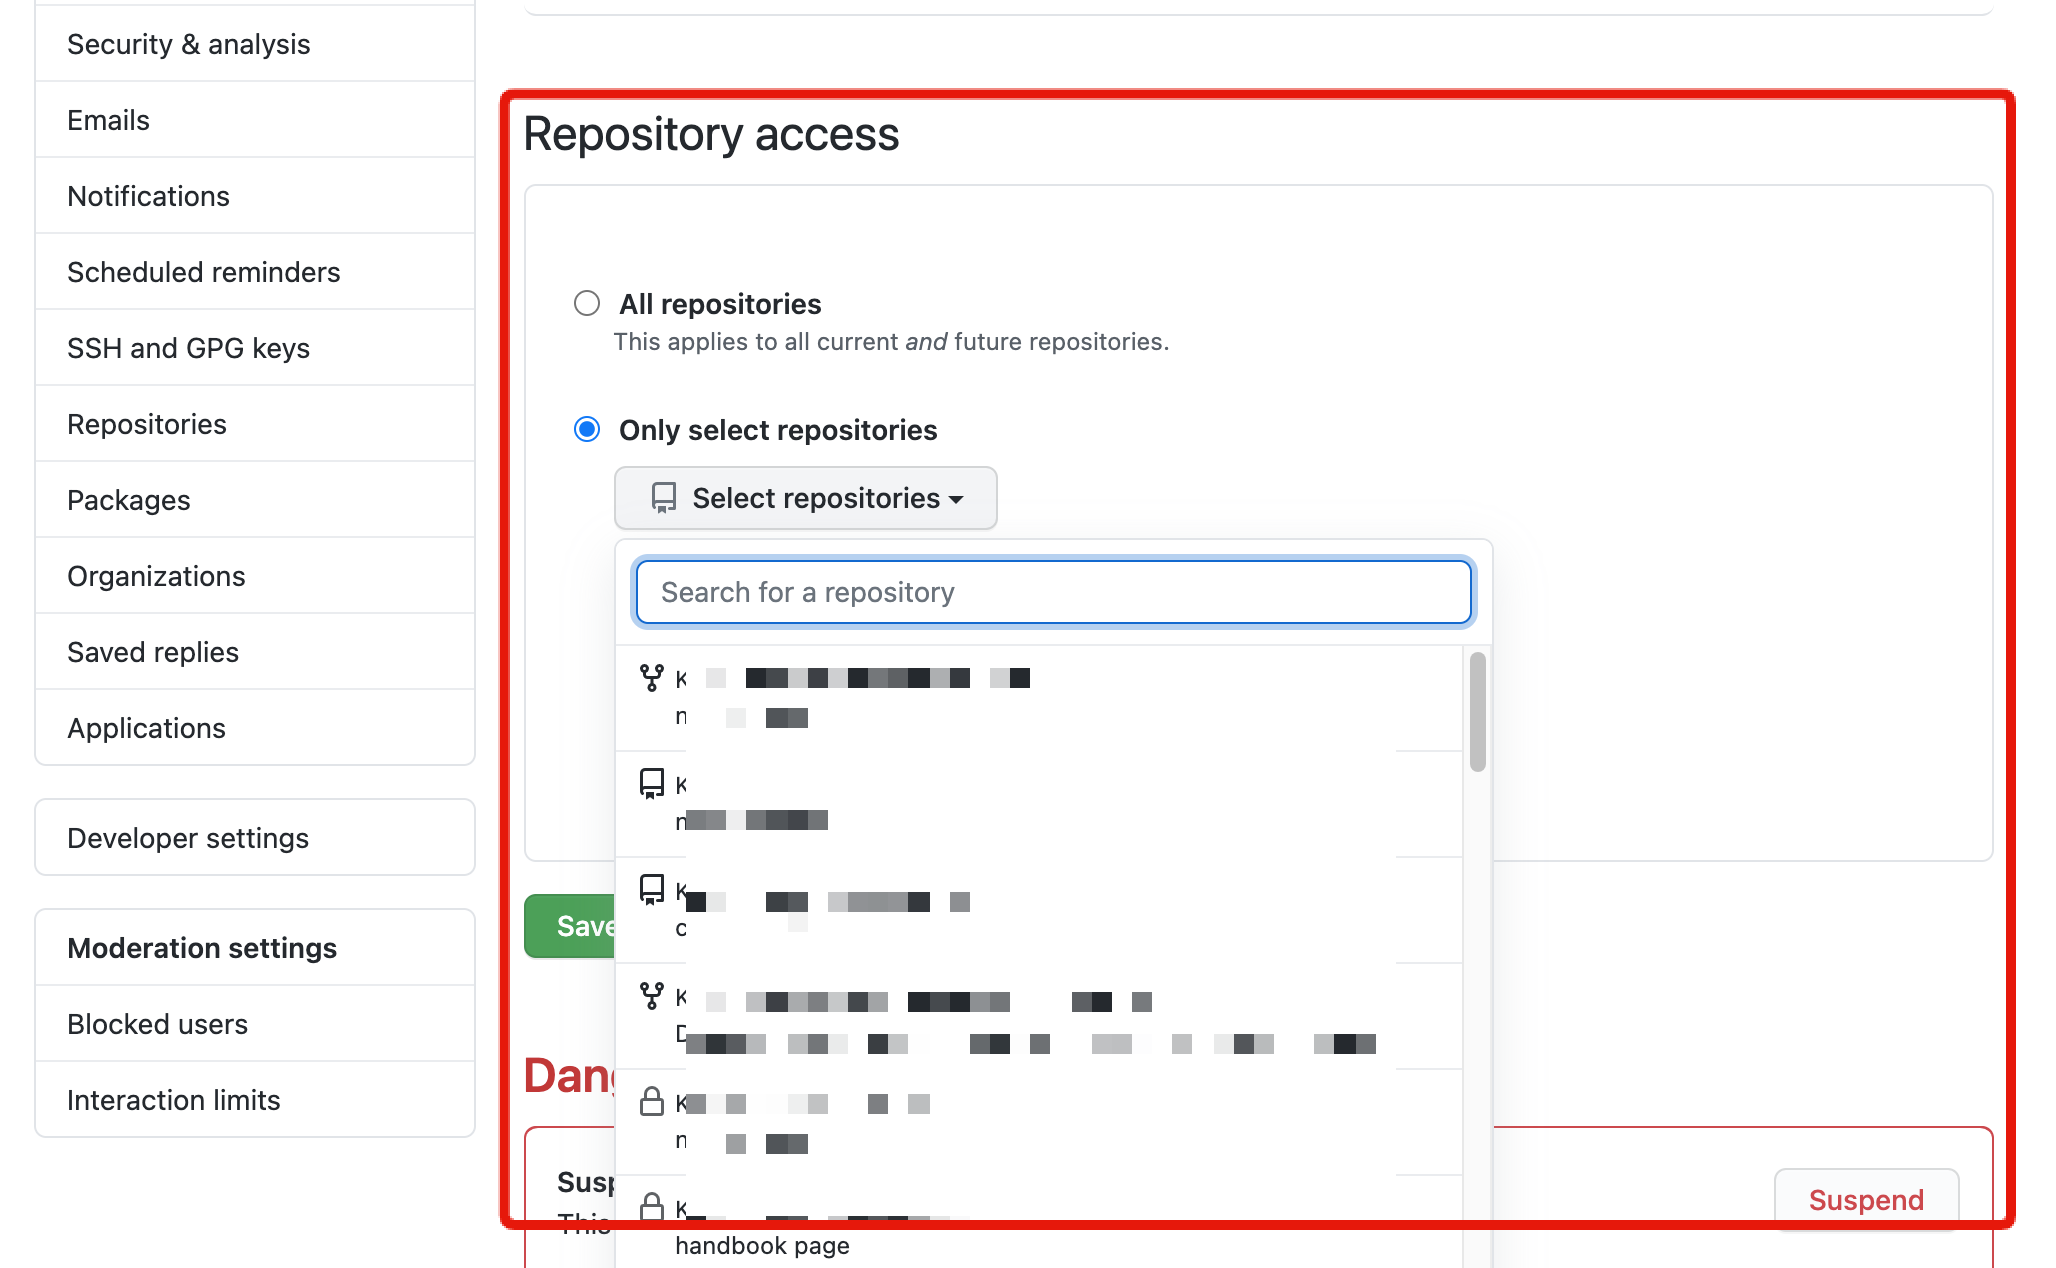
The repository connection settings can be changed later. If you want to use multiple Kuroco with one account, you will need to select multiple repositories here.
Please note that only repositories with administrator privileges can be connected.
After selecting the repository, click "Save".
You will be prompted to log in to Kuroco again, so please log in.
Once the connection is complete, you will be redirected to the KurocoFront screen.

Select the cloned repository in "Repository" and click "Update".
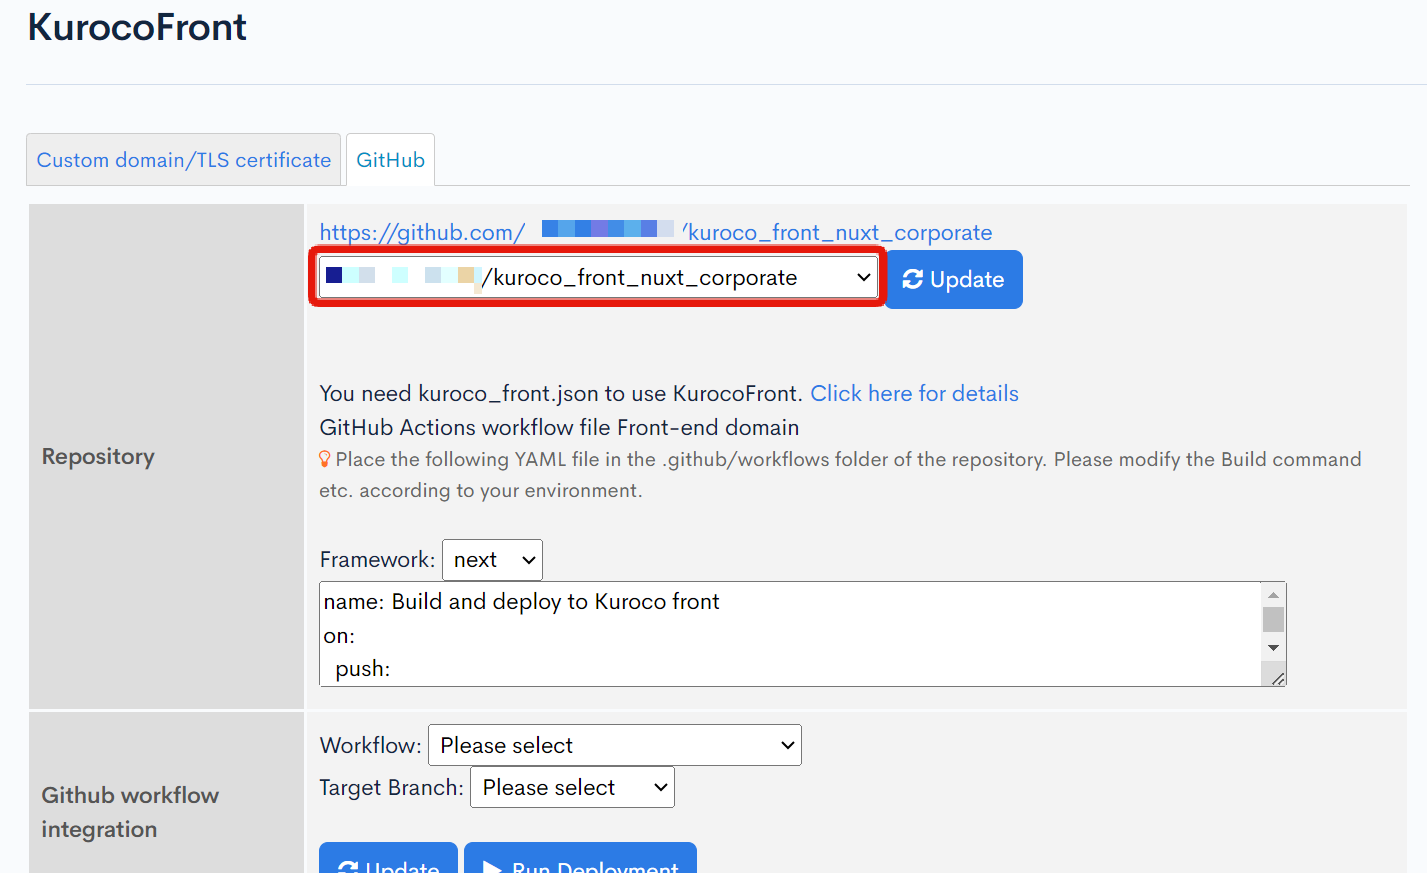
In "GitHub workflow integration", select the following and click "Update":
- Workflow: Build and deploy to KurocoFront
- Target branch: main
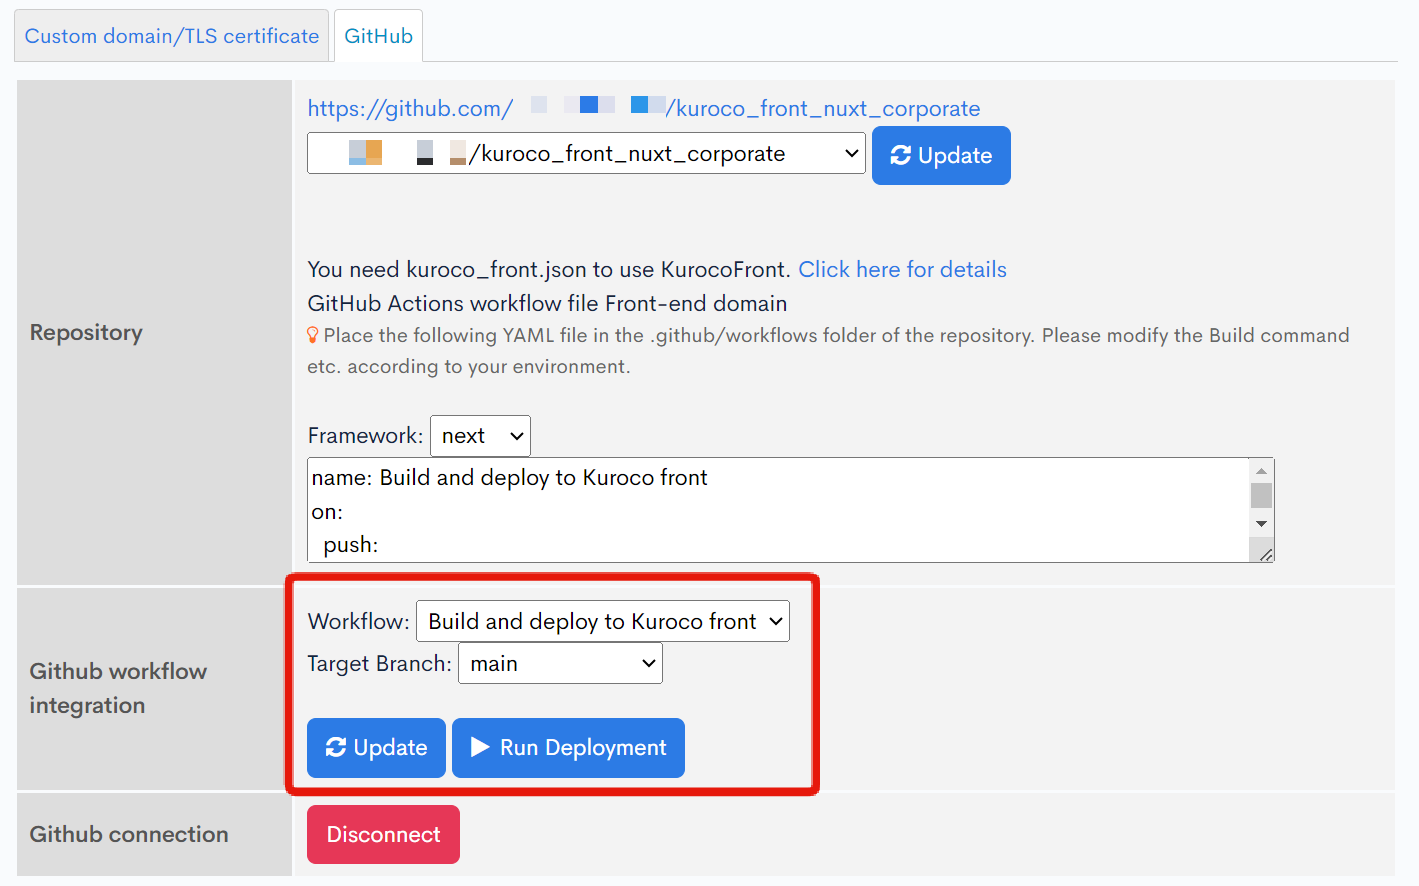
The configuration of KurocoFront is now complete.
Modifying the build.yml file
Modify the /.github/workflow/build.yml file.
Access [External system integration] -> [GitHub], set the Framework to nuxt3 and copy the contents inside the "Repository" framework text area.
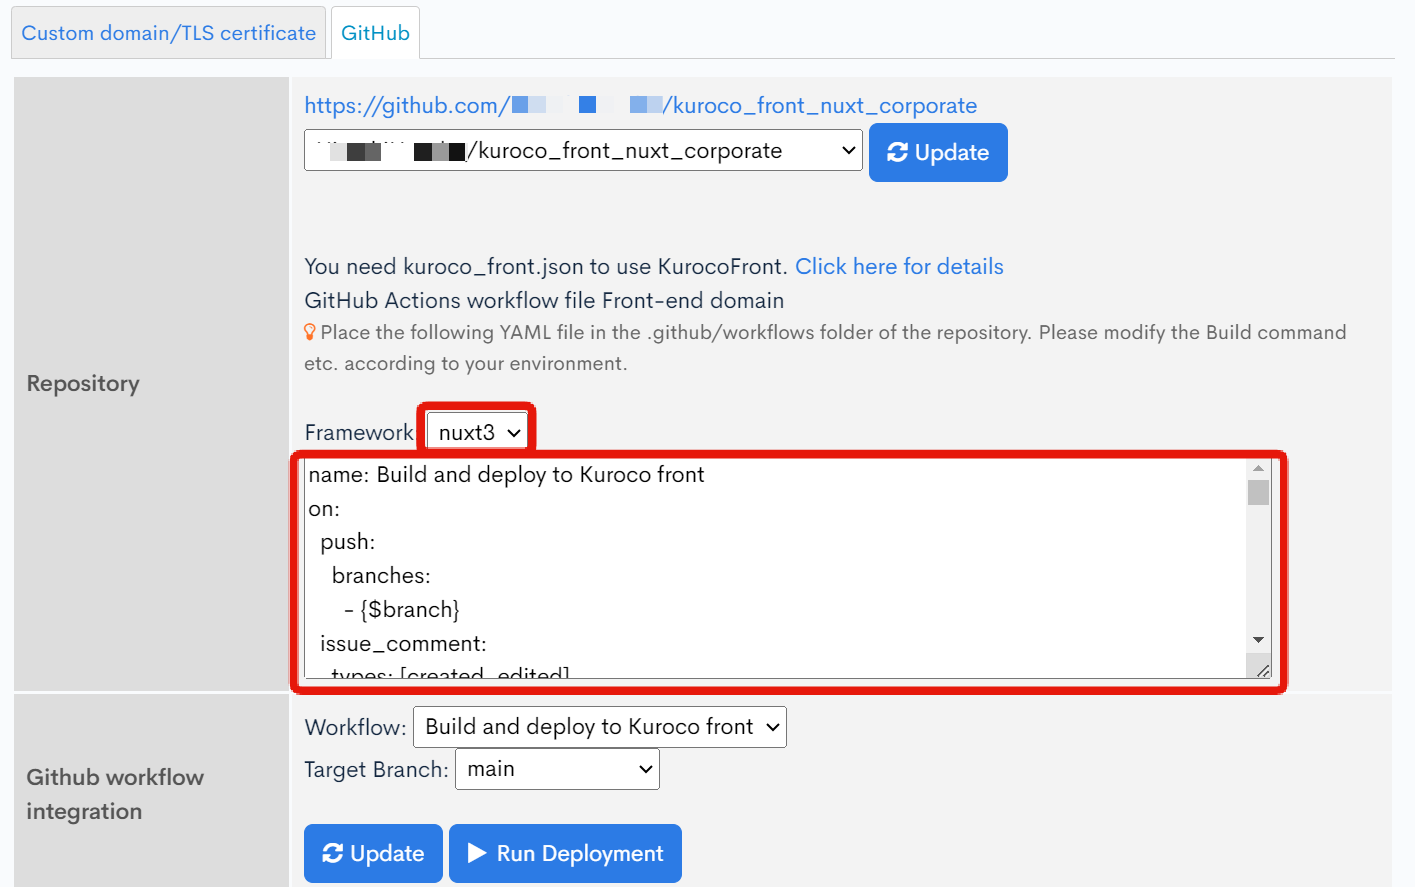
Open /.github/workflow/build.yml and overwrite it with the copied contents.
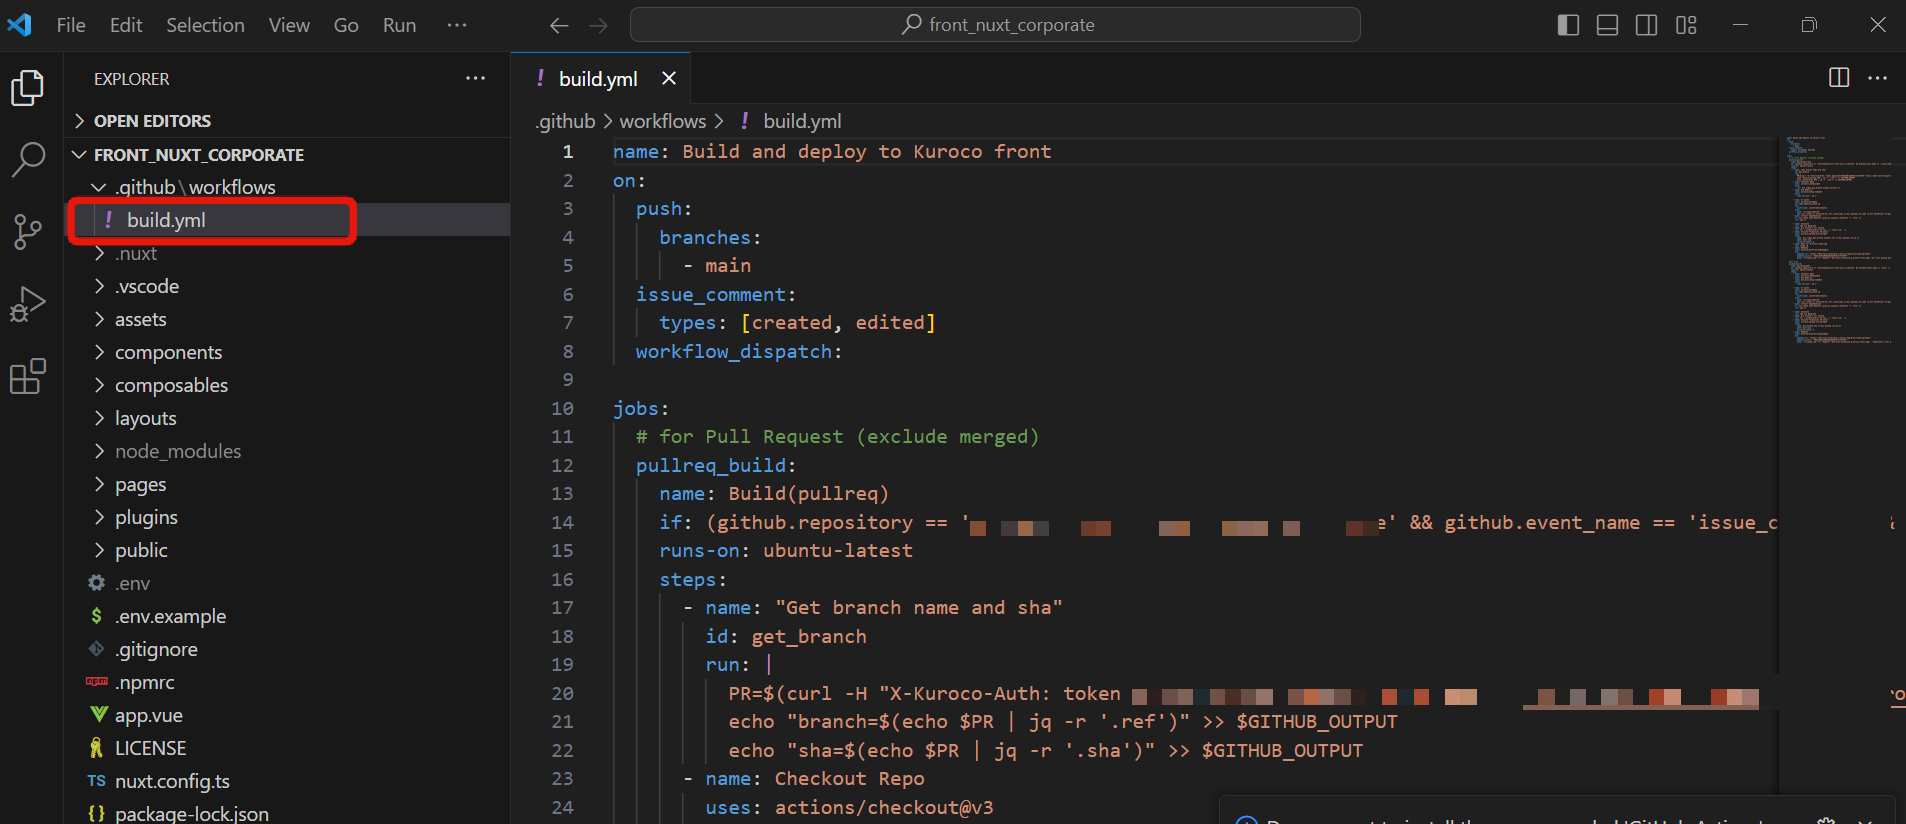
Once the file is updated, push the changes to GitHub. The process is complete after GitHub Actions has been executed and the build and deployment has been completed successfully.
Checking the display
Click "View site" from the Kuroco management screen.
Then, the site cloned from front_nuxt_corporate will be displayed.
Questions and bug reports
The setup for the corporate sample site is now complete.
If you have any questions or concerns, please contact us through our inquiry form.
Also, if you find any issues with the code, please submit an issue or pull request through our repository.
Related documents
Support
If you have any other questions, please contact us or check out Our Slack Community.