Converting Corporate Sample Site to SSG
Overview
The corporate sample site is structured as CSR throughout the entire site. This has the advantage of being able to see updates immediately in the Kuroco admin panel, requiring less awareness of whether processing is client-side or server-side for each page. This makes it a user-friendly structure for those not yet familiar with frontend development.
For pages like company overview and news on the corporate site that do not need to fetch content from the backend each time, pre-generating them during deployment can reduce API requests and speed up rendering.
This tutorial covers the steps to change specific pages of the corporate sample site to an SSG configuration.
For more information on the differences between CSR and SSG, refer to Jamstack architecture.
Prerequisites
This tutorial assumes that the corporate sample site is already set up and available for use. If not, please follow the tutorial below.
Changing the HTML rendering method is a frontend task. Refer to the Nuxt.js documentation if you have any questions.
Changing Rendering Method to SSG
Add <ClientOnly> to Target Pages
During deployment, add <ClientOnly> to sections that are generated only on the client-side and not during rendering. In the case of the corporate sample site, sections that are generated only on the client-side regardless of the rendering method already have <ClientOnly> explicitly added. Here, we will add <ClientOnly> to the following 2 files.
/pages/ltd-news/detail/[slug].vue
 <template>
+  <ClientOnly>
   <div>
     <UiPageHeader
       :path="[{ label: '会員限定コンテンツ', to: '/ltd-news/' }]"
       </template>
     </div>
   </div>
+  </ClientOnly>
 </template>

 <script setup>
/pages/mypage/edit/index.vue
 <template>
+  <ClientOnly>
   <div>
     <UiPageHeader
       :path="[{ label: 'マイページ', to: '/mypage/' }]"
       </div>
     </section>
   </div>
+  </ClientOnly>
 </template>

 <script setup>
Adjust Requests to SSG Page Endpoints
To fetch data from the endpoint on the server-side, remove the server: false option from the useFetch.
Example: /pages/contact/index.vue
 const { data: response } = await useFetch(
   `${config.public.kurocoApiDomain}/rcms-api/1/inquiry/1`,
   {
     credentials: "include",
-     server: false,
   }
 );
There are 18 occurrences in 12 files that need to be updated.
| Page | Endpoint |
|---|---|
/pages/index.vue | /rcms-api/1/news/list /rcms-api/1/ltd-news/list |
/pages/company/index.vue | /rcms-api/1/content/details/company |
/pages/contact/index.vue | /rcms-api/1/inquiry/1 (GET) /rcms-api/1/upload /rcms-api/1/inquiry/1 (POST) |
/pages/login/register/index.vue | /rcms-api/1/member/register |
/pages/login/reminder.vue | /rcms-api/1/reminder /rcms-api/1/reminder |
/pages/mypage/delete/index.vue | /rcms-api/1/member/delete |
/pages/mypage/index.vue | /rcms-api/1/inquiry/3 /rcms-api/1/member/update |
/pages/news/detail/[id].vue | /rcms-api/1/news/details/ /rcms-api/1/master |
/pages/news/index.vue | /rcms-api/1/master |
/pages/preview/news.vue | /rcms-api/1/master |
/pages/privacy/index.vue | /rcms-api/1/content/details/privacy |
/pages/service/index.vue | /rcms-api/1/content/details/service |
Configuring the Entire Site for SSG
Edit nuxt.config.ts to enable server-side rendering for the entire application. Change ssr: false to ssr: true.
import { defineNuxtConfig } from 'nuxt/config';

export default defineNuxtConfig({
  ssr: true, // Enable server-side rendering
  runtimeConfig: {
    public: {
      kurocoApiDomain: 'https://**********.g.kuroco.app',
    },
  },
  app: {
    head: {
      title: 'front_nuxt_corporate',
  ・
  ・
  ・
After making these changes, verify the display by running npm run dev. If there are any errors, double-check for any missing corrections.
Deployment
If the display is correct, push the changes and deploy. Once the build is successful and the display is confirmed, the rendering method change is complete.
Updating Backend Changes
With SSG configuration, pages like company information will no longer send API requests upon user access. This results in faster loading times by displaying pre-generated HTML, but changes made in the Kuroco management screen will not be reflected until a rebuild is performed.
For example, updating the corporate information content from the Kuroco management console alone will not update the display on the frontend.

To reflect content updates on the frontend, ensure that the branch targeted for integration is set on the GitHub page. When updating content, enable the [GitHub Actions Workflow].

This way, GitHub Actions will run when the content is updated, and the changes will be reflected on the frontend.
Additionally, You can set up a GitHubActions workflow to execute upon content updates or manually deploy by clicking [Run Deployment] on the GitHub page when you want to reflect the changes.

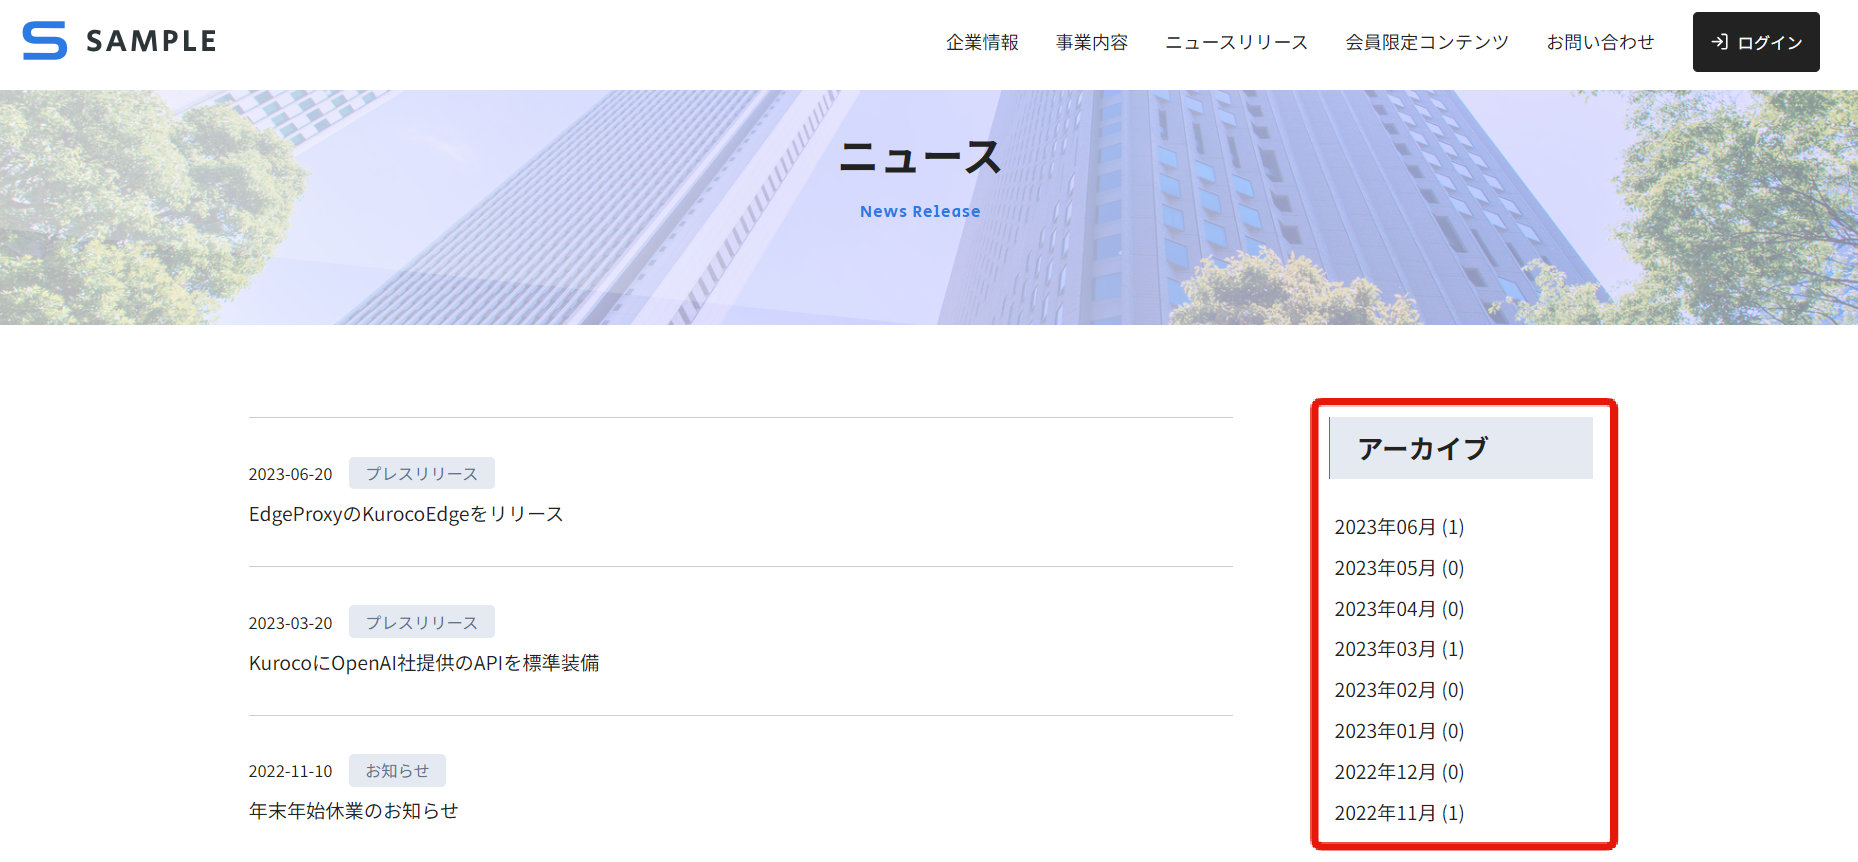
Displaying Archives on the News Page
On the corporate sample site's news page, the displayed archives use pre-processed batch calculations to tally the number of contents, and the values saved in the master are accessed and utilized via an API.
Front-end
Master

Batch Process

Consider the following methods for archive creation based on content update frequency and caching strategy:
- Aggregate upon user access using an API request, ensuring the endpoint is cached as much as possible.
- Set the archive aggregation trigger after content updates.
Related Documents
Support
If you have any other questions, please contact us or check out Our Slack Community.