Deploying the data source from GitHub to KurocoFront
This tutorial explains how to deploy data sources from GitHub to KurocoFront.
Deploy to KurocoFront
1. Prepare a GitHub repository
In GitHub, prepare the repository that you want to deploy to KurocoFront.
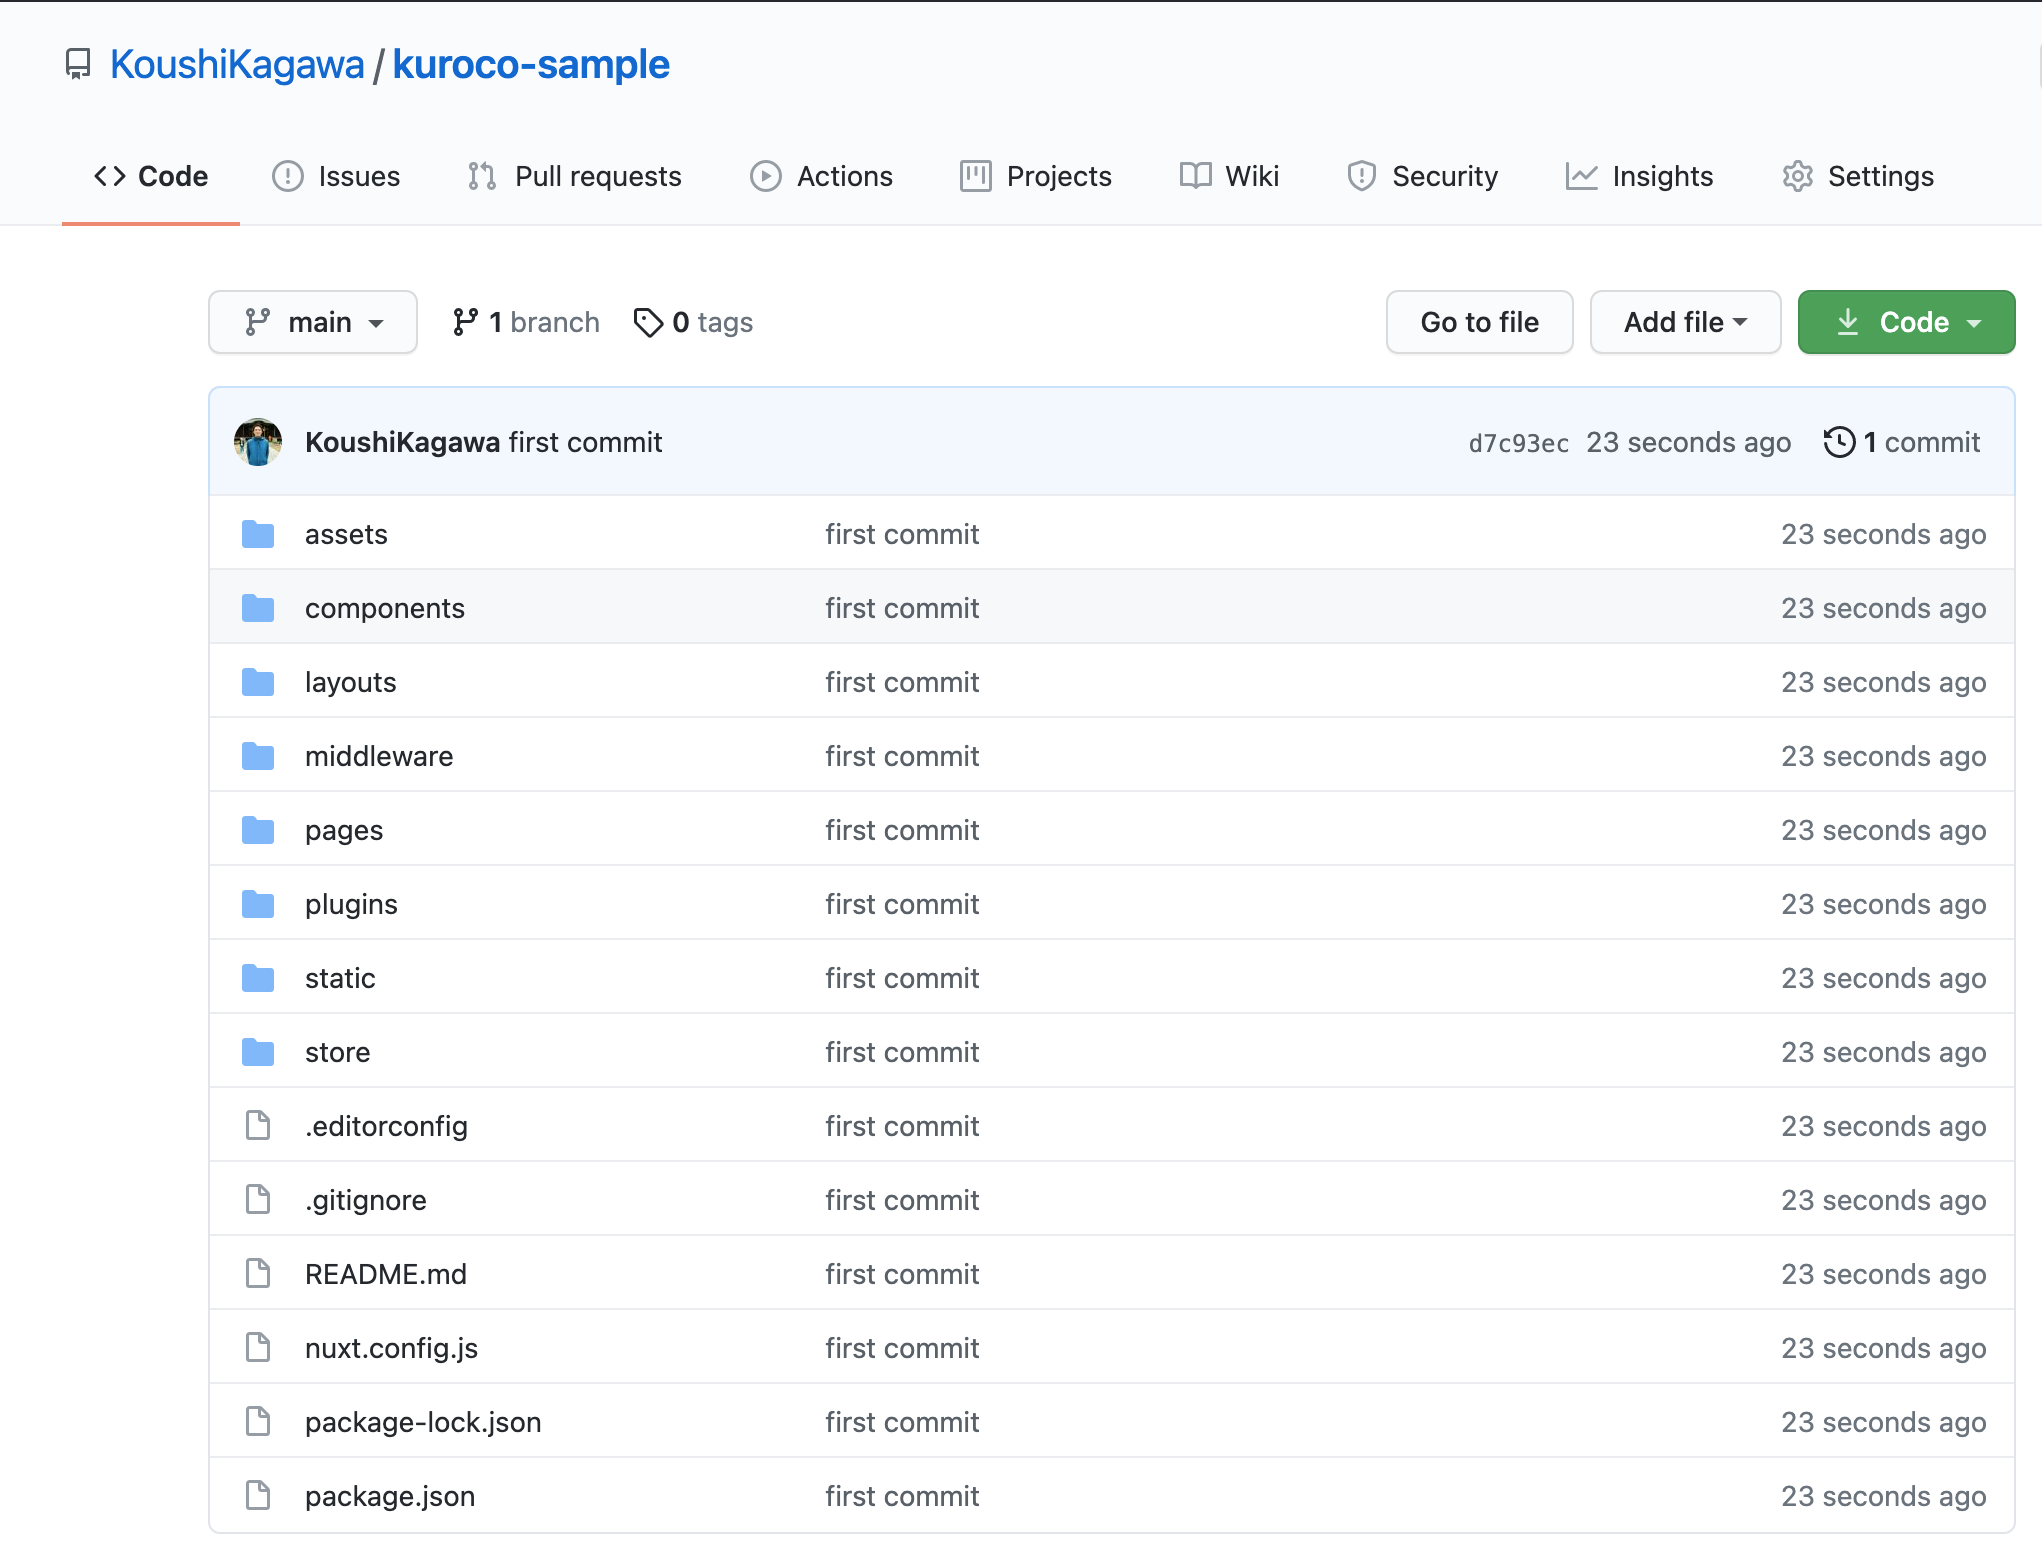
Since only static files can be hosted, the repository must contain only JavaScript framework such as Nuxt.js and media files such as HTML/CSS/JS files and images. The screenshot above shows a Nuxt.js repository.
2. Link the repository to KurocoFront
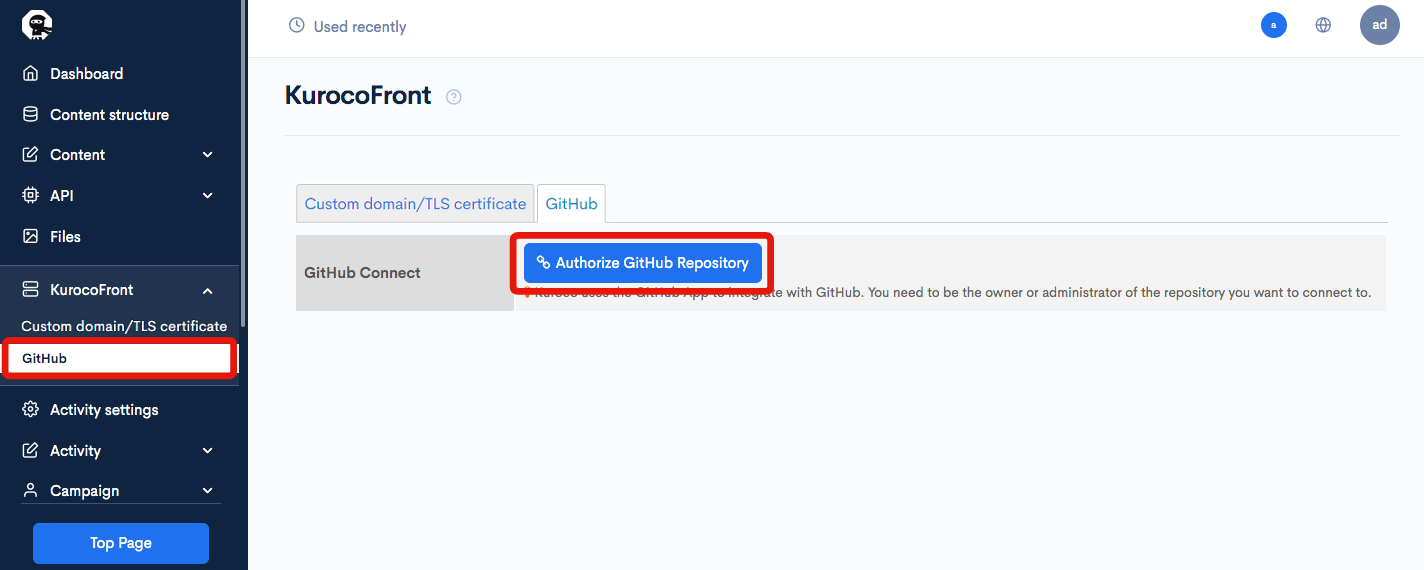
In the left sidebar menu of Kuroco's admin panel, select [KurocoFront] -> [GitHub]. Then, on the KurocoFront screen, click [Authorize GitHub Repository].
 You will be asked to log in to GitHub.
 Your GitHub account page will be displayed after logging in.
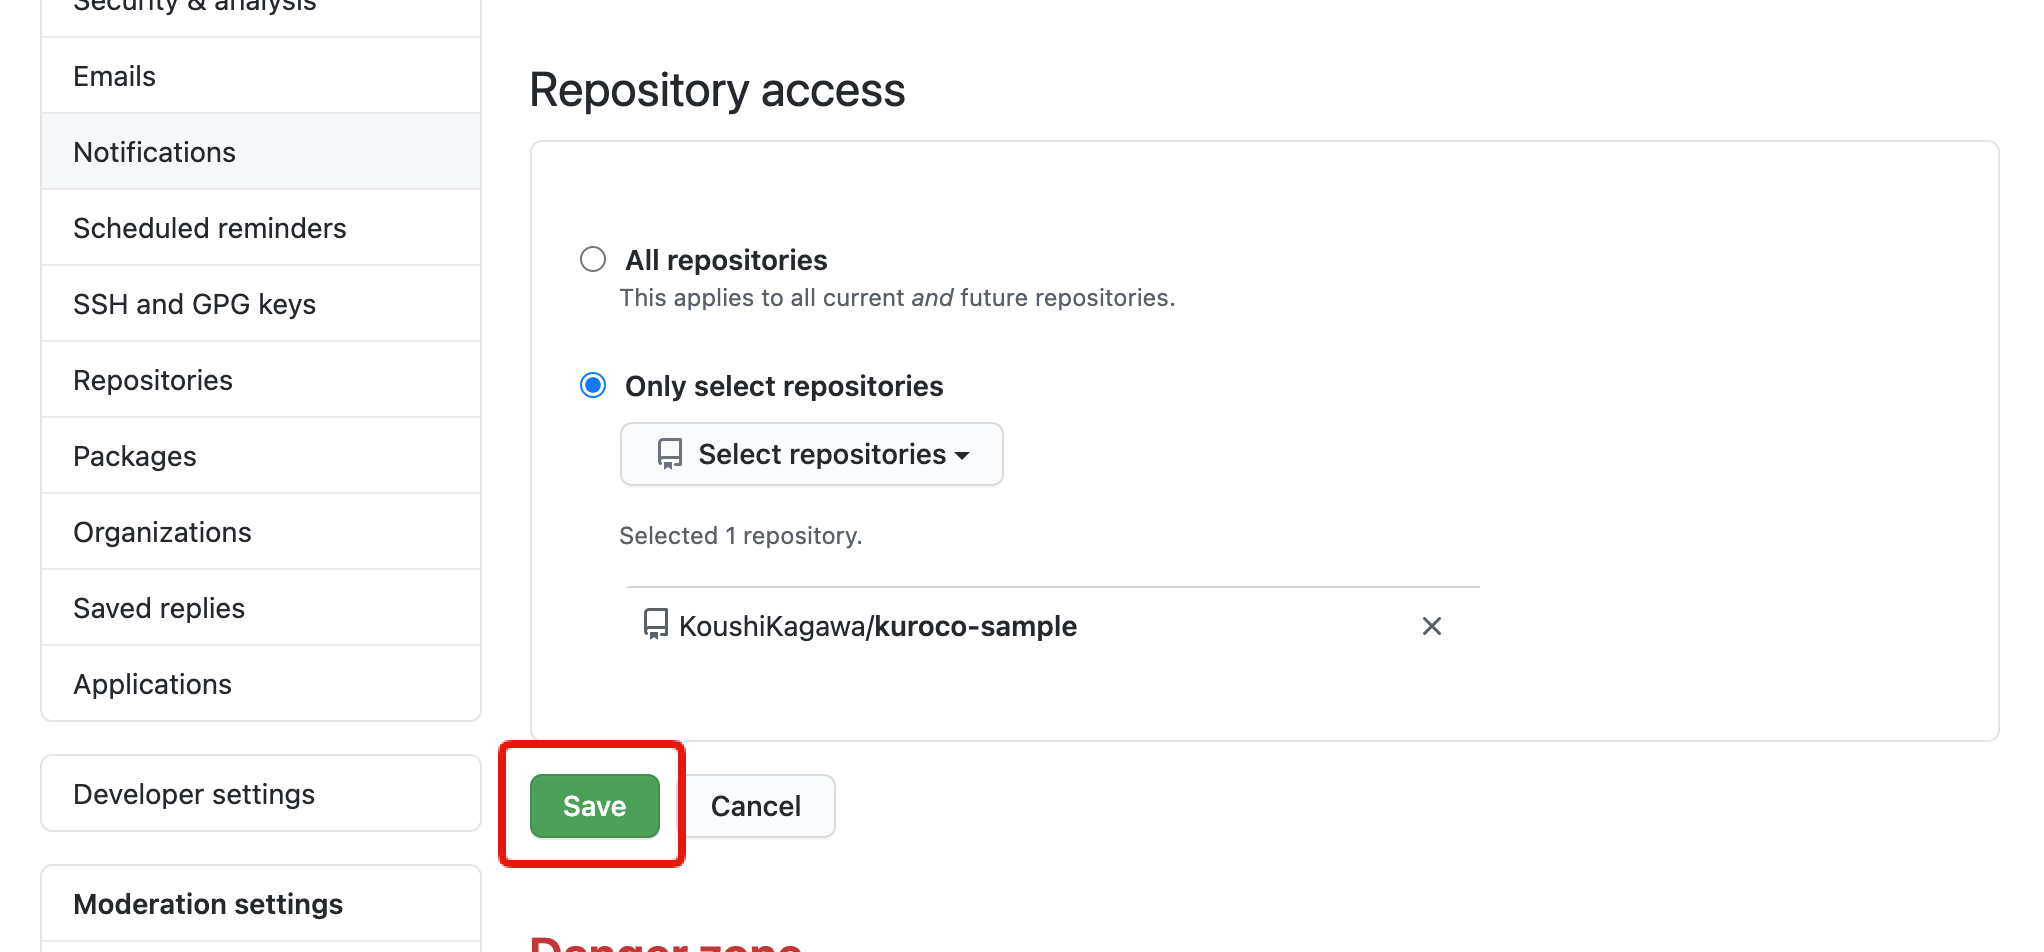
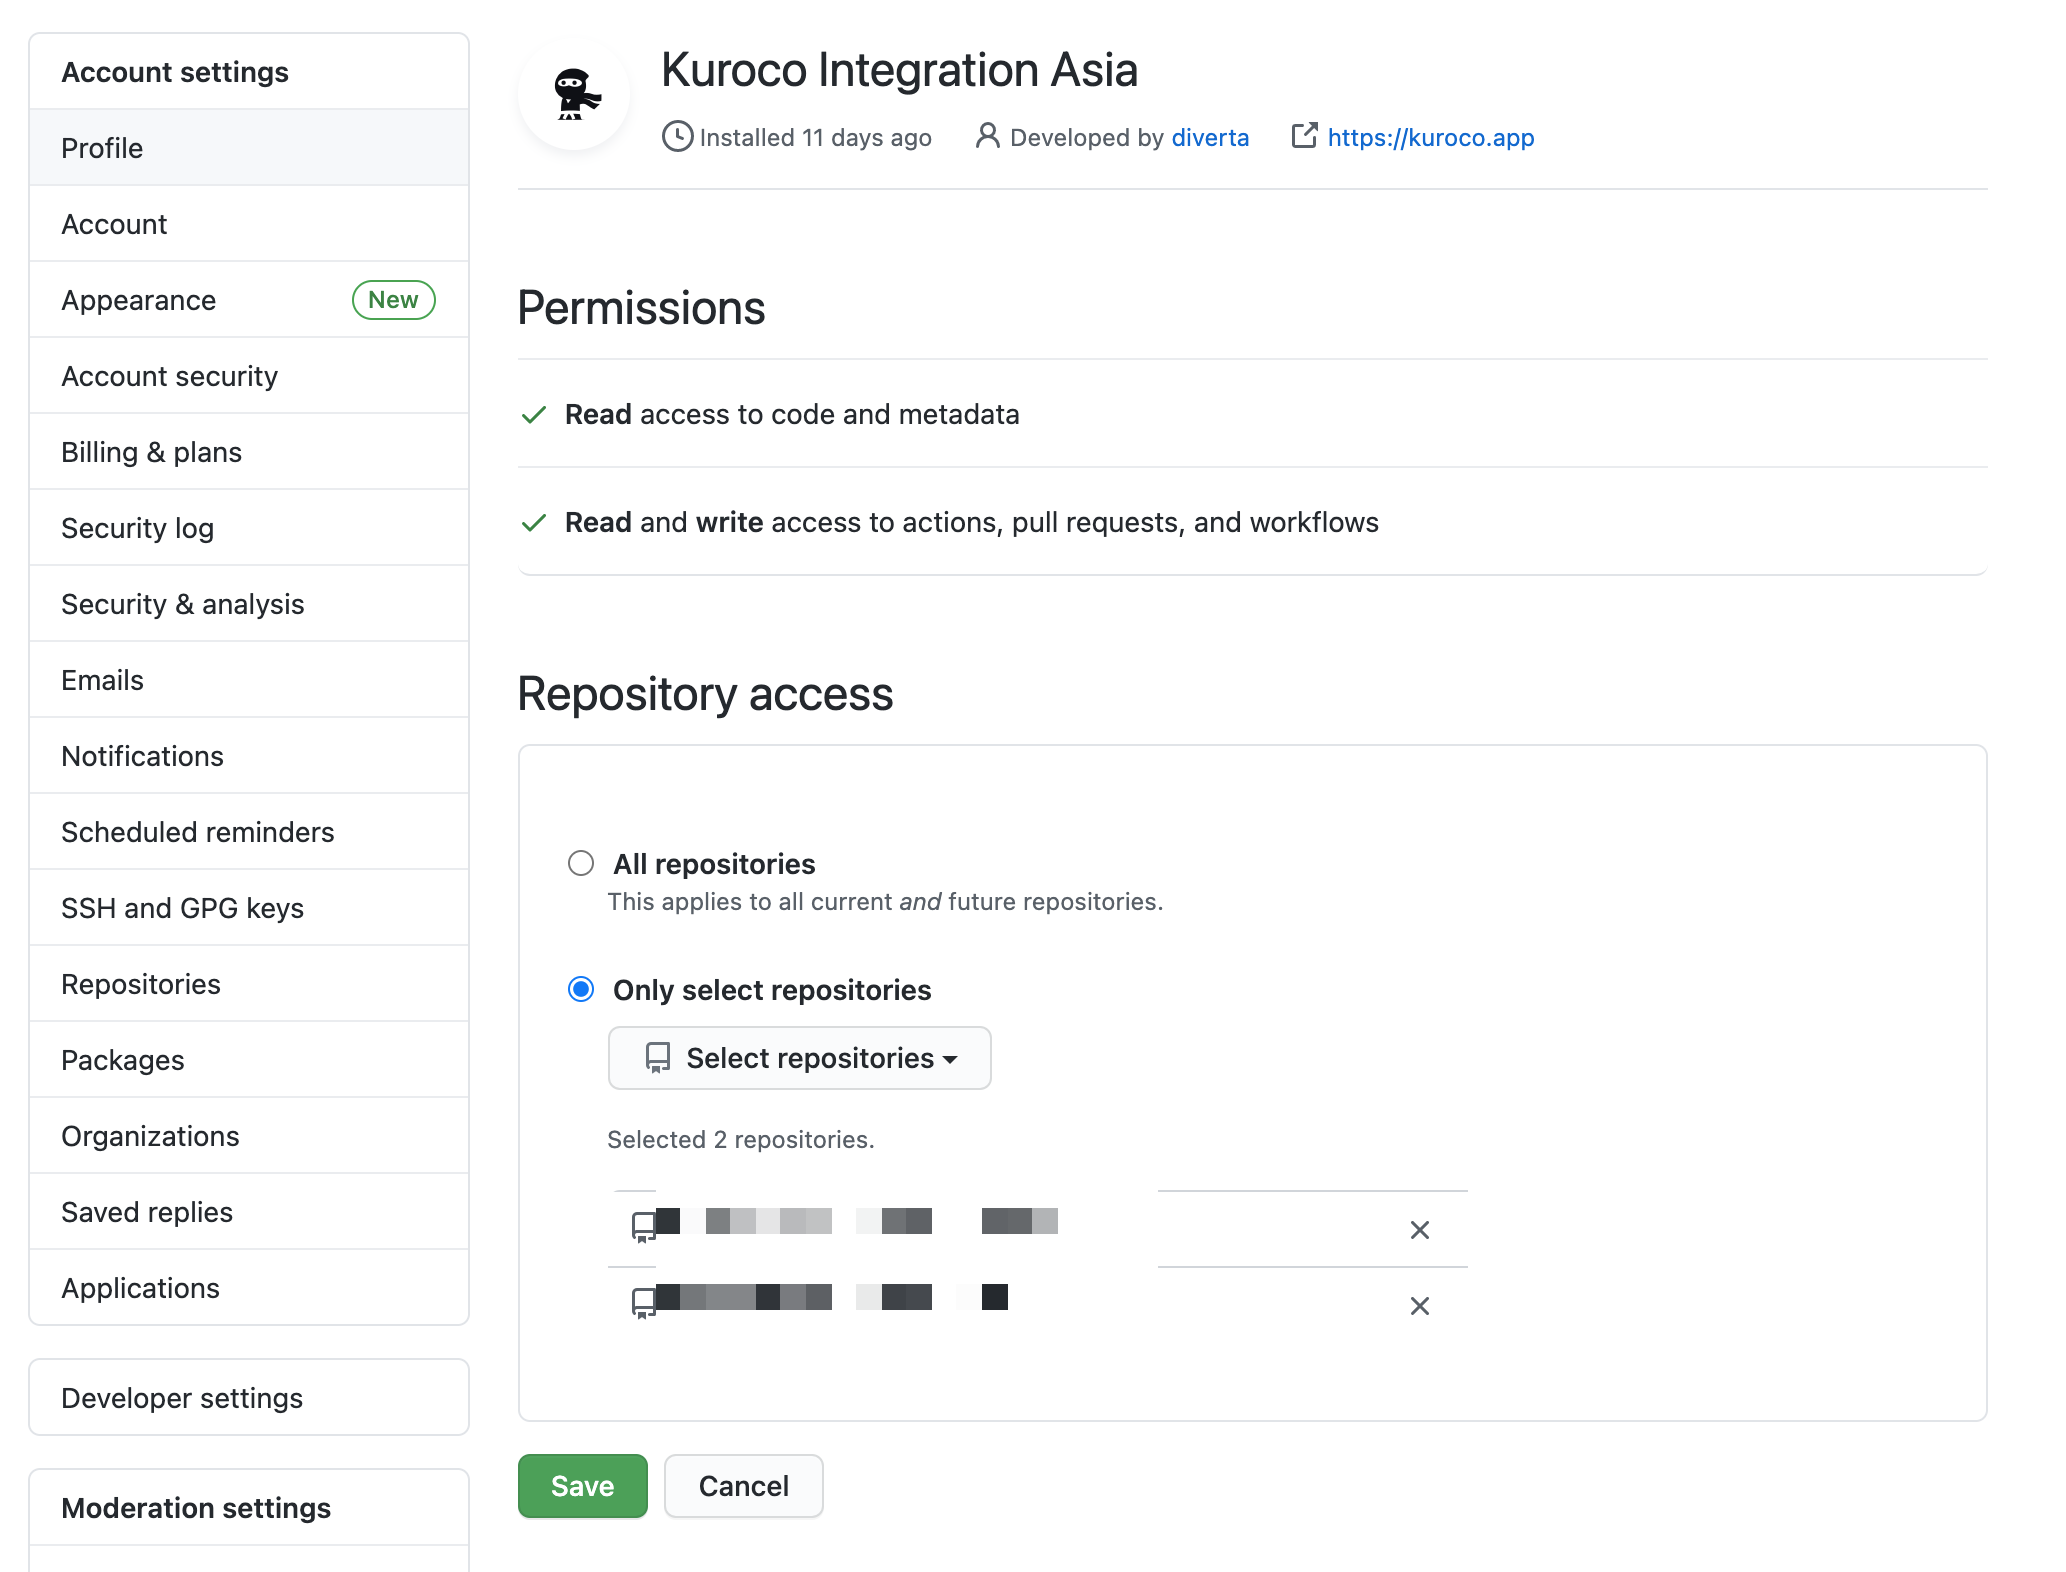 Under "Repository access", select the repository you want to link with KurocoFront.
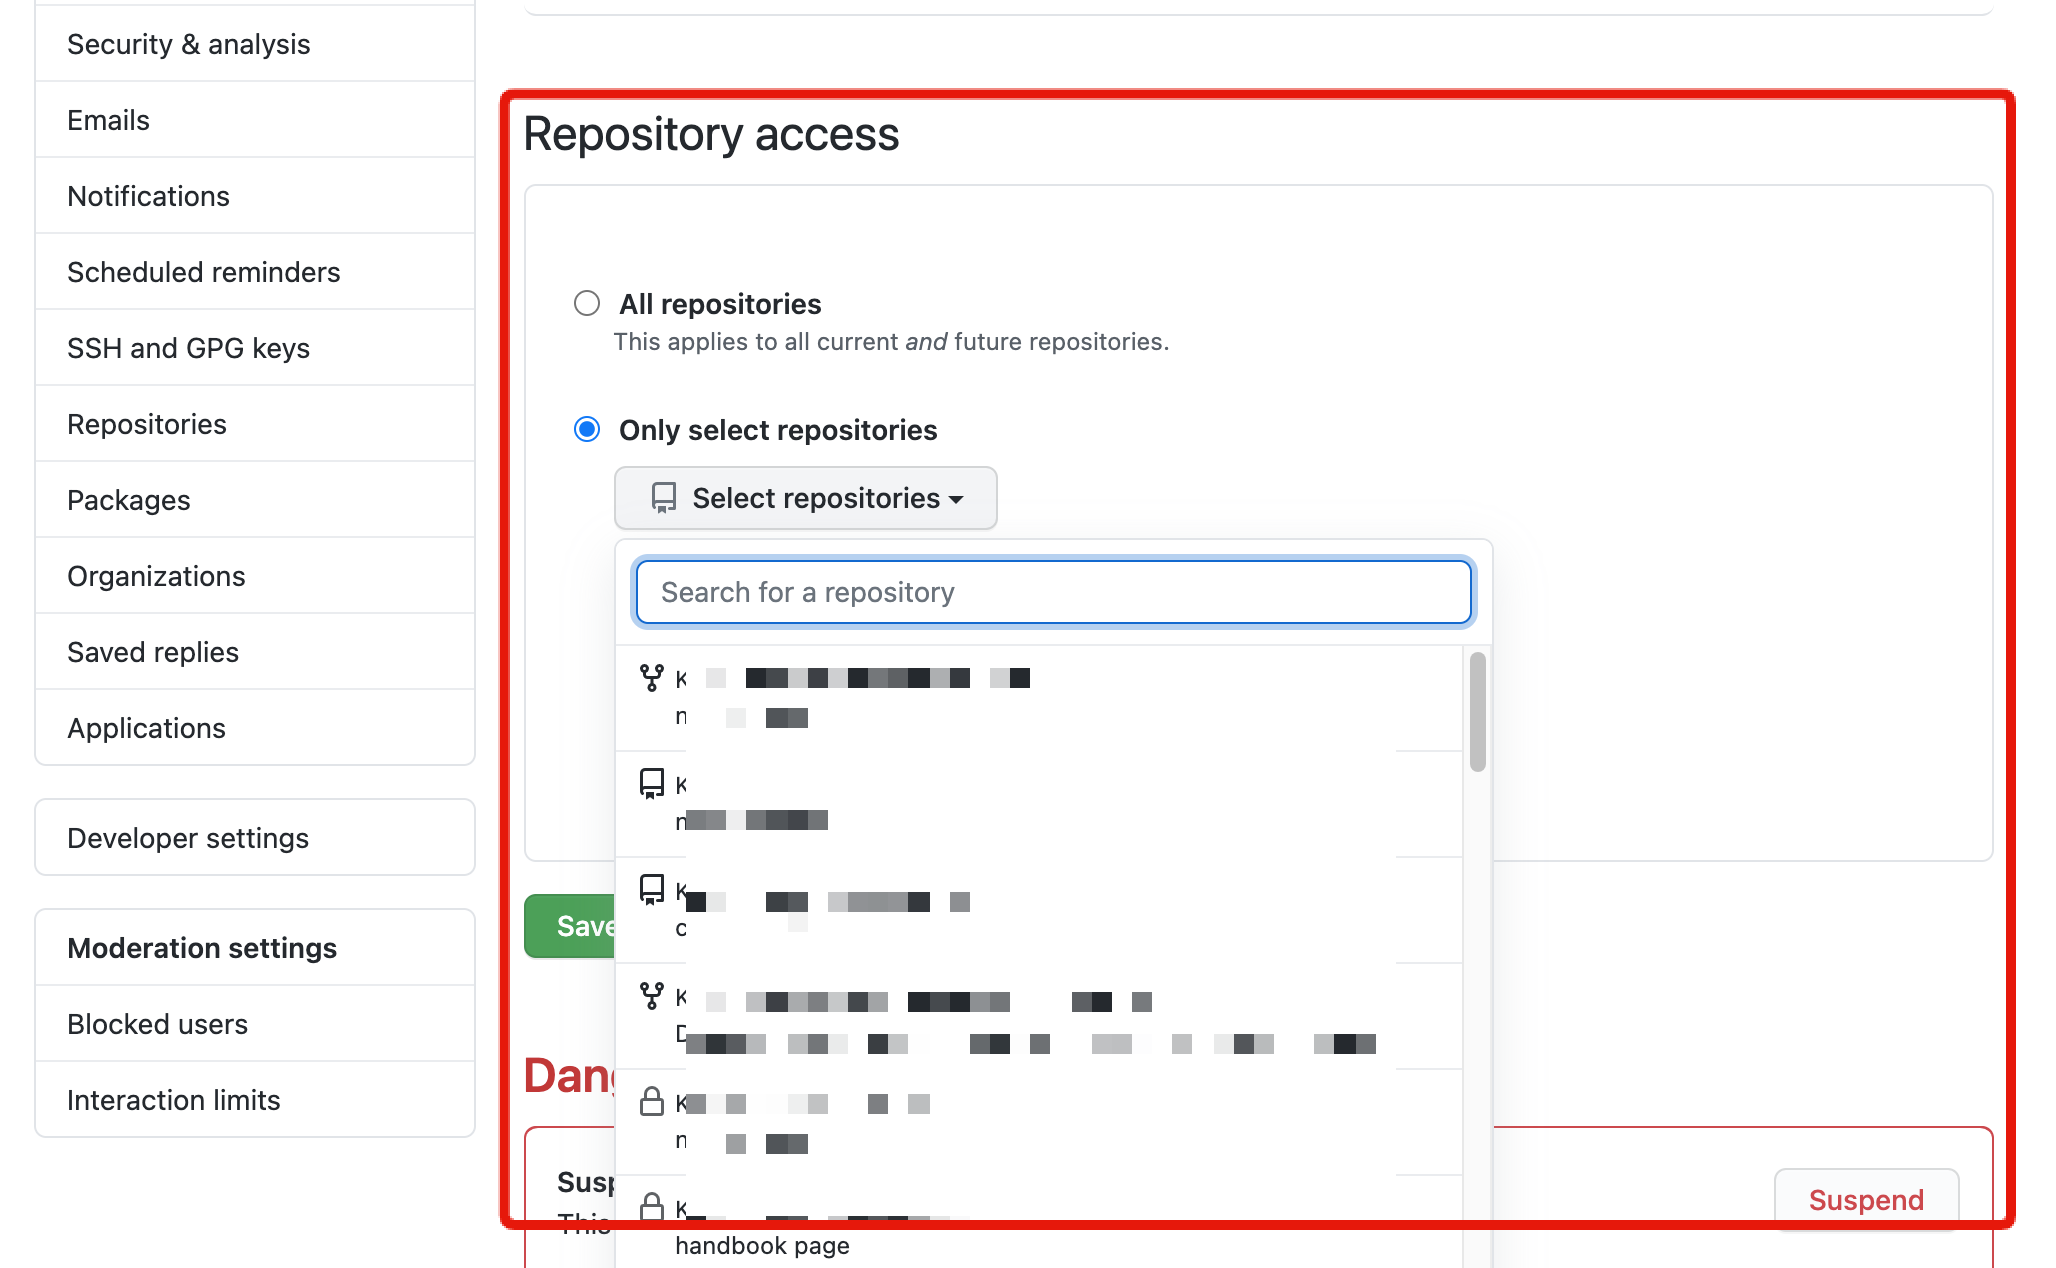
You can change your repository link settings afterwards. If you have multiple Kuroco projects on one account, select all the target repositories here.
Please note that you can only link repositories for which you have admin privileges in.
After you have selected your repository, click [Save].
 Log in to Kuroco again.
 After the connection has been established, you will be redirected to the KurocoFront page.
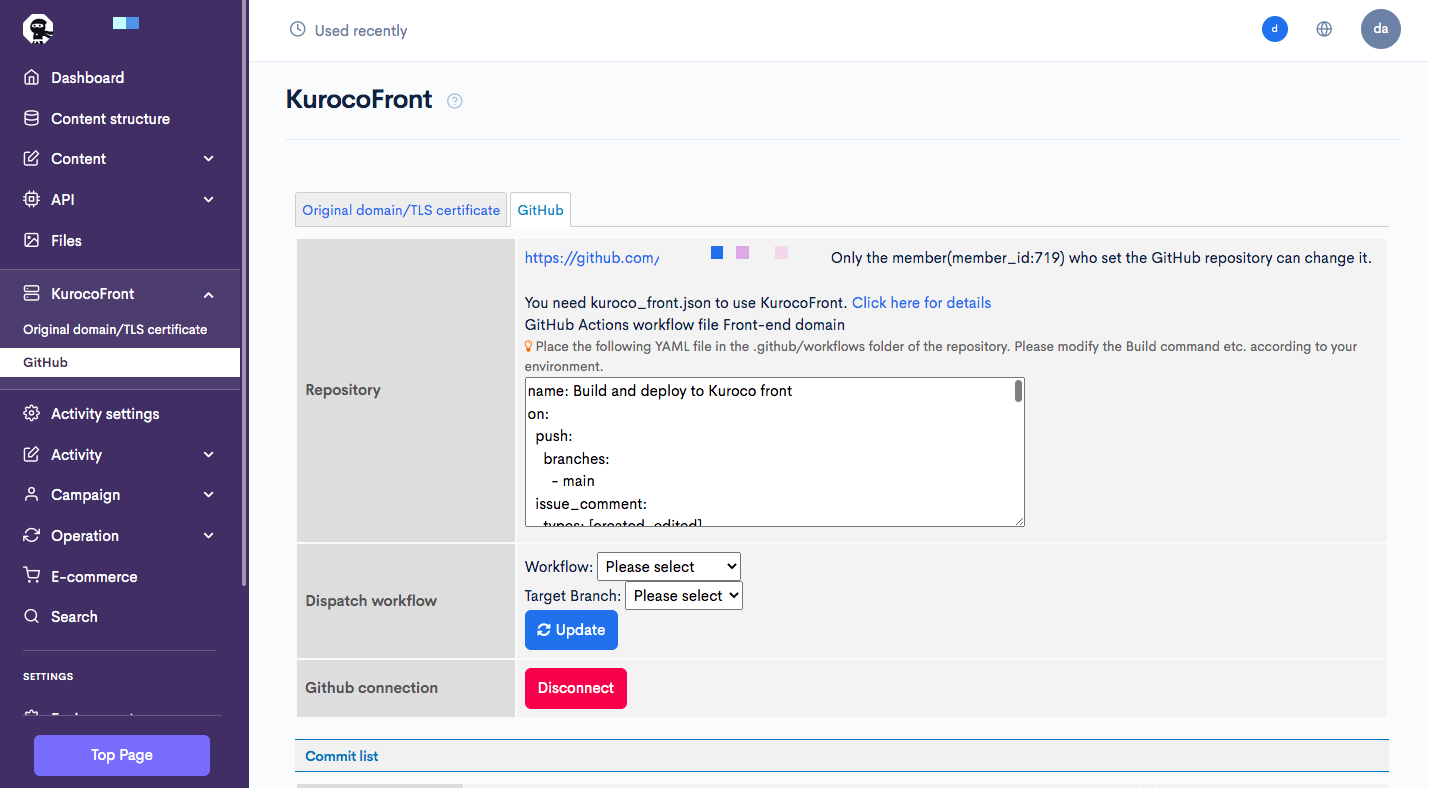 The connection between GitHub repository and KurocoFront is completed.
3. Create kuroco_front.json
In order to use KurocoFront, kuroco_front.json need to be placed under the root directory.
Note: Create kuroco_front.json under /static folder if using Nuxt.js.
{
    "rewrites": [
        {
          "source": ".*",
          "destination": "/index.html"
        }
      ],
    "redirects": [],
    "basic":[],
    "ip_restrictions":[]
}
Reference: What is kuroco_front.json?
Note: You can use the URL rewrite process, basic authentication, and IP address access restriction for kuroco_front.json. The password of BASIC authentication is a plain text. Be careful when you change the repository to public.
4. Place YAML file under .github/workflows
To use GitHub action, place the YAML file under .github/workflows.
Copy the part in KurocoFront's page shown below and create build.yml. Build command, branch name, etc. can be modified accordingly to suit your needs.
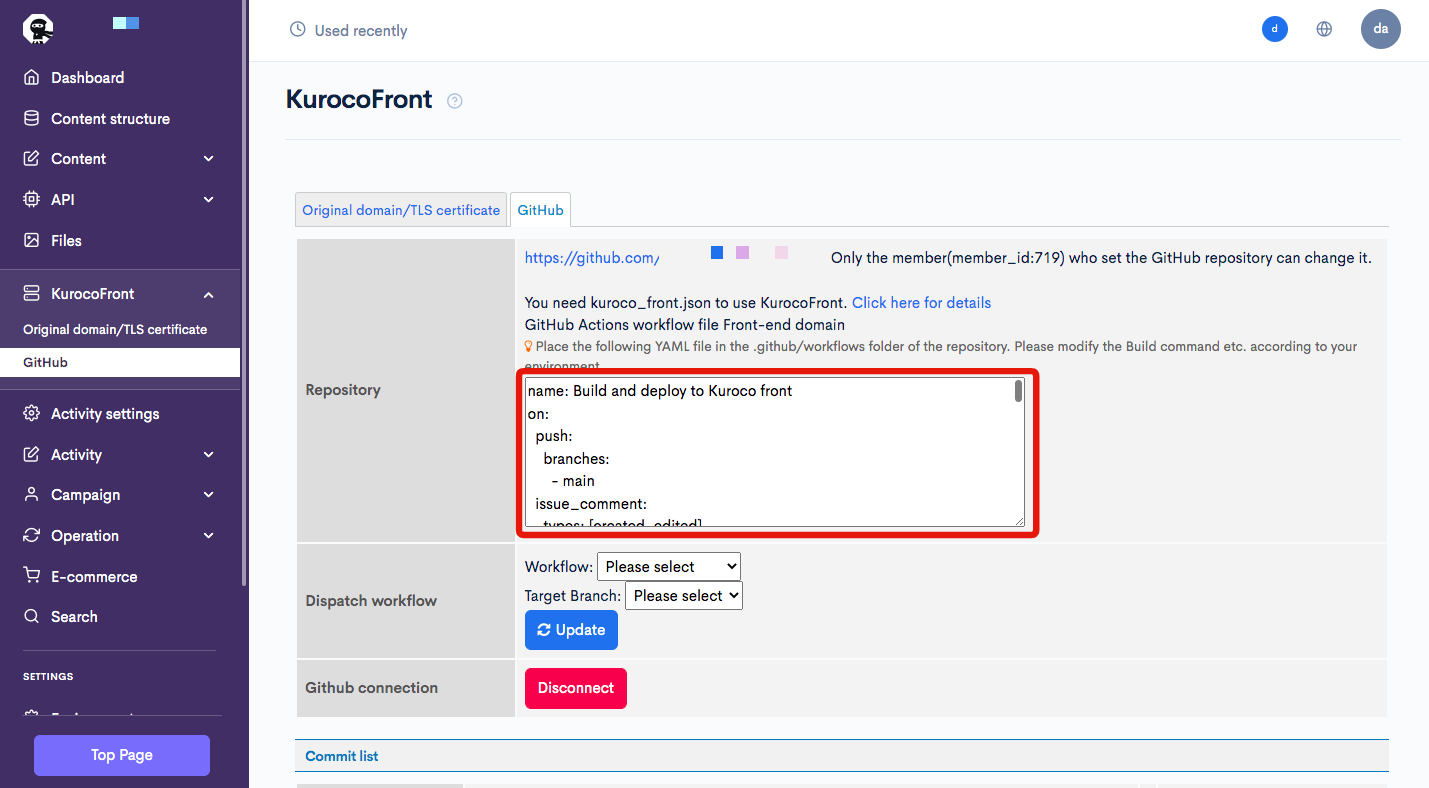 Place the created
 build.yml under .github/workflows to complete the configuration.
If the version of the action listed in the YAML file is out of date, an error may be displayed.
To learn how to automatically update your version of the action, see: Is there a way to keep GitHub Actions workflow actions up to date?
5. Deploy GithubActions
The created build.yml will work as soon as it is uploaded to Github.
We will confirm that the GitHub Actions is working by pushing an update to Github.
Execute the following command to push the update to Github.
git add .
git commit -m "ops: provide kuroco deployment"
git push
Go to the Github repository screen and click [Actions].
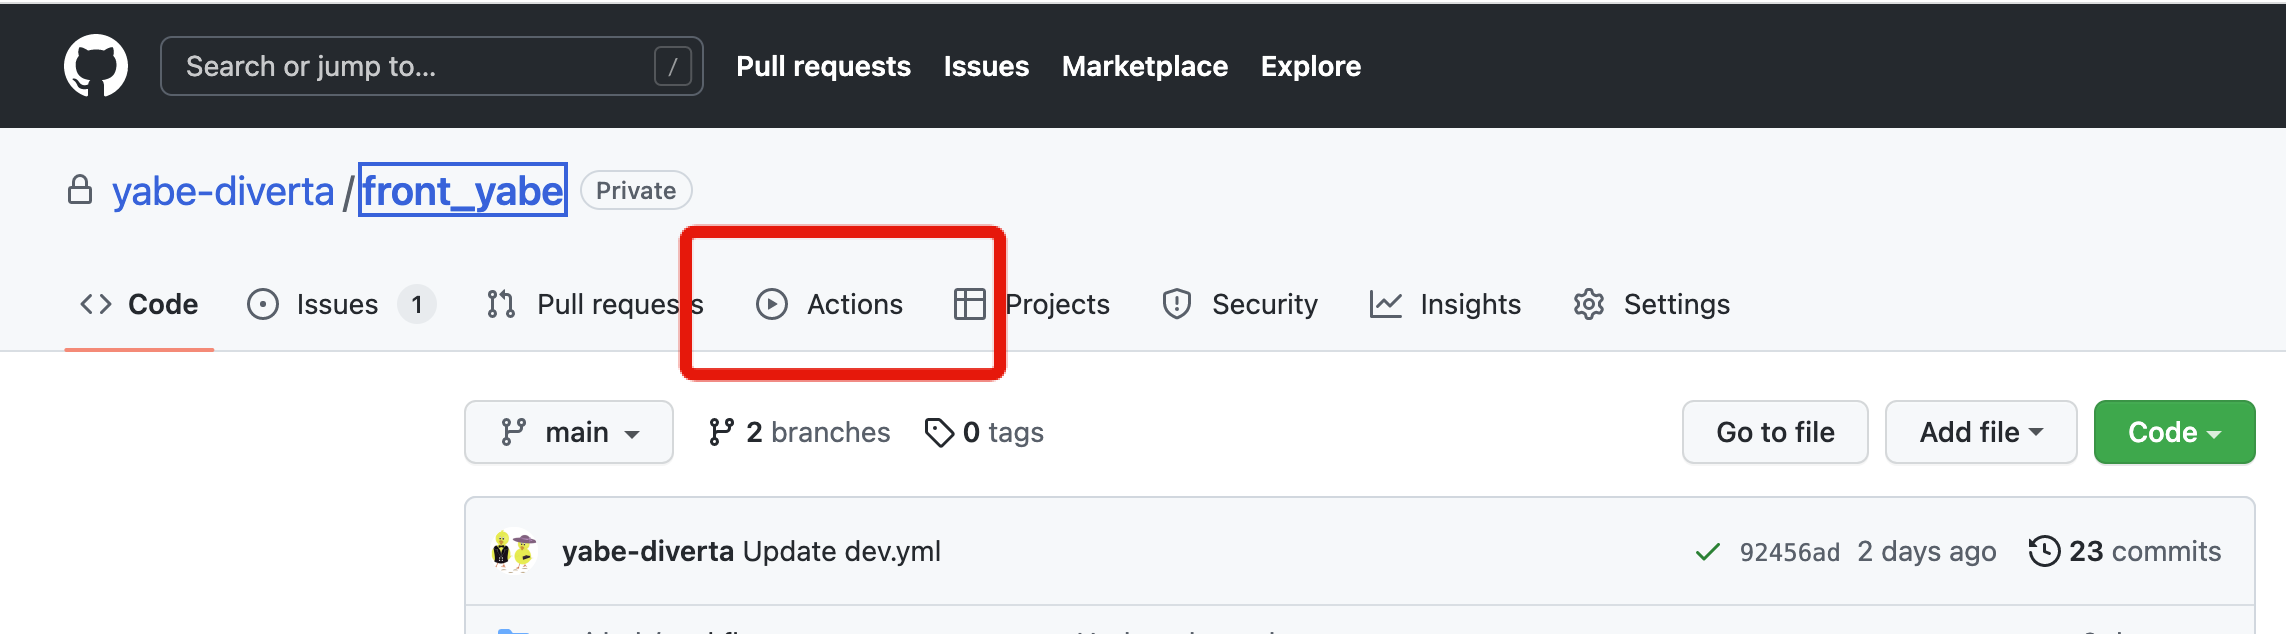
You can confirm that the Github Actions has started to run.
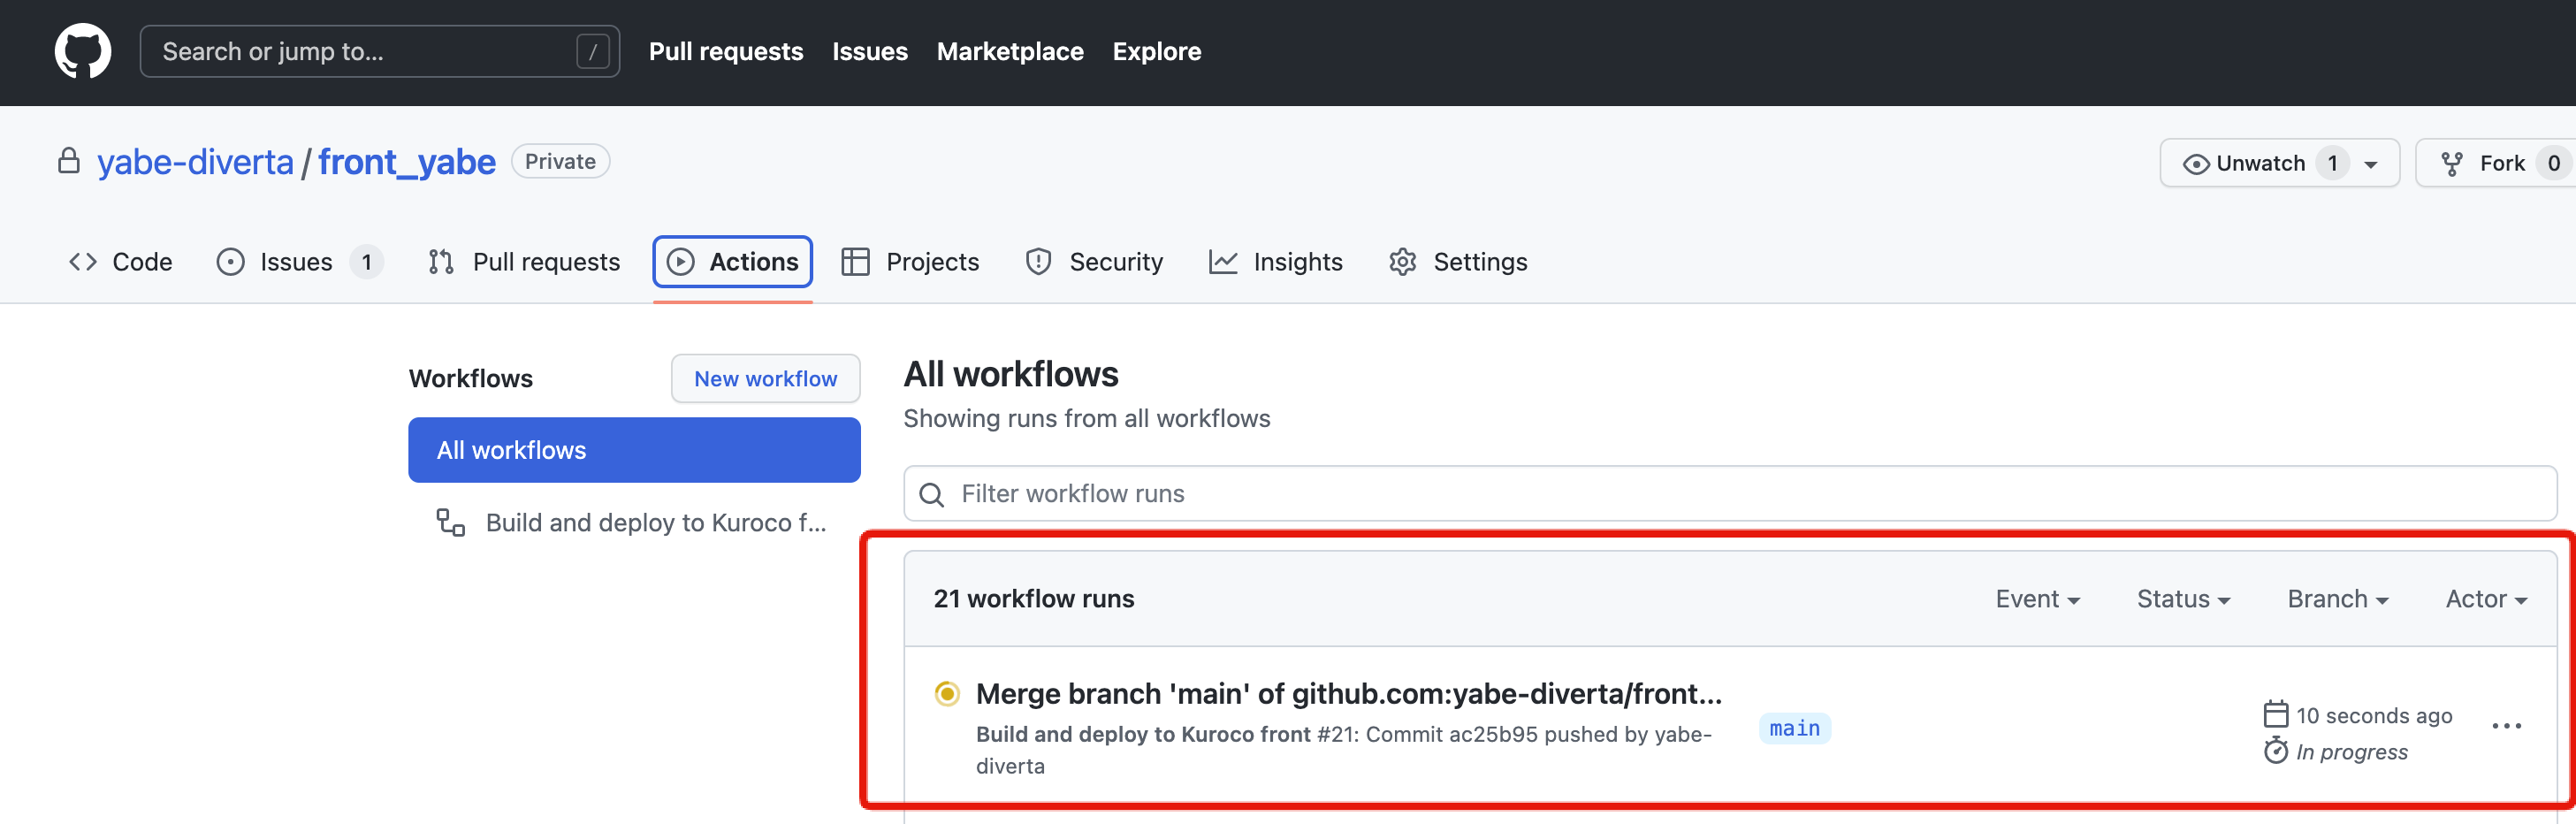
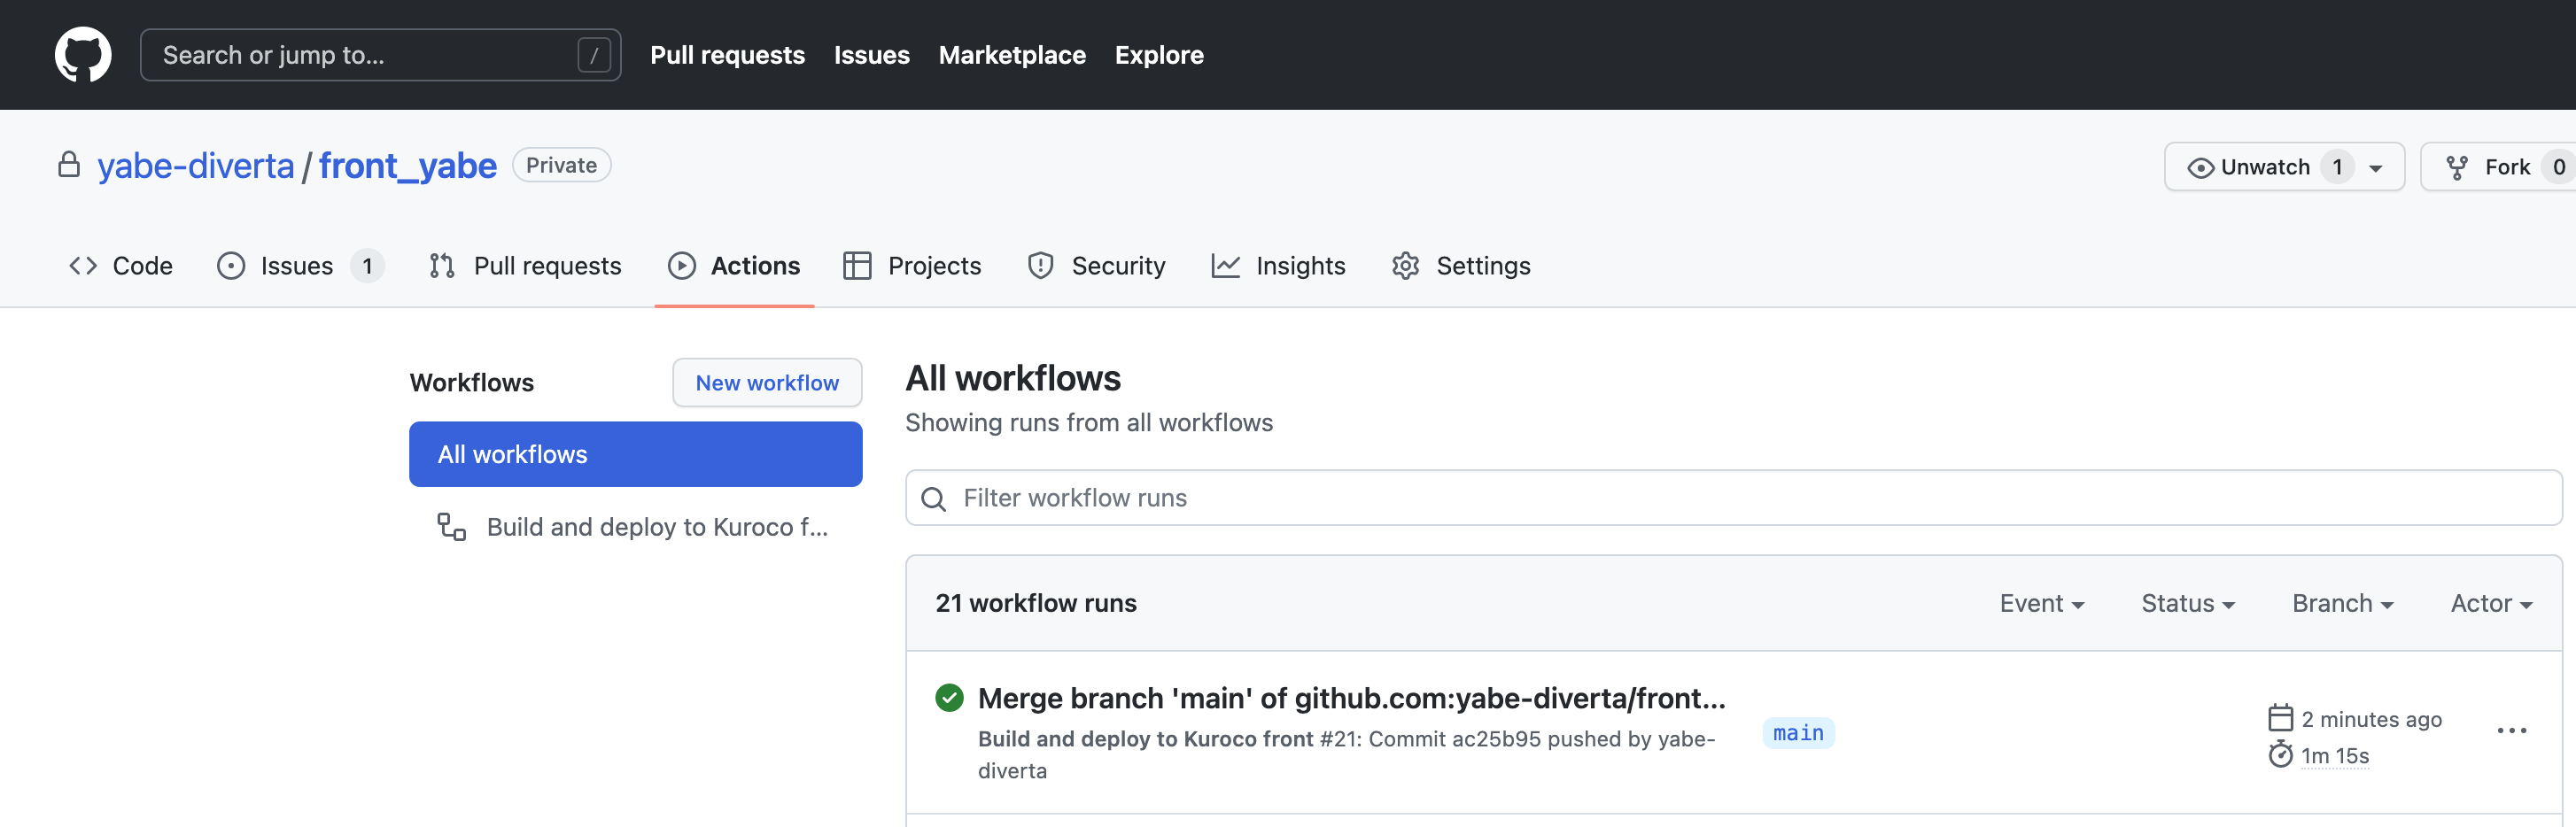
After waiting for a while, the Github Actions operation will be completed.
6. Display the front page
Click [Top page] button on the side menu.
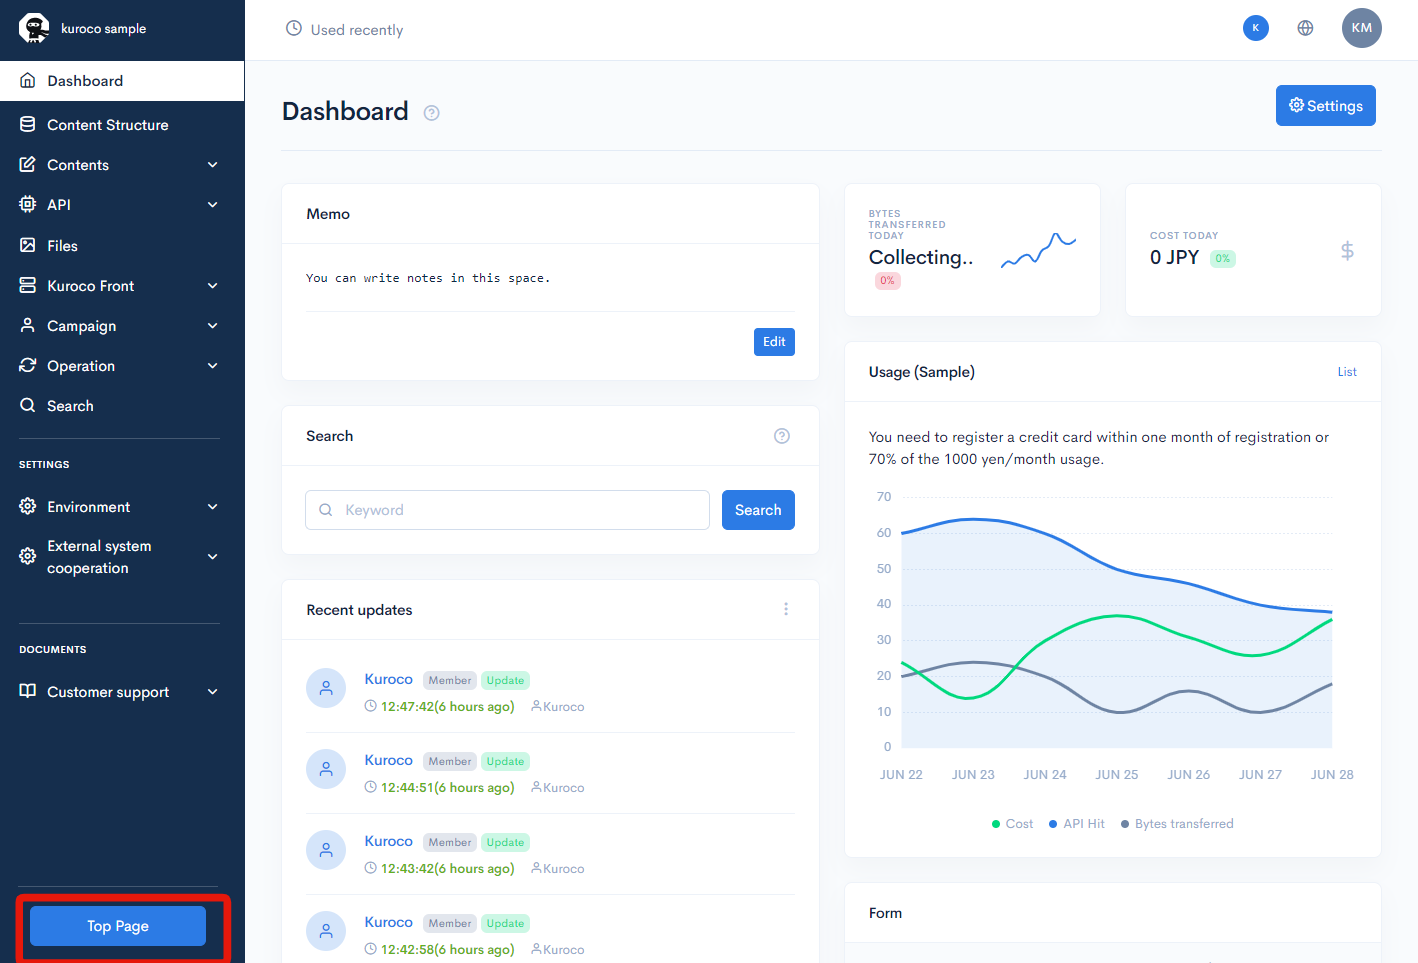 If the site is displayed without any issue, the deployment is complete.
Preview deployment on KurocoFront
In addition to normal deployments, KurocoFront allows for temporary deployments that work as a preview function.
When a reviewer wants to merge a GitHub pull request, they have to checkout/build the pull request on their local machine to verify and review the changes, which is inconvenient.
For this reason, it would be useful if the source code of the pull request could be built/deployed on a temporary URL (preview deployment) so that anyone can check the pull request artifact in a browser.
The build.yml has a pre-scripted preview deployment that will pre-deploy when a specific comment is made in the pull request.
If you have followed the normal deployment procedure above, no changes to the file are necessary.
Preview deployment steps
Creating a pull request for testing
Create an empty file for a pull request to confirm the operation.
git checkout -b preview_deploy
touch test.txt
git add .
git commit -m "chore: tmp"
git push --set-upstream origin preview_deploy
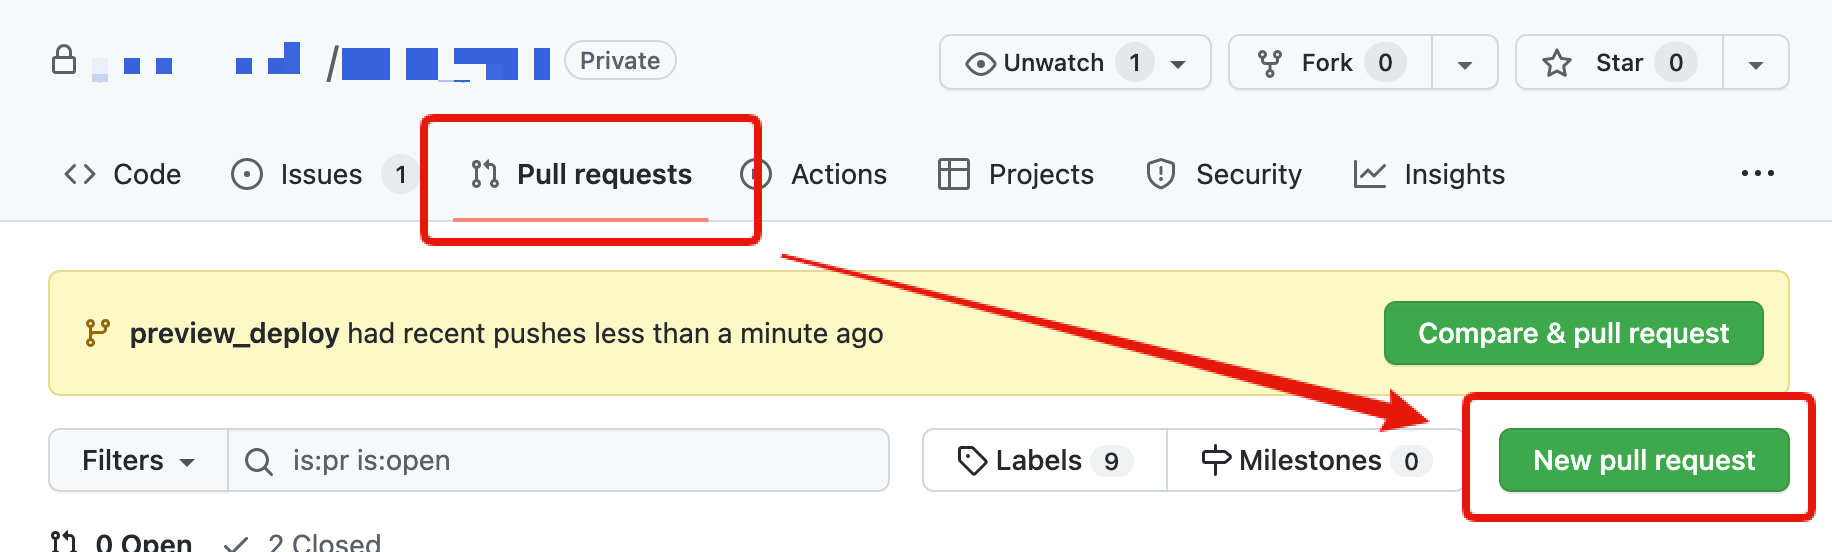
Go to the Github repository page and click [Pull requests], then click [New pull request].
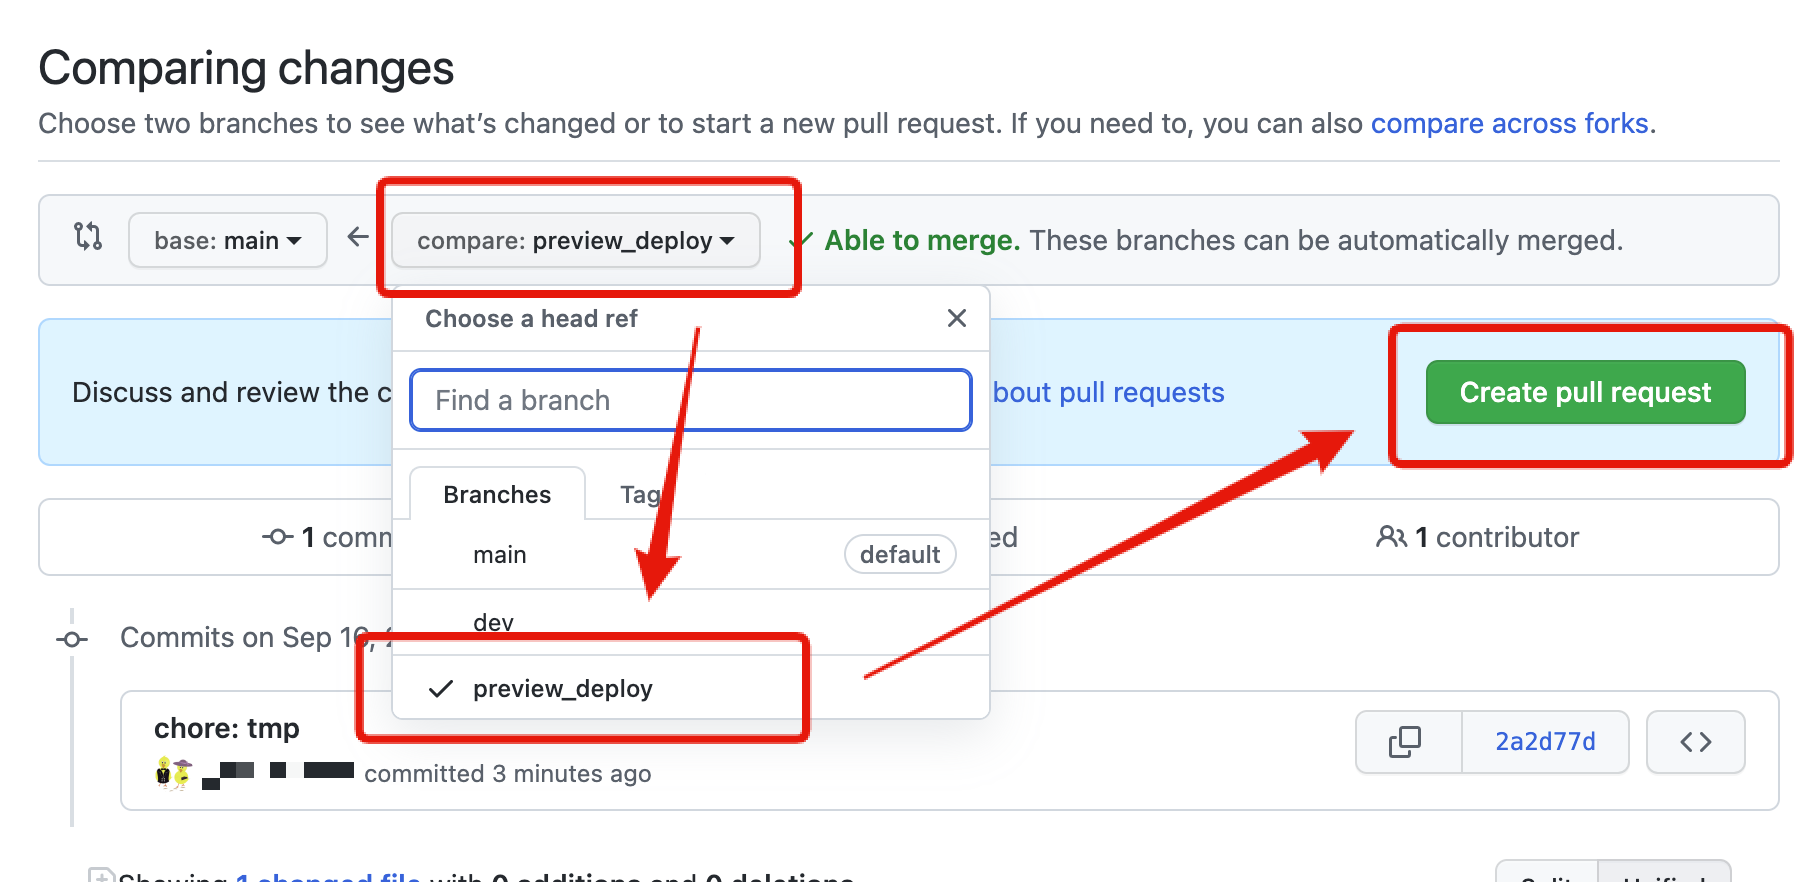
Click [compare: ***], select [preview_deploy], and click [Create pull request].
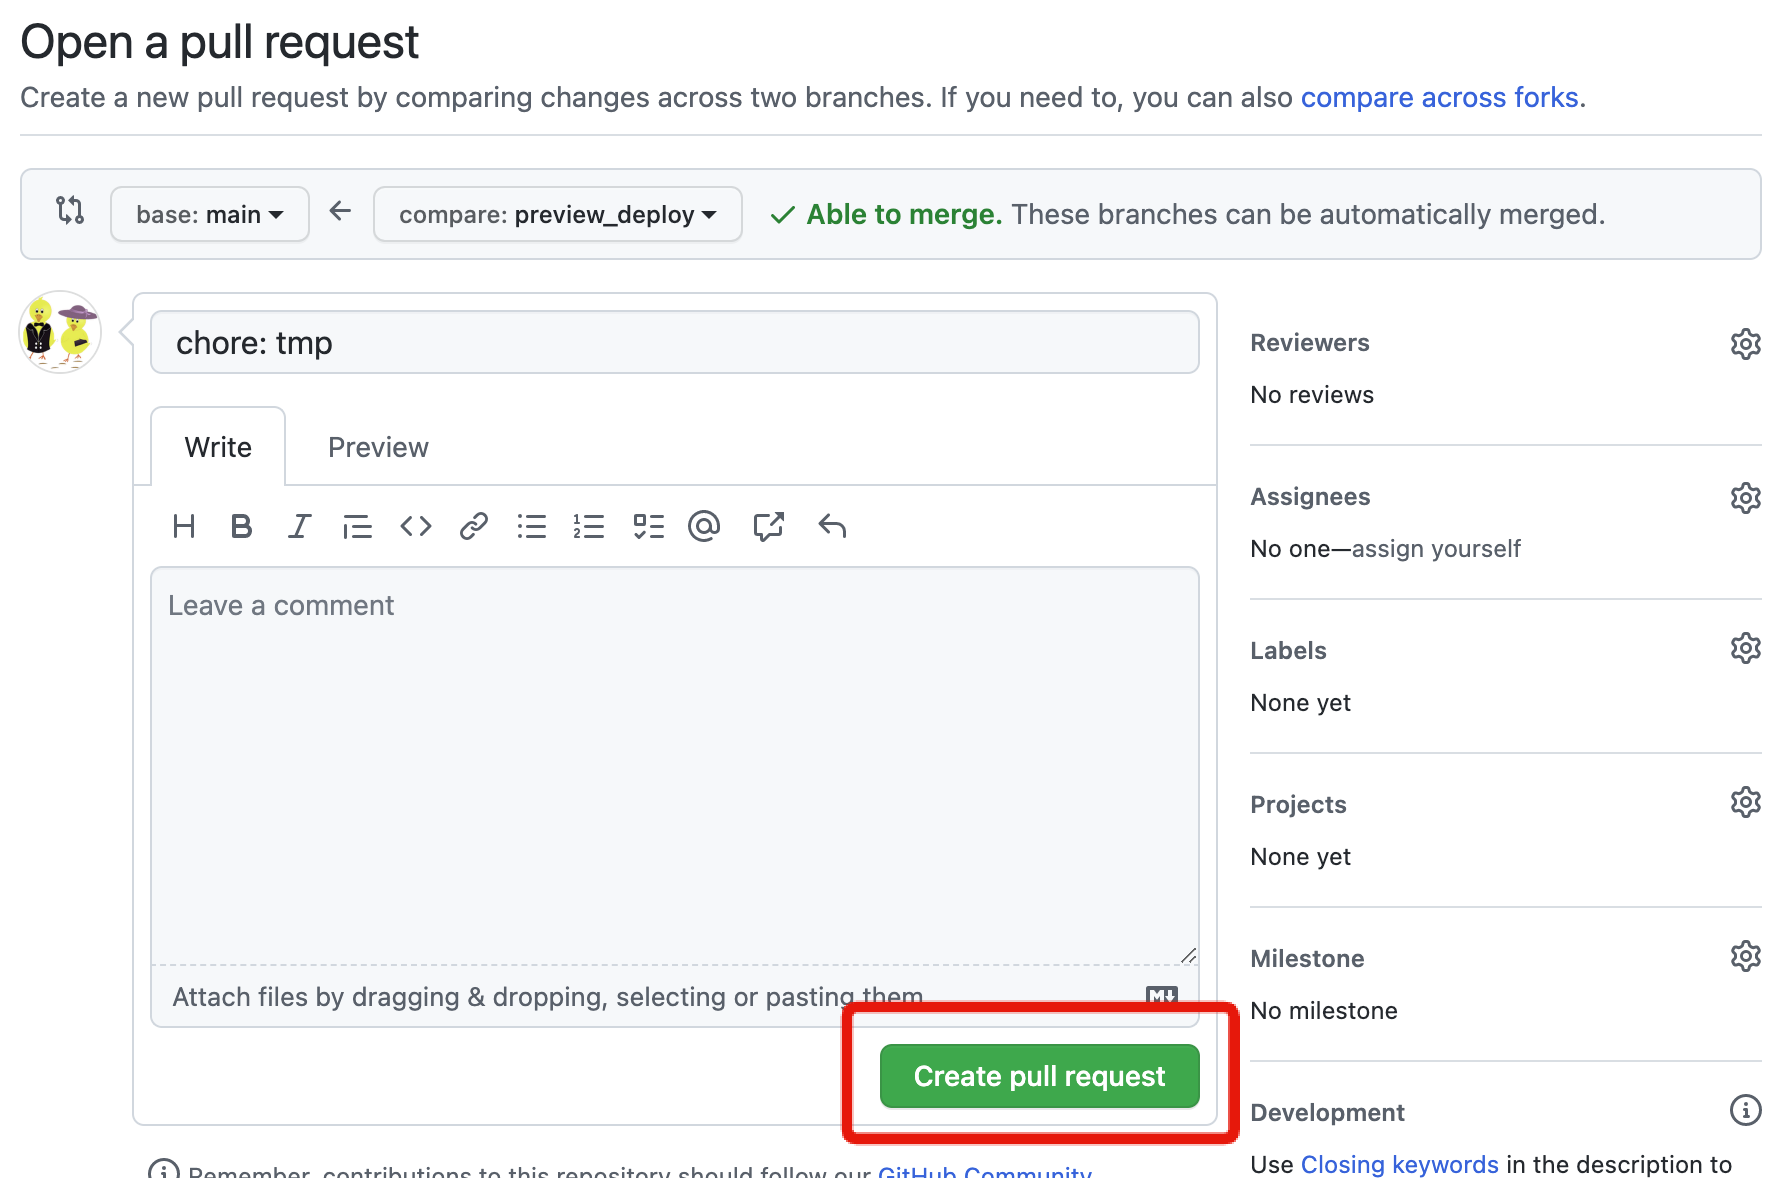
Click [Create pull request].
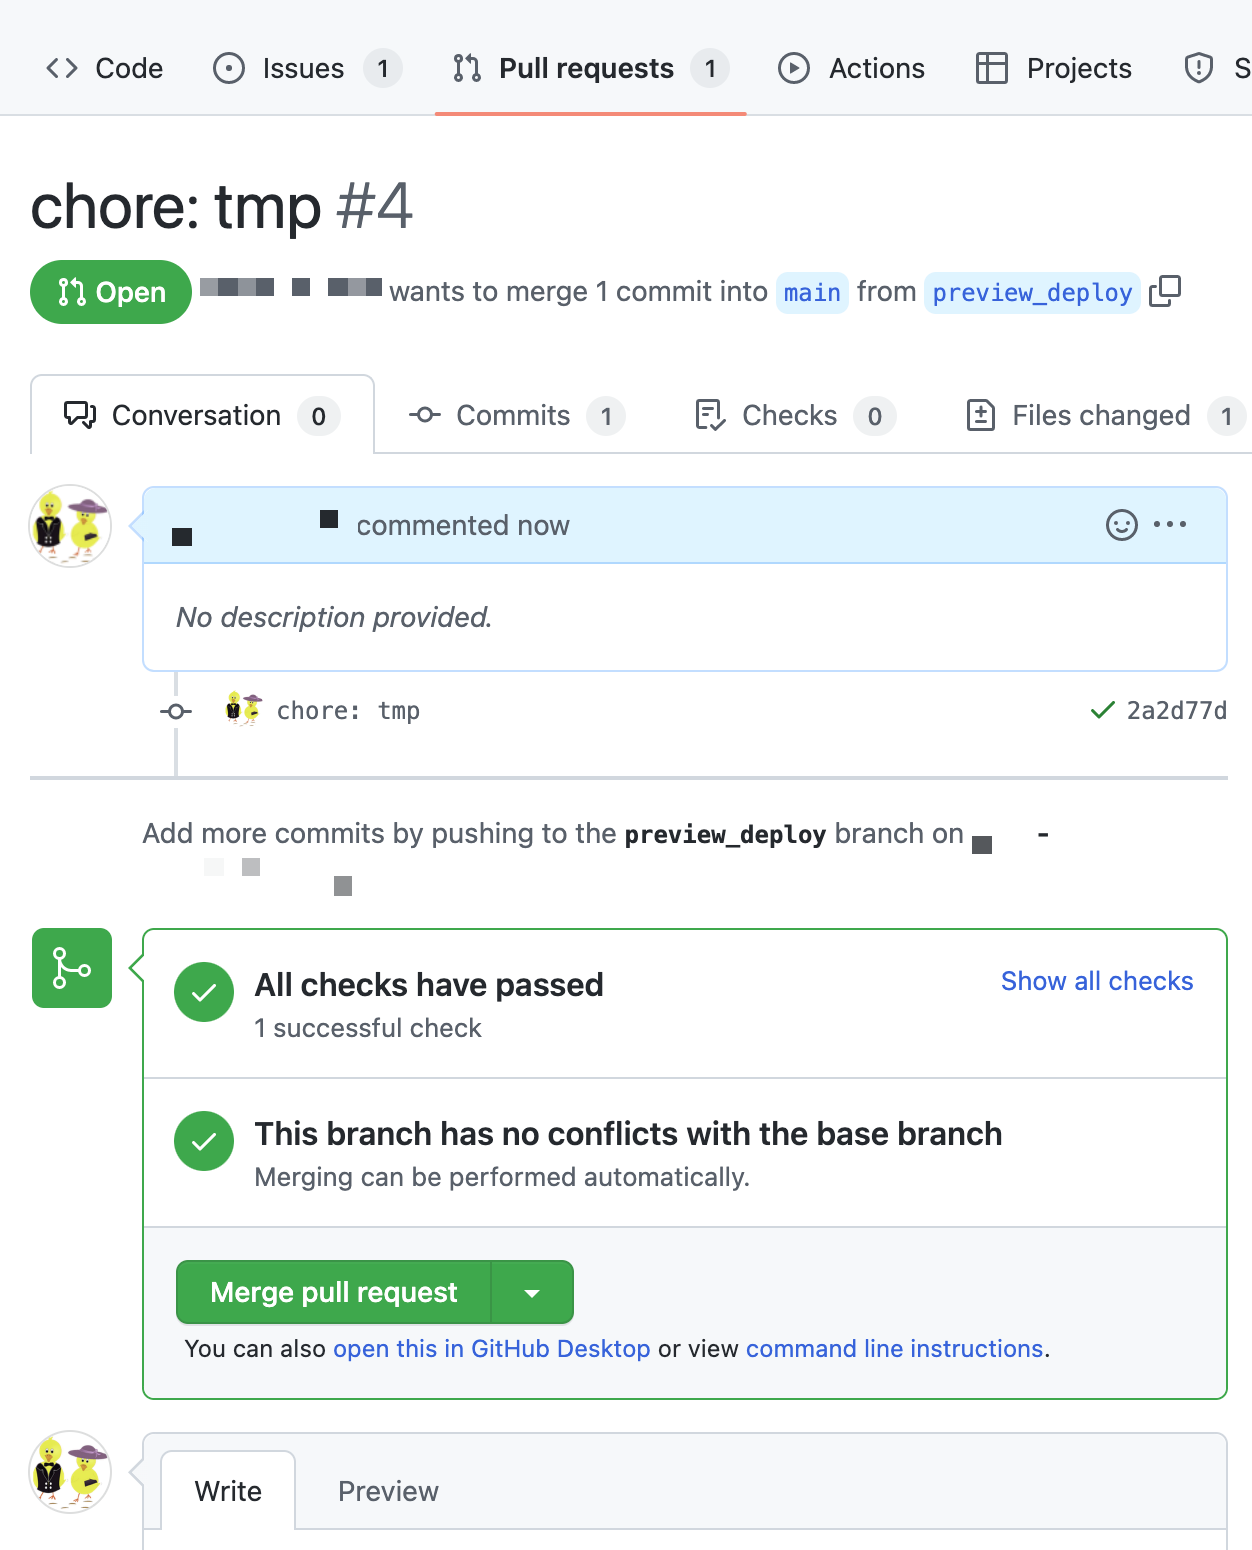
A pull request will be created.
Preview deploy
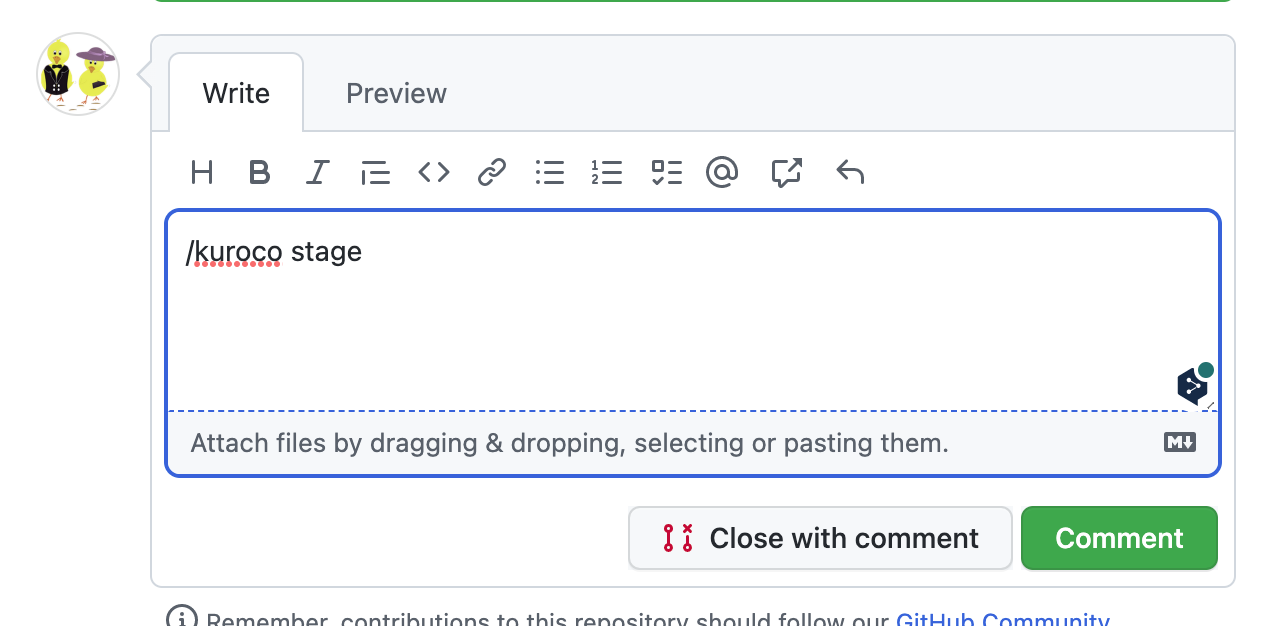
Enter /kuroco stage in the comment field at the bottom of the pull request screen and click [Comment].
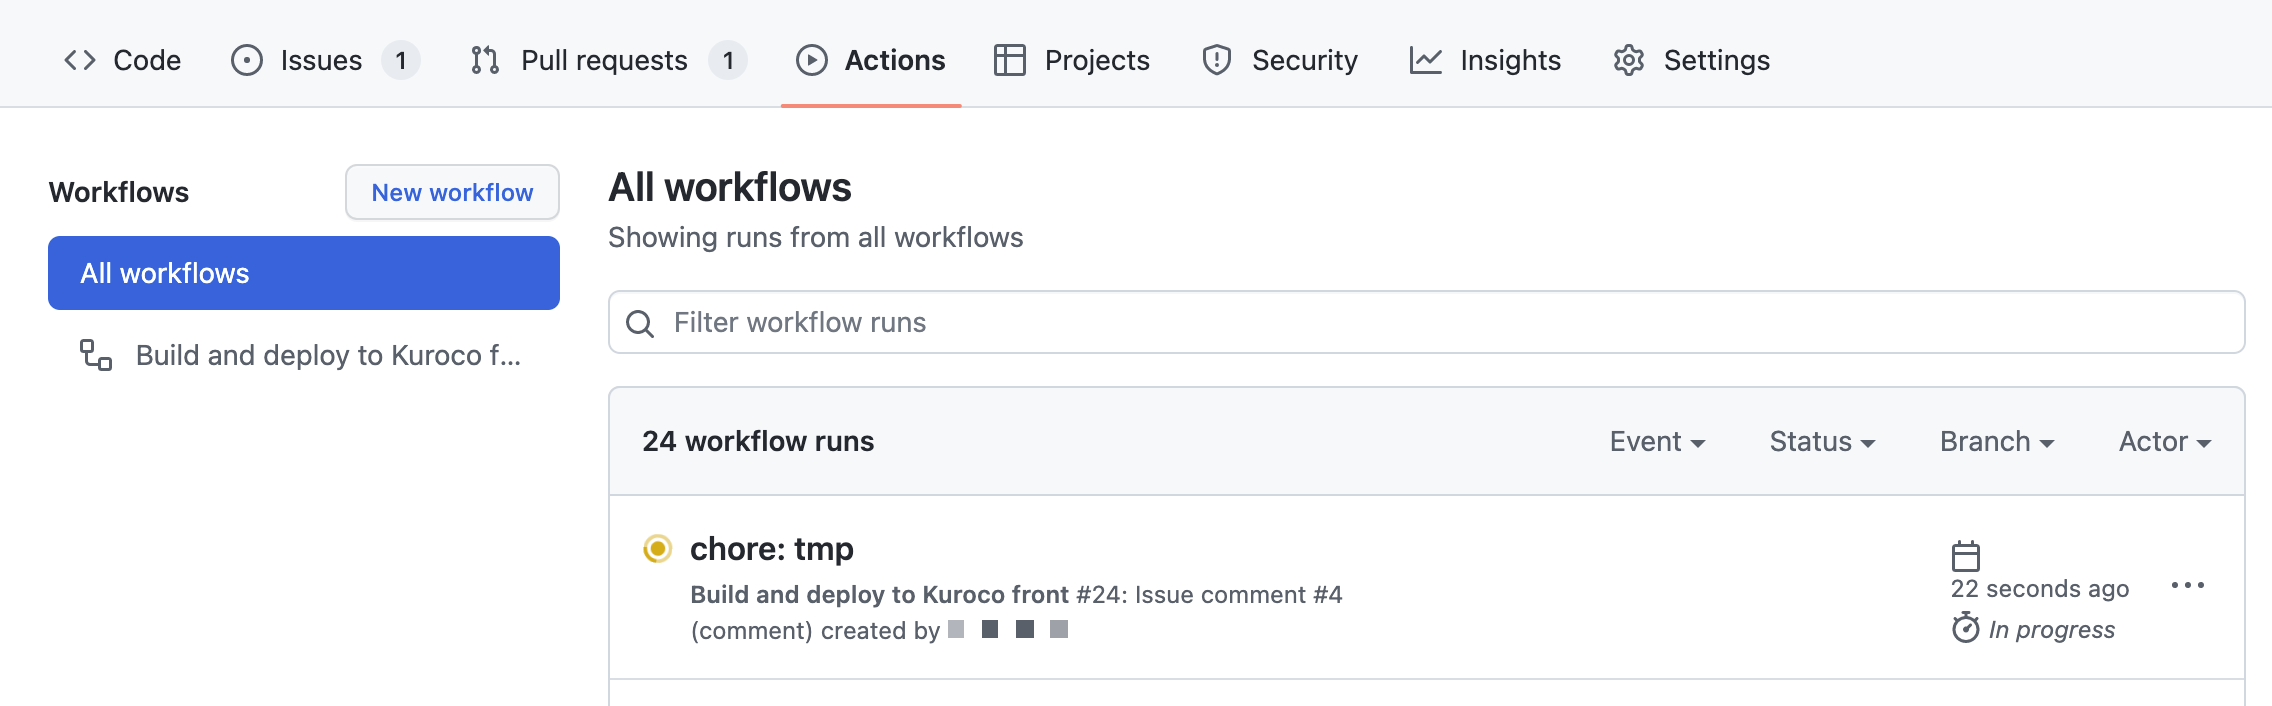
After confirming that the comment has been made, click on the Actions tab and you will see that Github Actions has responded to the /kuroco stage comment and started the preview deployment.
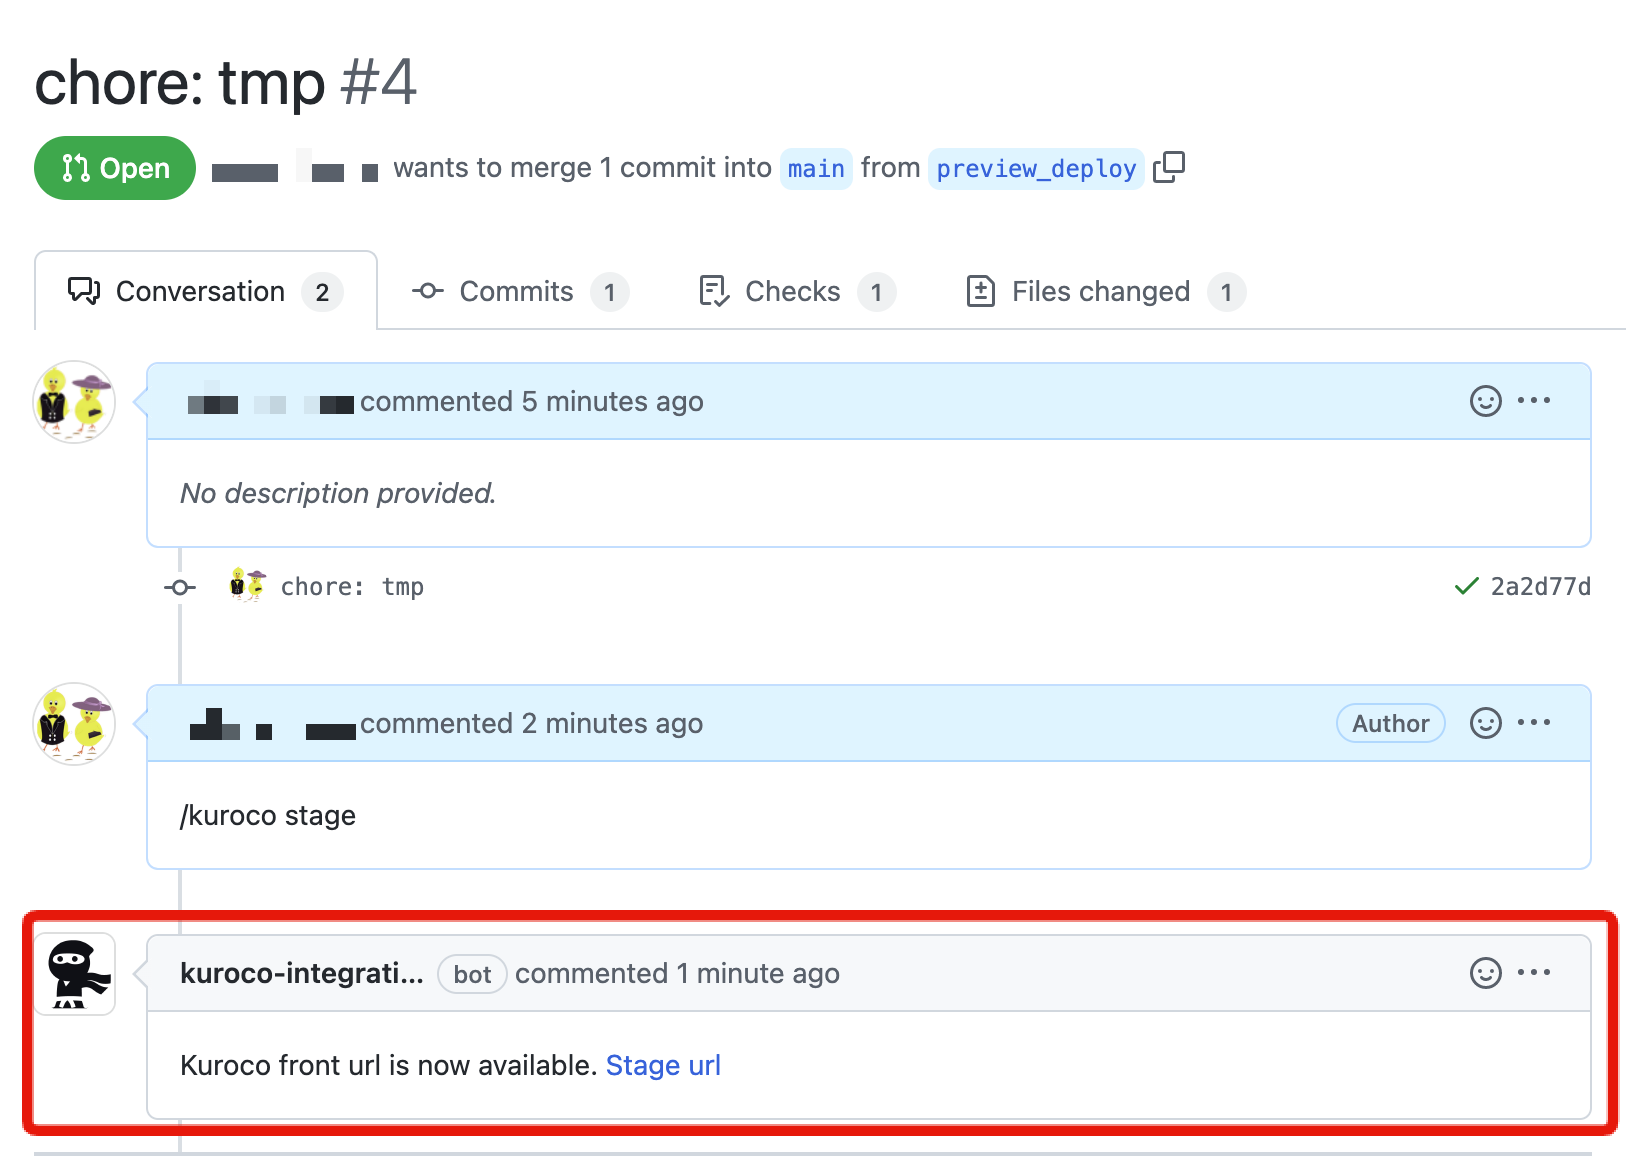
If you return to the pull request screen and refresh the screen a short while later, you will see that the preview deploy comment has been added along with a link to the temporary URL.
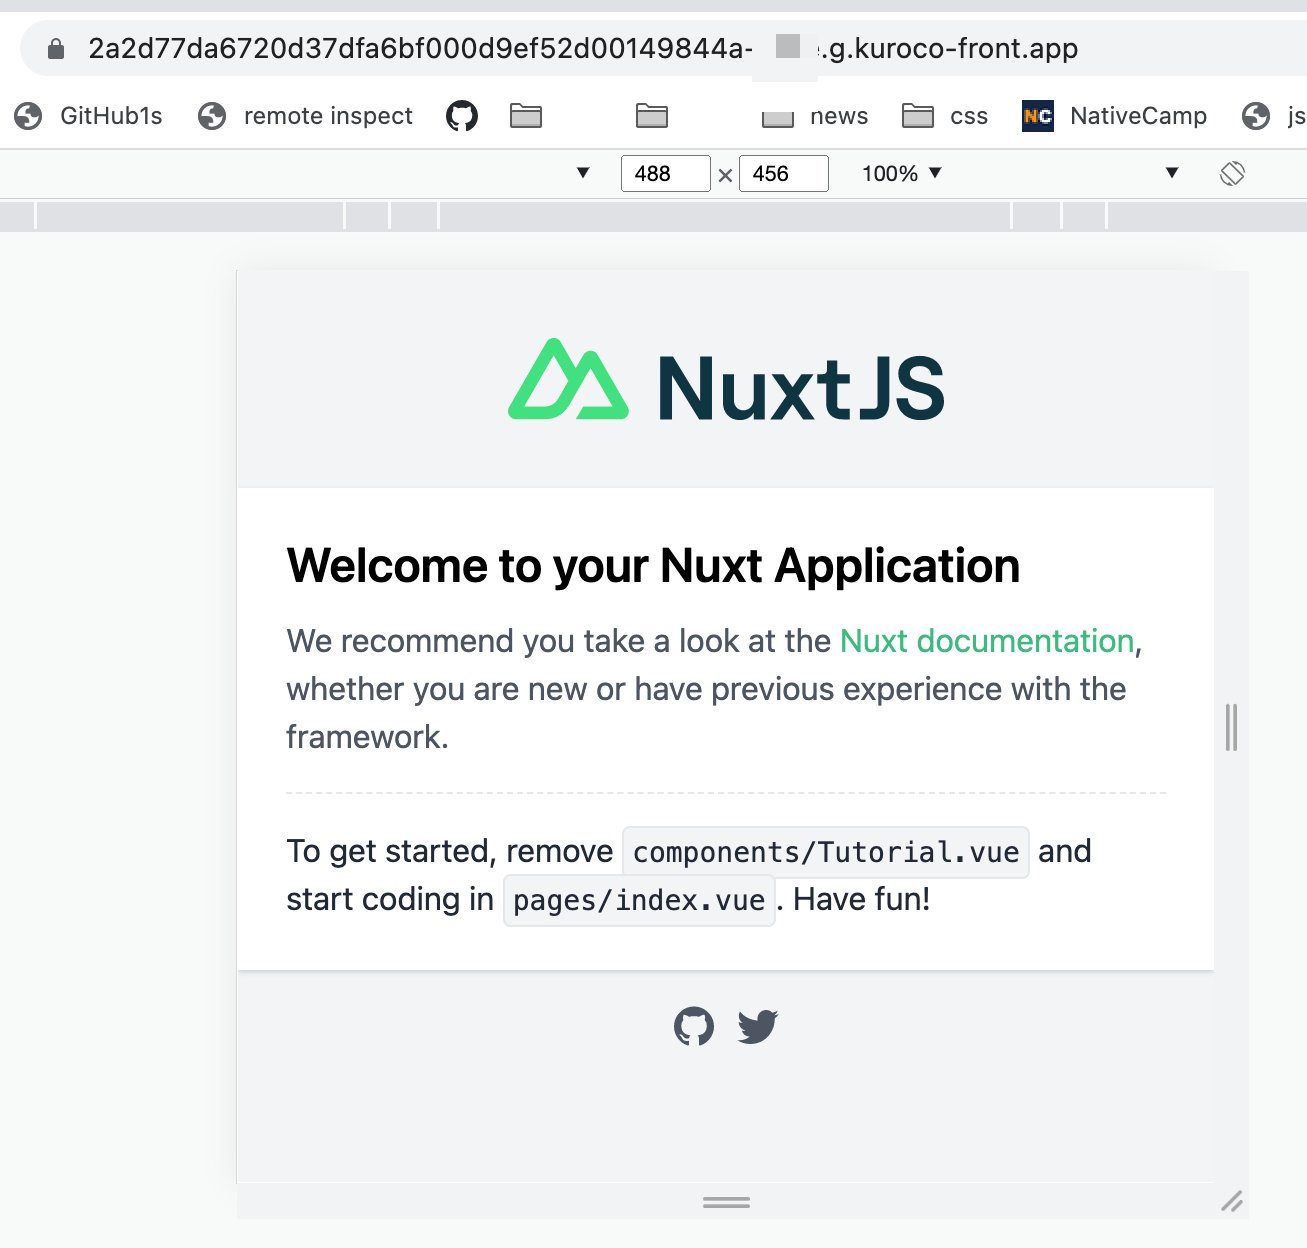
Access the temporary URL link and confirm that the contents of the pull request have been deployed.
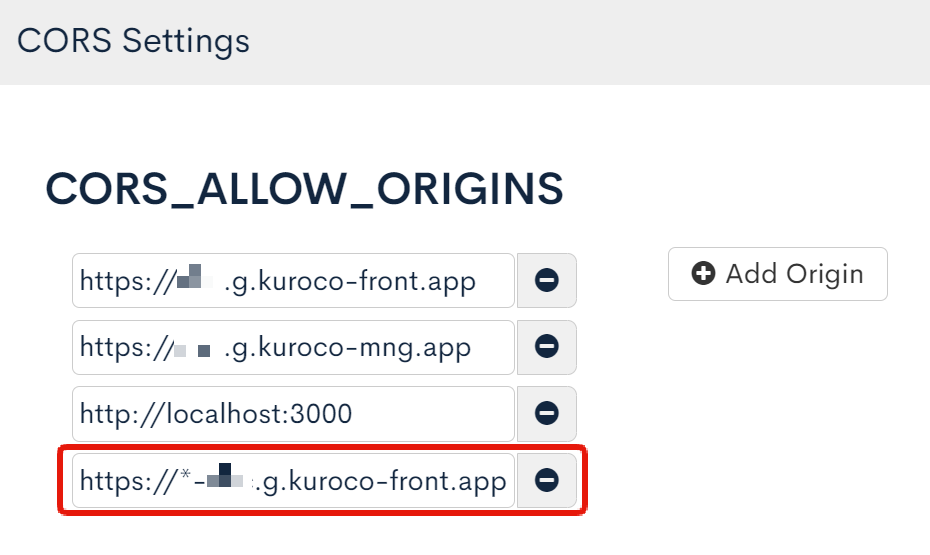
If a CORS error occurs when accessing the temporary URL issued in the preview deploy, specify a wildcard to allow access from the temporary URL.
Since a temporary URL is issued as https://hash-sitekey.g.kuroco-front.app, You can avoid CORS errors by specifying https://*-sitekey.g.kuroco-front.app.
Regarding the domain
KurocoFront's domain format is https://sample.g.kuroco-front.app by default.
Refer to Using your own custom domain name on KurocoFront to learn more about the custom domains.
Remark
- You can check the display status, etc. via KurocoFront Log
- If you don't know how to setup GitHub Actions, feel free to contact us via Support Slack.
- Please note that the site will not be displayed without kuroco_front.json.
Support
If you have any other questions, please contact us or check out Our Slack Community.