Implementing a search function
There are two ways to implement a search function in Kuroco:
- Using a filter
- Using search providers such as Algolia and Syncsearch
This tutorial explains how to implement a content search function using the first approach.
Implementing a search function using a filter
An API filter function allows you to implement a content search with conditions or keywords.
 First, let's review what a filter function does.
A filter function is used to filter data retrieved from an API endpoint. For example, entering the query below in the filter parameter returns data that matches the specified condition:
// specify contents with a topics_id of 1
topics_id = 1
You can specify flexible conditions such as complete or partial matches, number and date comparisons, and AND/OR. This enables you to implement complex searches.
// Specify contents whose title includes "WORD" or that were added between 2021-01-01 and 2021-12-31
subject contains "WORD" OR (inst_ymdhi >= "2021-01-01" AND inst_ymdhi <= "2021-12-31")
You can input the filter parameter in the locations below based on what function it serves.
| Location | Description |
|---|---|
| Endpoint settings | Set fixed search conditions that are always applied. For example, entering inst_ymdhi >=: relatively "-1 year" here retrieves only contents added within a year from the current date and time. |
GET parameter | Specify dynamic search conditions. If a filter has been set in the endpoint settings, the search results will match both conditions below: filter query(endpoint setting) AND filter query(GET parameter) |
To obtain variable results based on user input, set the filter query with the GET parameter.
To add a fixed condition, enter the query in the endpoint settings as needed.
A filter can only be used when the API model supports the function. Look for the filter parameter on the endpoint settings or Swagger UI screen.
The next section explains how to implement a search function using a filter. This tutorial covers 2 types of searches:
- Conditional search
- Keyword search
Before you start
Create an API
API
Set up a new API as follows.
| Field | Value |
|---|---|
| Title | Filter function API |
| Version | 1.0 |
| Description | For use by filter function |
| Sort | 0 |

Click [Add] to save these settings. You will be redirected to the Endpoint list screen. Click [Security].

Select "Cookie" and click [Save].

CORS
Next, click [Operation CORS] to configure the CORS settings.

Under "CORS_ALLOW_ORIGINS", add the following entries using [Add Origin].
http://localhost:3000- (Your front-end domain name)
Under "CORS_ALLOW_METHODS", add the following entries using [Add Method].
GETPOSTOPTIONS
Under "CORS_ALLOW_CREDENTIALS", select "Allow Credentials".

Click [Save] when you are done.
Implementing a conditional search
The steps below explain how to implement a conditional search based on the above overview.
1. Create a content structure and an endpoint
Follow the steps below to create a content structure and an endpoint.
Content structure
In the left sidebar menu, select [Content structure] -> [Add].
 Create a content structure with the following settings:
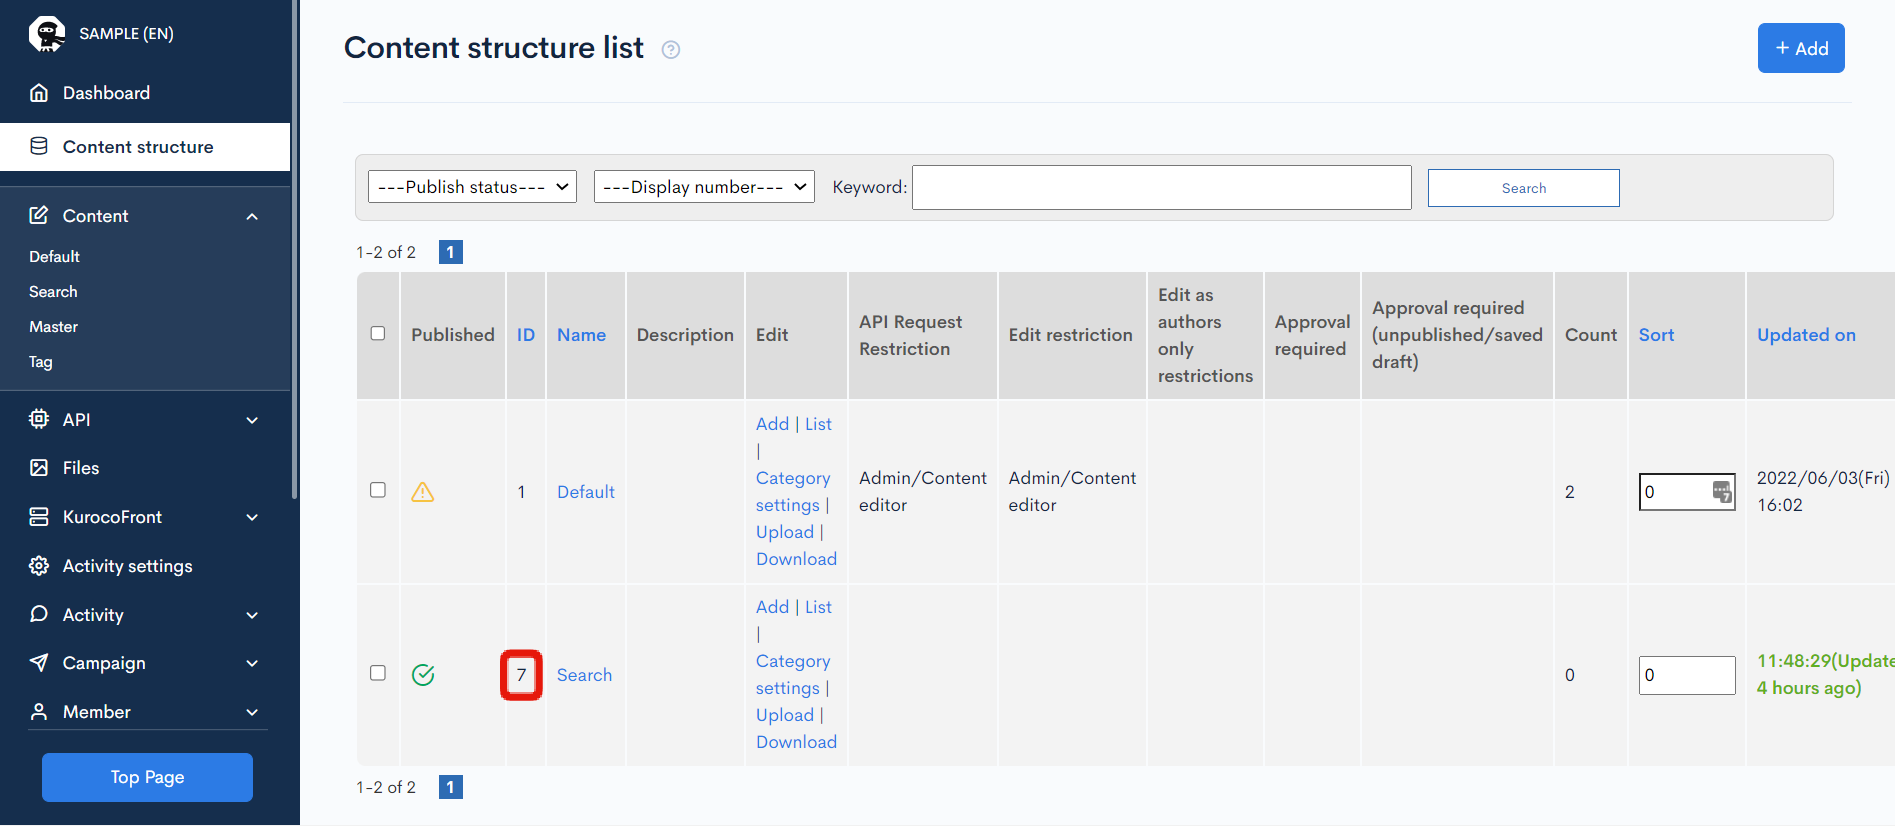
- Group name:
Search - Group ID: 7 (automatically assigned)

Create the following additional fields.
| ID | Field name | Field settings | Options |
|---|---|---|---|
| 1 | Text | Single-line text | - |
| 2 | Select | Single choice | 01::option102::option203::option3 |
| 3 | Checkbox | Multiple choice | 01::option102::option203::option3 |


Add some test data to this content group as follows.

Endpoint creation
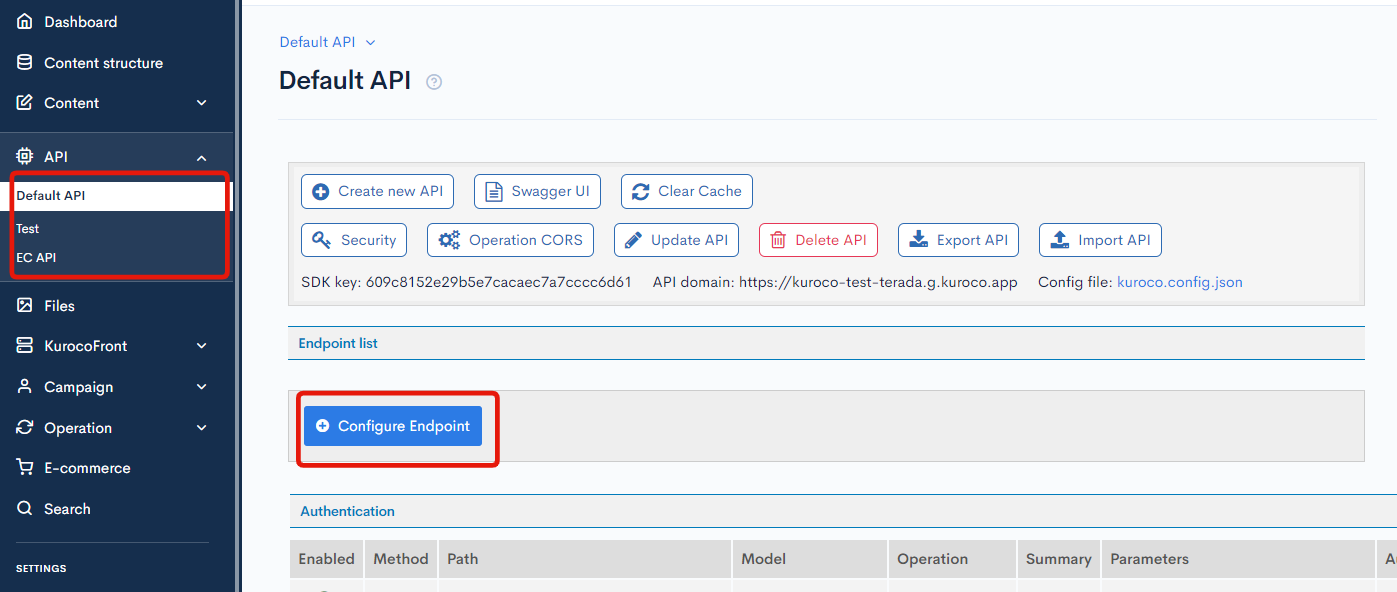
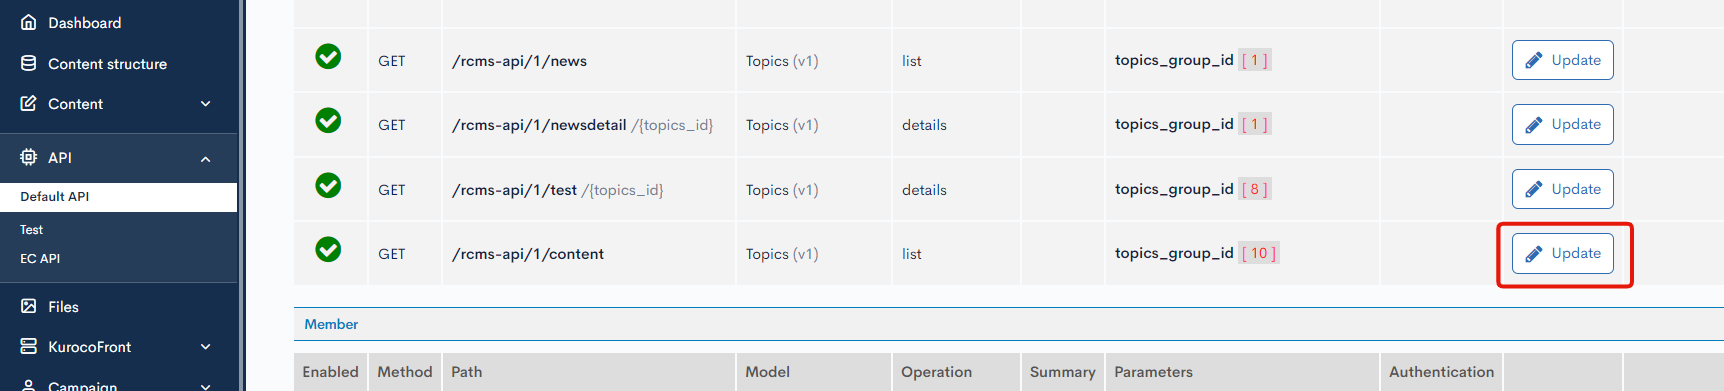
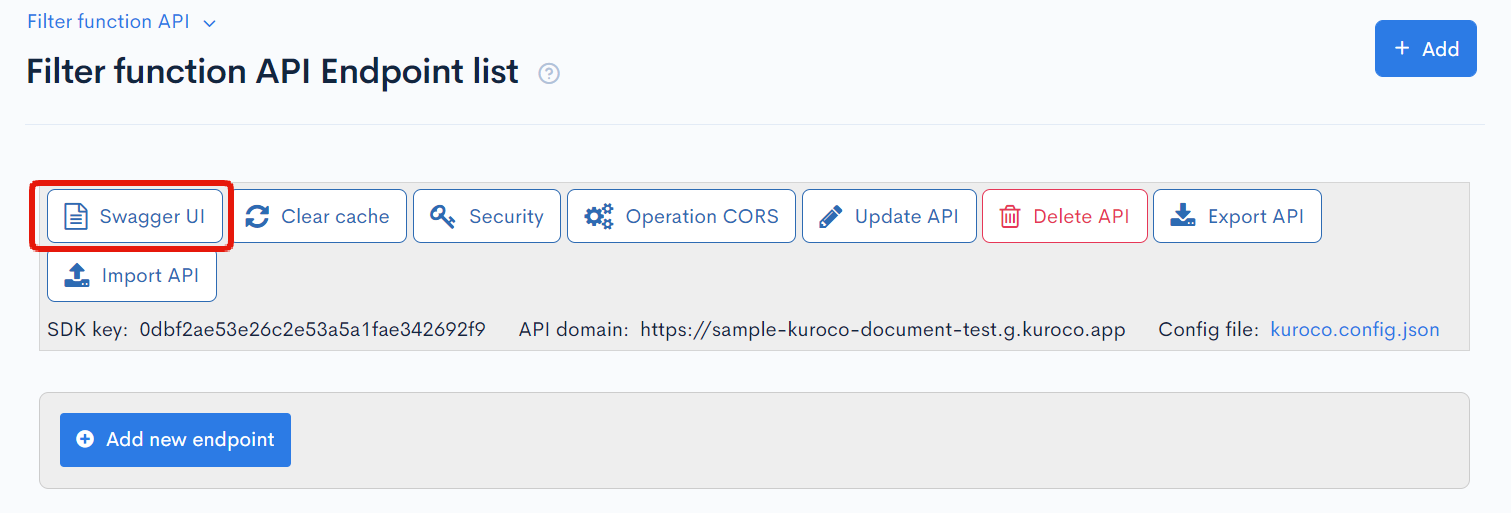
In the left sidebar menu, click [API] and select the filter function API to access its endpoint list screen.
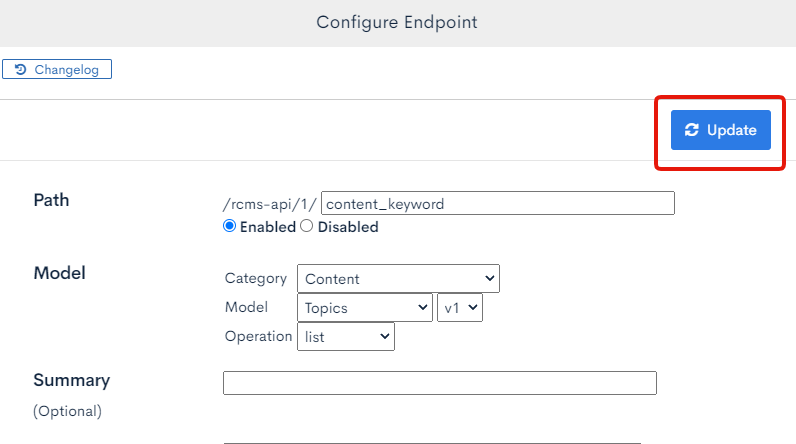
Click [Configure Endpoint].
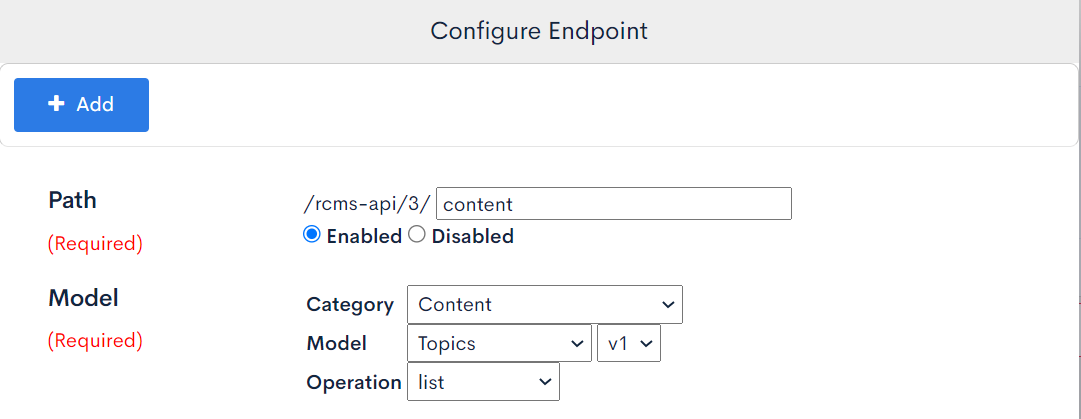
Create an endpoint with the following settings:
| Field | Value |
|---|---|
| Path | (/rcms-api/**/) content |
| Category | Content |
| Model | Topics (v1) |
| Operation | list |
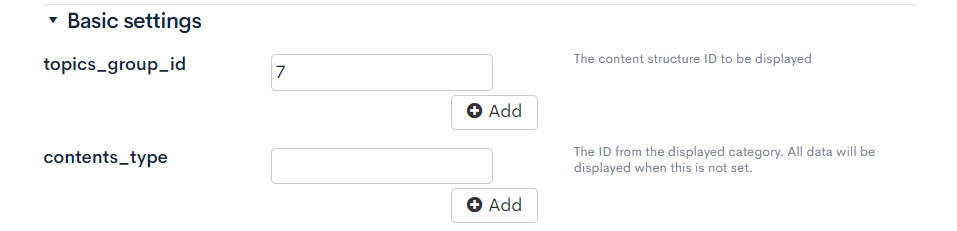
| topics_group_id | (ID of "Search" content group) |
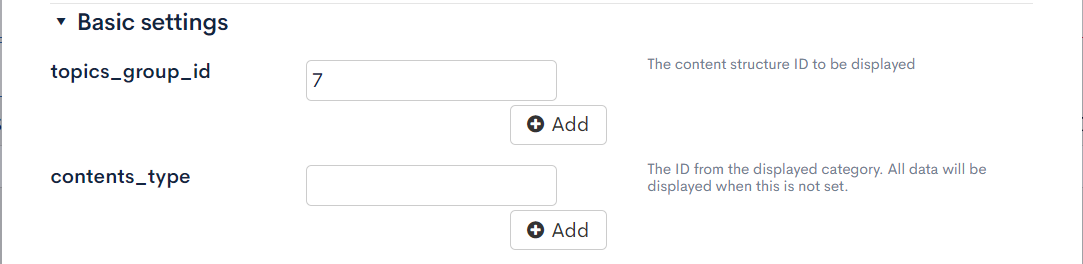
The content group ID can be found on the Content structure list screen.
2. Configure the endpoint
On the search endpoint list screen, click [Update] next to the endpoint you created.
 On the pop-up screen, scroll down to the
 filter_request_allow_list field.
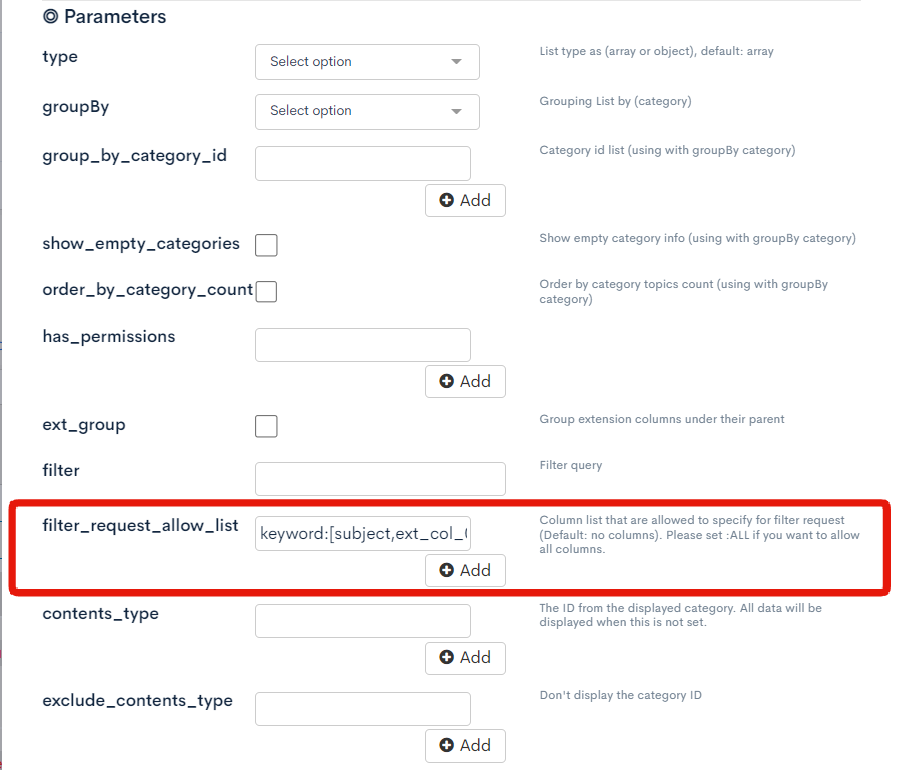 By default, query filtering by the
 GET parameter is disabled. Specifying the search items allowed using filter_request_allow_list activates the filter.
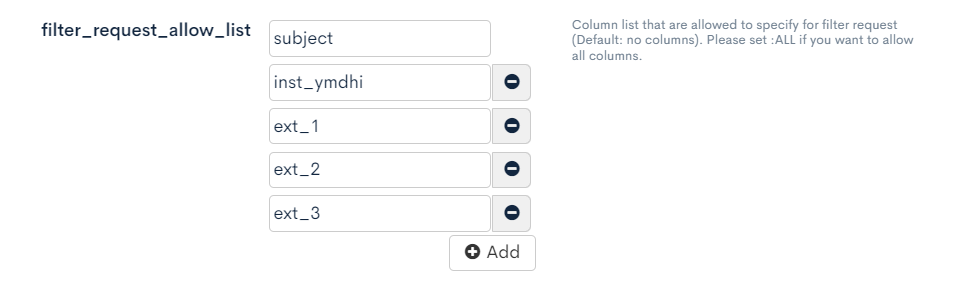
For this tutorial, add the following entries:
subjectinst_ymdhiext_1ext_2ext_3
Depending on when you signed up with Kuroco, additional fields may be follow the label format ext_col_01 instead of ext_1.
If query filtering does not work using the above settings, please verify the Swagger UI response.
Entering :ALL here allows all fields to be searched. Although this is convenient, it sometimes weakens API security. (For example, fields that have not been set as valid response data will be also allowed as search items.)
Therefore, we generally recommend setting each search item individually.
If you use :ALL, check to ensure that there are no issues with the data returned by the endpoint.
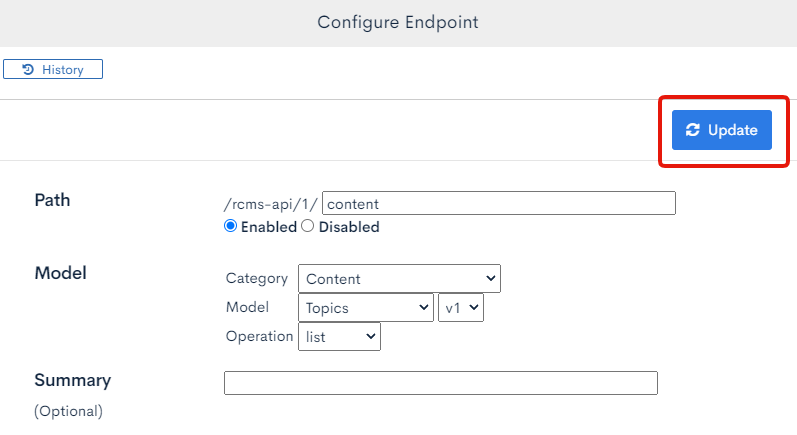
After you have specified the desired fields, click [Update] to save the changes.
3. Verify the endpoint operations
On the API endpoint list screen, click [Swagger UI].
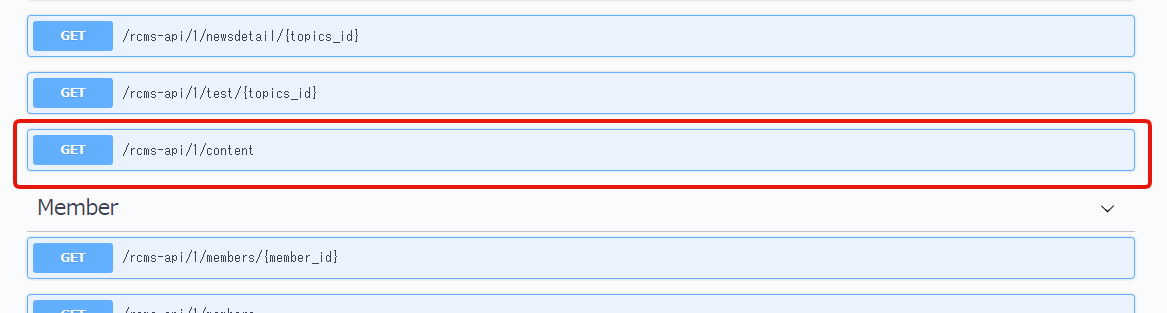
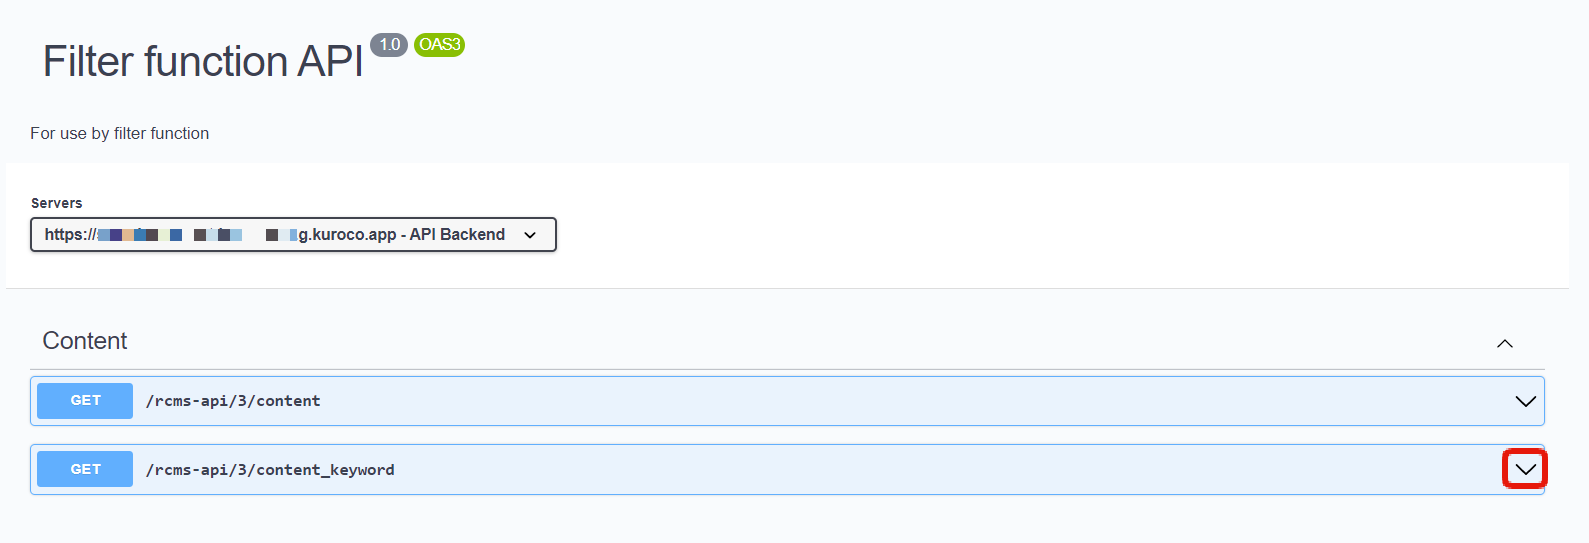
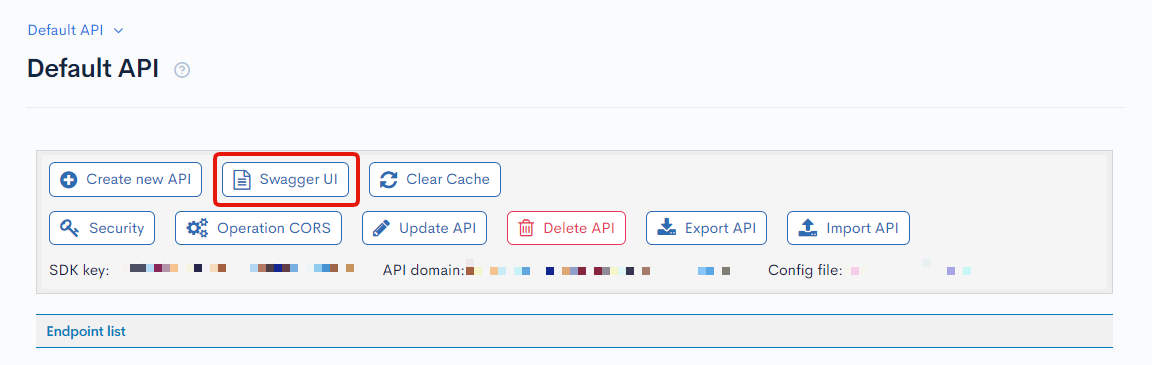 Under "Content" on the API Swagger UI screen, click the endpoint you have configured. This opens a dropdown panel.
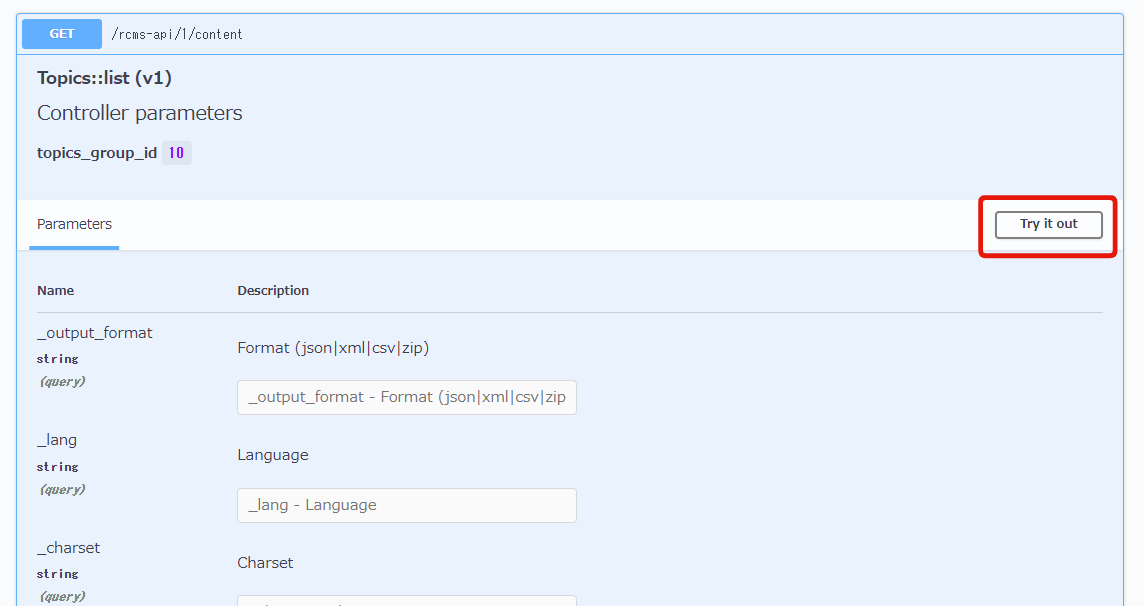
 Click [Try it out] to begin the verification.
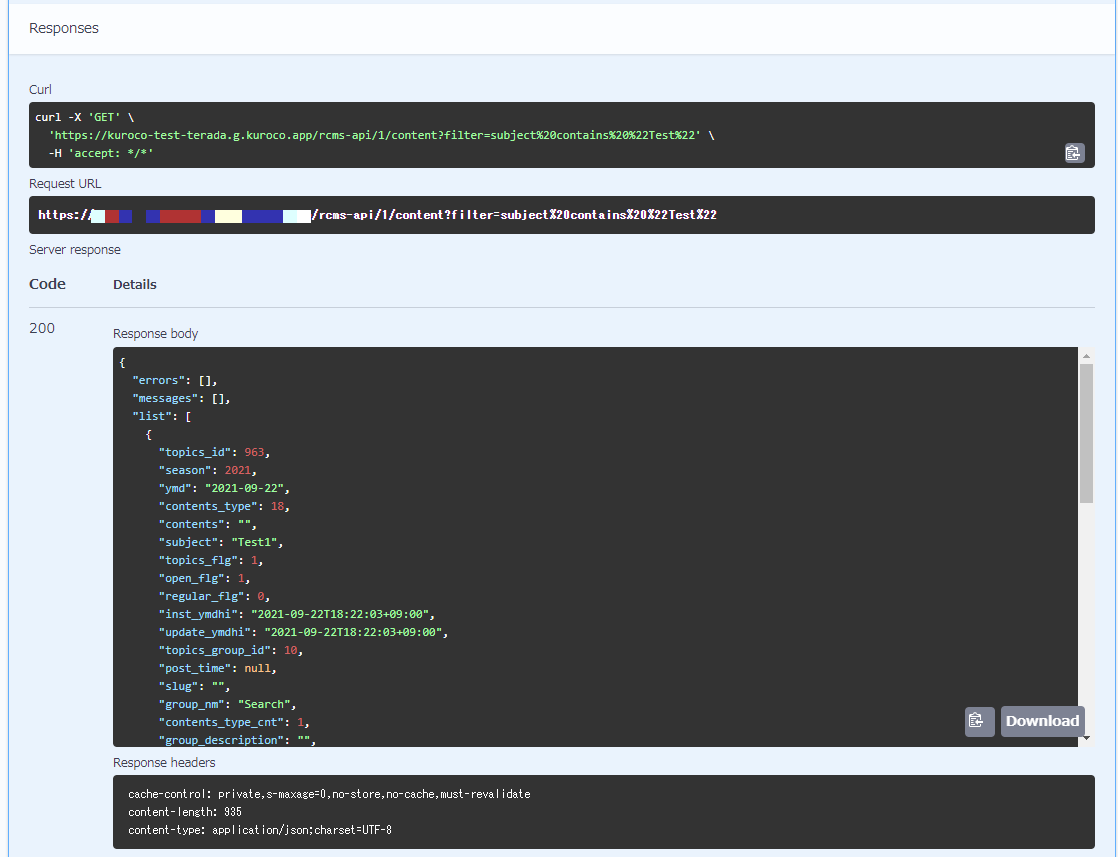
Subject search
Enter a query in the filter parameter. For this tutorial, enter subject contains "Test".
See: How to use search function for more details on the query format.
 After you have entered your query, scroll down to the bottom and click [Execute].
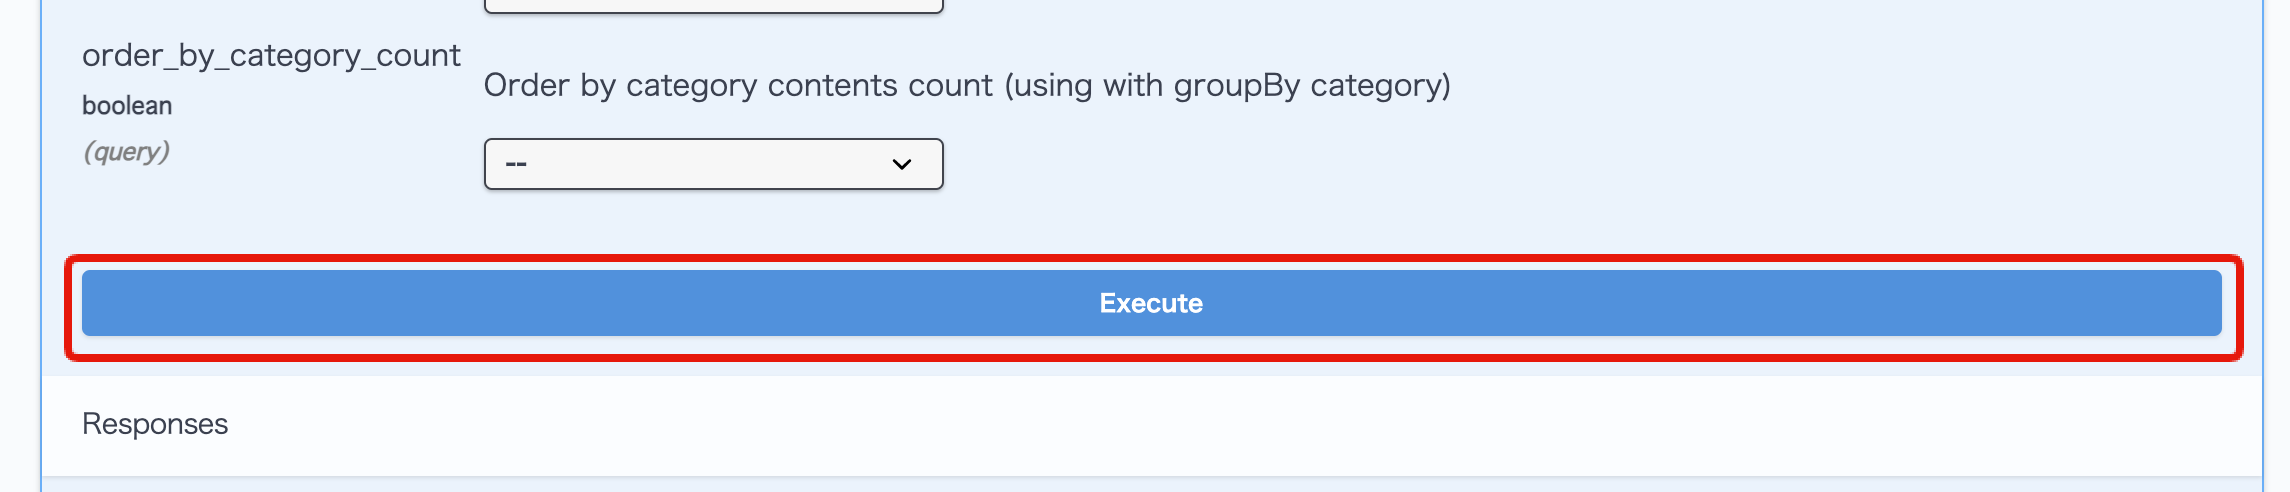 Verify the responses displayed.
Selection type Search
Enter "ext_2 = "01"" and confirm that you can retrieve the content for the selected option1.

Once input is complete, click the [Execute] button.
Check if the results are displayed as expected, confirming whether the search is performed correctly.

The key for the selection type such as single choice content is stored as a string. When applying filters, make sure to enclose them explicitly with " ".
For example, even if the single choice-type are registered as follows, apply the filter as ext_2 = "1" instead of ext_2 = 1.
1::option1
2::option2
3::option3
4. Implement the search function
Next, implement a search function using the configured endpoint.
For this tutorial, we use Nuxt.js to create a simple search form and search results table.

First, create the following component under the file name pages/search/index.vue.
<template>
  <div>
    <div class="search-form">
      <p>
        <label for="subject">Title</label>
        <input v-model="searchInput.subject" type="text">
      </p>
      <p>
        <label for="inst_ymdhi">Created at</label>
        <input v-model="searchInput.inst_ymdhi.from" type="date">
        ~
        <input v-model="searchInput.inst_ymdhi.to" type="date">
      </p>
      <p>
        <label for="ext_1">Text</label>
        <input v-model="searchInput.ext_1" type="text">
      </p>
      <p>
        <label for="ext_2">Select</label>
        <select v-model="searchInput.ext_2">
          <option value="">Not selected</option>
          <option value="01">option1</option>
          <option value="02">option2</option>
          <option value="03">option3</option>
        </select>
      </p>
      <p>
        <label for="ext_3">Checkbox</label>
        <input v-model="searchInput.ext_3" type="checkbox" value="01">option1
        <input v-model="searchInput.ext_3" type="checkbox" value="02">option2
        <input v-model="searchInput.ext_3" type="checkbox" value="03">option3
      </p>
      <button type="button">Search</button>
    </div>
    <div v-if="Object.keys(searchResult).length > 0" class="search-result">
      <template v-if="(searchResult.errors || []).length === 0">
        <table>
          <tr>
            <th>ID</th>
            <th>Title</th>
            <th>Created at</th>
            <th>Text</th>
            <th>Select</th>
            <th>Checkbox</th>
          </tr>
          <tr v-for="content in searchResult.list" :key="content.topics_id">
            <td>{{ content.topics_id }}</td>
            <td>{{ content.subject }}</td>
            <td>{{ content.inst_ymdhi }}</td>
            <td>{{ content.ext_1 }}</td>
            <td>{{ content.ext_2 }}</td>
            <td>{{ content.ext_3 }}</td>
          </tr>
        </table>
      </template>
      <template v-else>
        {{ searchResult.errors }}
      </template>
    </div>
  </div>
</template>

<script>
export default {
  data() {
    return {
      searchInput: {
        subject: '',
        inst_ymdhi: {
          from: '',
          to: '',
        },
        ext_1: '',
        ext_2: '',
        ext_3: []
      },
      searchResult: {},
    }
  },
  mounted() {},
  methods: {}
}
</script>

<style scoped>
.search-form {
  border: 1px solid;
  padding: 10px;
}
.search-form label {
  display: block;
  float: left;
  width: 100px;
}
.search-result {
  width: 100%;
  margin-top: 20px;
}
.search-result table, th, td {
  border: solid 1px;
  border-collapse: collapse;
}
.search-result th, td {
  padding: 5px;
}
.search-result table {
  width: 100%;
}
</style>
The .search-form element displays a search form, and .search-result shows a search result.
Any user-entered values are stored in searchInput within the data object. The corresponding search result responses are stored in searchResult.
data() {
  return {
    // User input values (.search-form)
    searchInput: {
      subject: '',
      inst_ymdhi: {
        from: '',
        to: '',
      },
      ext_1: '',
      ext_2: '',
      ext_3: []
    },
    // Search result responses (.search-result)
    searchResult: {},
  }
},
Run the command npm run dev to launch your local environment and go to http://localhost:3000/search. You should see the form below.
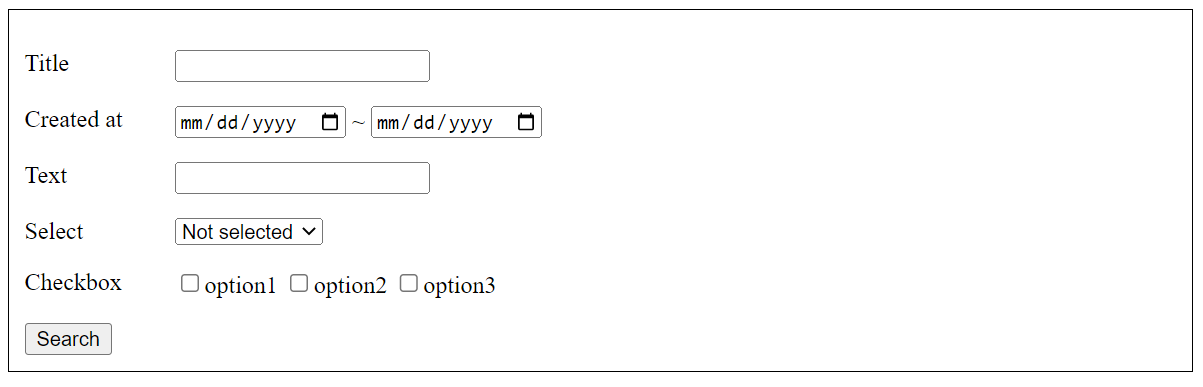
At this stage, nothing happens if you click the [Search] button, because you haven't implemented the endpoint call process yet. To do so, you must define methods and implement a search process by calling an endpoint.
First, create a search method. Write your process to call the endpoint you configured above and name it "2. Endpoint settings".
This method transfers the filter query generation process to the buildFilterQuery method. (The detailed mechanisms will be explained later.)
methods: {
  // Send request to the endpoint and store the fetch result in 'searchResult'.
  async search() {
    let searchResult;
    try {
      // Replace the endpoint URL below with your own.
      const response = await this.$axios.get("/rcms-api/3/content", {
        params: {
          filter: this.buildFilterQuery()
        }
      })
      searchResult = response?.data || {};
    } catch(errorResponse) {
      searchResult = { errors: errorResponse?.data?.errors || ['Unexpected error'] };
    }
    this.searchResult = searchResult;
  },
  // Generate filter query
  buildFilterQuery() {
    return '';
  }
}
Substitute /rcms-api/3/content above with the path shown in your own Kuroco admin panel.
Second, define the search method as a click event of the [Search] button, located at the bottom of the .search-form element.
<!--
    <button type="button">Search</button> <= add '@click="search"'
-->
<button type="button" @click="search">Search</button>
Third, write the specific process of buildFilterQuery. It converts the value stored in the searchInput data attribute to a filter query.
For this tutorial, we generate a query with the following conditions:
- Date: Specify range
- Text: Partial match
- Select: Full match
- Checkbox: Partial match
Fields with no input value are not included in the search conditions.
The generated query varies depending on the input format, target field, and functional requirements. Please implement the appropriate process based on your own environment.
methods: {
  // ...
  buildFilterQuery() {
    const filterQuery = Object.entries(this.searchInput).reduce((queries, [col, value]) => {
      switch (col) {
        // Date: Select range
        case 'inst_ymdhi':
          if (value.from !== '') {
            queries.push(`${col} >= "${value.from}"`);
          }
          if (value.to !== '') {
            queries.push(`${col} <= "${value.to}"`);
          }
          break;
        // Text: Partial match
        case 'subject':
        case 'ext_1':
          if (value !== '') {
            queries.push(`${col} contains "${value}"`);
          }
          break;
        // Select: Full match
        case 'ext_2':
          if (value !== '') {
            queries.push(`${col} = "${value}"`);
          }
          break;
        // Checkbox : Partial match
        case 'ext_3':
          if (value.length > 0) {
            queries.push('(' + value.map(v => `${col} contains "${v}"`).join(' OR ') + ')');
          }
          break;
        default:
          break;
      }
      return queries;
    }, []).join(' AND ');

    return filterQuery;
  }
}
Lastly, add the following code to mounted to display the contents list without condition specifications by default.
mounted() {
  this.search();
},
Now you have implemented the conditional search component. Test the form on your localhost to verify the results.

Implementing a keyword search
This section explains how to implement a keyword search function.
Based on the above conditional search implementation, you might have thought of connecting partial match conditions for each item with OR.
subject contains "KEYWORD" OR ext_1 contains "KEYWORD"
You can create a keyword search function simply using this approach. However, as the number of items increases, issues can arise when you pass long, complex queries like this one:
subject contains "KEYWORD" OR ext_1 contains "KEYWORD" OR ext_4 contains "KEYWORD" OR ext_5 contains "KEYWORD" OR ext_6 contains "KEYWORD" OR ...
Therefore, the filter function contains the following mechanism to implement simpler keyword search queries:
search_keyword contains "KEYWORD"
The steps below show you how to implement the search_keyword function.
Some sites work with keyword instead of search_keyword depending on when you applied for Kuroco.
If it does not work well, please try using keyword as well.
1. Create a content structure and an endpoint
For this tutorial, use the following content structure and endpoint:
Content structure
Use the conditional search you implemented above.
Endpoint
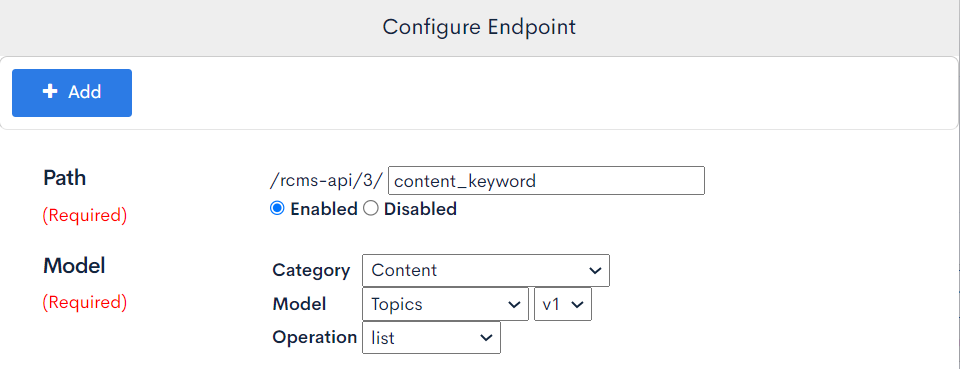
Create an endpoint with the following settings:
| Field | Value |
|---|---|
| Path | (/rcms-api/**/)content_keyword |
| Category | Content |
| Model | Topics (v1) |
| Operation | list |
| topics_group_id | (ID of the "Search" content group) |
The content group ID can be found on the Content structure list screen.
2. Configure the endpoint
On the search endpoint list page, select the endpoint you want to implement the search function for and click [Update].

On the pop-up screen, scroll down to the filter_request_allow_list field.

The allowed search items follow the formats below:
| Format | Description |
|---|---|
| search_keyword | Searches for all items (e.g., search_keyword). |
| search_keyword:[item 1,item 2,...] | Enter multiple search items separated with a comma (e.g., search_keyword:[subject]; search_keyword:[ext_1,ext_2]). |
The value :ALL includes search_keyword as a search item along with the other items specified.
For this tutorial, enter search_keyword:[subject,ext_1] to set the title and text as the search items.

Click [Update] to save the settings.
3. Verify the endpoint operations
On the API endpoint list screen, click [Swagger UI].
 On the Swagger UI screen, click the endpoint you created.
Click [Try it out] to begin the verification.

For this tutorial, we want to generate a search query with a partial match using the contains command.
Enter search_keyword contains "1" in the filter parameter.

Click [Execute].
Verify the responses displayed.
4. Implement the search function
Next, implement the search function using the endpoint you set up earlier.
For this tutorial, we use Nuxt.js to create the components for a simple search form and search result table.
First, create the following component under the file name pages/search_keyword/index.vue.
<template>
  <div>
    <div class="search-form">
      <p>
        <label for="keyword">Keyword</label>
        <input v-model="searchInput.search_keyword" type="text">
      </p>
      <button type="button" @click="search">Search</button>
    </div>
    <div v-if="Object.keys(searchResult).length > 0" class="search-result">
      <template v-if="(searchResult.errors || []).length === 0">
        <table>
          <tr>
            <th>ID</th>
            <th>Title</th>
            <th>Created at</th>
            <th>Text</th>
            <th>Select</th>
            <th>Checkbox</th>
          </tr>
          <tr v-for="content in searchResult.list" :key="content.topics_id">
            <td>{{ content.topics_id }}</td>
            <td>{{ content.subject }}</td>
            <td>{{ content.inst_ymdhi }}</td>
            <td>{{ content.ext_1 }}</td>
            <td>{{ content.ext_2 }}</td>
            <td>{{ content.ext_3 }}</td>
          </tr>
        </table>
      </template>
      <template v-else>
        {{ searchResult.errors }}
      </template>
    </div>
  </div>
</template>

<script>
export default {
  data() {
    return {
      searchInput: {
        search_keyword: '',
      },
      searchResult: {},
    }
  },
  mounted() {
    this.search();
  },
  methods: {
  async search() {
      let searchResult;
      try {
        // Replace with your own endpoint URL.
        const response = await this.$axios.get("/rcms-api/3/content_keyword", {
          params: {
            filter: this.buildFilterQuery()
          }
        })
        searchResult = response?.data || {};
      } catch(errorResponse) {
        searchResult = { errors: errorResponse?.data?.errors || ['Unexpected error'] };
      }
      this.searchResult = searchResult;
    },
    // Generate filter query.
    buildFilterQuery() {
      return '';
    }
  }
}
</script>

<style scoped>
.search-form {
  border: 1px solid;
  padding: 10px;
}
.search-form label {
  display: block;
  float: left;
  width: 100px;
}
.search-result {
  width: 100%;
  margin-top: 20px;
}
.search-result table, th, td {
  border: solid 1px;
  border-collapse: collapse;
}
.search-result th, td {
  padding: 5px;
}
.search-result table {
  width: 100%;
}
</style>
Substitute /rcms-api/3/content_keyword above with the path shown in your own Kuroco admin panel.
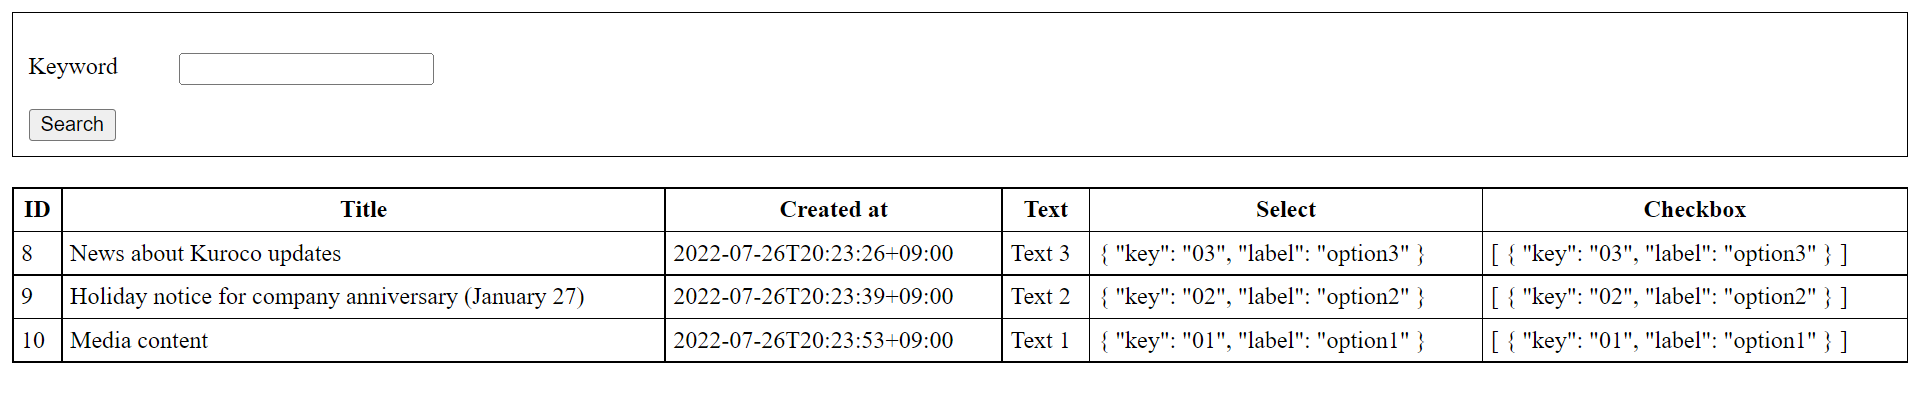
Run the npm run dev command to launch your local environment and go to http://localhost:3000/search_keyword. You should see the form below.
Use the same attribute definitions as the conditional search above, except for the following:
- The
.search-formelement in the template - The
searchInputproperty of thedataobject - The
buildFilterQuerymethod
For the .search-form element, define only the keyword input field. Store the entered value in searchInput.search_keyword.
<div class="search-form">
    <p>
    <label for="keyword">Keyword</label>
    <input v-model="searchInput.keyword" type="text">
    </p>
    <button type="button" @click="search">Search</button>
</div>
data() {
  return {
    searchInput: {
      search_keyword: '',
    },
    searchResult: {},
  }
},
As the final step of implementing the keyword search function, edit buildFilterQuery to include the keyword search query generation process.
methods: {
  // ...
  buildFilterQuery() {
    const filterQuery = Object.entries(this.searchInput).reduce((queries, [col, value]) => {
      switch (col) {
        case 'search_keyword':
          if (value !== '') {
            queries.push(`${col} contains "${value}"`);
          }
          break;
        default:
          break;
      }
      return queries;
    }, []).join(' AND ');
    return filterQuery;
  }
}
Now you are ready to test the form on your localhost and verify the results.

Appendix: Implementing Search Across Multiple Content Definitions
When searching across multiple content definitions, the following must be identical in each content definition:
- Type of field setting
- Slug of content field
- ID of content field
(When adding items with empty fields, numbers will increment, so please adjust to ensure they are identical.)
Appendix: Using a commercial service
In this tutorial, we will not go into specific details, but if you need to search through tens of thousands of records or require fast retrieval of large amounts of data, there is also an option to use external services. There are no particular usage restrictions, so please consider the following as a reference as well.
Related documents
Support
If you have any other questions, please contact us or check out Our Slack Community.