Bulk uploading using the `bulk_upsert` API
The bulk_upsert API operation enables you to update multiple content posts at once.
To do this, you have to import data into the Content module in CSV format. The uploaded CSV file is subject to the following conditions:
- It has to be uploaded manually to KurocoFiles.
- The uploading process is batch executed at midnight (0:00) every day.
- A new uploading process will be initiated if you update any files between 0:00 the previous day and 0:00 today.
- If there is existing content, it will be updated by the uploaded data. Otherwise, new content will be created.
- The uploaded CSV file will be encoded in UTF-8.
CSV file
For this tutorial, we will upload the following list of mobile devices.
| item_number | item_name | category | description | status | item_color | release_date | is_public |
|---|---|---|---|---|---|---|---|
| 00000001 | SmartPhone | SP | Smartphone | 1 | black,white,red,blue | 2020/12/10 | TRUE |
| 00000002 | SmartPhone Lite | SP | popular edition Smartphone | 1 | black,white | 2021/12/10 | TRUE |
| 00000003 | Tablet | TB | Tablet | 0 | silver | 2020/1/15 | FALSE |
| 00000004 | Tablet 2 | TB | Tablet (2nd gen) | 1 | silver | 2022/1/15 | TRUE |
Below is an explanation of each column in this CSV file.
| Column | Label | Input type | Value |
|---|---|---|---|
| item_number | Item code | Number | A unique 8-digit number for each item. |
| item_name | Item name | Text | Name or type of the item. |
| category | Item category | Text |
|
| description | Item description | Text | A description or comment about the item. |
| status | Availability | Number |
|
| item_color | Color(s) | Text | Color of the item. Separate multiple values for the same item with commas. |
| release_date | Release date | Date (yyyy/mm/dd) | Item release date. |
| is_public | Public status | Text |
|
Content structure setup
To import each row of the CSV file as a separate content post, we need to create a content structure containing fields that match the columns of the uploaded data.
If a corresponding default field exists, use the default field.
Otherwise, create an additional field and set the CSV column name as the identifier.
1. Create a content structure
Start a new content structure.
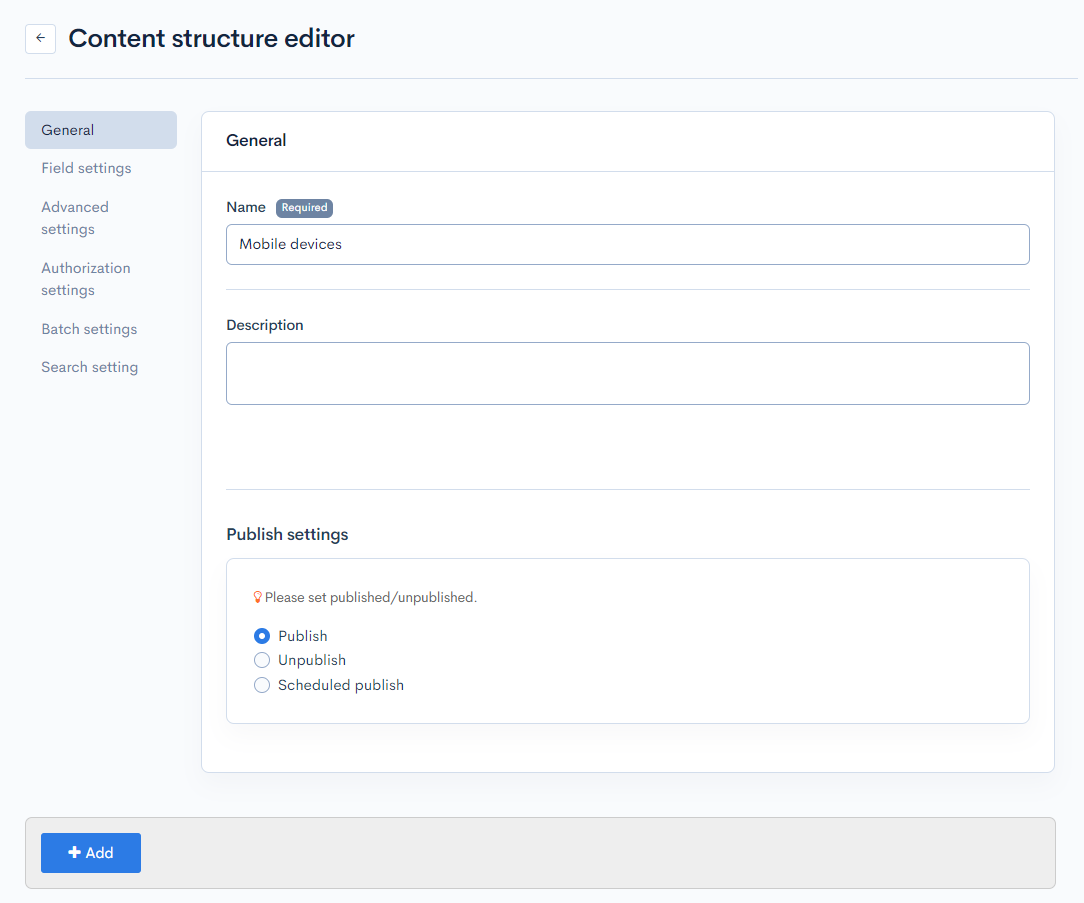
In the default part of the editor, enter the following:
| Field | Value |
|---|---|
| Name | Mobile devices |
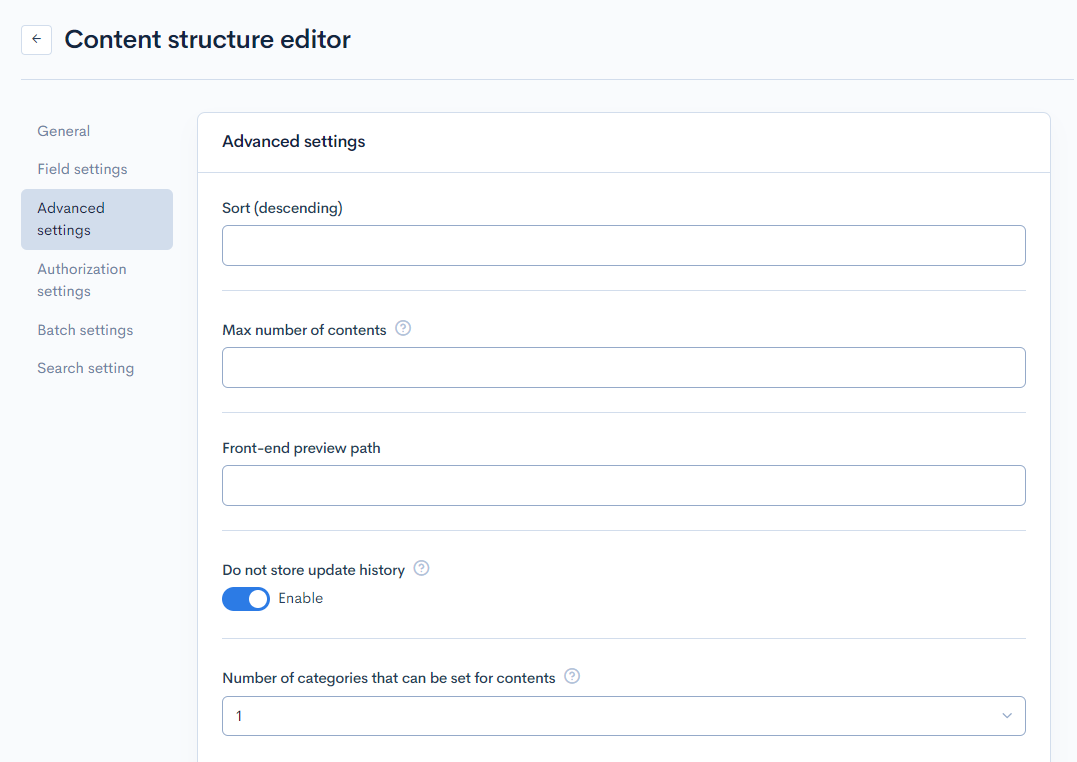
| Do not store update history | Select "Enable". |
By default, the content structure contains the fields below.
| Field name | Identifier (CSV column name) | API endpoint parameter | Description |
|---|---|---|---|
| ID/Slug | item_number | slug | When sending requests to the bulk_upsert endpoint, slug needs to have a text value. Therefore, a prefix is automatically added to yield this input format: ITEM-%%item_number%%. |
| Date | release_date | ymd | - |
| Category | category | contents_type | - |
| Title | item_name | subject | - |
| Publish setting | is_public | open_flg | A value of TRUE corresponds to a published content status, while FALSE corresponds to unpublished. |
2. Add the corresponding fields
Next, set up the additional fields as follows:
| Field ID | Field name | Identifier (CSV column name) | Format (field settings) | Description |
|---|---|---|---|---|
| 1 | Item code | item_number | Single-line text | This is the same CSV column that is mapped to "ID/Slug", but here the original numerical value is retrieved without the prefix. |
| 2 | Description | description | Multi-line text | - |
| 3 | Availability | status | Single choice | Set the following options:
|
| 4 | Color(s) | item_color | Multiple choice | Set the following options:
|
For the additional fields, the endpoint parameters will be the same as the custom-defined identifiers.


When you are done, click [Add] at the bottom of the screen the save this content structure.

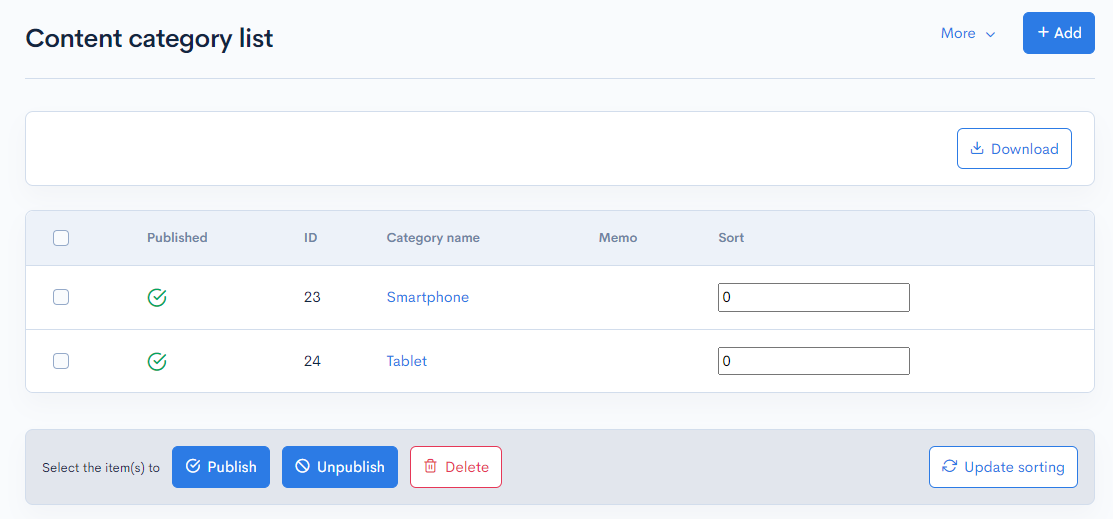
3. Create categories
Finally, create categories to classify your mobile devices. "Category name" is the item category value, and "Field 01" is the key.
| Category ID | Category name | Field 01 |
|---|---|---|
| (Auto-generated) | Smartphone | SP |
| (Auto-generated) | Tablet | TB |
Create an admin account to run the back-end processes
Now we need to create an account to run the back-end process. The member ID will be used in the batch process.
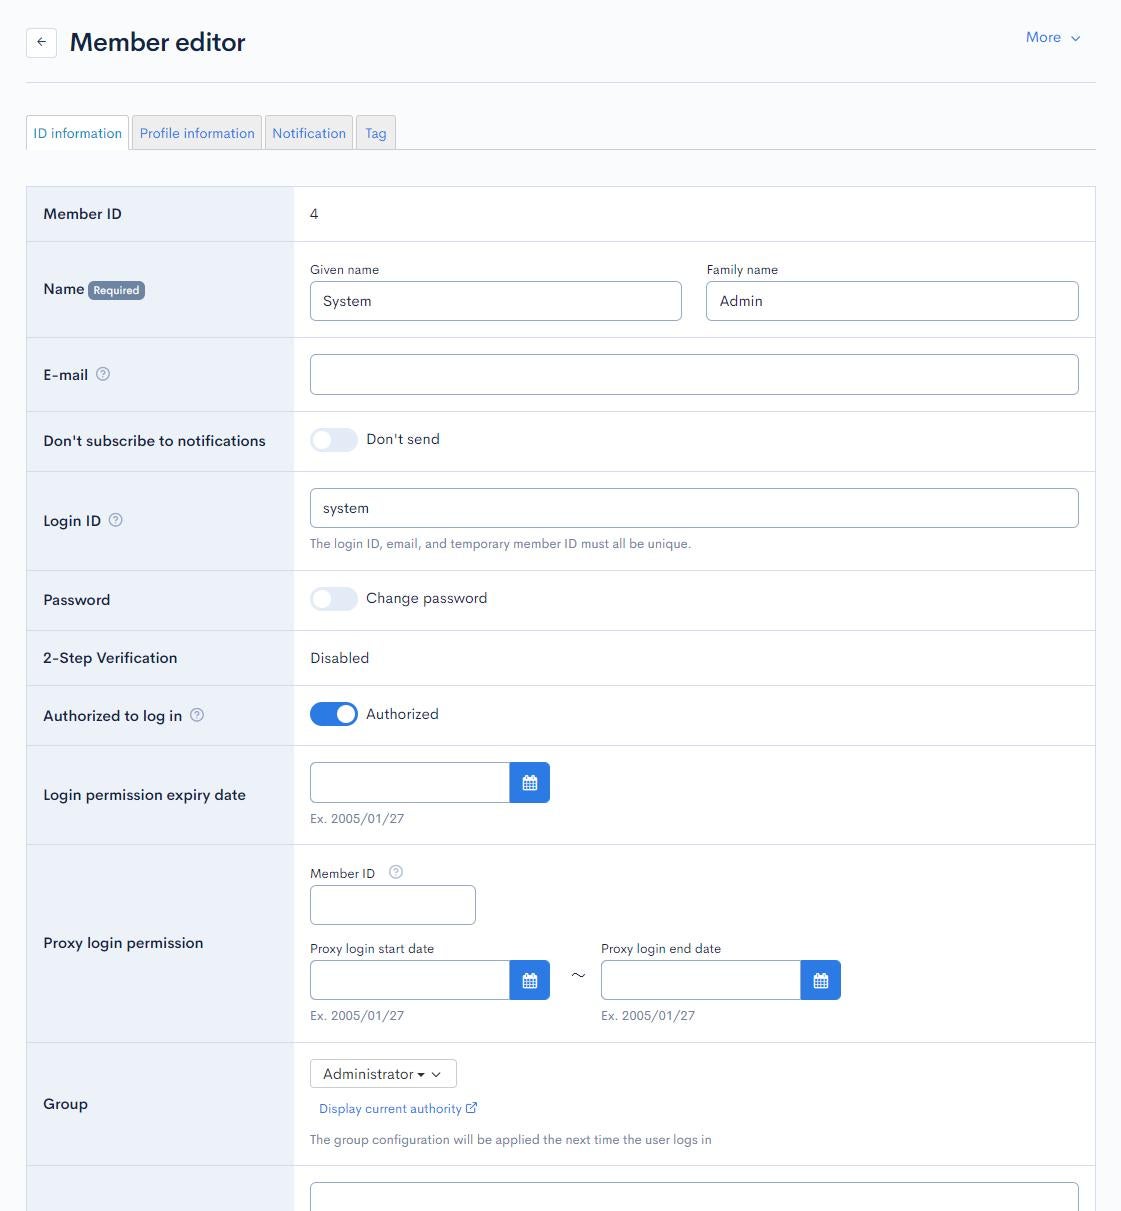
Create a new member
Open the Member editor and set up a new account as follows:
| Field | Value | Description |
|---|---|---|
| Name | System Admin | Enter a value for back-end use only. |
| (your e-mail) | Enter your e-mail address. | |
| Login ID | system | Enter a value for back-end use only. |
| Password | (any password) | Set a strong, unique password. |
| Group | Admin | Select a group with superuser privileges. For this tutotial, we are using the default group "Admin" (group ID = 1). |

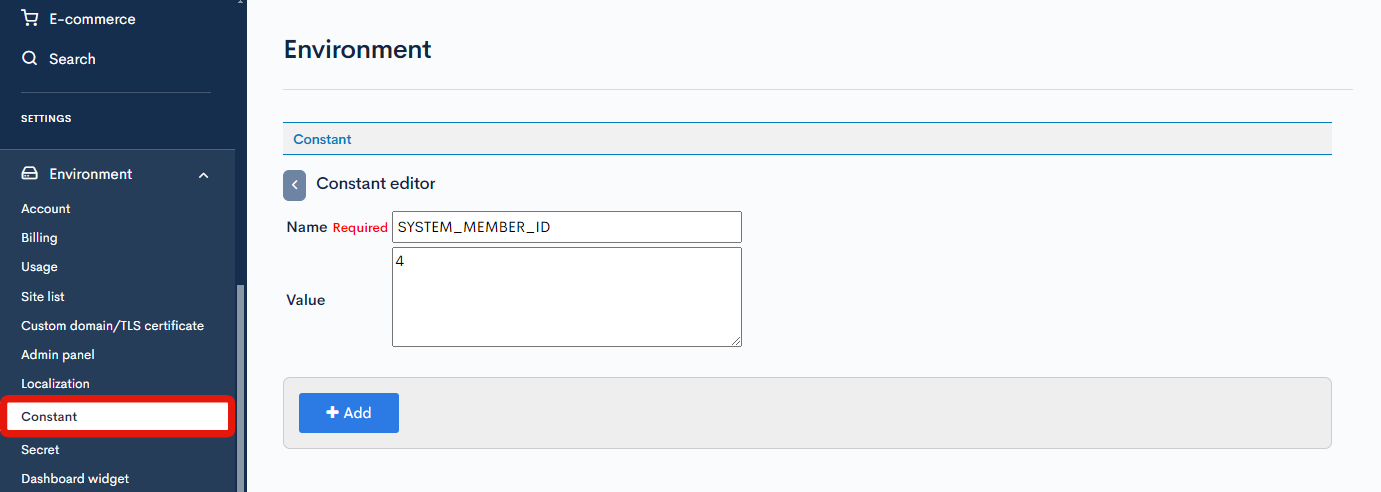
Define the constants
You also need to add a new constant for the batch process.
| Field | Value |
|---|---|
| Name | SYSTEM_MEMBER_ID |
| Value | (Enter the member ID of the "System Admin" account you created above.) |
API settings
Create a new API
Access the API screen and create a new API to set the endpoint for backend processing.
Mixing endpoints with different purposes (for front-end, back-end, etc.) in the same API complicates authentication settings. Since this may increase security risks, it is recommended to separate the API settings by usage.
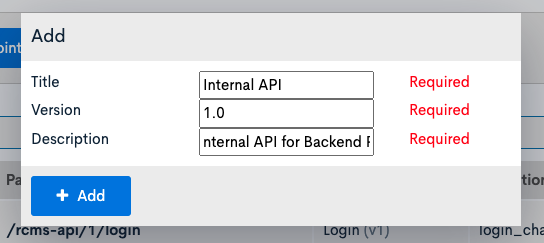
| Item name | Value | Description |
|---|---|---|
| title | Internal API | Set a value that makes it easy to identify that it is for backend use. |
| version | 1.0 | |
| description | Internal API for Backend Process |
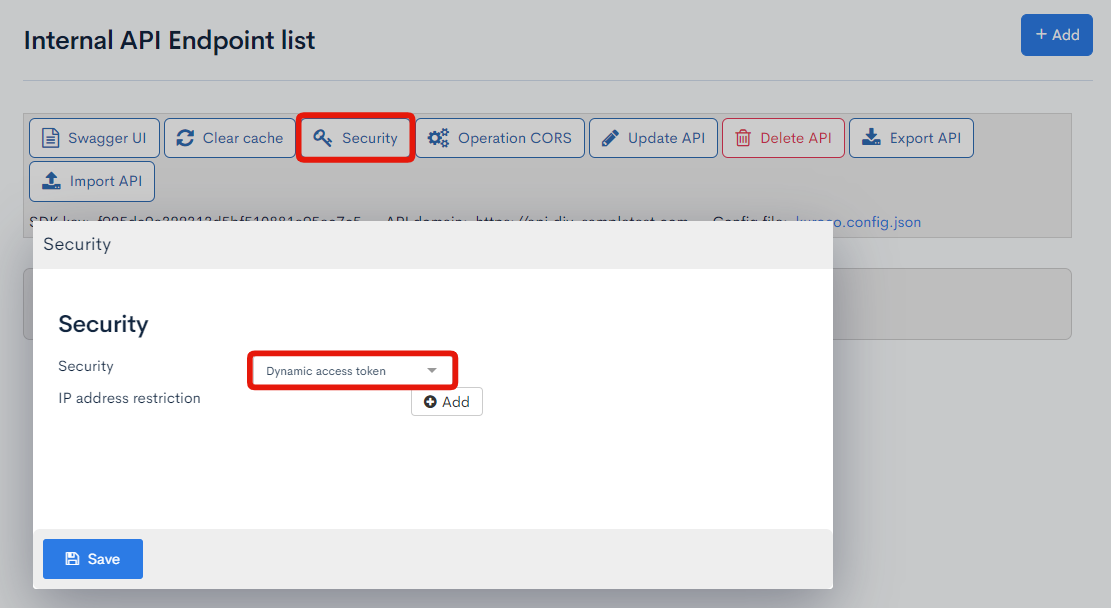
After creating the API, click [Security], select [Dynamic Access Token], and save.
Add the bulk_upsert endpoint
Click the [Add new endpoint] button to add the bulk_upsert endpoint to the API you just set up.
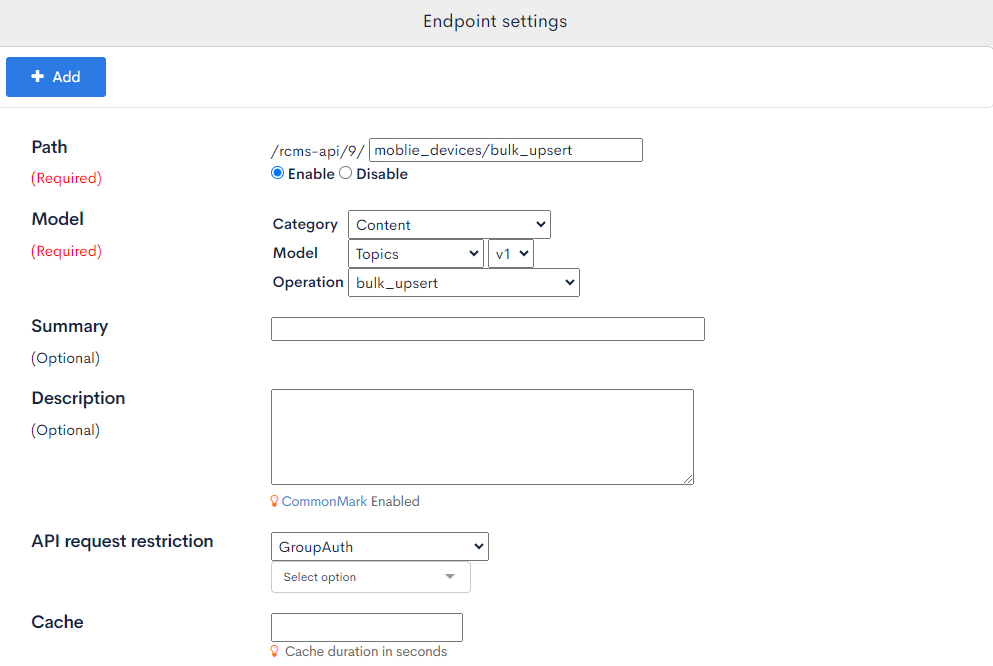
| Item name | Value | Description |
|---|---|---|
| Path | mobile_devices/bulk_upsert | |
| Model | categoryー: Content Model: Topics (v1) Operation: bulk_upsert | |
| API request restriction | GroupAuth (Admin) | Set a group that the member created previously at Create a new member belongs to. |
For the basic settings and advanced settings, set the following values.
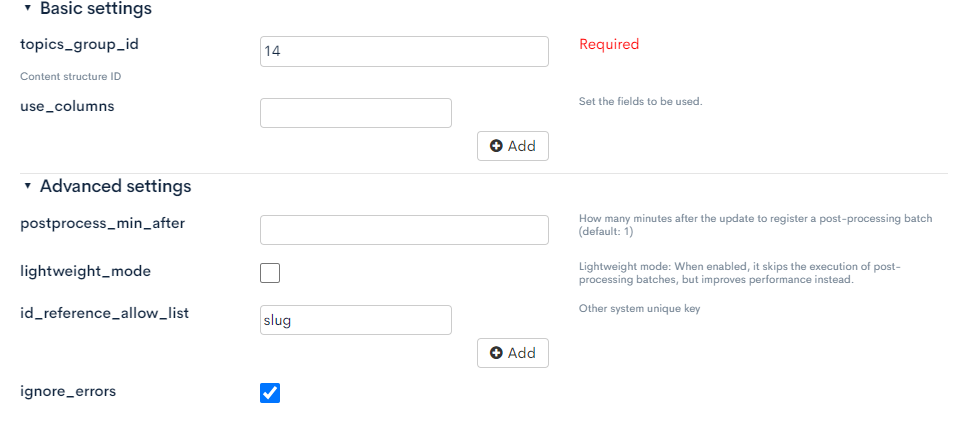
| Parameter name | Value | Description |
|---|---|---|
| topics_group_id | 14 | ID of the topics group to be updated. Set the ID numbered to the topics group "mobile device" created previously. |
| id_reference_allow_list | slug | Set items that can be specified as keys when updating content. Detail is explained below. |
| ignore_errors | true | Ignores rows with validation errors and add/update only valid content. |
Regarding id_reference_allow_list parameter
When updating existing content with the bulk_upsert API, you need to specify the topics_id which is the key to identify the target content. Normally, we specify the number automatically assigned by Kuroco as follows.
{
    "topics_id": 1,
    "slug": "ITEM-00000001",
    "subject": "Smartphone",
    ...
}
The problem here is how to identify the topics_id to be updated.
For other items, values can be converted from the CSV file, but topics_id is data held only by Kuroco. In order to identify this value, it is necessary to call the list API in advance to obtain the existing content. However, implementing this has the following problems:
- Program gets complicated
- Process time increases
id_reference_allow_list is a parameter prepared to solve the above. If it is set, you can add or update content using any item as a key instead of topics_id. For example, if slug is set like this time, the following requests can be specified.
{
    "topics_id": "slug",
    "slug": "ITEM-00000001",
    "subject": "Updated Title",
    ...
}
If the above data is sent, if the content of slug = "ITEM-00000001" already exists, it will be updated, otherwise it will be newly added. This makes it possible to add content using only the ID of the original data without considering the topics_id numbered by Kuroco.
Implement batch process
Using the settings set up so far, we will implement batch process that executes daily import.
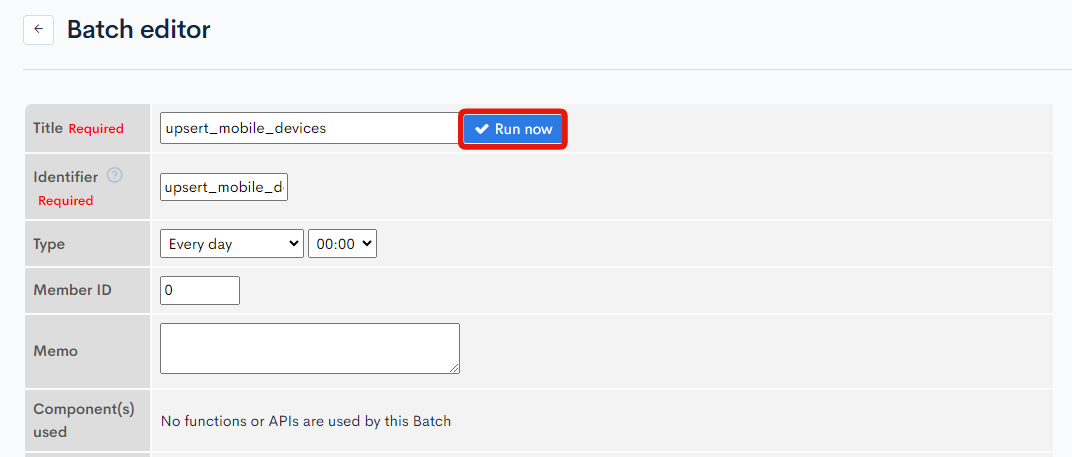
First, access the Batch editor screen and enter the following contents.
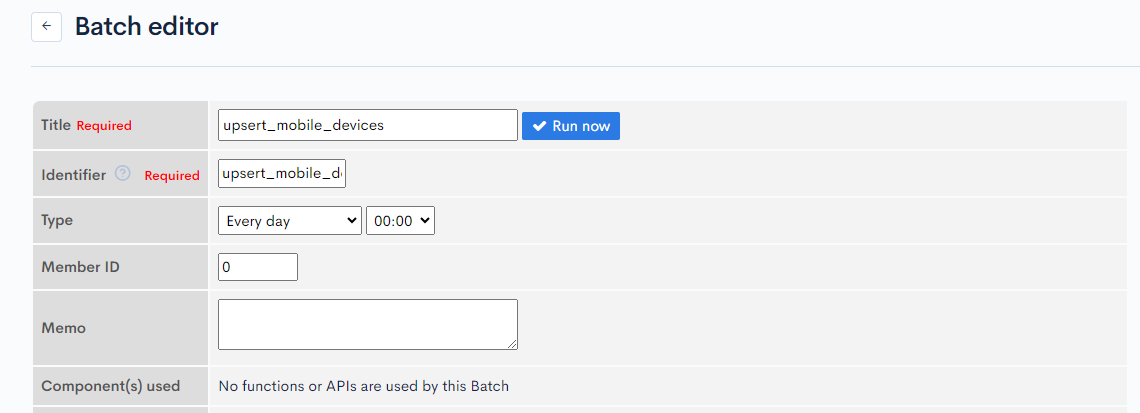
| Item name | Value |
|---|---|
| Title | upsert_mobile_devices |
| Identifier | upsert_mobile_devices |
| Type | Every day/00:00 |
After entering above, enter the following code in the Process field and click [Add].
{*
    Pre-processing
*}
{* Authenticate using the member ID set in the constant *}
{login member_id=$smarty.const.SYSTEM_MEMBER_ID overwrite=true}

{* Check if CSV file is placed *}
{assign var='uploaded_csv_path' value='/files/ltd/bulk_upsert/mobile_devices.csv'}
{if !$uploaded_csv_path|rcms_file_exists}
    {logger msg1='upsert_mobile_devices' msg2='CSV file is not found'}
    {return}
{/if}
{* Check the update date and time of CSV file *}
{assign var='csv_updated_at' value=$uploaded_csv_path|rcms_file_mtime}
{if $csv_updated_at < '-1 day 0:00:00'|strtotime}
    {logger msg1='upsert_mobile_devices' msg2='CSV file is not updated'}
    {return}
{/if}

{* %% bulk_upsert %% *}
Next, replace the commented part {* %% bulk_upsert %% *} in the code above with the actual content update process.
First, access the Swagger UI screen and select the endpoint mobile_devices/bulk_upsert created previously.
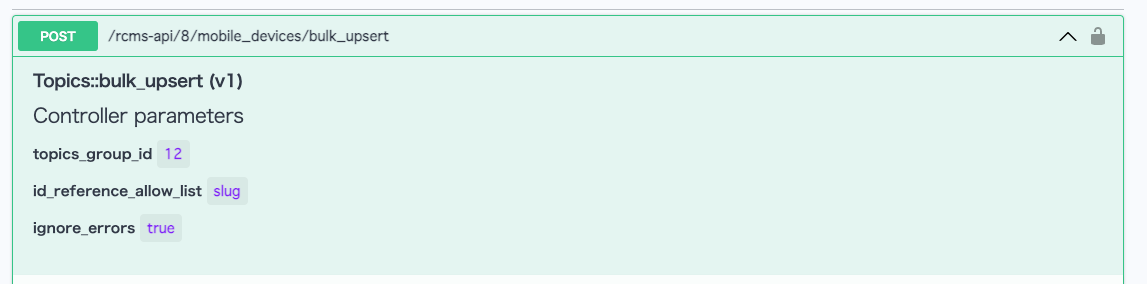
Click [Request body] -> [Schema] to see the definition of the request body accepted by the bulk_upsert endpoint.
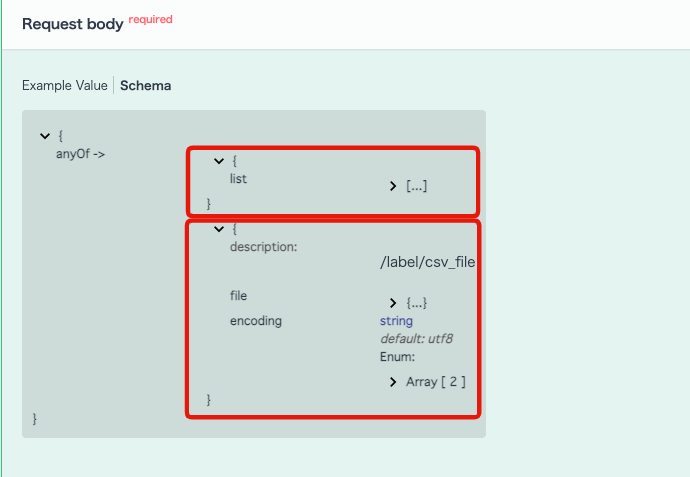
The bulk_upsert API accepts request bodies in the following two formats. This time, we will proceed with processing using the JSON format.
| Format | Request body |
|---|---|
| JSON | {"list": [{...}]} |
| CSV file | {"file": {...}, "encoding": "..."} |
When updating in JSON format
You can see a detailed definition of each item by expanding the list property from the Request body schema.
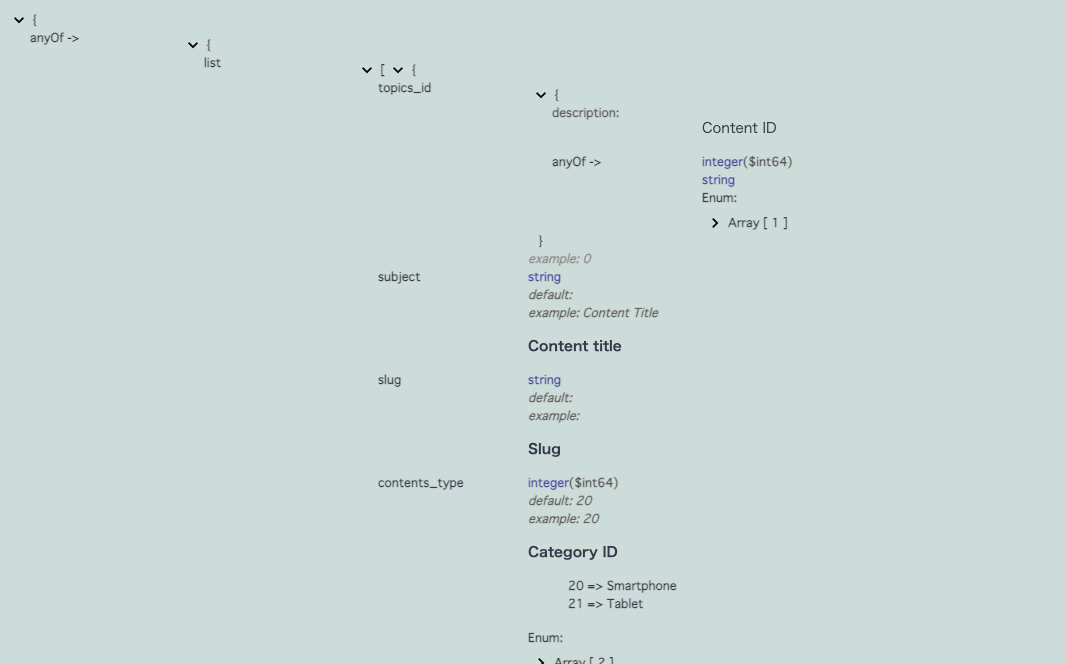
Comparing the above schema with the items we are updating, we can see that the request body should look something like this:
{
    "list": [
        {
            "topics_id": "slug",
            "slug": "ITEM-00000001",
            "subject": "SmartPhone",
            "contents_type": 78,
            "open_flg": 1,
            "ymd": "2020-12-10",
            "item_number": "00000001",
            "description": "Smartphone",
            "status": "1",
            "item_color": ["black", "white", "red", "blue"]
        },
        {
            "topics_id": "slug",
            "slug": "ITEM-00000001",
            // ...
        },
        // ...
    ]
}
Now that we know the format of the request body to pass to the endpoint, we can implement batch process. Add the following code to the batch process created earlier and click the [Update] button.
{*
    Initiate necessary constants
*}
{* json body ({"list": []}) passed to bulk_upsert endpoint *}
{assign_array var='bulk_upsert_body'      values=''}
{assign_array var='bulk_upsert_body.list' values=''}

{assign_array   var='csv_header' values=''}{* CSV header ([]) *}
{assign         var='chunk_unit' value=1000}{* Unit for split upload *}

{*
    Get the total number of rows of CSV to be processed in advance
*}
{assign var='last_index' value=-1}
{read_file name='uploaded_csv' row='csv_row' type='csv' path=$uploaded_csv_path}
    {assign var='last_index' value=$last_index+1}
    {logger msg1="last_index取得処理" msg2=$last_index}
{/read_file}

{*
    Update process
*}
{* index indicating the row being processed *}
{assign var='i' value=0}
{* Read CSV file *}
{read_file name='uploaded_csv' row='csv_row' type='csv' path=$uploaded_csv_path}
    {if !$csv_row|@is_array}
        {logger msg1='upsert_mobile_devices' msg2='Invalid csv row' msg3=$csv_row}
    {elseif $i === 0}
        {* Get CSV header *}
        {assign var='csv_header' value=$csv_row}
        {$csv_header|@rcms_json_encode}
        {logger msg1="CGet CSV header" msg2=$csv_row}
    {else}
        {logger msg1="Get CSV header"}
        {* CSV行の変換 *}
        {assign_array var='topics'           values=''}
        {assign       var='topics.topics_id' value='slug'}{* add/update slug as key *}
        {foreach from=$csv_row key='k' item='v'}
            {assign var='col_name'   value=$csv_header[$k]}{* Get CSV Item name *}
            {if     $col_name == 'item_number'}
                {* Product no. *}
                {assign var='topics.slug'        value="ITEM-`$v`"}
                {assign var='topics.item_number' value=$v}
            {elseif $col_name == 'item_name'}
                {* Item name *}
                {assign var='topics.subject' value=$v}
            {elseif $col_name == 'category'}
                {* category *}
                {if     $v == 'SP'}
                    {assign var='topics.contents_type' value=78}
                {elseif $v == 'TB'}
                    {assign var='topics.contents_type' value=79}
                {/if}
            {elseif $col_name == 'item_color'}
                {* color *}
                {assign var='topics.item_color' value=','|explode:$v}
            {elseif $col_name == 'release_date'}
                {* release date *}
                {strtodate var='topics.ymd' format='Y-m-d' timestamp=$v}
            {elseif $col_name == 'is_public'}
                {* public/private *}
                {if $v == 'TRUE'}
                    {assign var='topics.open_flg' value=1}
                {else}
                    {assign var='topics.open_flg' value=0}
                {/if}
            {else}
                {* Others *}
                {assign var="topics.`$col_name`" value=$v}
            {/if}
        {/foreach}
        {* Add to JSON body ({"list": [..., {...}]}) *}
        {assign var='bulk_upsert_body.list.' value=$topics}
    {/if}
    {* Update by dividing for each number defined in $chunk_unit *}
    {if $bulk_upsert_body|@count === $chunk_unit ||
        ($i === $last_index && $bulk_upsert_body|@count > 0)}
        {* Request to bulk_upsert endpoint (Add _async=true parameter and execute in batch process) *}
        {api_internal
            var='bulk_upsert_response'
            status_var='bulk_upsert_status'
            endpoint='/rcms-api/8/mobile_devices/bulk_upsert?_async=true'
            method='POST'
            queries=$bulk_upsert_body
            member_id=$smarty.session.member_id}
        {* Output to log if failed *}
        {if !$bulk_upsert_status || $bulk_upsert_response.errors}
            {logger msg1='upsert_mobile_devices' msg2='Request failed' msg3="index: `$i`" msg4=$bulk_upsert_response}
        {/if}
        {* JSON bodyの初期化 ({"list": []}) *}
        {assign_array var='bulk_upsert_body.list' values=''}
    {/if}
    {logger msg1=$i msg2=$last_index msg3=$topics msg4=$csv_row}
    {assign var='i' value=$i+1}
{/read_file}
Replace /rcms-api/8/mobile_devices/bulk_upsert with your own endpoint.
Use the category ID in your environment for {assign var='topics.contents_type' value=78}、{assign var='topics.contents_type' value=79}.
We supplement the details of the processing.
About reading CSV files
read_file is a plugin for reading text data line by line. It can be used to read CSV files by specifying csv for the type parameter.
The character code that can be read by read_file is UTF-8 only.
{read_file name='uploaded_csv' row='csv_row' type='csv' path=$uploaded_csv_path}
    {* ... *}
{/read_file}
The CSV row data is assigned to the variable name $csv_row specified by the row parameter. You can check the contents of the data by writing the following process inside the {read_file}{/read_file} block.
{$csv_row|@rcms_json_encode}
The following array data is output. The request body is generated by transforming these values based on the field definition.
["00000001", "SmartPhone", "SP", "Smartphone", "1", "black,white,red,blue", "2020/12/10", "TRUE"]
About adding/updating contents
The api_internal plugin is used to call the bulk_upsert endpoint for adding/updating content.
Please refer to Can I call Kuroco's API from custom function? for more information on how to use it.
{api_internal
    var='bulk_upsert_response'
    status_var='bulk_upsert_status'
    endpoint='/rcms-api/23/mobile_devices/bulk_upsert?_async=true'
    method='POST'
    queries=$bulk_upsert_body
    member_id=$smarty.session.member_id}
The endpoint path has the _async=true parameter to execute API processing asynchronously.
Calls to endpoints are typically synchronous. After submitting the request, you need to wait for the processing to complete. However, since the bulk_upsert API handles a large amount of content at once, depending on the number of CSV data, it may take some time to complete the process, resulting in a timeout.
If you use the _async=true parameter, it will only register the batch process and return the response immediately without executing the addition/update process at the time of the request. The processing of the called API is executed in a separate process from the caller, so timeout issues can be avoided. Specify this when the number of data to be updated is large.
Check the operation
Now that the settings have been completed, let's check the operation.
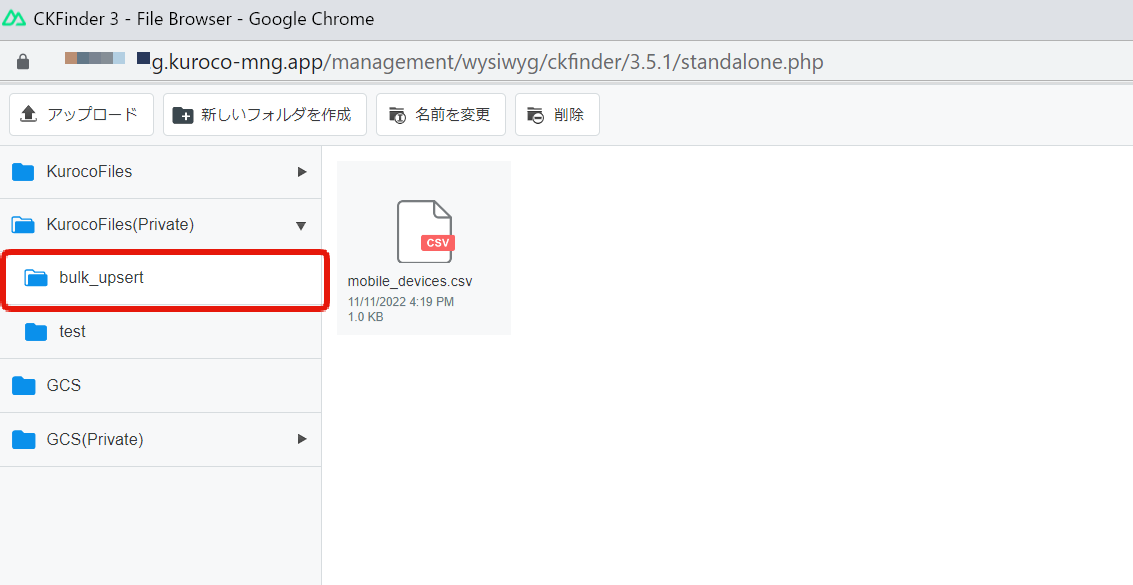
First, place the CSV file (mobile_devices.csv) in the directory (/ltd/bulk_upsert) specified by batch processing.
Since the KurocoFiles (Private) folder will be ltd, create a bulk_upsert folder under it and set the CSV file.
Next, access the editor screen created previously and click [Run now].
If you check the contents list of "mobile device", you can see that the contents are registered from CSV.
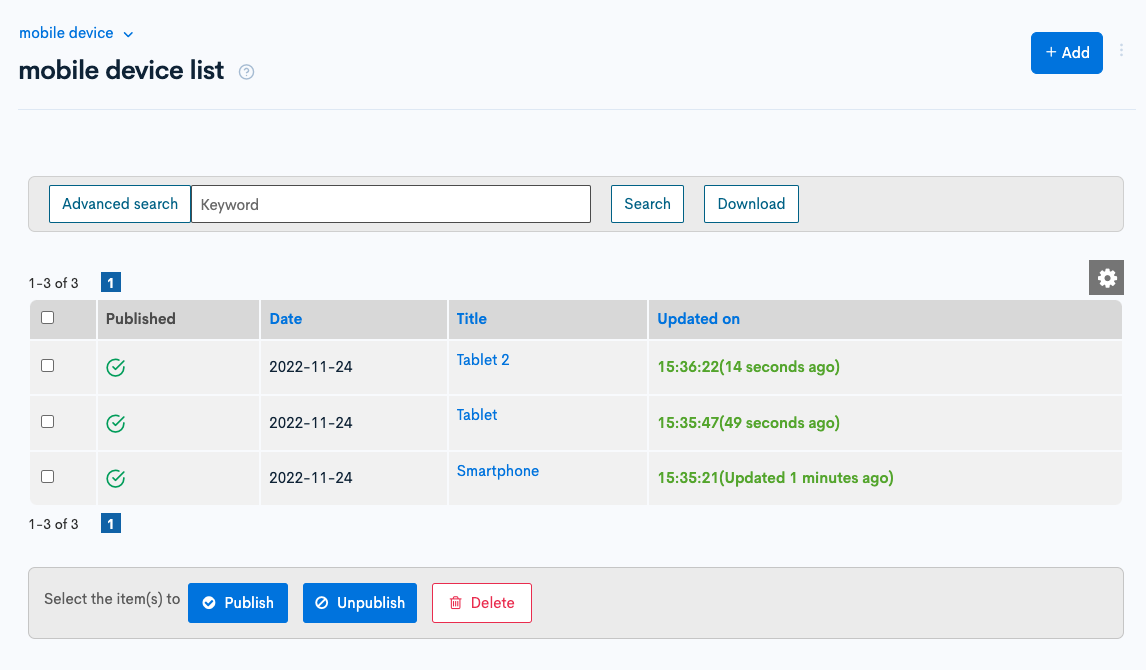
Confirmation of operation is completed.
Related documents
Support
If you have any other questions, please contact us or check out Our Slack Community.