Restoring a site from a backup
Overview
In Kuroco, you can select a backup as the source when adding a site from the Site list to create a sub-site in the state at the time the backup was taken.
To return an existing site to the state at the time of a backup, first create a sub-site from the backup and check its content. Then, use that sub-site as the sync source and run a full sync to the existing site.
This tutorial explains these steps.
What you will learn
You will restore a site from a backup with the following steps:
- Create a sub-site from a backup
- Check the content of the sub-site
- Return the existing site with a full sync
Prerequisites
- All operations are performed in the admin panel of the main site. The Site list is displayed only on the main site.
- A backup of the site you want to restore has been taken on the Backup screen. Only completed, unexpired backups can be selected as the source. Both manual backups and auto backups can be selected.
A full sync overwrites a wide range of data on the sync target with the content of the sync source, including not only content but also members and inquiry data. Data added or updated on the sync target after the backup was taken will be lost by the full sync.
See the Sync item list for the items that are synchronized.
Items that are not synchronized even by a full sync are not returned to the state at the time of the backup. These include KurocoFront settings, mail (SendGrid, Amazon SES, SMTP) and messaging (Slack, LINE, etc.) settings, custom domain/TLS certificate, secrets, and external system integrations such as GitHub. For log management, only aggregate data is synchronized.
Check the items marked ✗ or partially synchronized for full sync in the Sync item list, and configure them individually on the site to be restored as needed.
Before proceeding, we recommend taking a backup of the current state of the site to be restored.
Create a sub-site from a backup
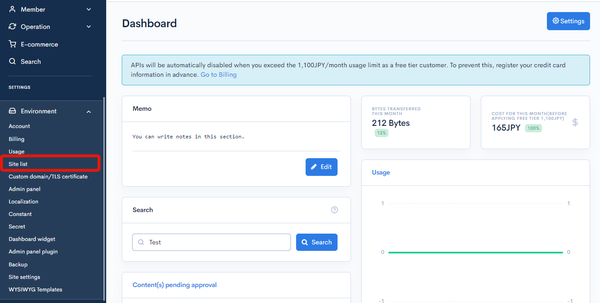
In the left sidebar menu, click [Environment] -> [Site list].
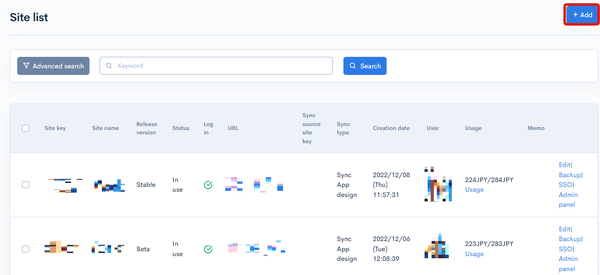
Click [Add].
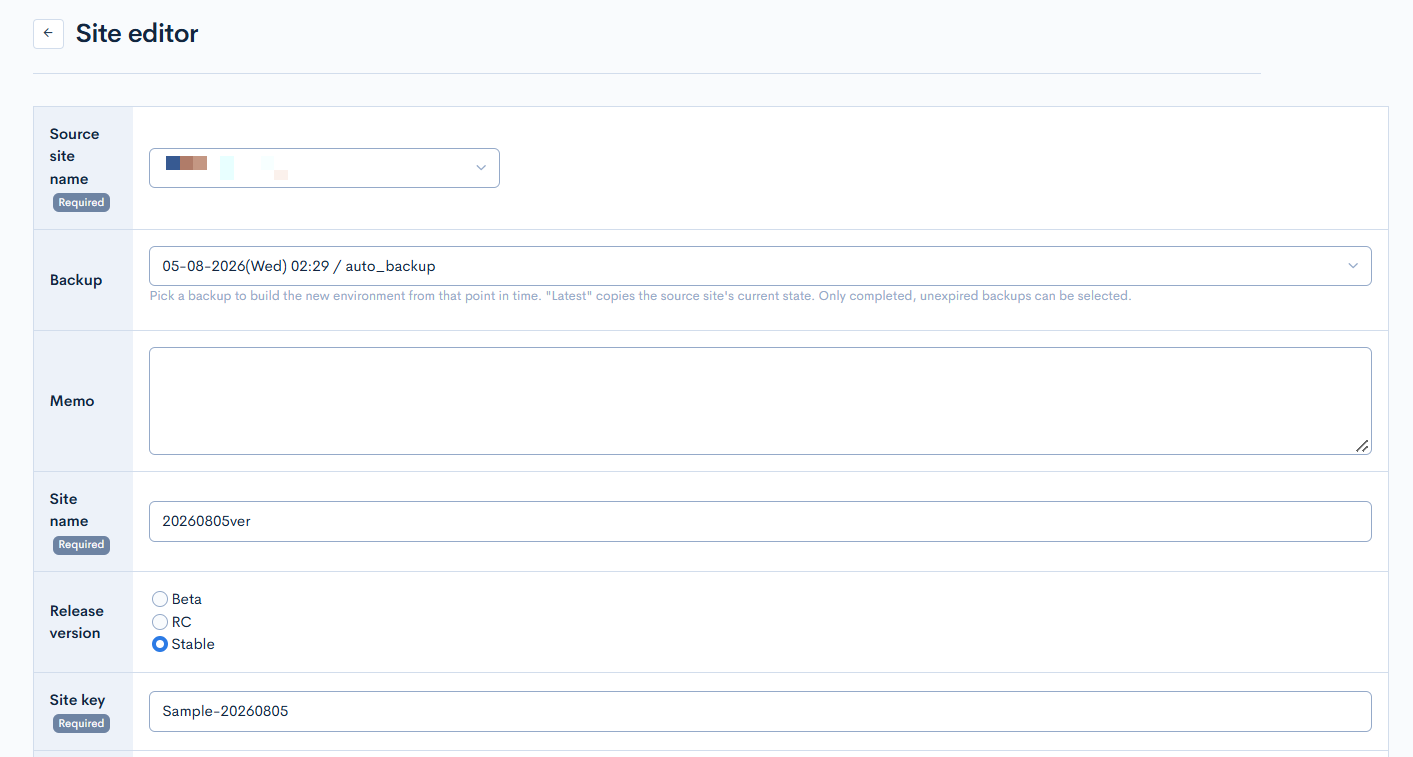
On the site addition screen, enter the following and click [Add].
| Field | Setting |
|---|---|
| Source site name | Select the site you want to restore. |
| Backup | Select the backup of the point in time you want to return to. Each option shows the backup date and time and the memo. Only backups of the site selected in [Source site name] are listed. |
| Site name | Enter any site name. |
| Site key | Enter any site key. |
For the other fields, see Site list.
If you select [Latest] in [Backup], the site is created by copying the current state of the source site instead of a backup.
Check the content of the sub-site
In the Site list, click [Admin panel] or [SSO] of the sub-site you created to open the admin panel of the sub-site.
Check that the content, settings, and other data are in the state of the point in time you want to return to.
Return the existing site with a full sync
After checking the content of the sub-site, run a full sync to the existing site with the sub-site as the sync source.
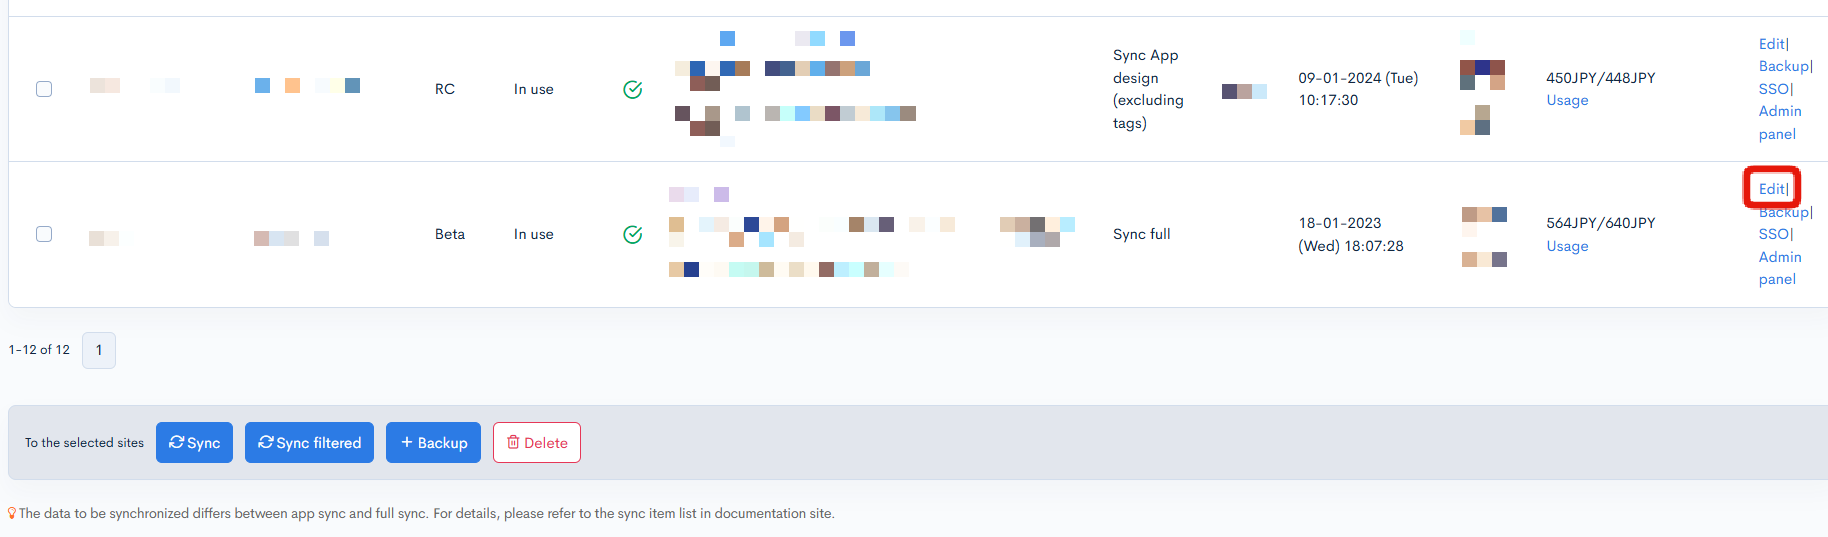
Click [Environment] -> [Site list], and click [Edit] for the site to be restored.
Configure the following in [Synchronization] and click [Update].
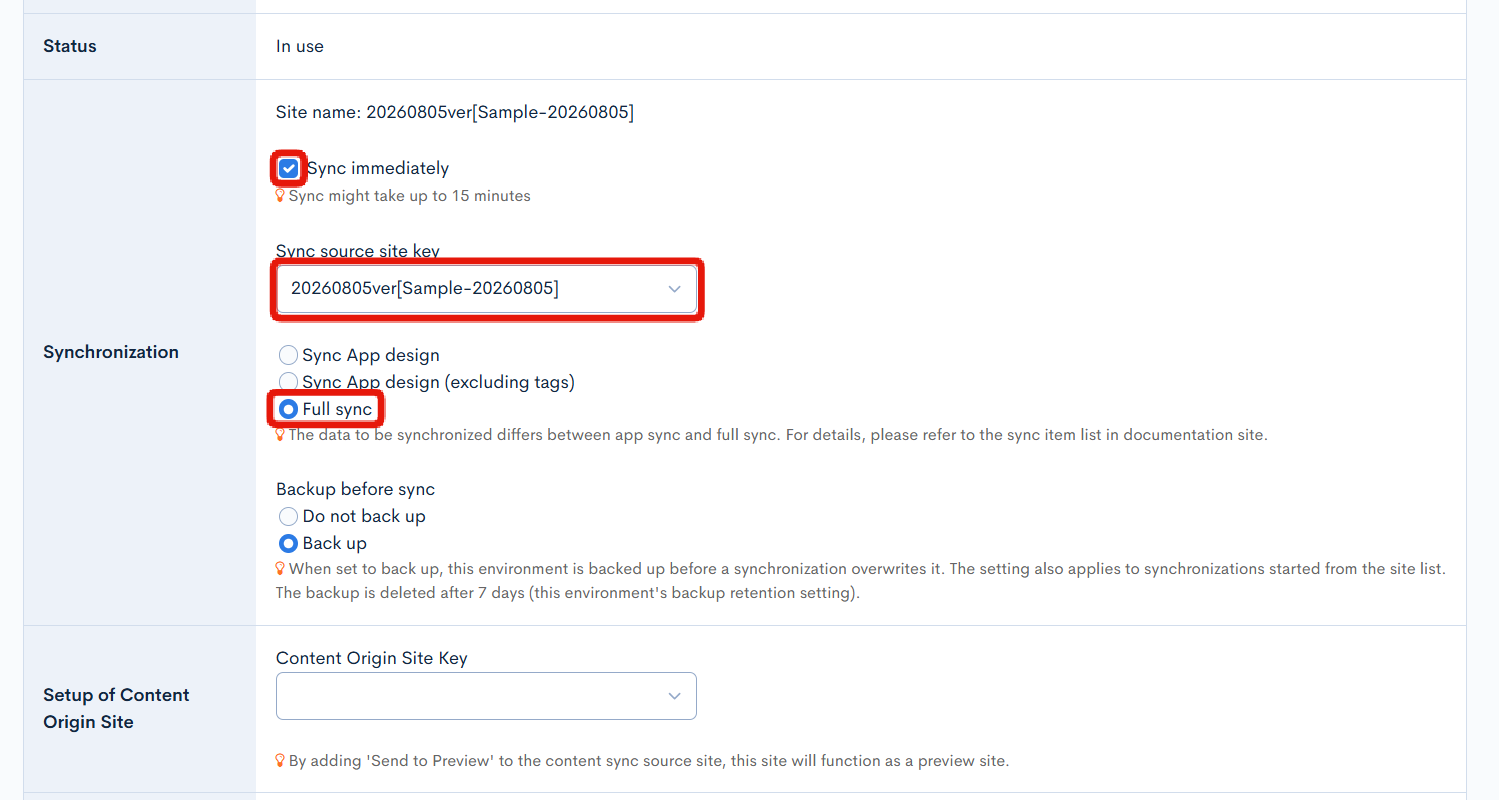
| Field | Setting |
|---|---|
| Sync immediately | Check this box. |
| Sync source site key | Select the sub-site created from the backup. |
| Sync App design / Full sync | Select [Full sync]. |
| Backup before sync | Select [Back up] to take a backup of the site to be restored before the sync runs. |
The sync might take up to 15 minutes after the update. You can check the progress in the sync batch status section of the site list.
After the sync is complete, check in the admin panel of the restored site that the content has returned to the state at the time the backup was taken.
The sync source site key and sync type you set are saved on the restored site and are also used by syncs started with [Sync] or [Sync filtered] on the site list. To avoid unintended syncs after the restoration, change the sync source site key back to [Don't sync] in the Site editor as needed.
You can delete the sub-site that is no longer needed after the restoration with [Delete] in the Site list.
Related documents
Support
If you have any other questions, please contact us or check out Our Slack Community.