Sending notification messages to users who submitted a form response
Overview
Kuroco has a feature to automatically register users who submit a form as members. This makes it easy to send notification messages to members who have applied for a seminar, for example.
In this tutorial, we will introduce the settings to automatically register users who have submitted a response as members and how to send notification messages.
What you'll learn
You will learn how to send messages to users who have submitted a form by following the steps below.
- Automatically register users who submitted a response
- Send notification messages to users who submitted a response
Automatically register users who submitted a response
Create a group that the user belongs to
First, create a group that the user who submits a response belongs to when they are registered as a member. Aft Click [Member] -> [Group].
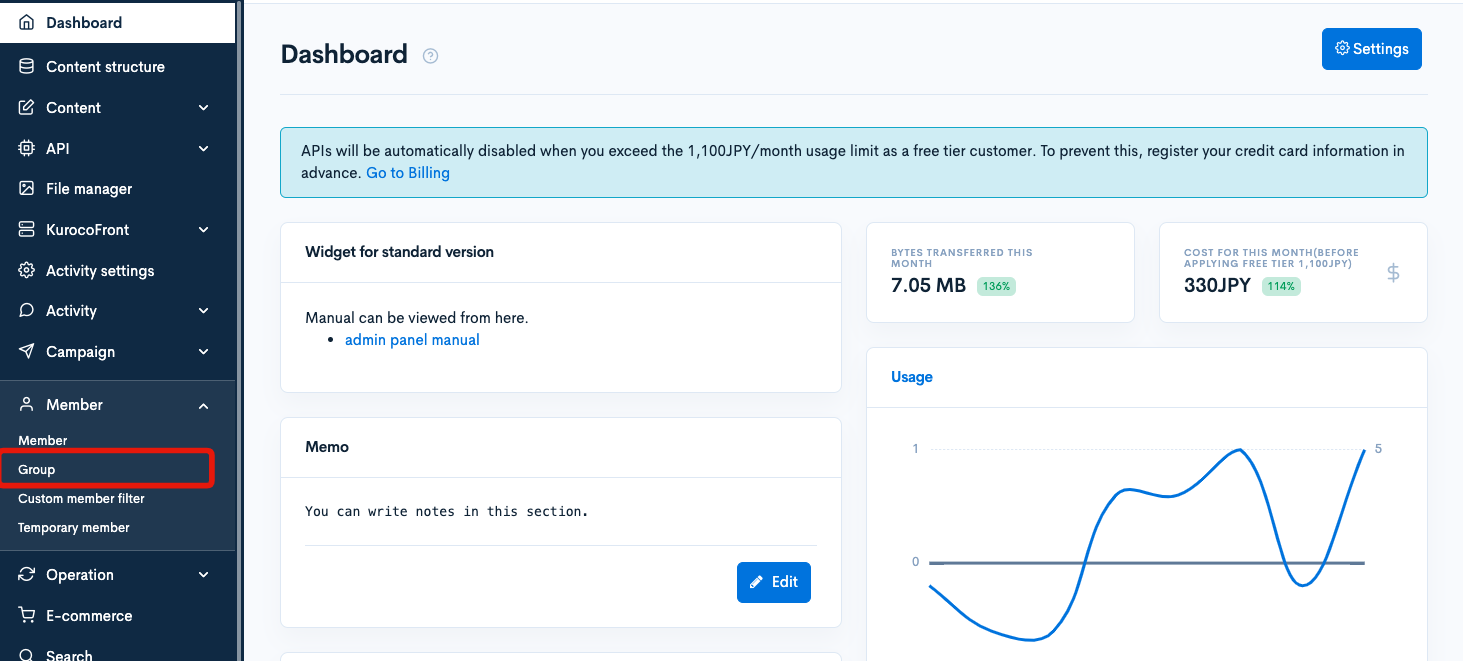
Click [Add].

Enter the following:
| Item | Value |
|---|---|
| Name | Seminar Applicants |
| User type | Log in only |
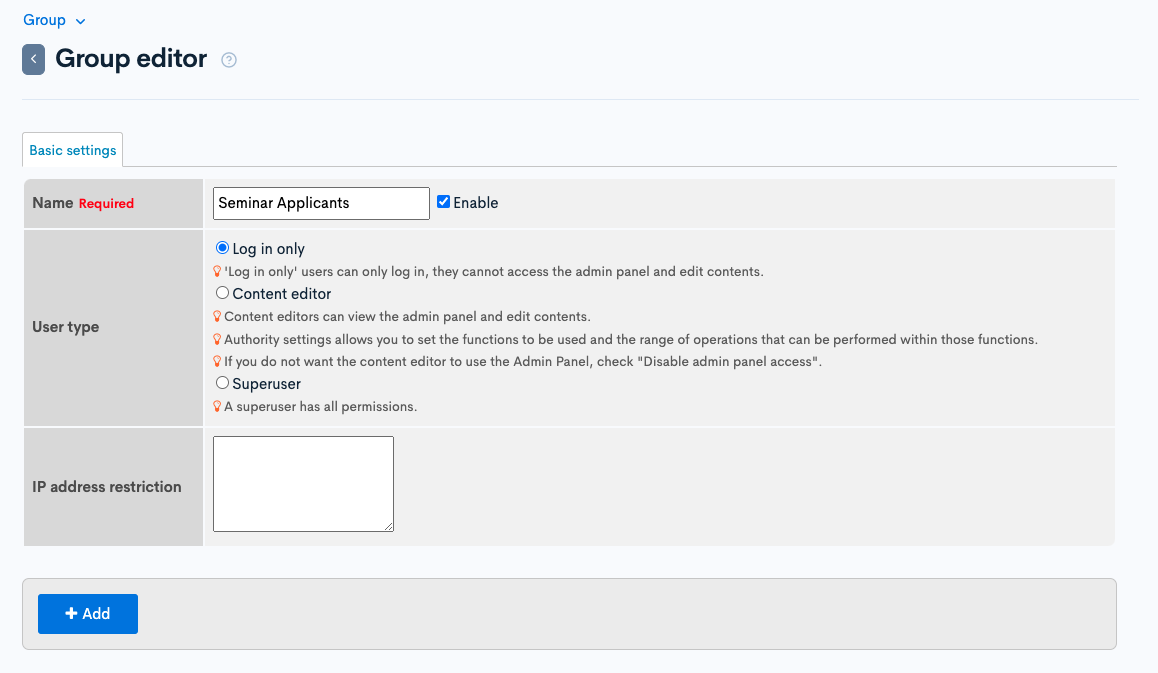
After entering the information, click [Add] to add the group.
Create a form
Next, create a form.
Click [Campaign] -> [Form].
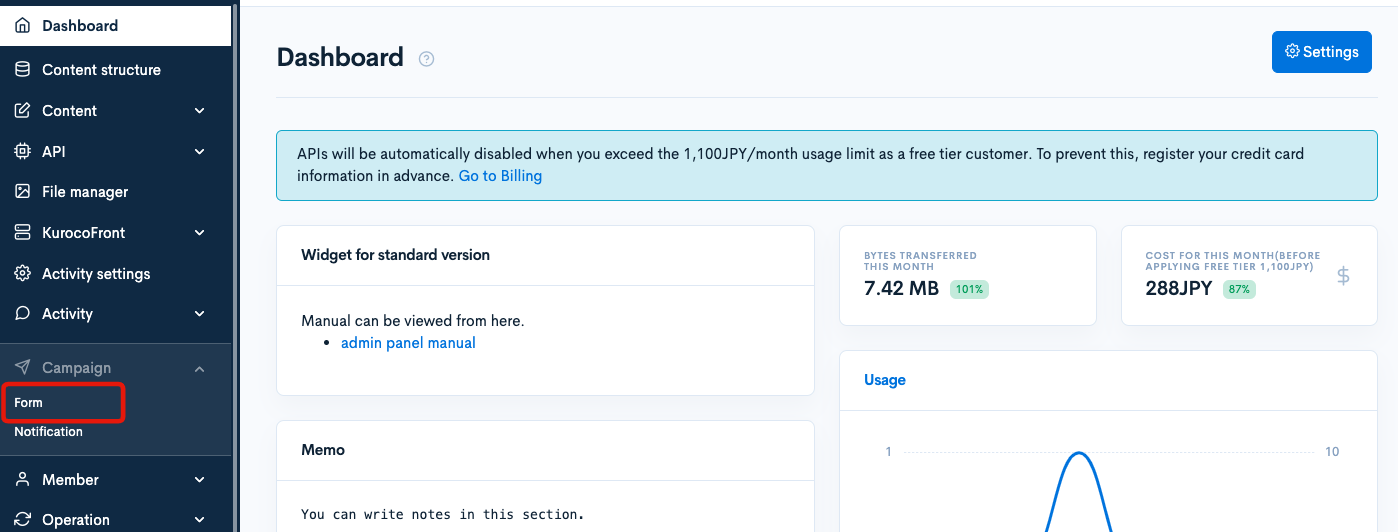
Click [Add].

Enter the following:
| Item | Value |
|---|---|
| Name | Seminar Registration Form |
| Automatic user registration | Check [Enable] and set the group you created earlier (Seminar applicants) |
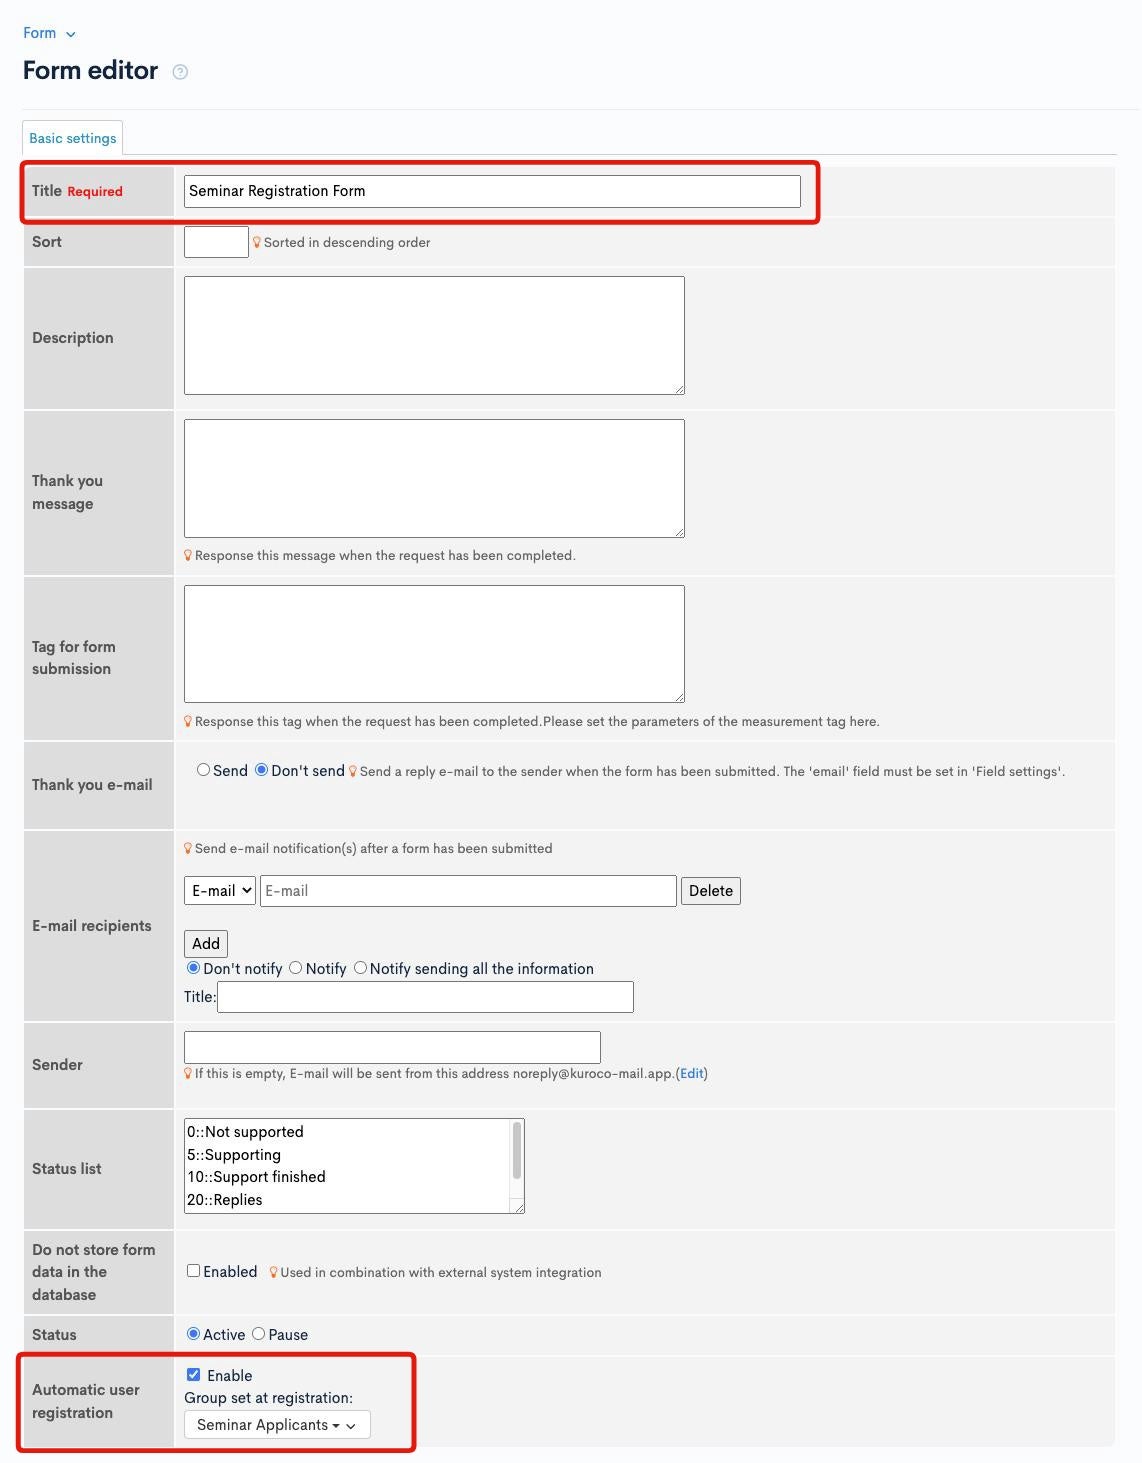
After entering the necessary information, click [Add] to add the form.
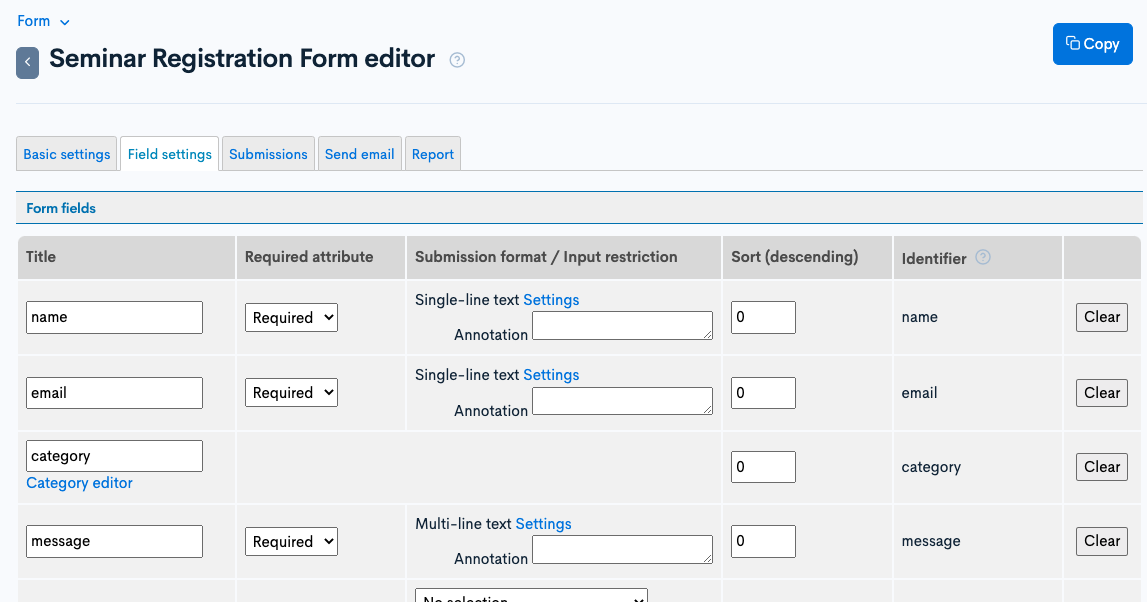
For this tutorial, we will use the default settings for the form configuration, so there is no need to update the basic settings. Only the "name," "email," and "message" fields will be used, as shown below.
Create an endpoint
Next, we will create an endpoint for sending form responses. Click [API] -> [Default].

Click [Add new endpoint].

Create the following endpoint:
| Item | Value |
|---|---|
| Path | seminar_application |
| Category | Form |
| Model | InquiryMessage |
| Operation | send |
| id | ID of the form you created earlier (6) |
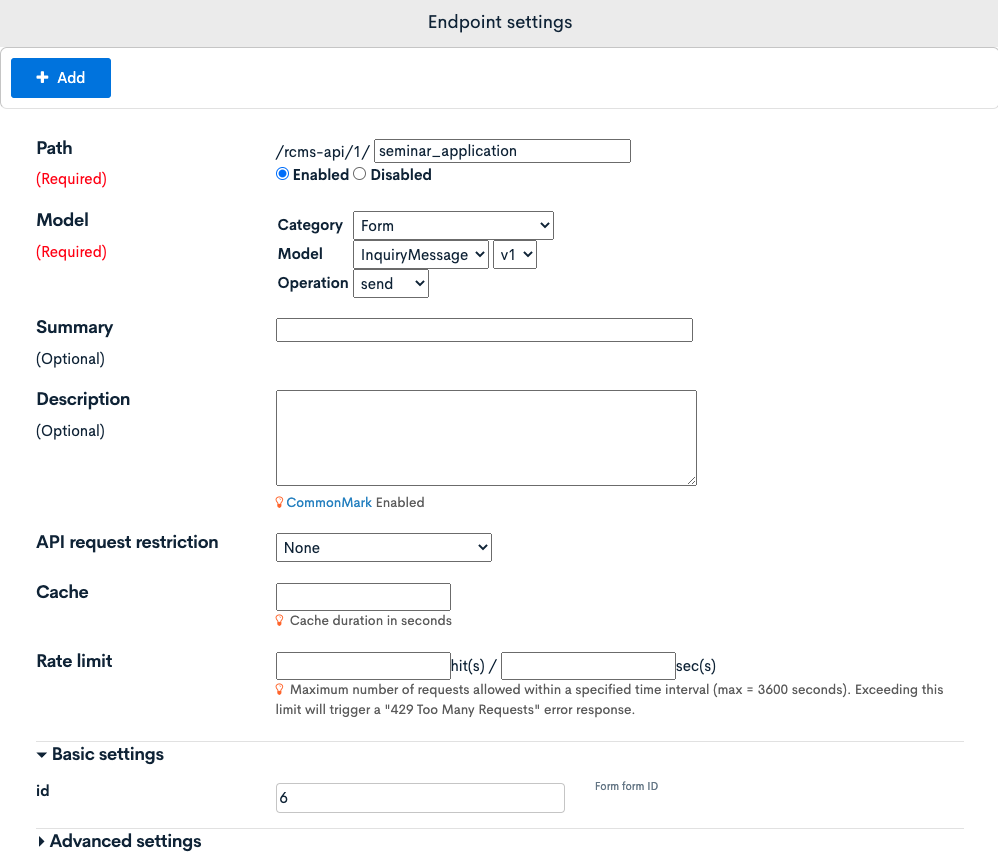
Once you have finished the configuration, click [Add] to create the endpoint.
Send the form response
Click [Swagger UI] for the default API.

Click [Try it out] for the endpoint you created.
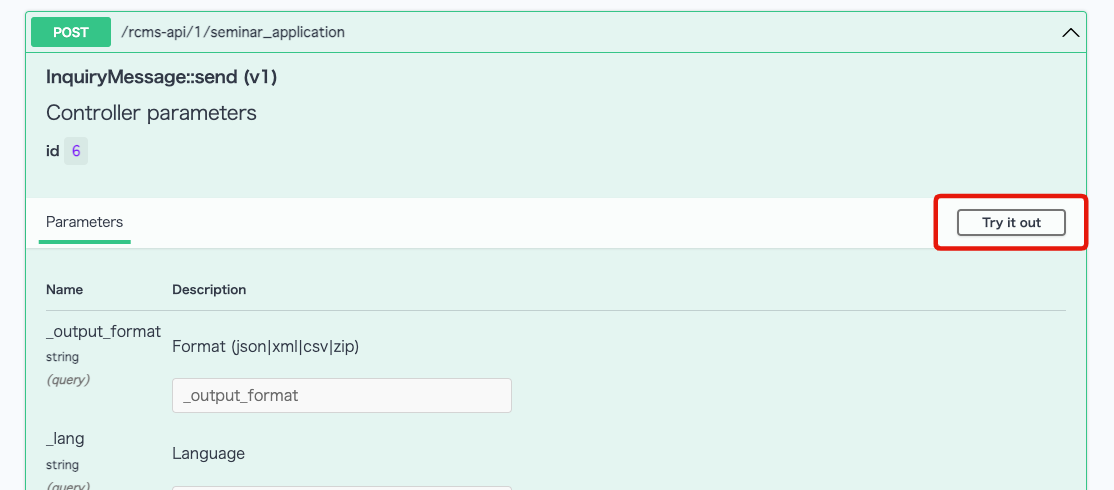
Enter the following request body and click [Execute]:
{
  "name": "Diverta Jiro",
  "email": "email@example.com",
  "body": "Example Message"
}
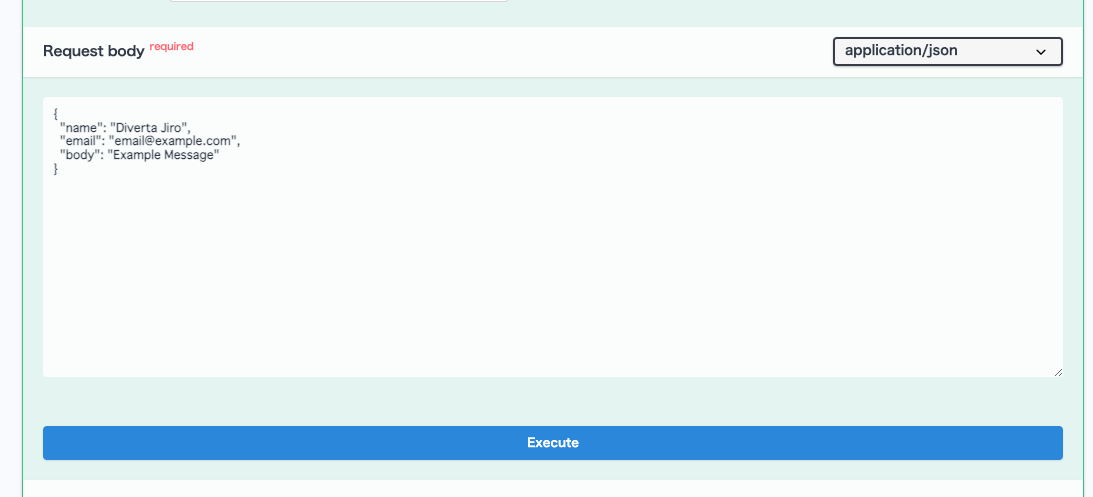
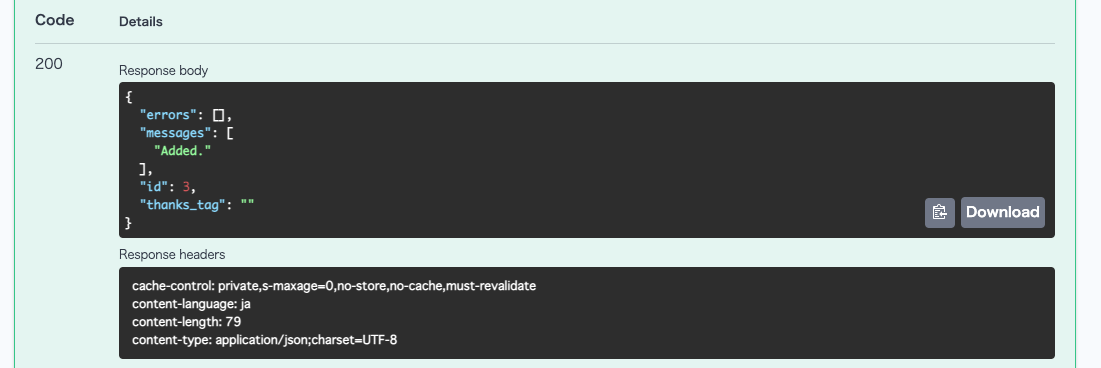
Confirm that "Added" and the response ID are displayed.
When you access [Member] -> [Member], you can confirm that the user who submitted the form has been added.
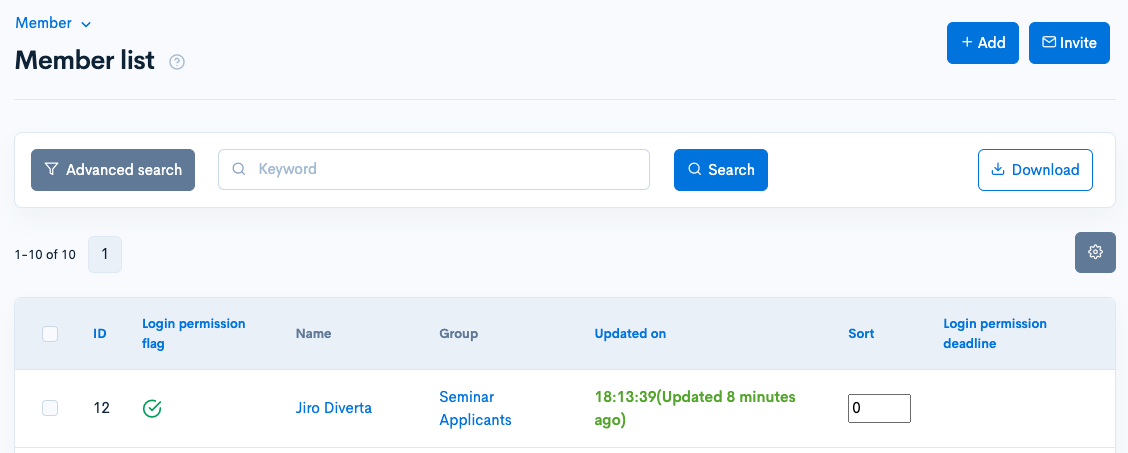
The details of the operation are as follows:
- If logged in, add the target group to the settings.
- If not logged in and email is POSTed:
- If there is a corresponding member with the email address: get the member_id and link it with the response data.
- If there is no corresponding member with the email address:
- Register the member and link the added member_id with the response data.
- The registration target data is email, name1, name2, email_send_ng_flg (fixed to 0).
- The form submission names are set to name1 and name2 separated by a half-width space.
- If there is no name, the part before the "@" mark of the email is set as name1 (surname).
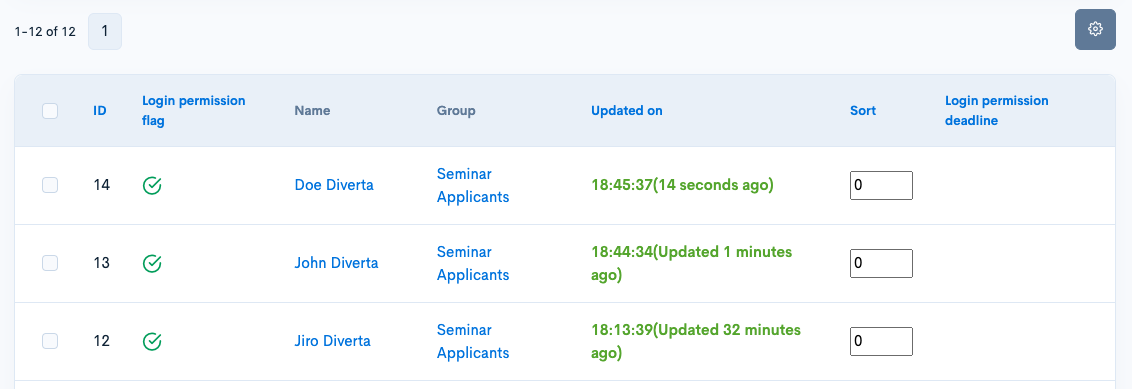
Register several test users using the same procedure.
Send notification messages to users who submitted a response
Now that you have identified the users who have submitted form responses and registered them as members in a specific group, you can send notification messages to this group.
Create a custom member filter
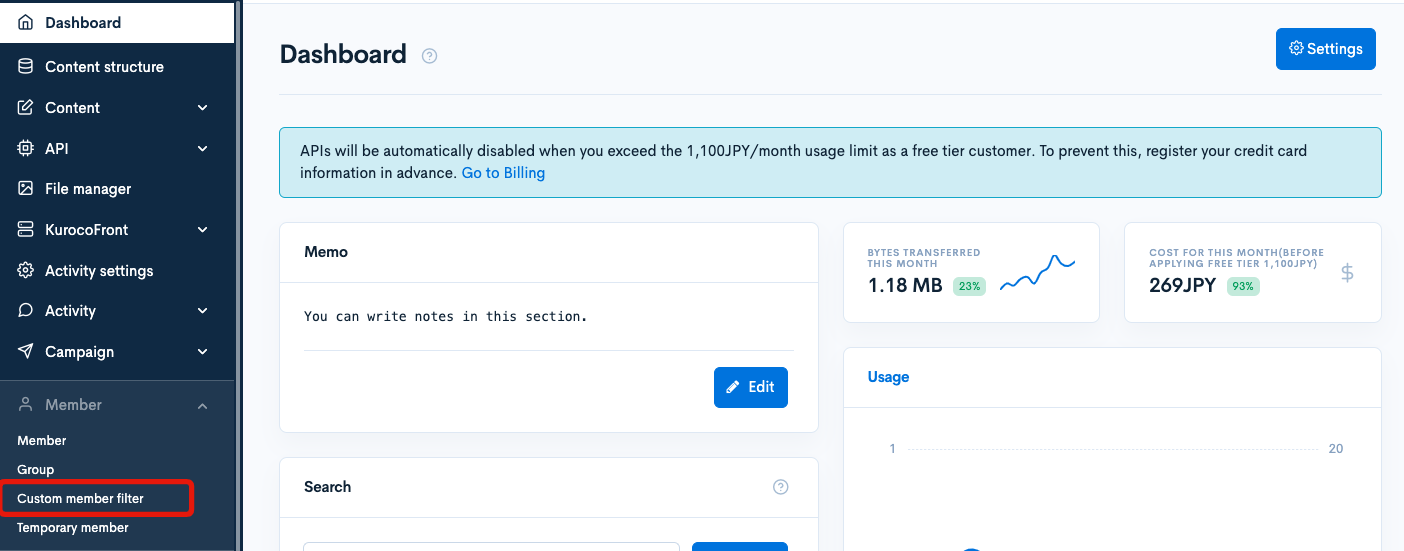
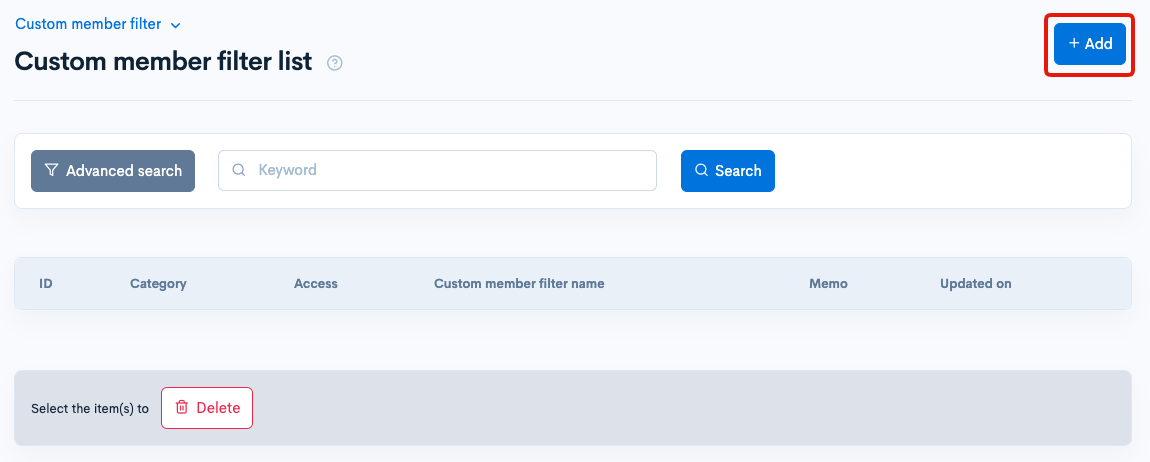
Click [Member] -> [Custom member filter].
Click [Add].
Enter the following information:
| Field | Value |
|---|---|
| Name | Seminar applicants |
| Access restrictions | Everyone |
| Member filter conditions | Group in Seminar applicants |
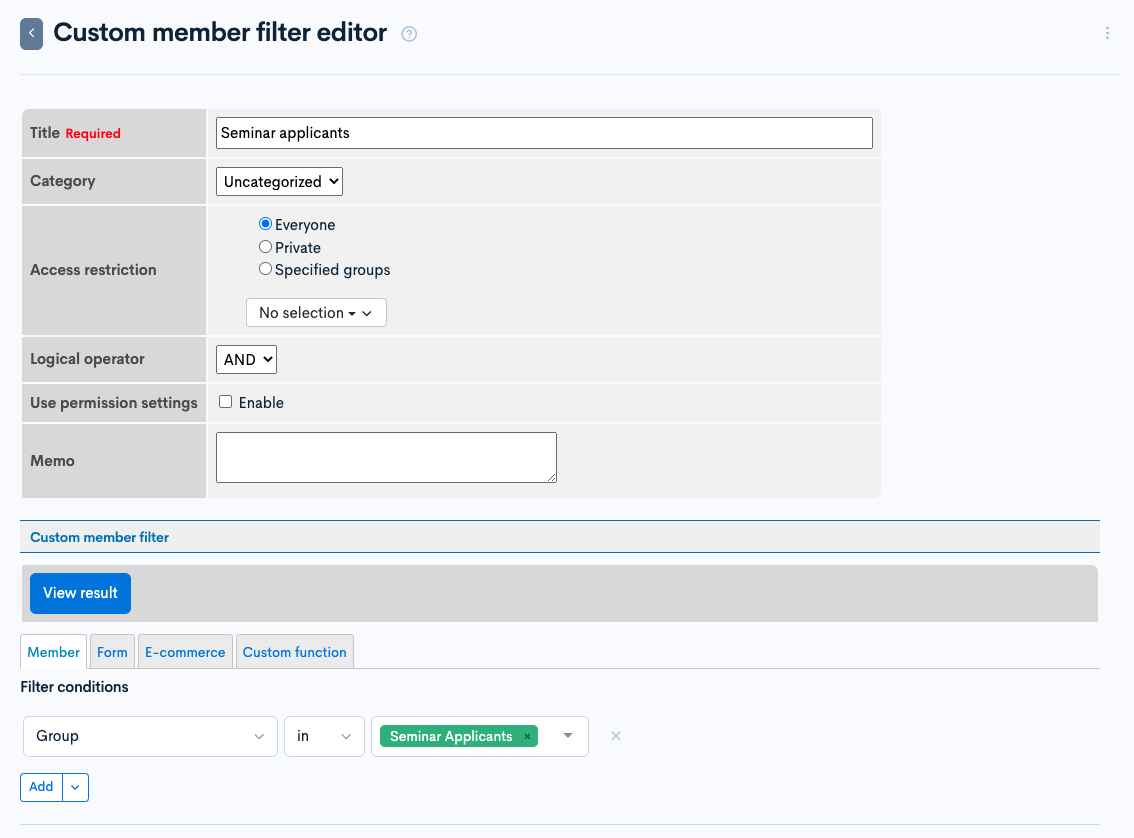
Once you have entered the information, click [Add] to create the custom member filter.
Creae a notification
Next, create a notification to send a message to seminar applicants. Click [Campaign] -> [Notification].
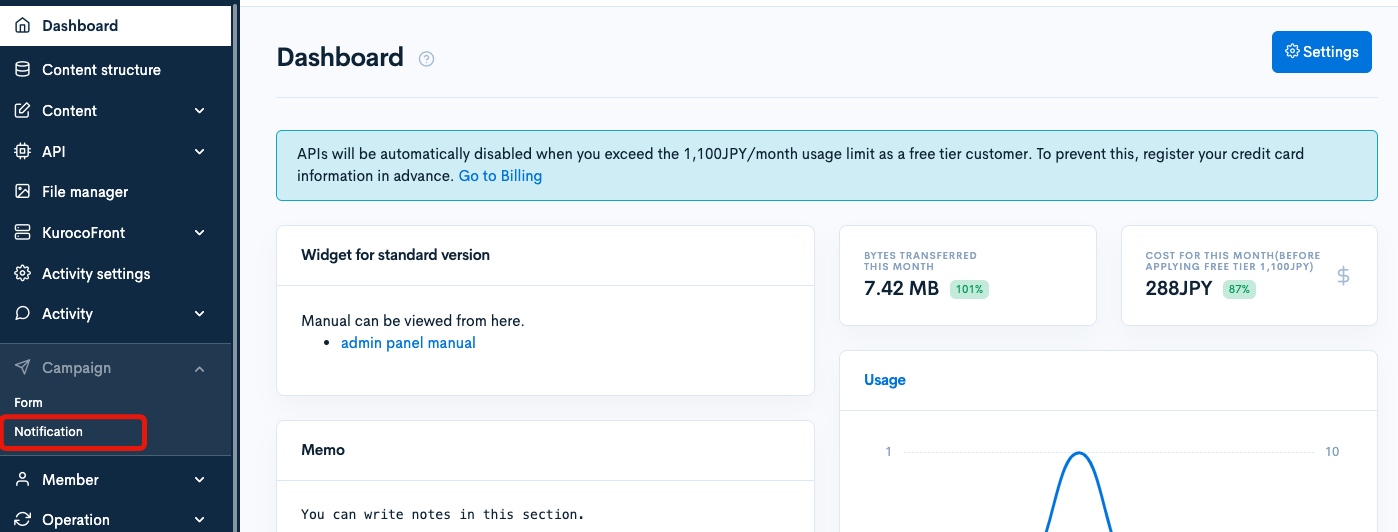
Click [Add].

Enter the following:
| Item | Value |
|---|---|
| Name | Notification to seminar applicants |
| Sender email (From) | noreply@kuroco-mail.app |
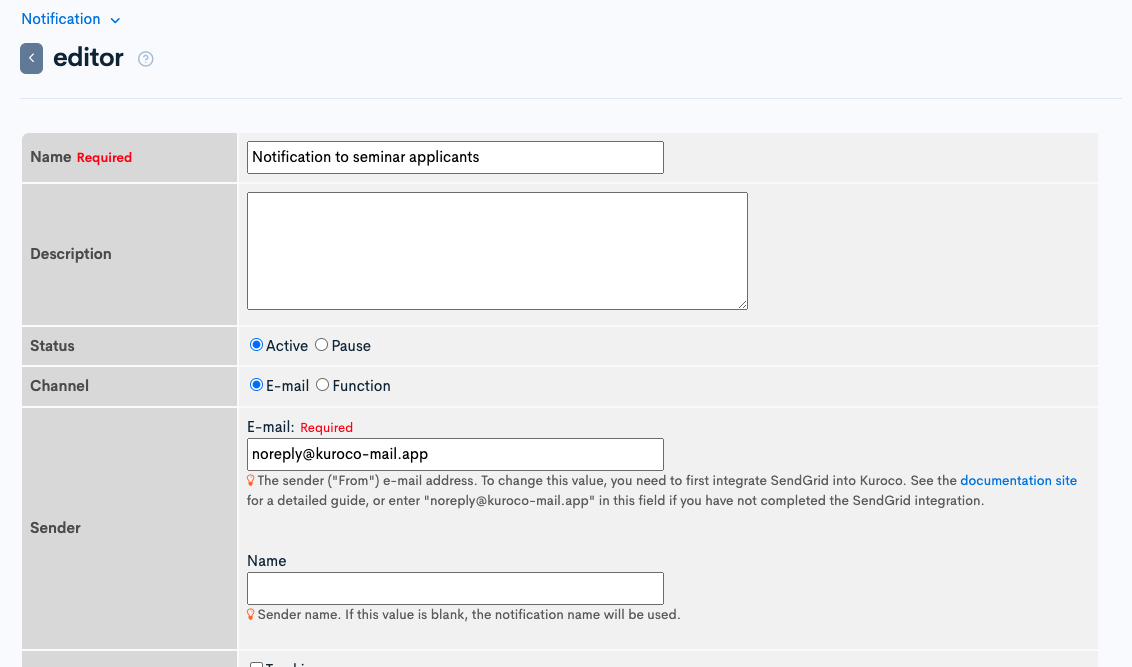
After entering, click [Add] to add a custom member filter.
Next, set the custom member filter (for seminar applicants) that you created earlier as the default recipient.
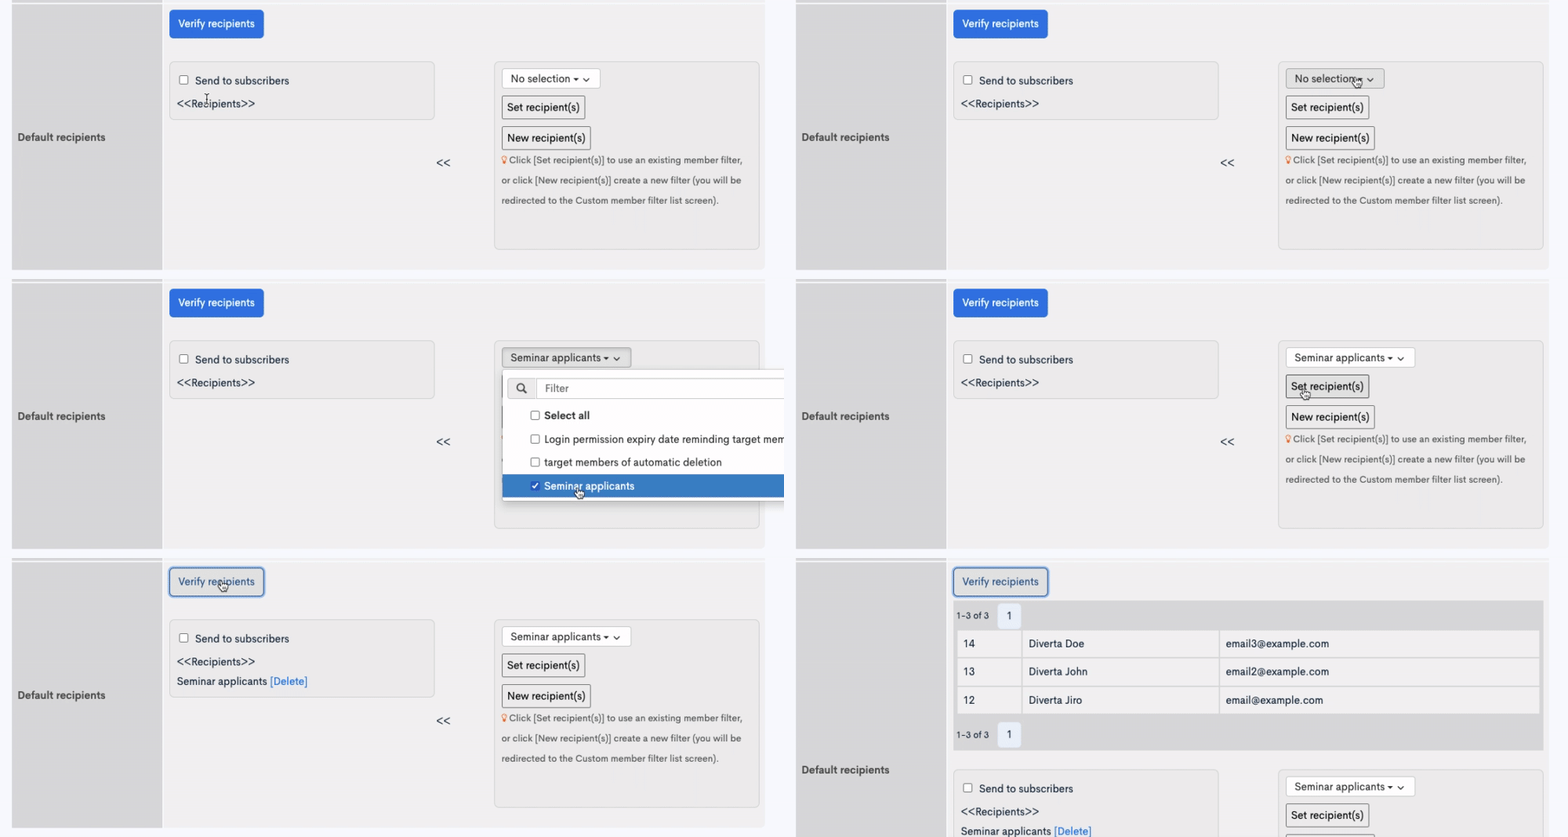
After setting it up, click [Update] to apply the settings.
Sending messages
From the basic settings of the notification, click the [Message] tab.

Click [Add].

Set the notification date and time, subject, and message body.
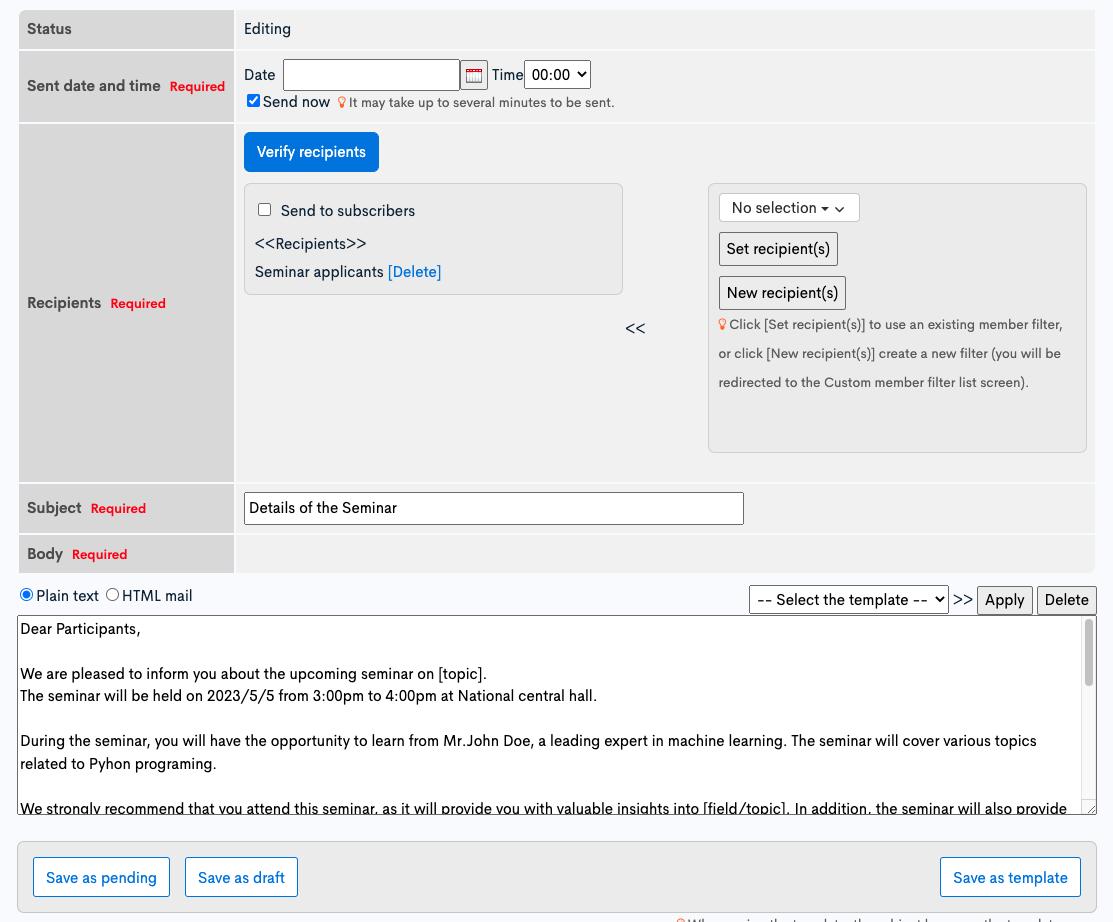
Click [Verify recipients] to confirm the notification message recipients.
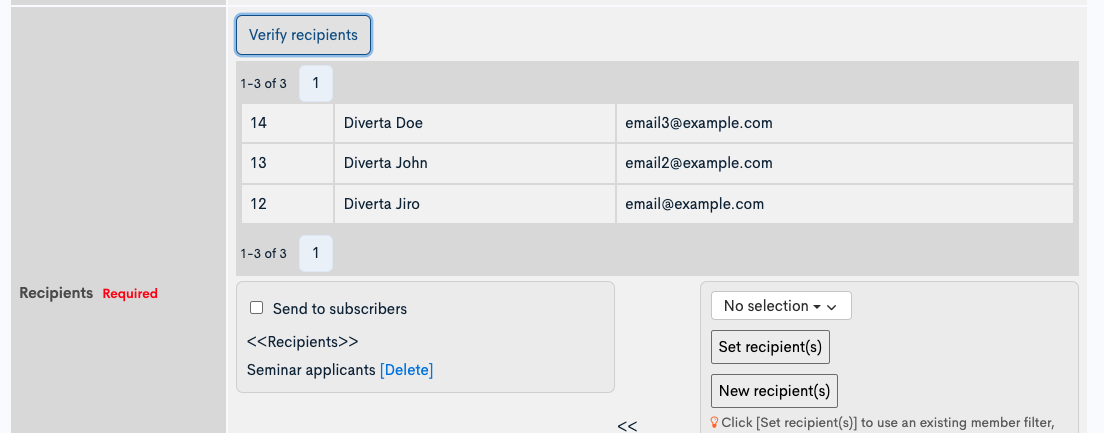
Click [Save as pending] if there are no problems.
When the specified date and time arrives, the message will be sent.

That's it for sending notification messages to users who have submitted a form. Please refer to the related documents to adjust the form item settings, implementation, customization of thank-you emails, and editing of notification messages.
Related documents
- Setting up inquiry forms with Kuroco and Nuxt.js
- Can I customize my thank-you email?
- How do I include content from the original form submission in the thank-you e-mail?
- How do I display inquiry numbers (submission no.) in e-mail notifications?
- Can I modify the contents of the notification e-mails sent to admins?
- Sending email notifications
- List of variables available for custom functions (Notification substitution)
- Set form response to user's member information registered by form submission
Support
If you have any other questions, please contact us or check out Our Slack Community.