Setting up inquiry forms
This tutorial explains how to set up inquiry forms in a project using Kuroco.
This tutorial is written with the following versions:
Nuxt2: v2.15.8
Nuxt3: v3.8.0
This tutorial assumes that you have already set up a project with Kuroco and Nuxt.js.
If you have not yet set up one, please refer to the following tutorial.
Nuxt.js:Beginner's guide to Kuroco
About Kuroco forms
The form function in Kuroco allows the user to define data to support the creation of HTML forms, set automatic replies, and view form data submitted by users.
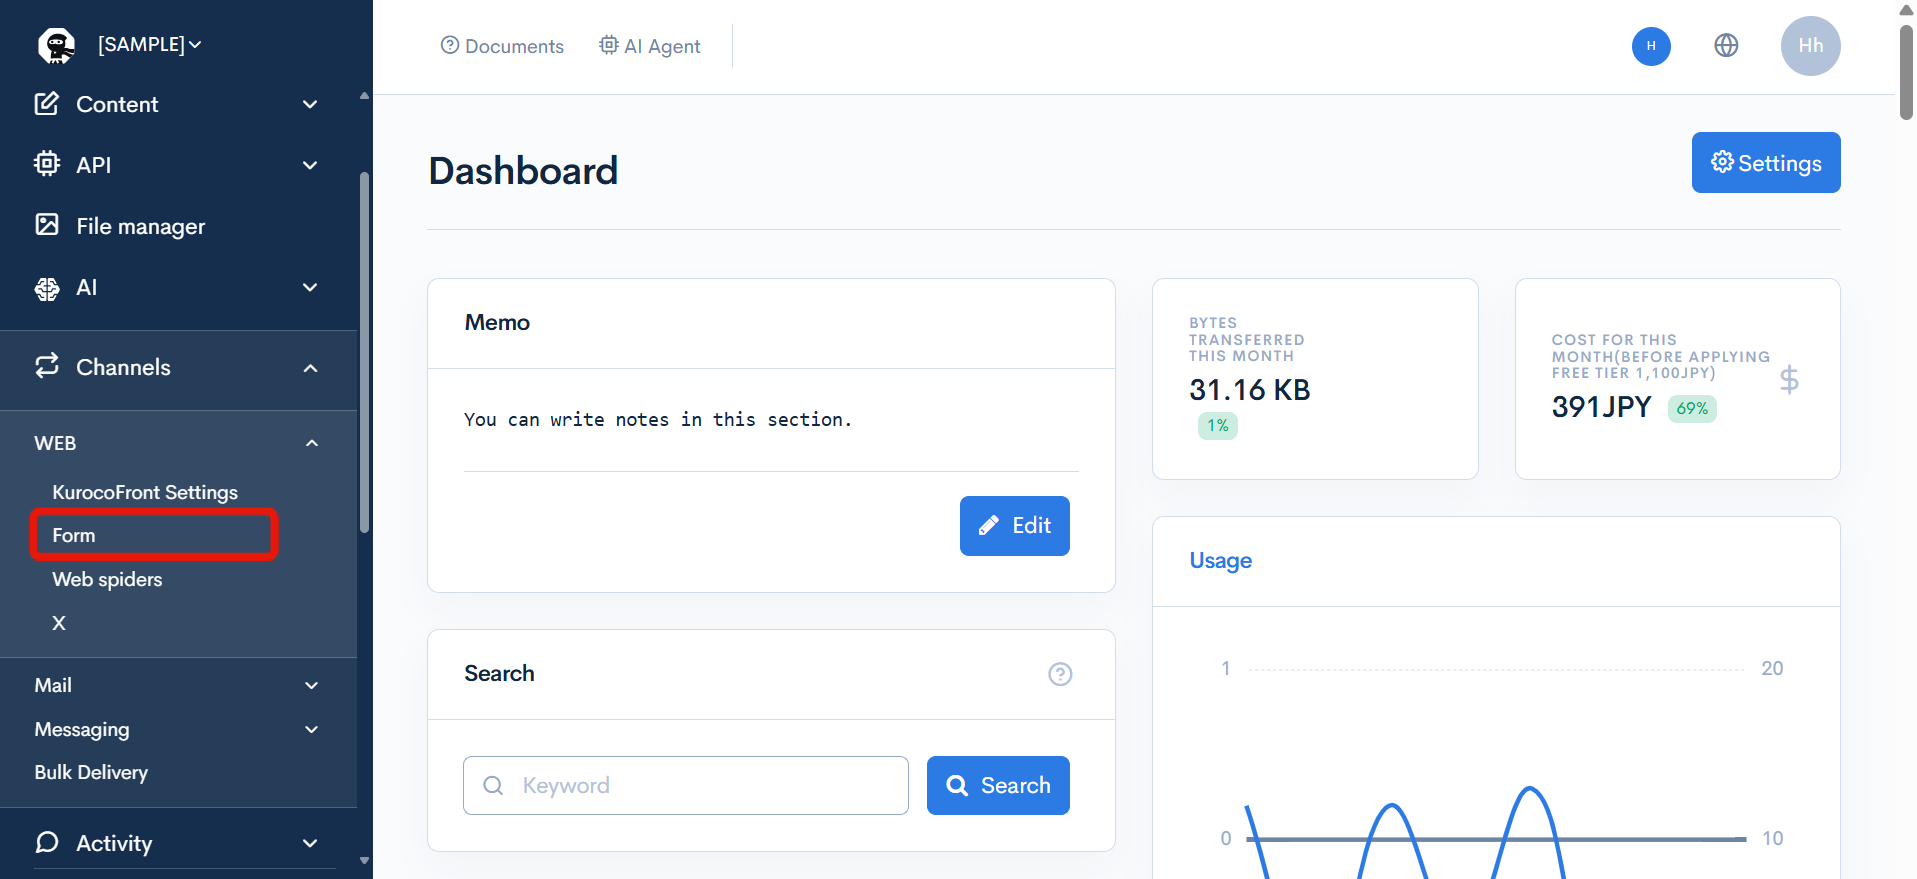
You can manage form settings via the [Channels] -> [WEB] -> [Form] module of the admin panel.
For more information, refer to the following user guide documents:
Before your form can be used, you need to configure various settings and codes on the front-end. The sections below explain the steps to enable forms in your Kuroco and Nuxt.js project.
Defining your form data
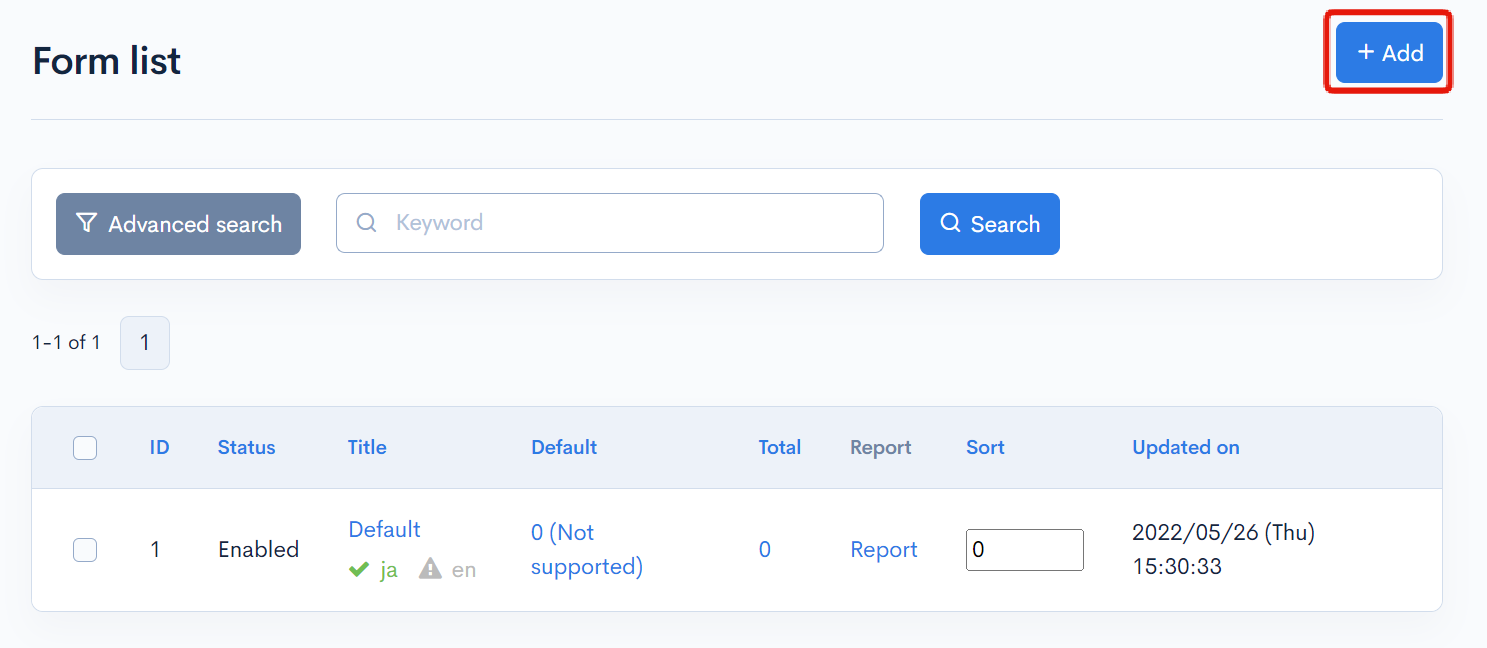
To create a new form, click [Add] in the upper right corner of the form list screen.
You will be redirected to a new form editor. See: Form editor - Basic settings for a detailed description of each field. For this tutorial, we will create a sample form with the following entries:
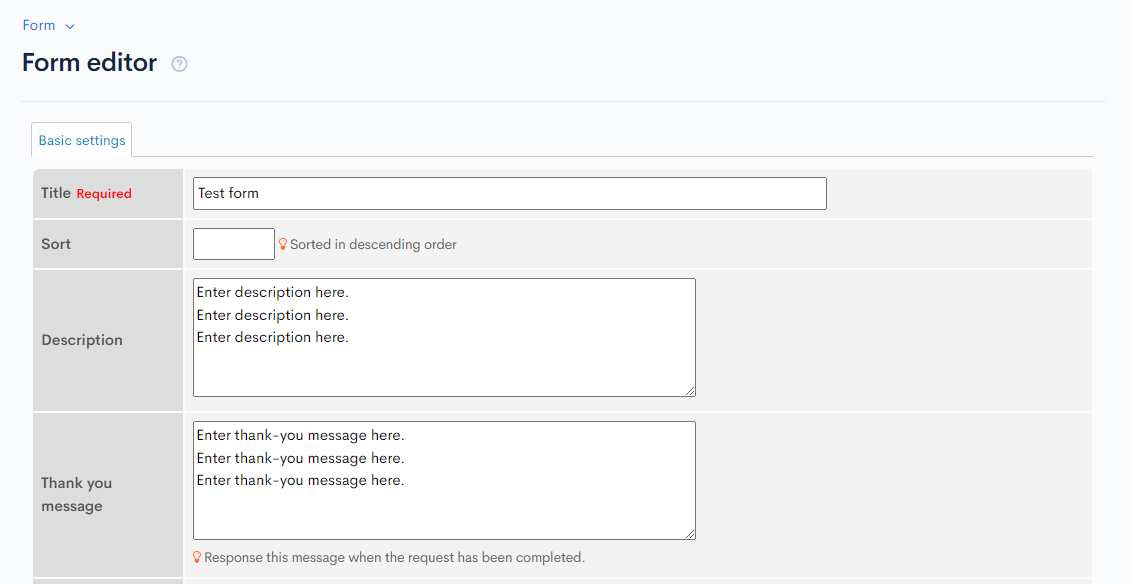
| Field | Value |
|---|---|
| Title | Test form |
| Description | Enter description here.Enter description here.Enter description here. |
| Thank you message | Enter thank-you message here.Enter thank-you message here.Enter thank-you message here. |
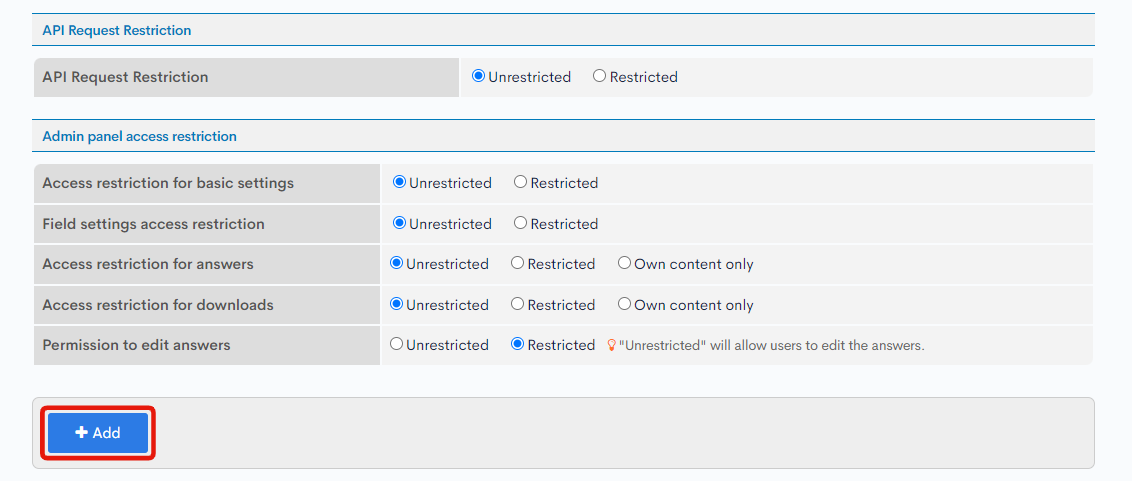
When you are done, click [Add] at the bottom of the screen.
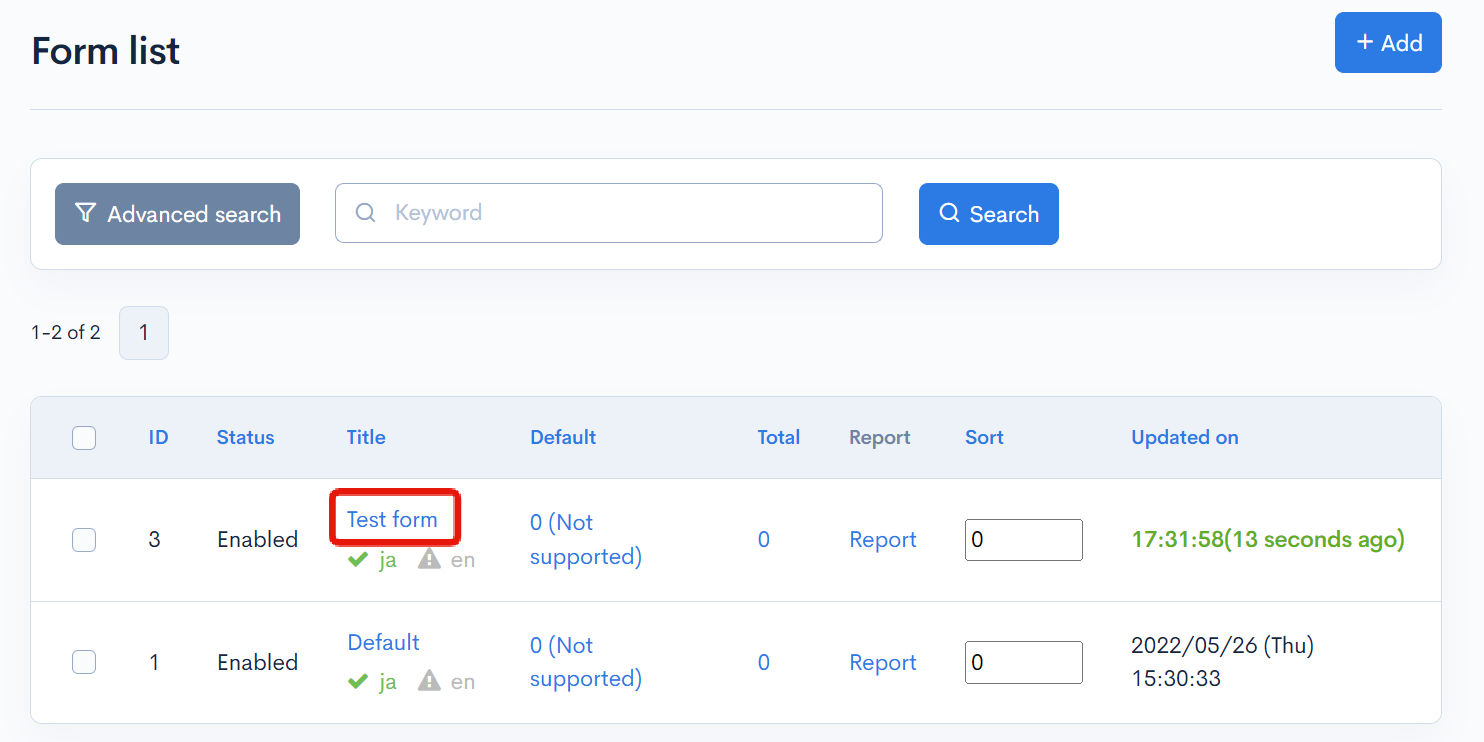
You will be redirected back to the form list, which now contains your newly created form.

Note: The number displayed in the "ID" column is the unique identifier of the inquiry form.
The ID value of each entry is automatically generated and varies depending on the environment. In the above example, the ID number is 3. However, for the steps below, remember to substitute this value with the ID shown on your screen.
Verifying the form settings
Verify the field settings
On the form list screen, click the title of your new form.
You will be redirected to the form editor screen. From there, click the [Field settings] tab.
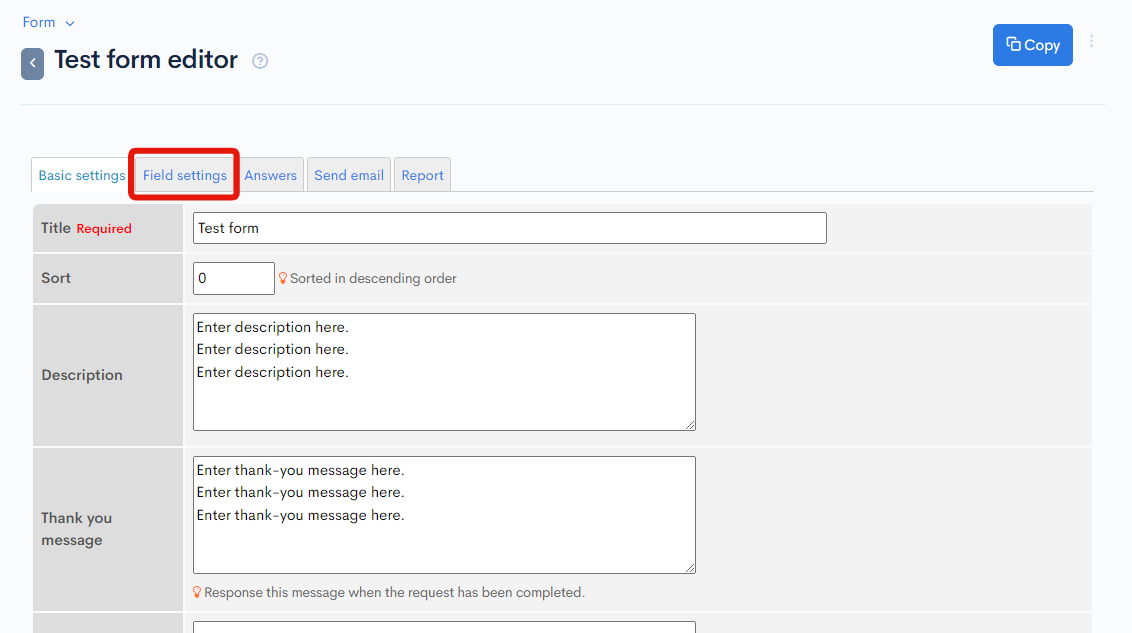
This will take you to the form field settings screen.
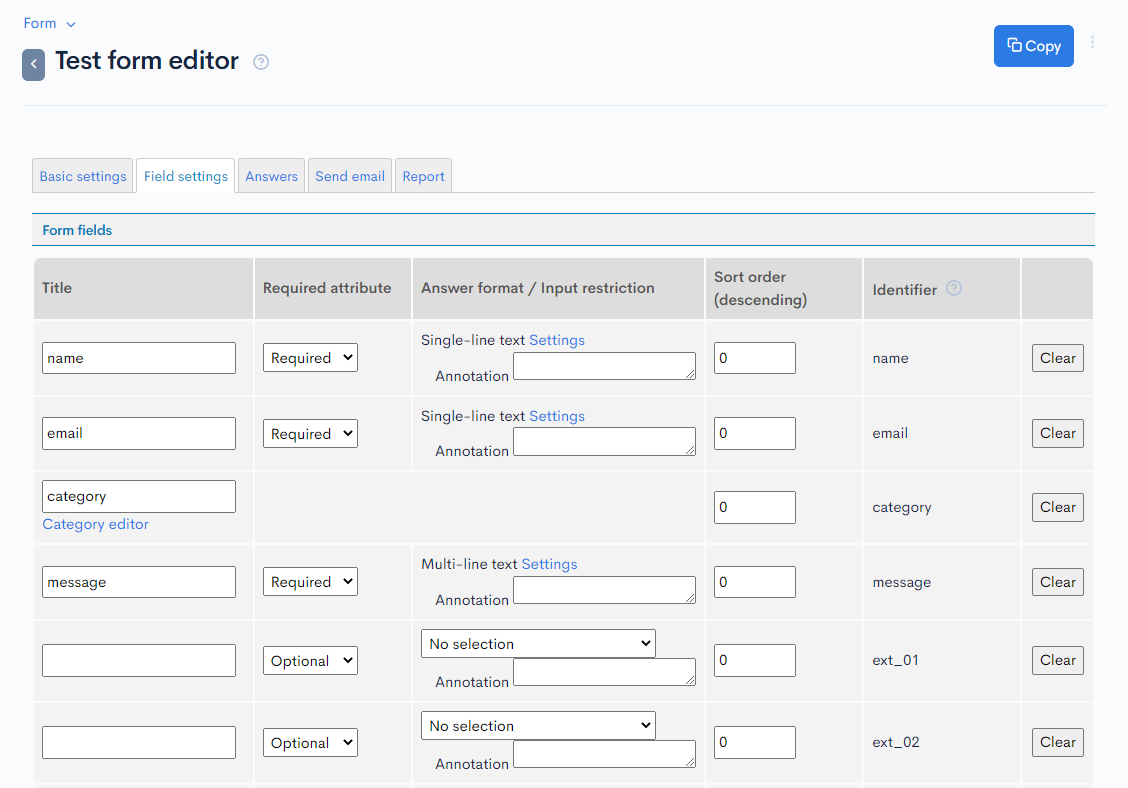
Here, you can set HTML definitions of the inquiry form fields.
"name", "email", and "message" have been preset, since they are required fields in Kuroco. To add a custom field, you can define it as desired in the blank fields below "message".
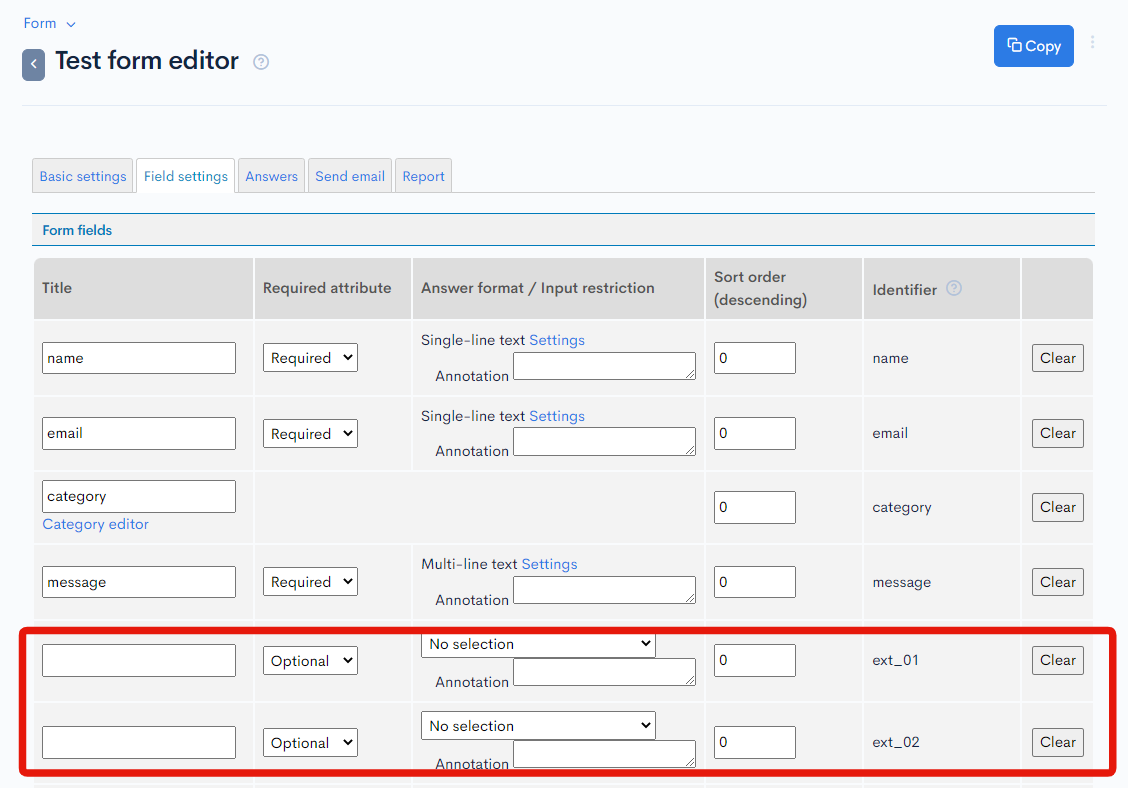
For this part of the tutorial, we will use only the default fields.
Verify the responses
Click the [Submissions] tab to view a list of user-submitted responses to the form.
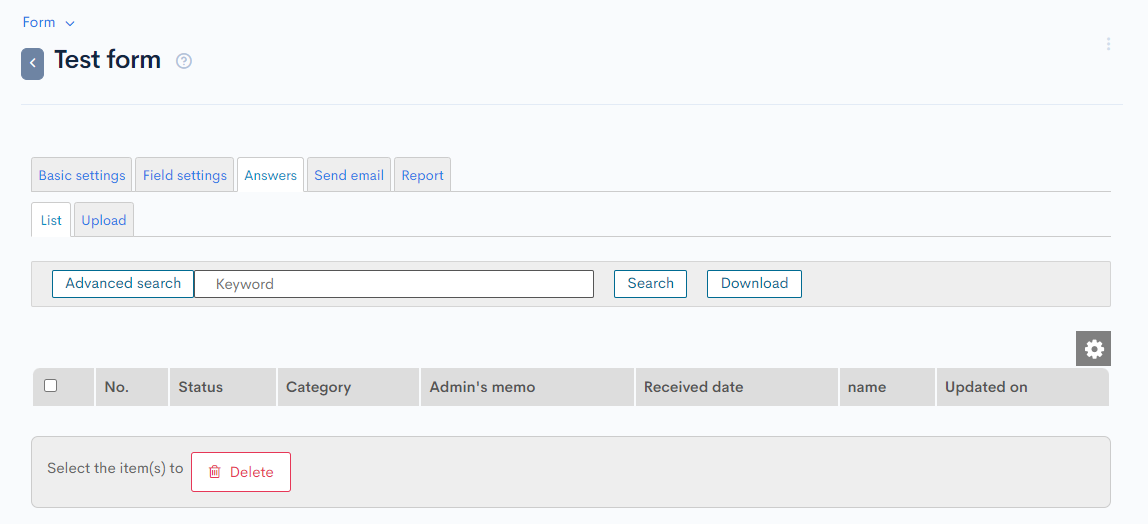
All responses submitted via the HTML form are displayed here.
(In the above screenshot, there are no records displayed, since the HTML form has not been created yet and hence no data has been submitted.)
Details such as the response contents can be verified on this screen or in the [Report] tab to the right.
Setting up endpoints for the form
Next, create two endpoints as follows and enable the form function on the front-end:
- For form definition retrieval:
(GET) form - For form data submission:
(POST) form
A. (GET) form endpoint setup
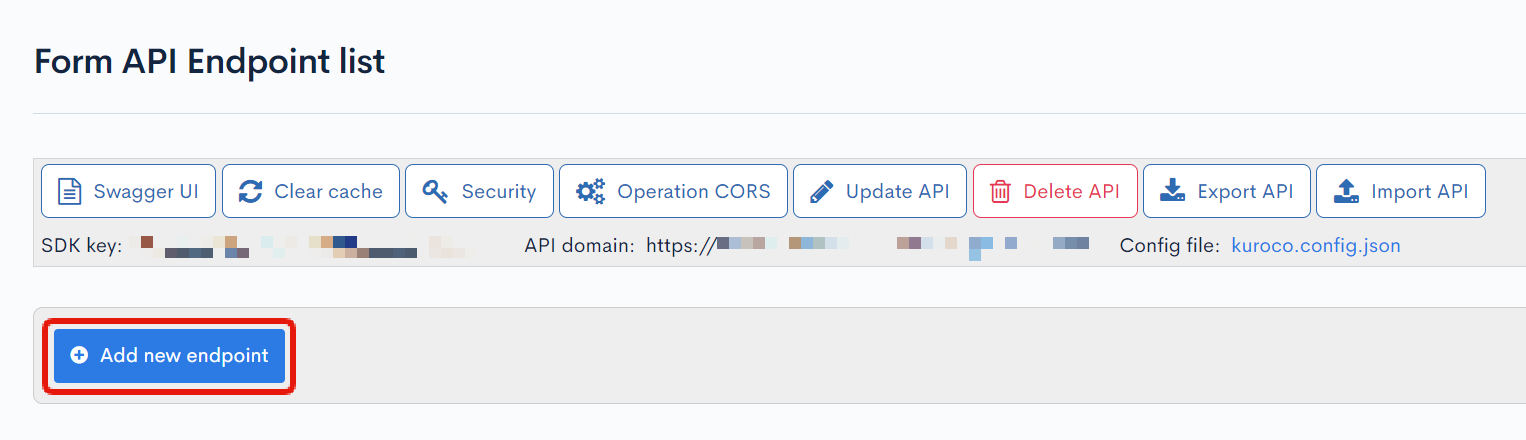
In the sidebar menu, select the target API from [API] and click [Add new endpoint] on the endpoint list screen.
Set up your endpoint as follows:

| Field(s) | Setting |
|---|---|
| Path | form |
| Category | Form |
| Model | InquiryForm |
| Operation | details |
| API Request Limit | None |
For simplicity, we will omit the authorization settings here.
Swagger UI verification
Then, verify if the Swagger UI can retrieve the form you have defined. On the endpoint list screen, click [Swagger UI].
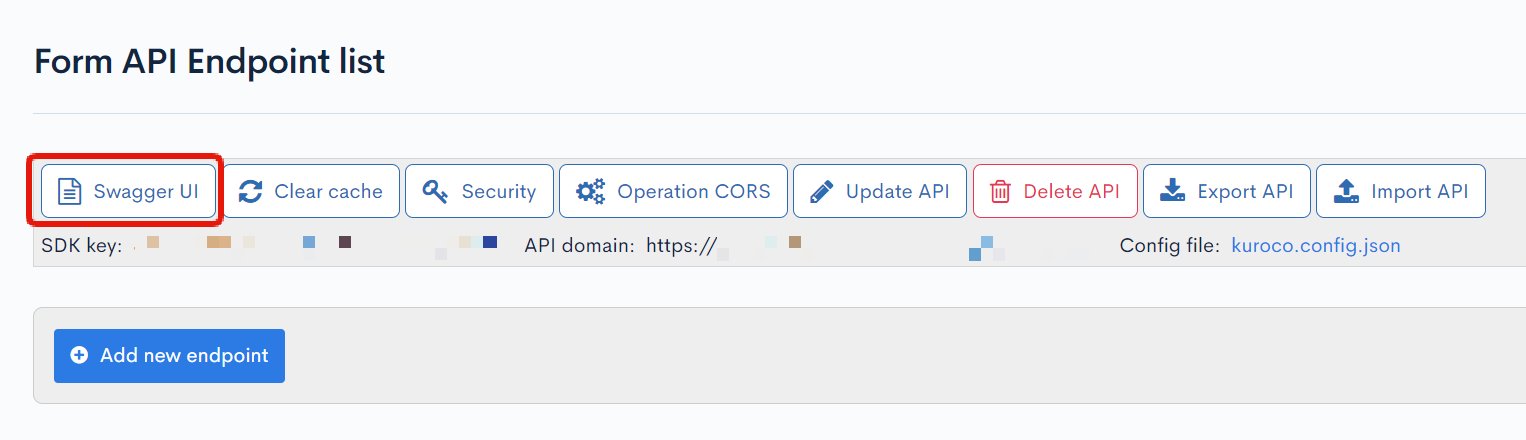
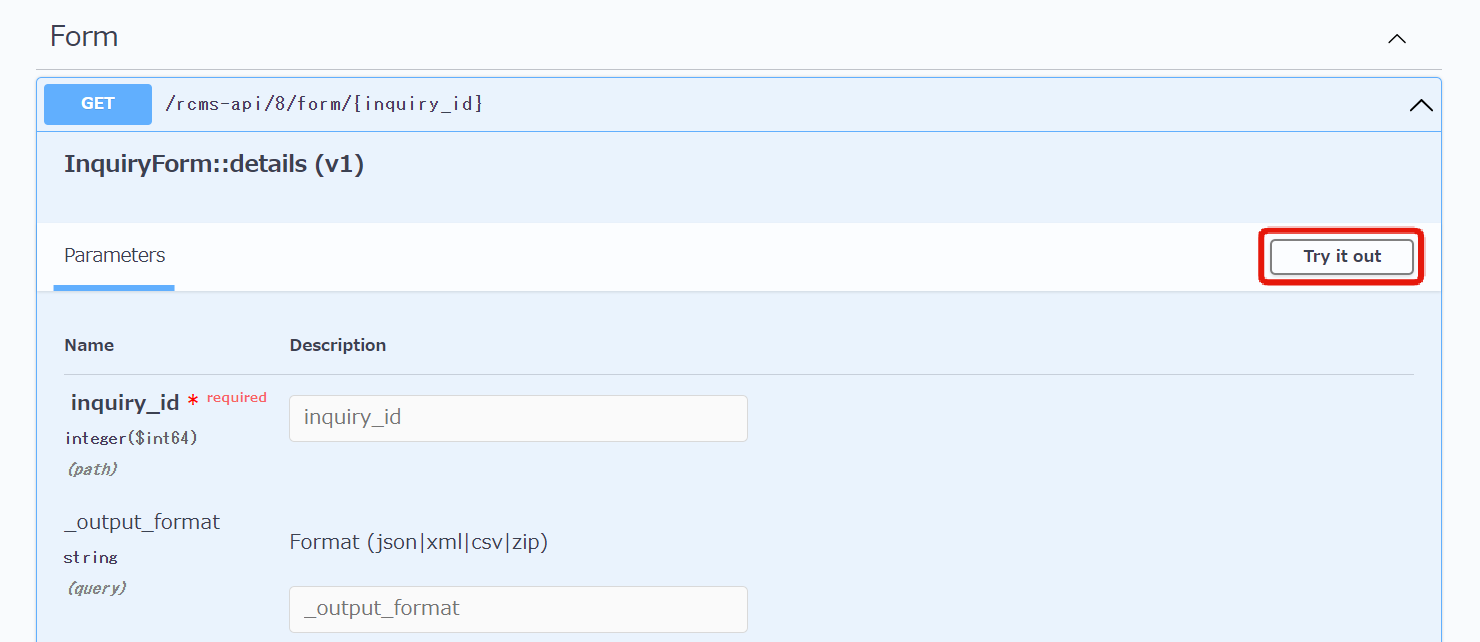
You will be redirected to the Swagger UI screen. Select the endpoint you created earlier.
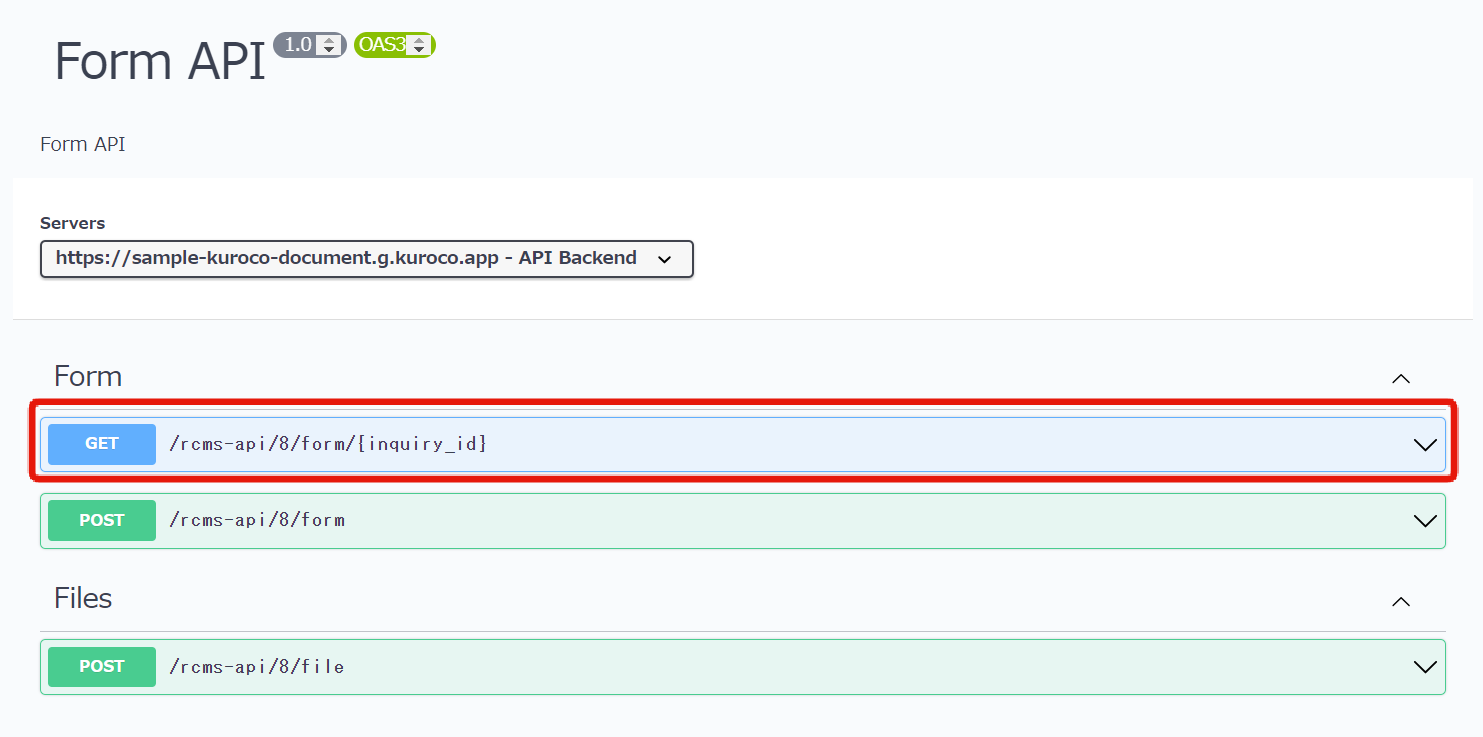
Click [Try it out]
Enter the ID of your new form (in this case, 3) in the "inquiry_id" field and click [Execute].
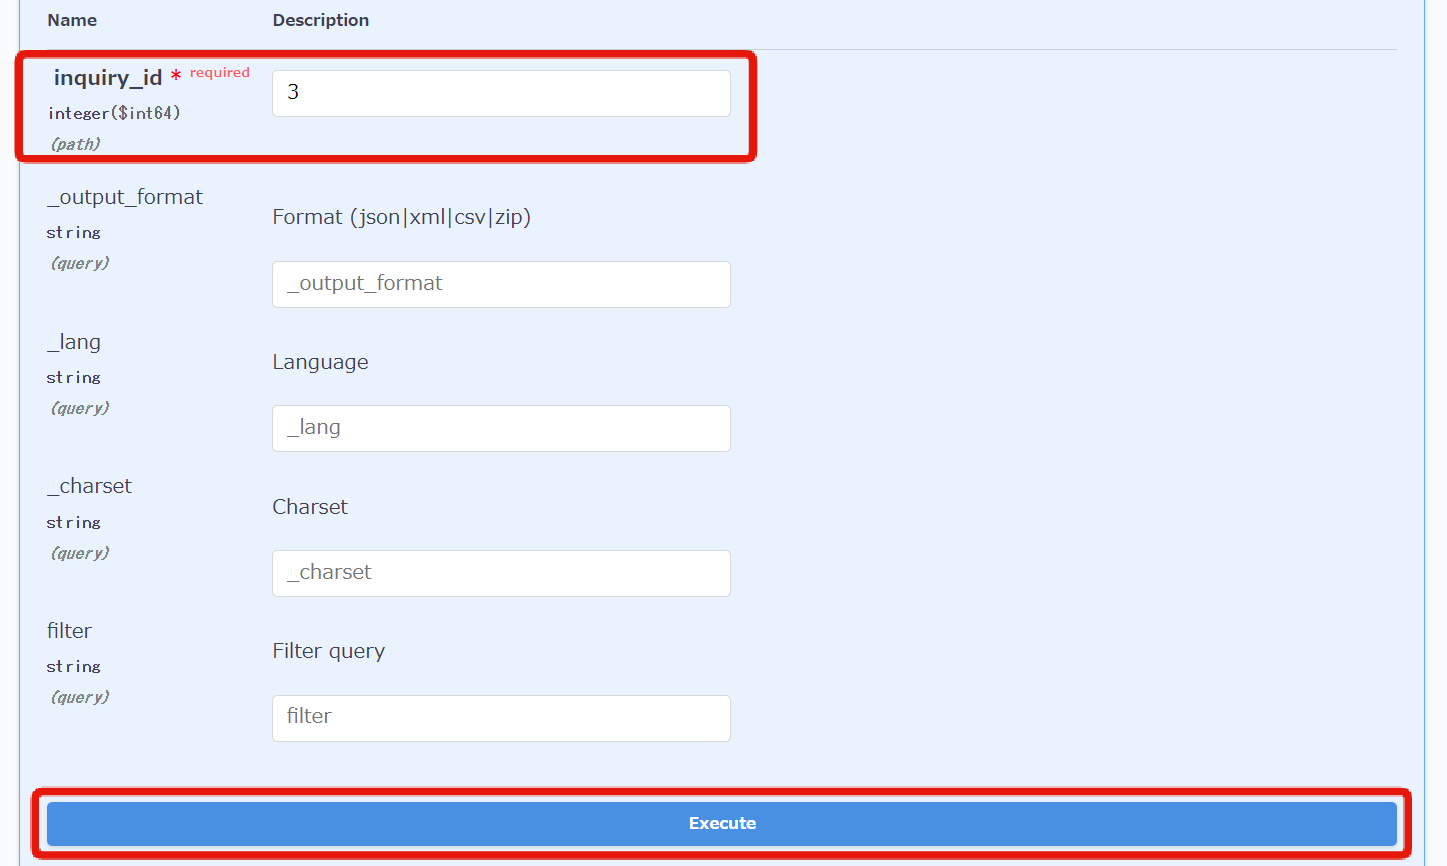
The form will be converted to JSON and displayed under "Responses".

B. (POST) form endpoint setup
You also need to create an endpoint for submitting data from HTML to the target form.
As before, select your target API in the sidebar menu and click [Add new endpoint] on the endpoint list screen.
Set up your endpoint as shown below.
Similarly, we omit the authorization settings here for simplicity.

| Item | Setting |
|---|---|
| Path | form |
| Category | Form |
| Model | InquiryMessage |
| Operation | send |
| API Request Limit | None |
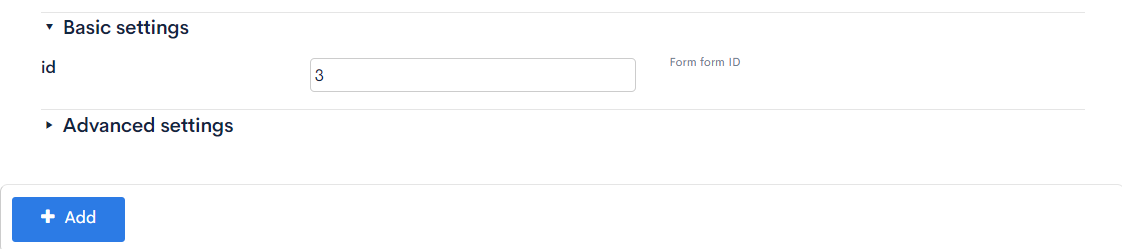
| id | Form ID to which the submission is sent (3) |
When you are done, click [+Add] to save these settings.
Next, let's confirm the behavior of the POST request.
Click on the [Try it out] button for the InquiryMessage::send endpoint created earlier.

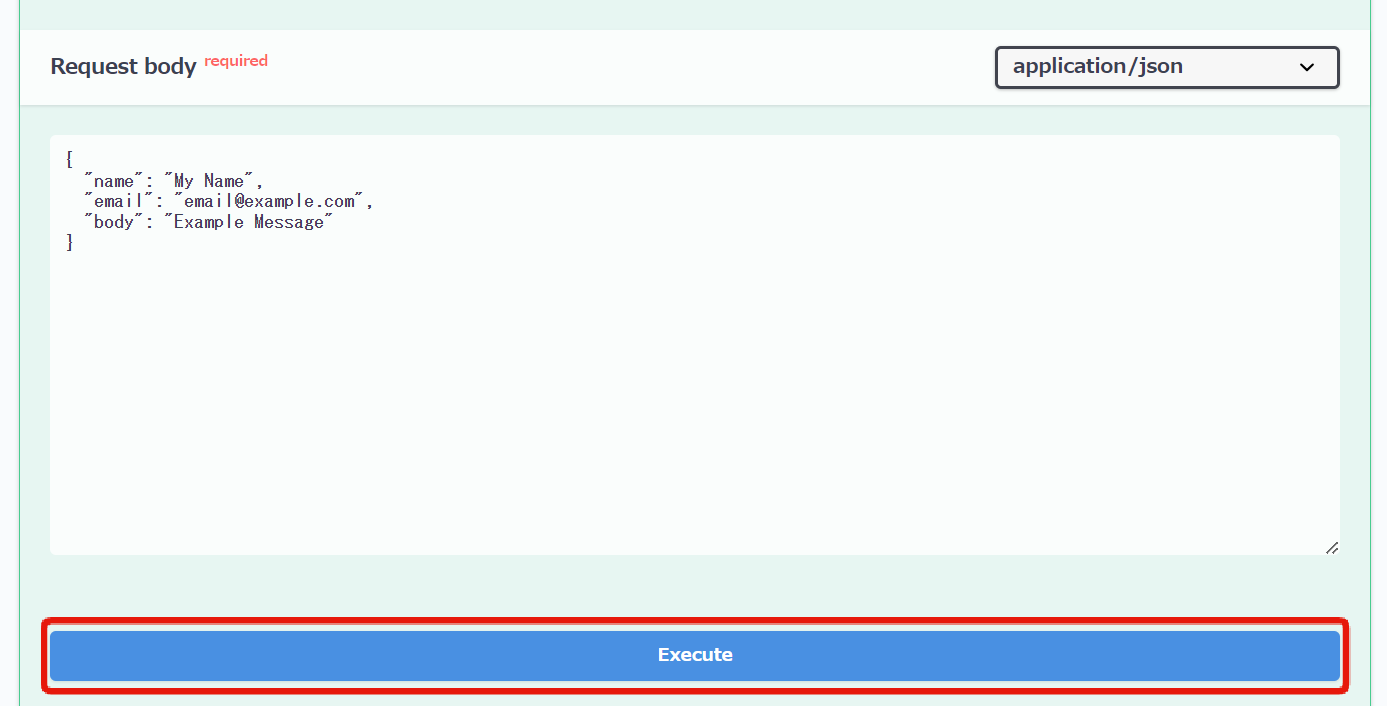
In the "Request body" section, you'll see a sample of data that can be sent. Edit the JSON below and click [Execute].
{
  "name": "My Name",
  "email": "email@example.com",
  "body": "Example Message"
}
The response will include the ID of the answer registered in Kuroco's form and a thank-you message.
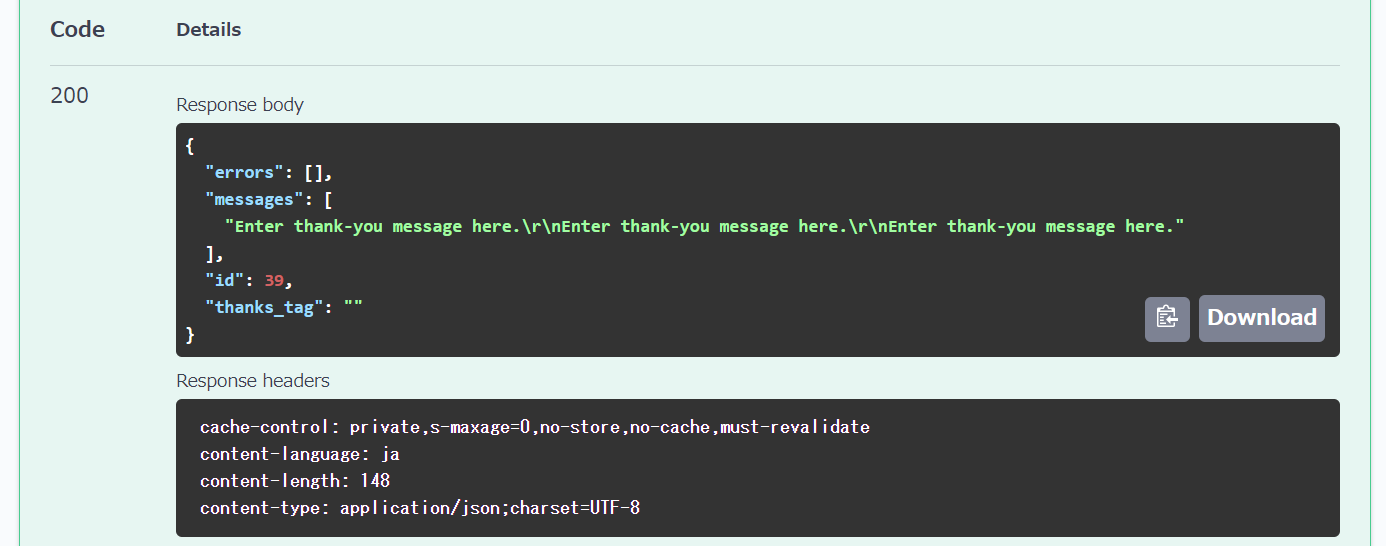
Upon checking the response, you'll see that the data you submitted is stored in Kuroco.
We have now set up two endpoints:
- For form definition retrieval:
(GET) form - For form data submission:
(POST) form
Next, let's use them to create and submit your form.
Additional front-end modifications
In the Nuxt installation directory, create additional files with the following structure. This time, create the following files in the /form/ directory to display a form.
pages
 - form
   - index.vue
Insert the following code.
- Nuxt2
- Nuxt3
loading...
loading...
For const FORM_ID = 3 above, substitute the ID value with your own.
For /rcms-api/8/form/${FORM_ID} and /rcms-api/8/form, enter the path shown on your endpoint list screen.
Browser verification
Next, verify the above file in youe browser.
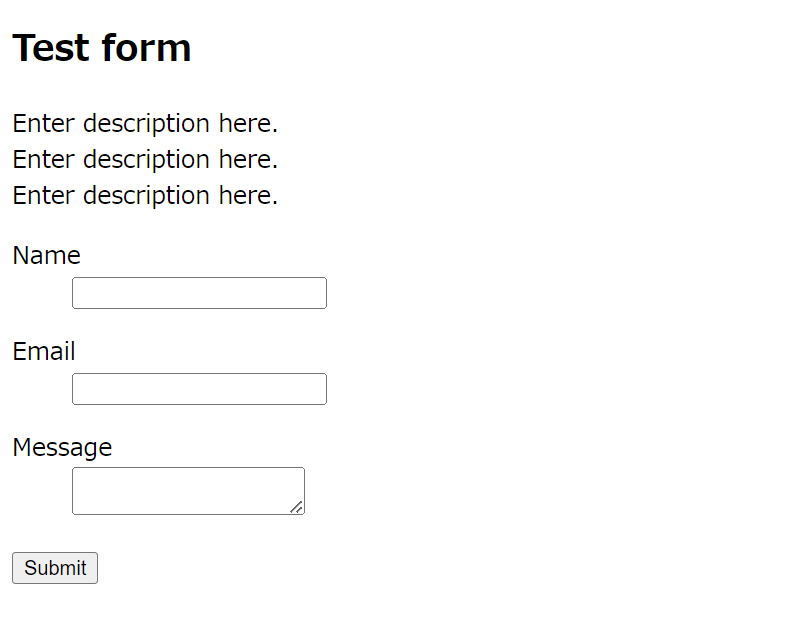
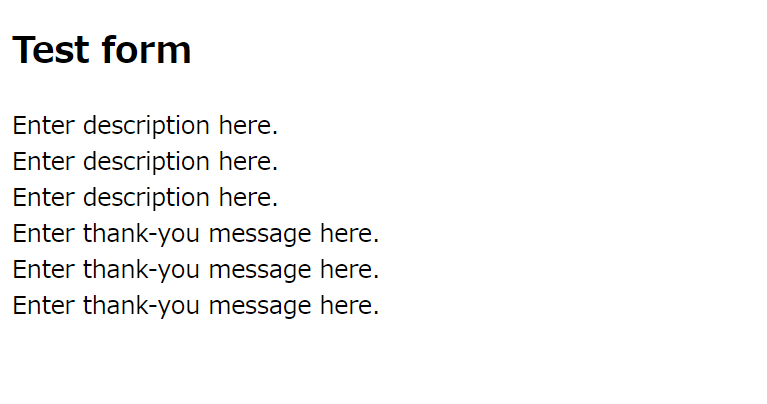
If your local server is down, run npm run dev to access http://localhost:3000/form. You should see the screen below:
When checking the [Network] tab in Chrome's developer console, you can confirm that communication is taking place with Kuroco, retrieving detailed information about the form.
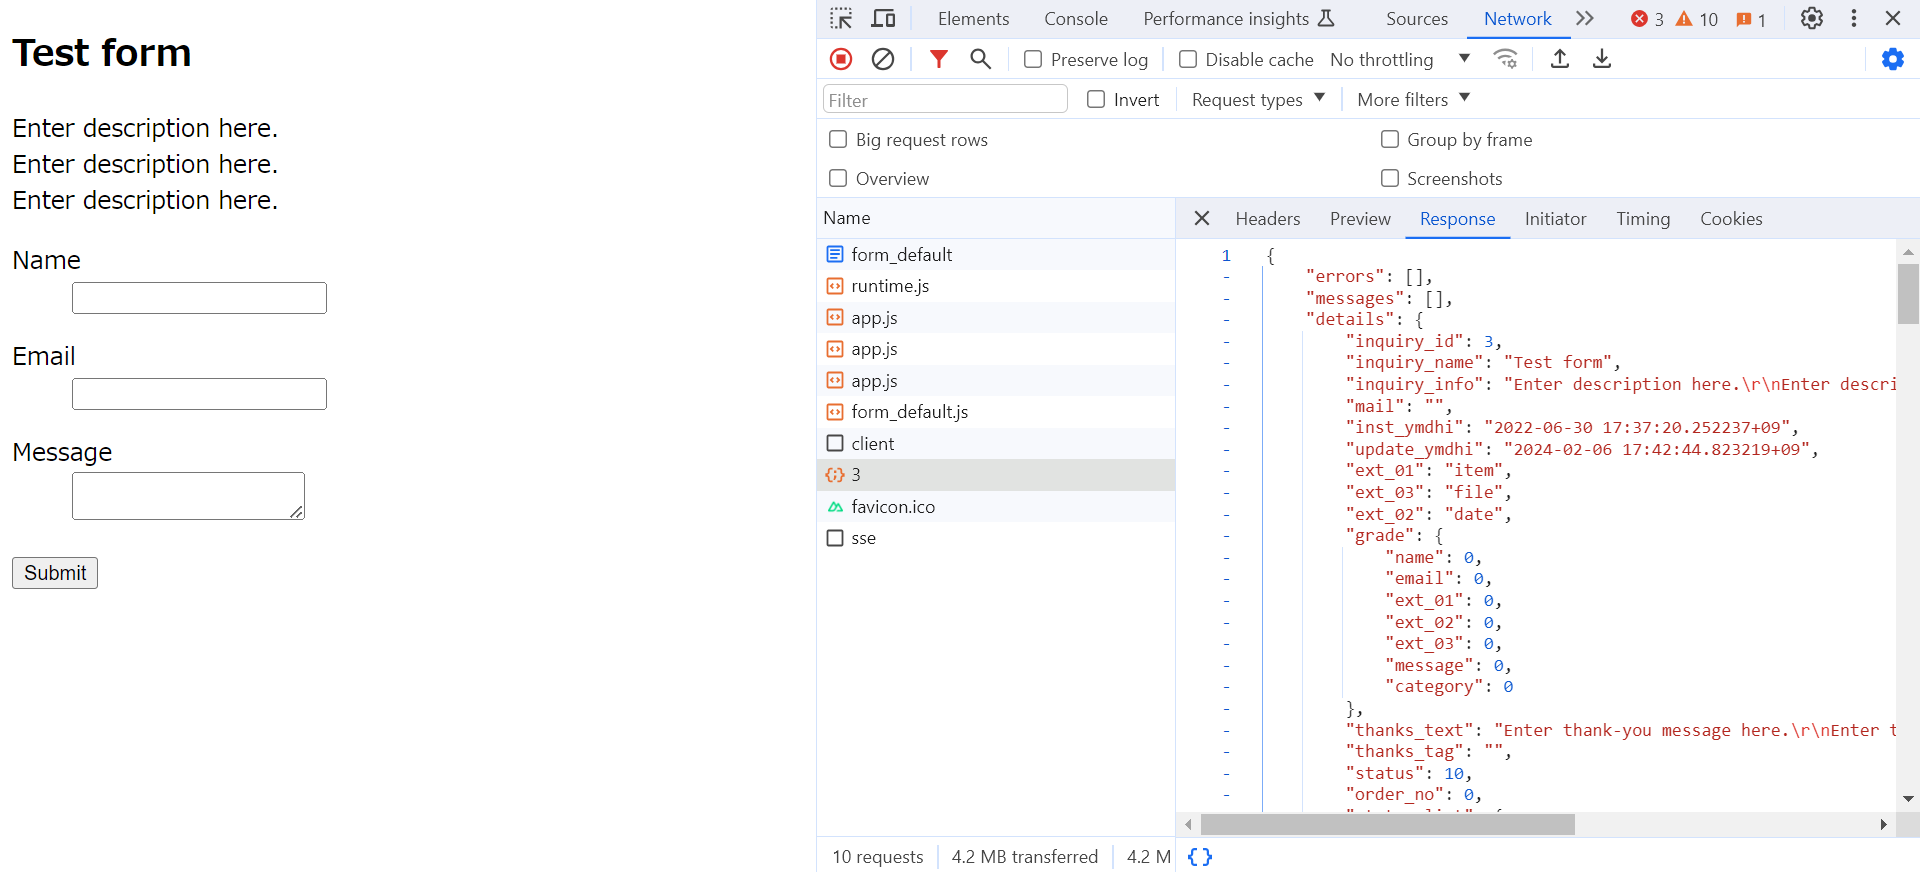
For detailed information in the response, please check the development console or use SwaggerUI to verify from the Kuroco management screen.
Send the HTML form data
Next, submit data from the HTML form. Enter values for each item as follows:
| Field | Input Value |
|---|---|
| Name | Test Name |
test@example.com | |
| Message | Test Message |
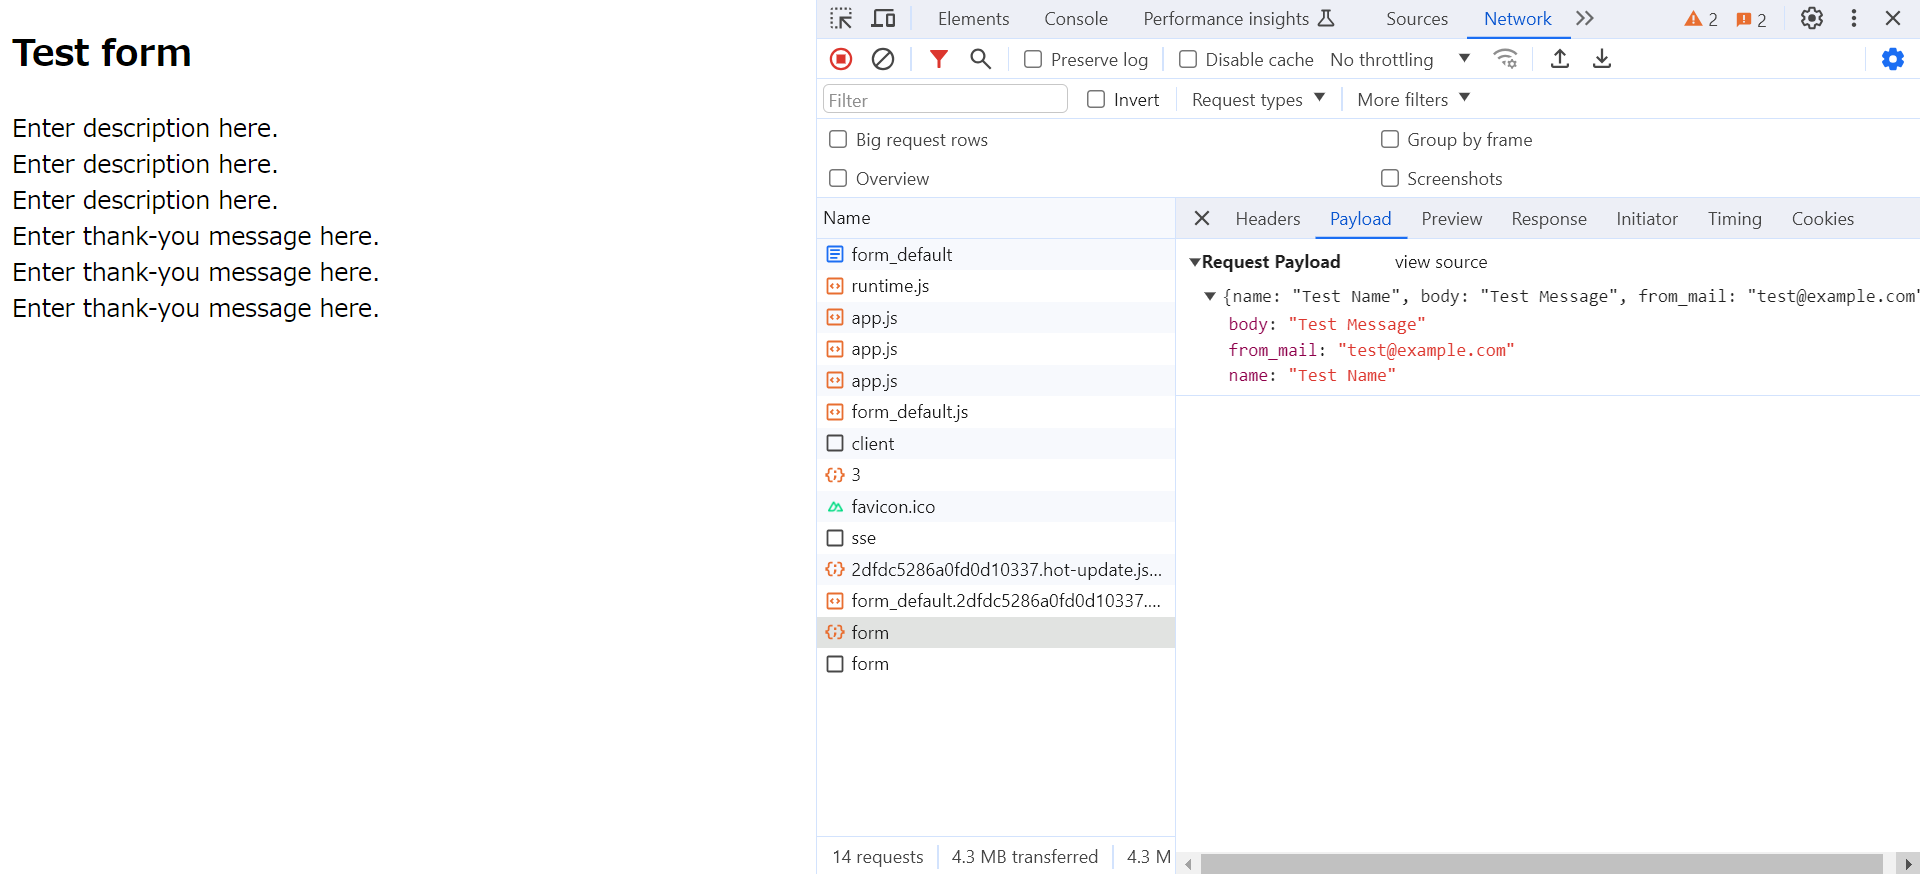
Upon clicking the [submit] button, the data will be sent, and a thank you message will be displayed.
As seen in the source code under "handleOnSubmit()," this action POSTed the data of [Form Items] to Kuroco.
You can also verify the content POSTed from the development console. If the submission is unsuccessful, please ensure that the data format matches the format confirmed in SwaggerUI.
Data verification in Kuroco
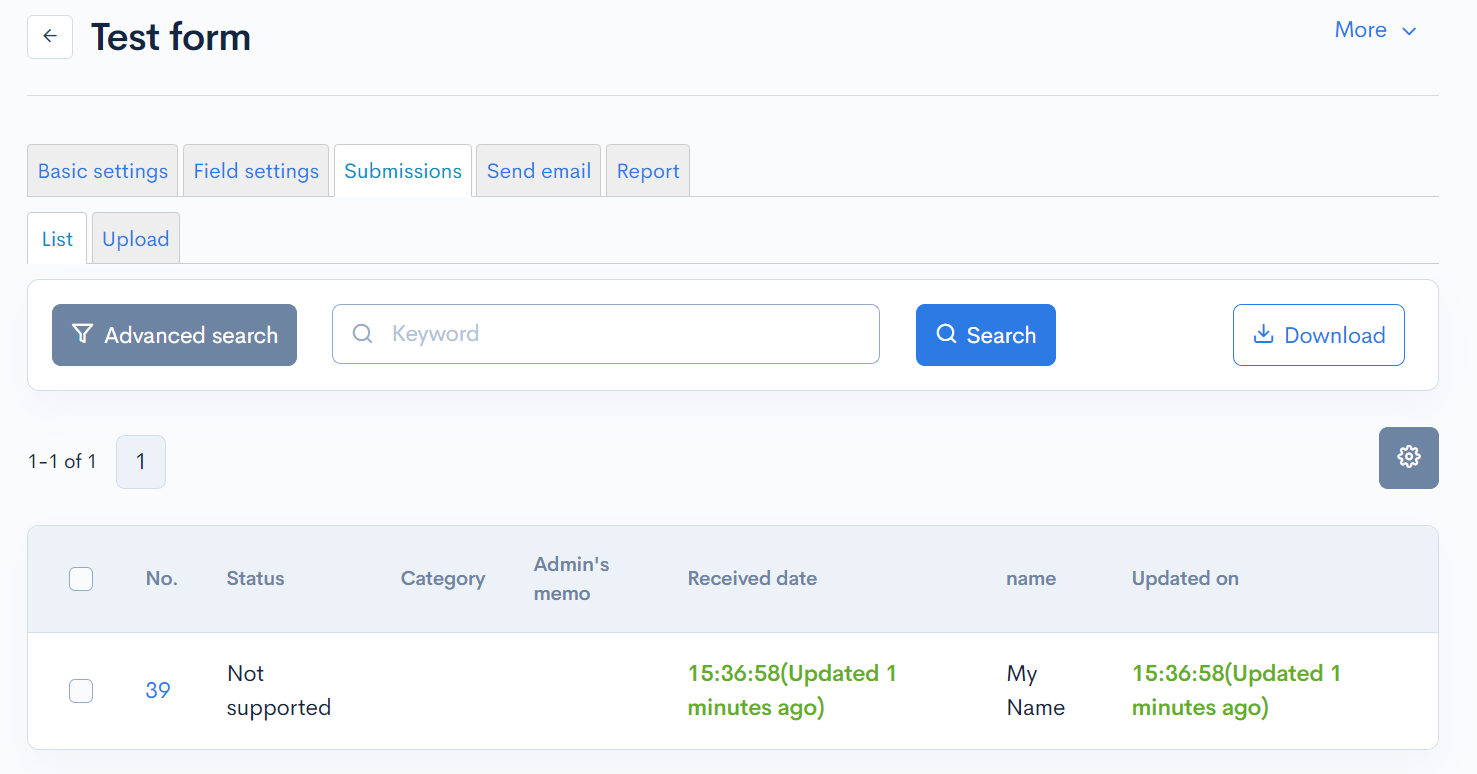
On the form list screen, click [Test form].
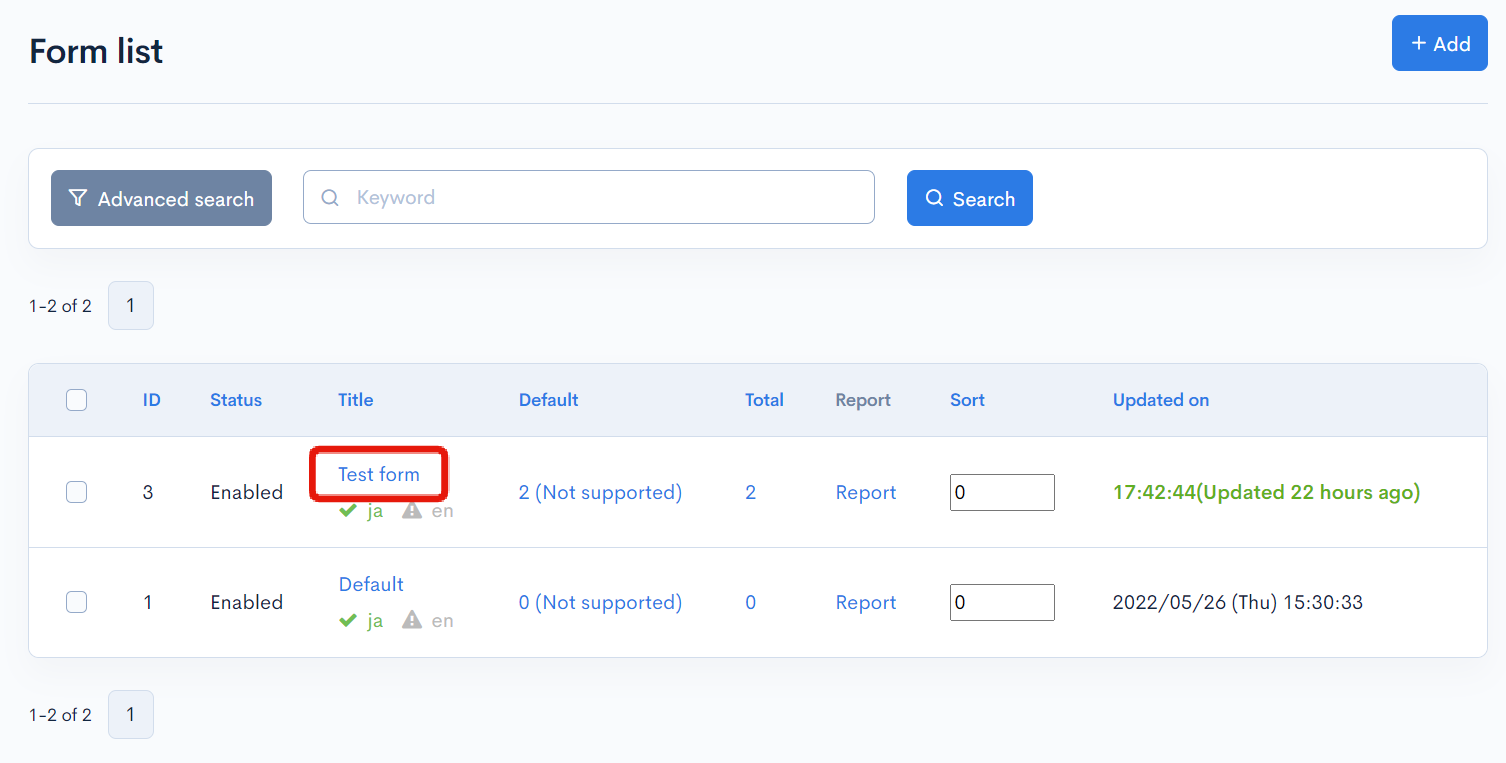
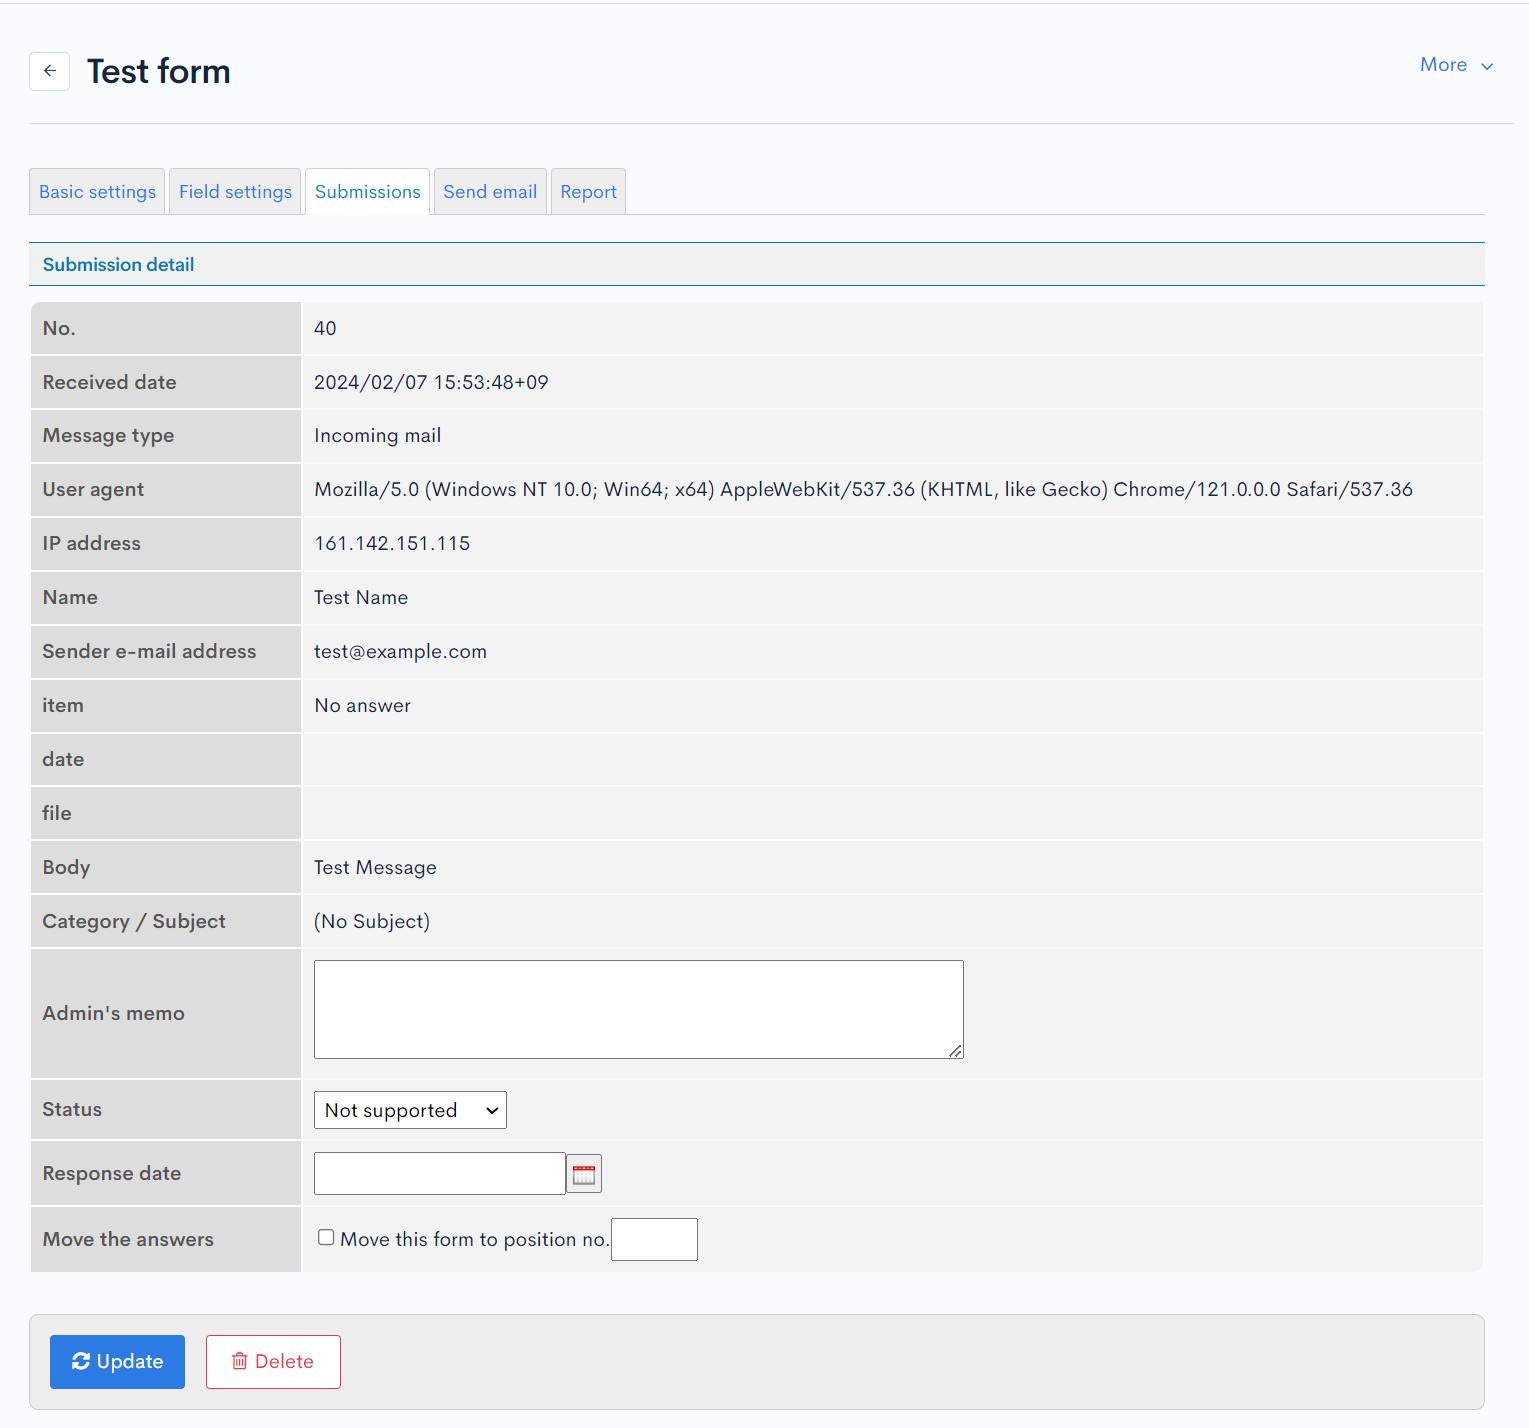
Click the [Submissions] tab to view the list of form responses received. You should see the entry you submitted earlier.
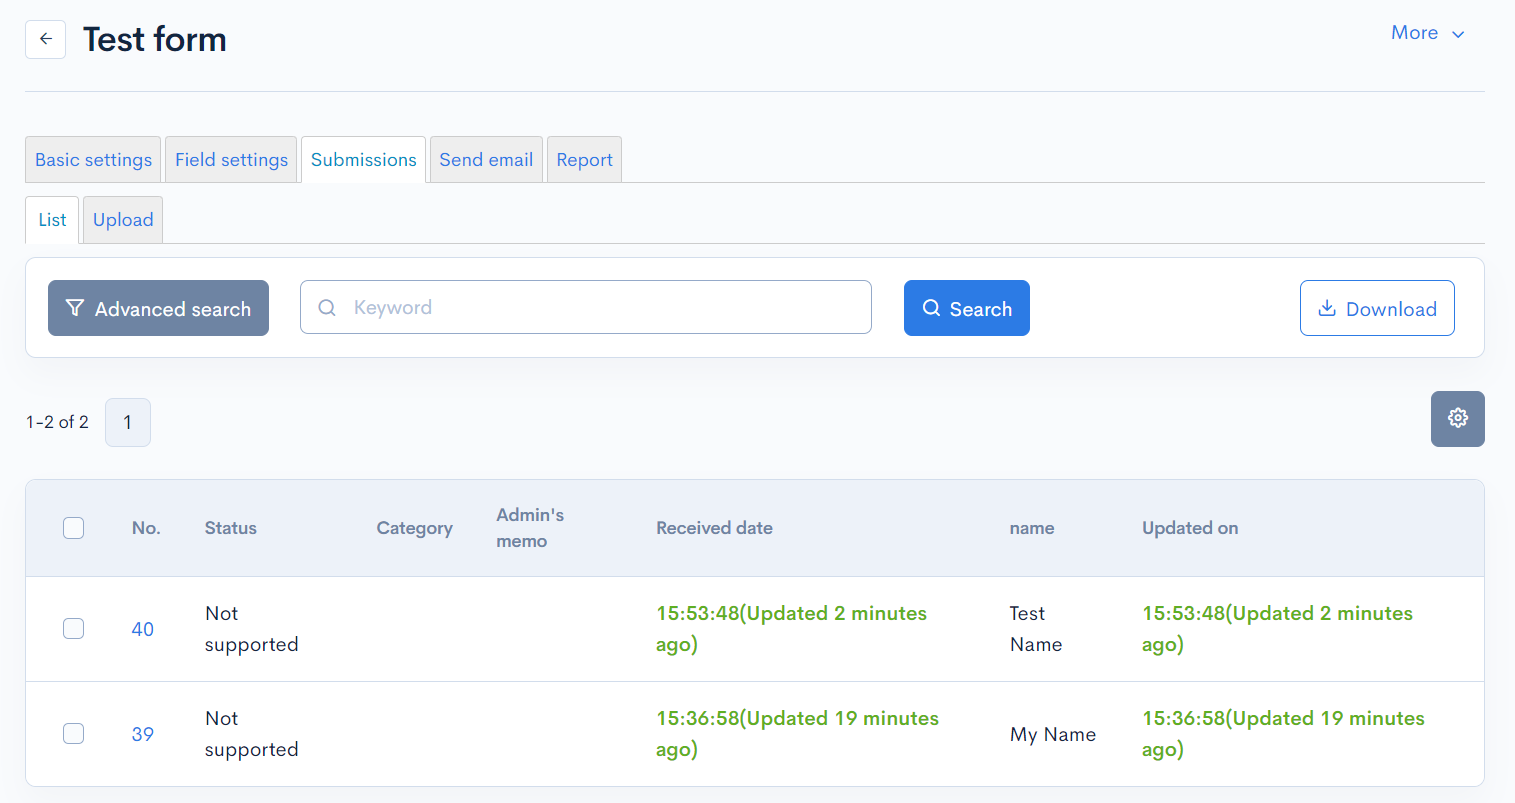
You can click the "No." link ([40] in this example) to view the response details, which contain data submitted via the HTML form.
Form validation
Lastly, let's test the form validation function.
Revisit the form page and enter an invalid value in the [email] field. Sample input:
| Field | Input value |
|---|---|
| [name] | Empty |
| [email] | mail |
| [message] | Empty |
After you click [submit], an error message will be displayed at the top of the screen.
Please also check the error messages from Kuroco in the development console.
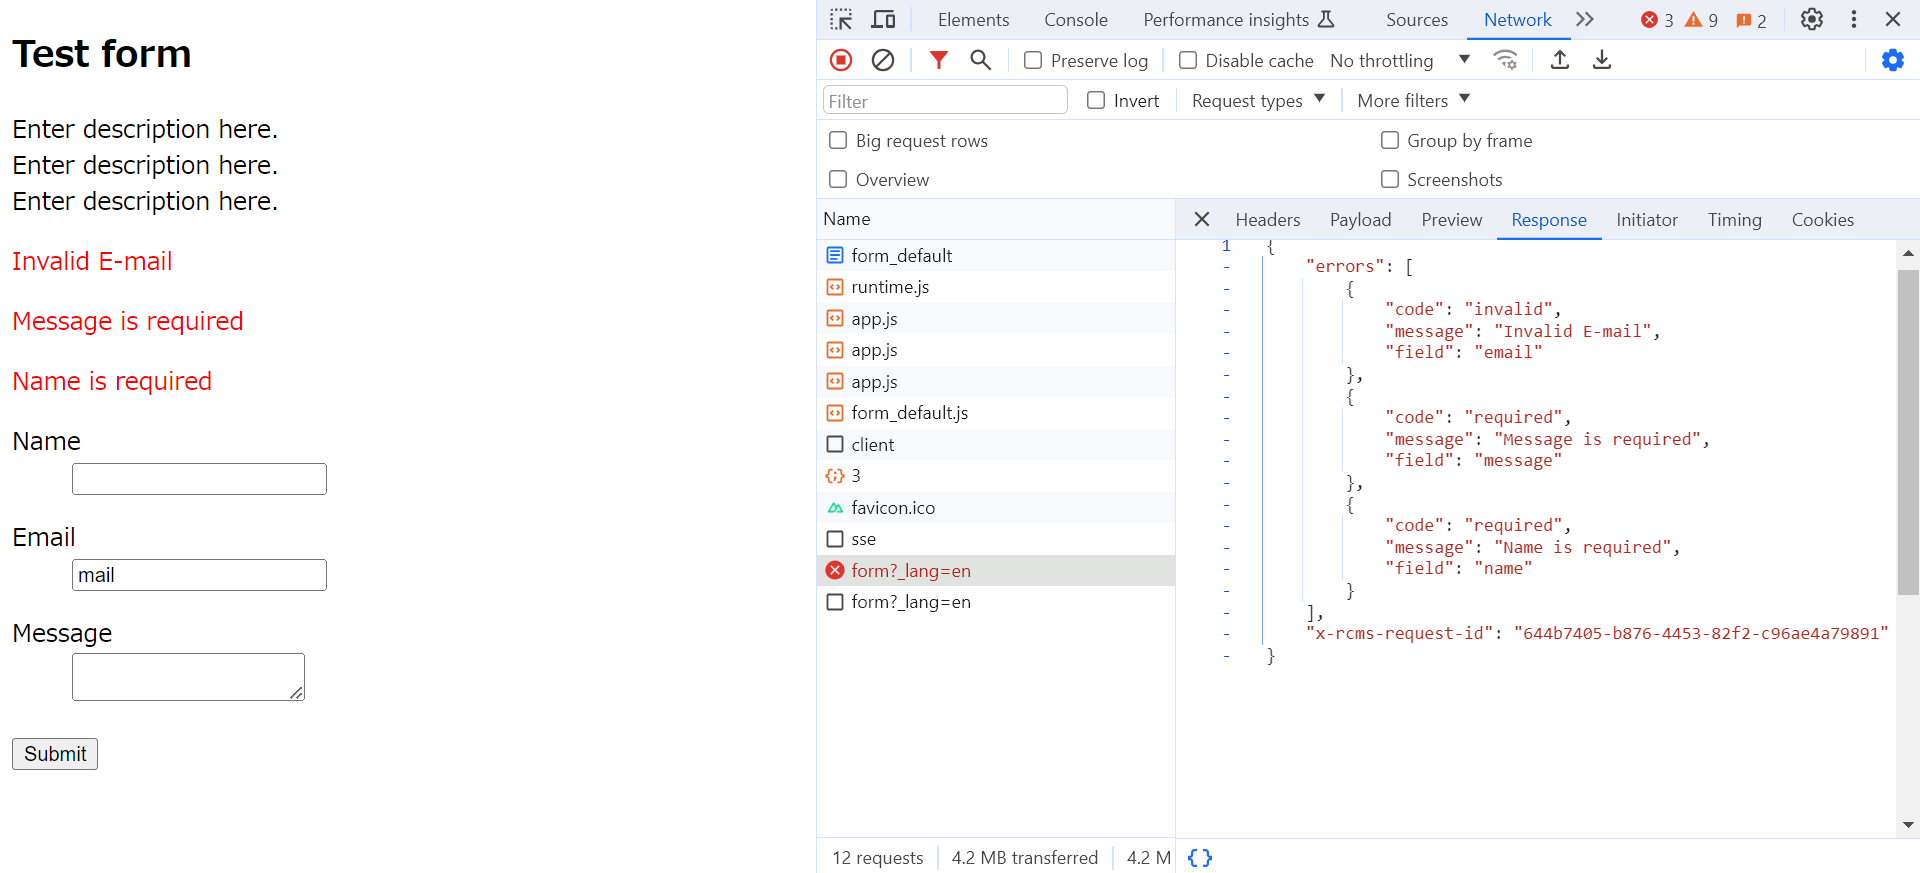
The above procedure verifies Kuroco's server-side validation. When an error occurs, the error content and HTTP status code are returned in the response body. As seen in the source code, you need to implement error handling on the front-end as well.
To validate dynamic forms, you will need custom implementations based on the values obtained from Kuroco.
Custom fields
In addition to the default form fields, you can freely define custom fields following the steps below.
Add a custom field
On the form list screen, click [Test form].
Click the [Field settings] tab to display the inquiry field settings screen.

Dropdown selection
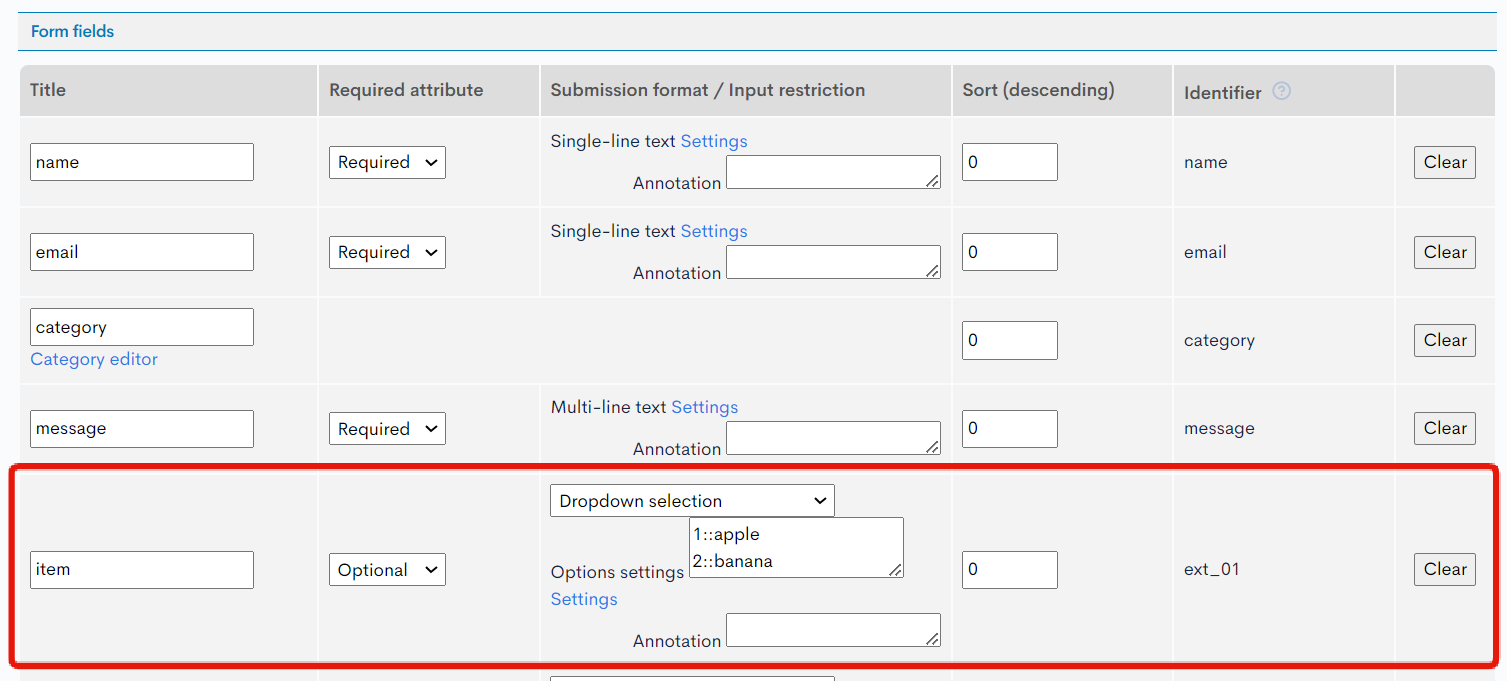
To set up a dropdown selection field, enter the values shown below in a blank custom entry:
| Field | Input value |
|---|---|
| Title | item |
| Required attribute | Optional |
| Answer format / Input restriction | Dropdown selection |
| Options settings | 1::apple 2::banana |
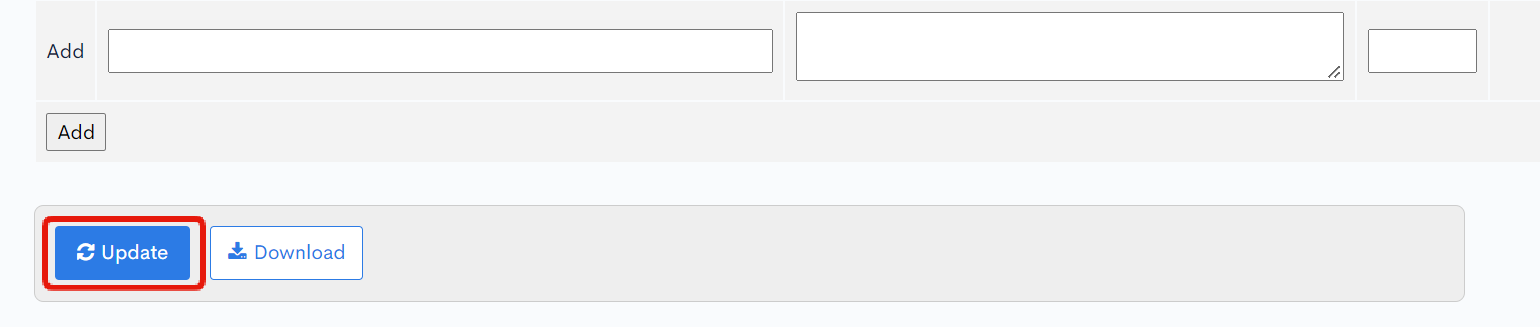
When you are done, click [Update] near the bottom of the screen.
Using SwaggerUI, confirm that the response from the InquiryForm::details endpoint in Kuroco includes the added form field (ext_01).
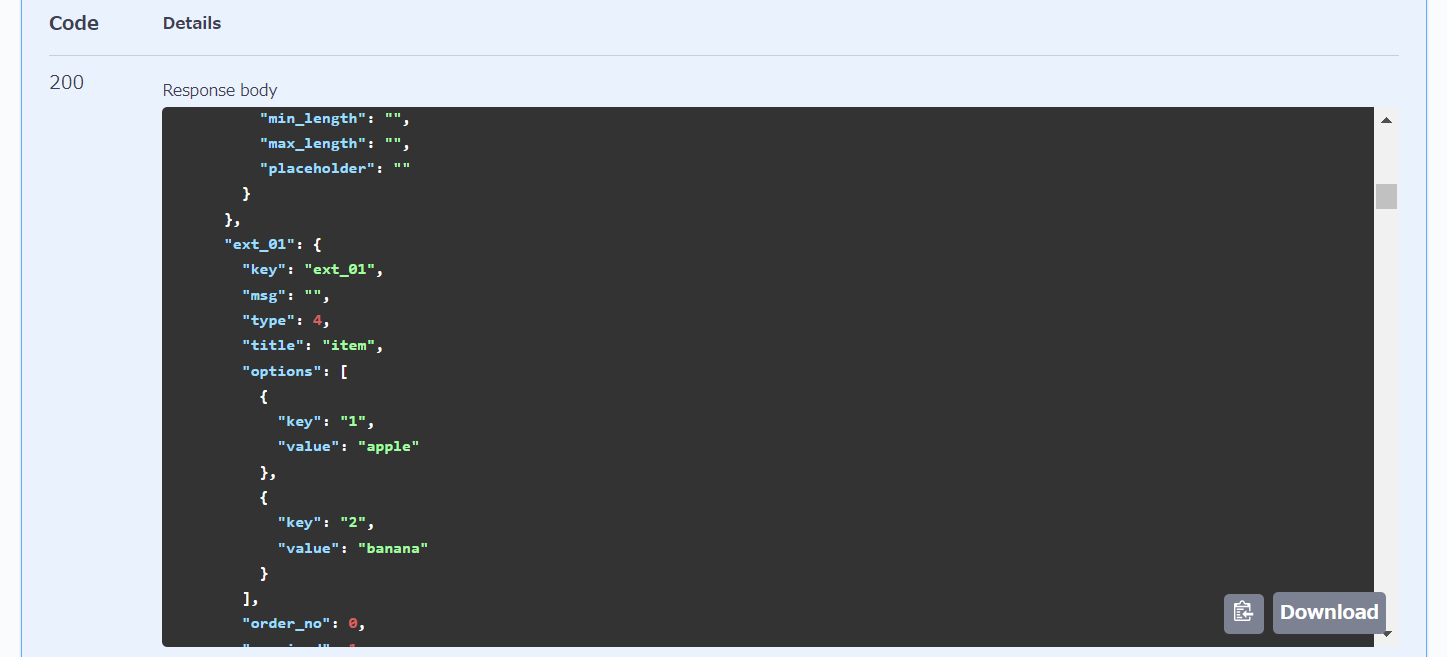
Next, using SwaggerUI, check how to POST the 'ext_01' field to the InquiryMessage::send endpoint, including its data format.
Check SwaggerUI's Example Value and Schema.
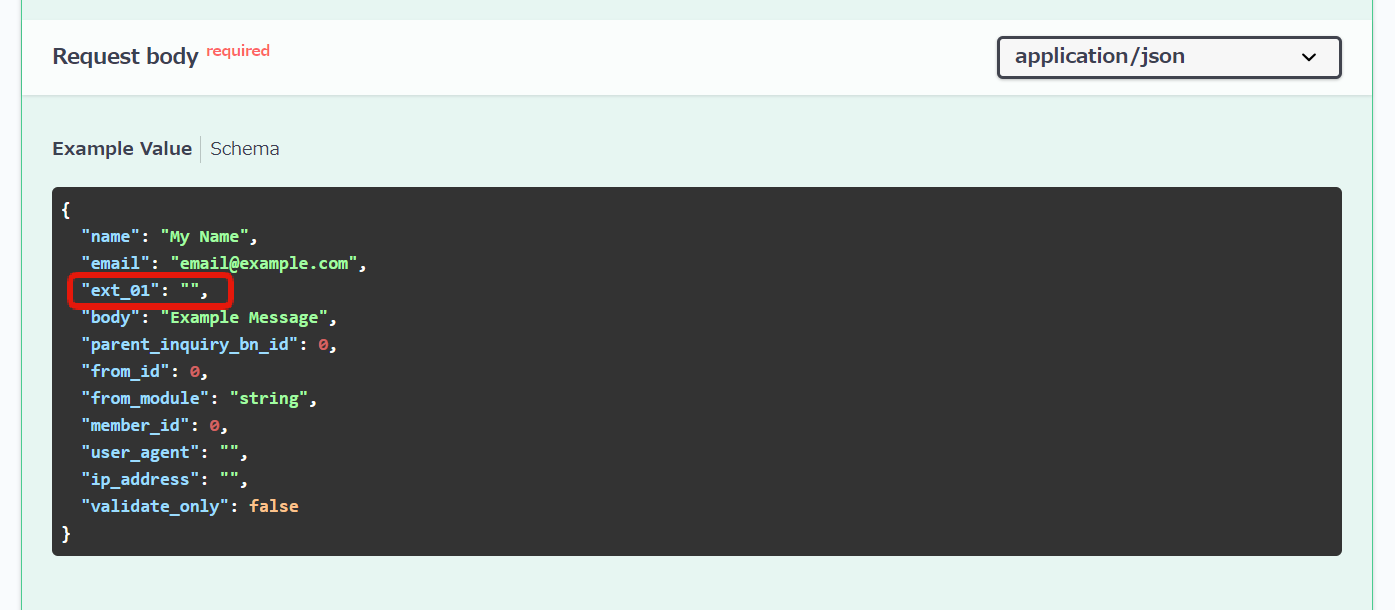
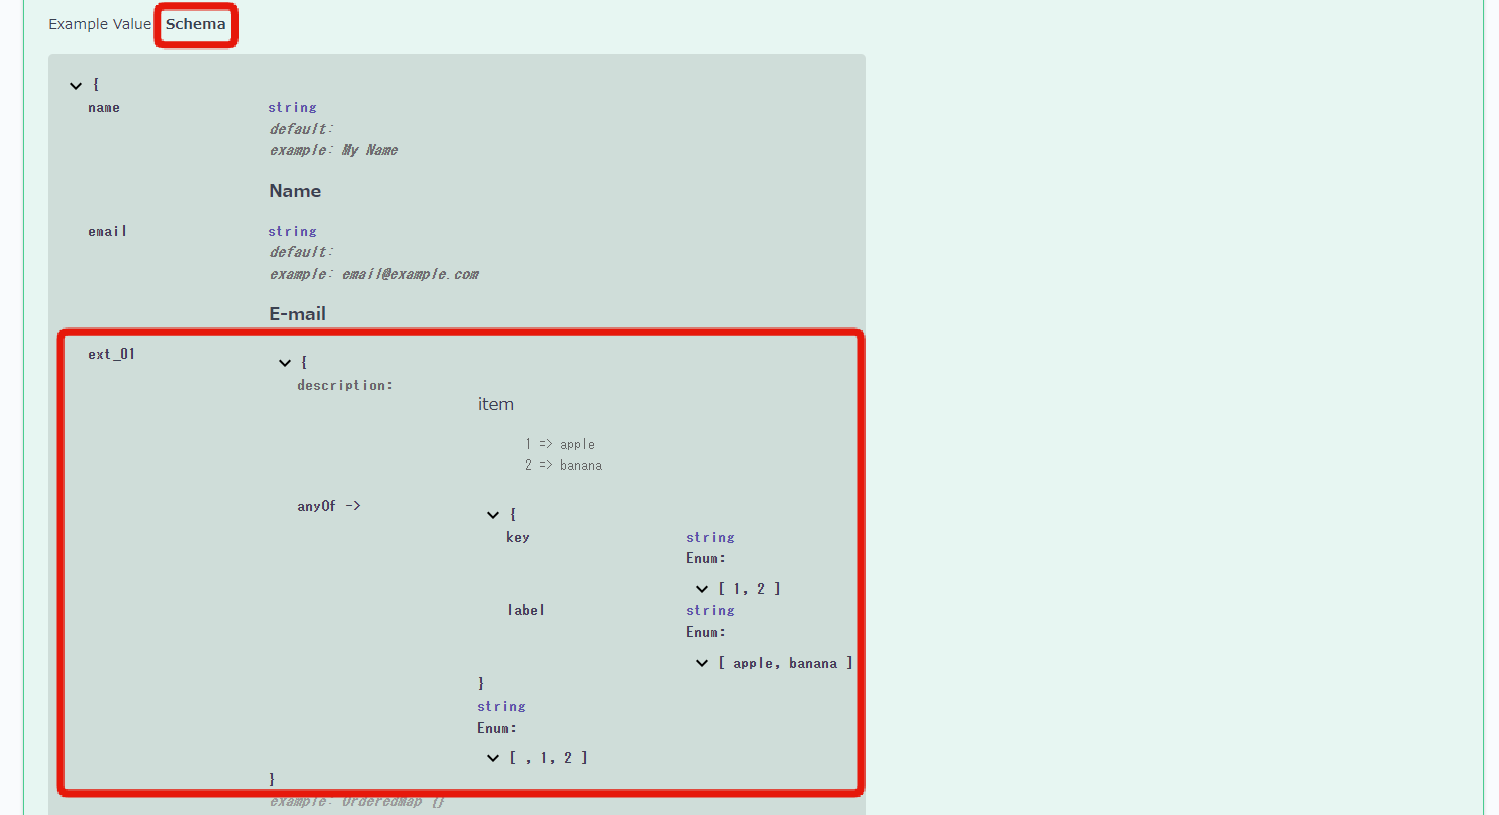
In this case, for a single selection (select box), it accepts data in the following formats:
"ext_01": {"key": "1" , "label": "apple"}"ext_01": "1"
Based on the confirmed information, add frontend code to display the contents of options obtained from Kuroco as choices and POST the selected key using a select box.
The updated code is as follows:
- Nuxt2
- Nuxt3
loading...
loading...
Confirm that the added field is displayed.
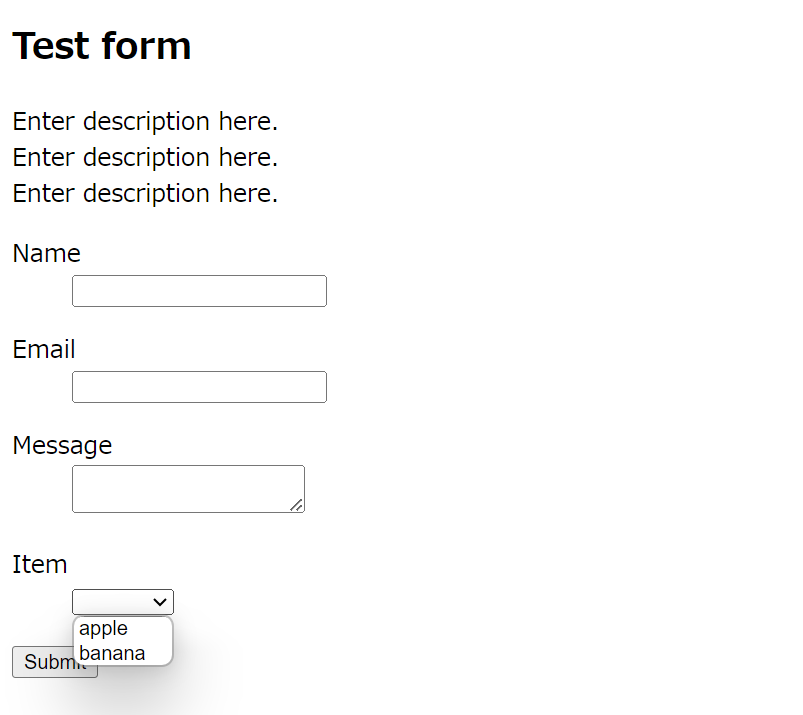
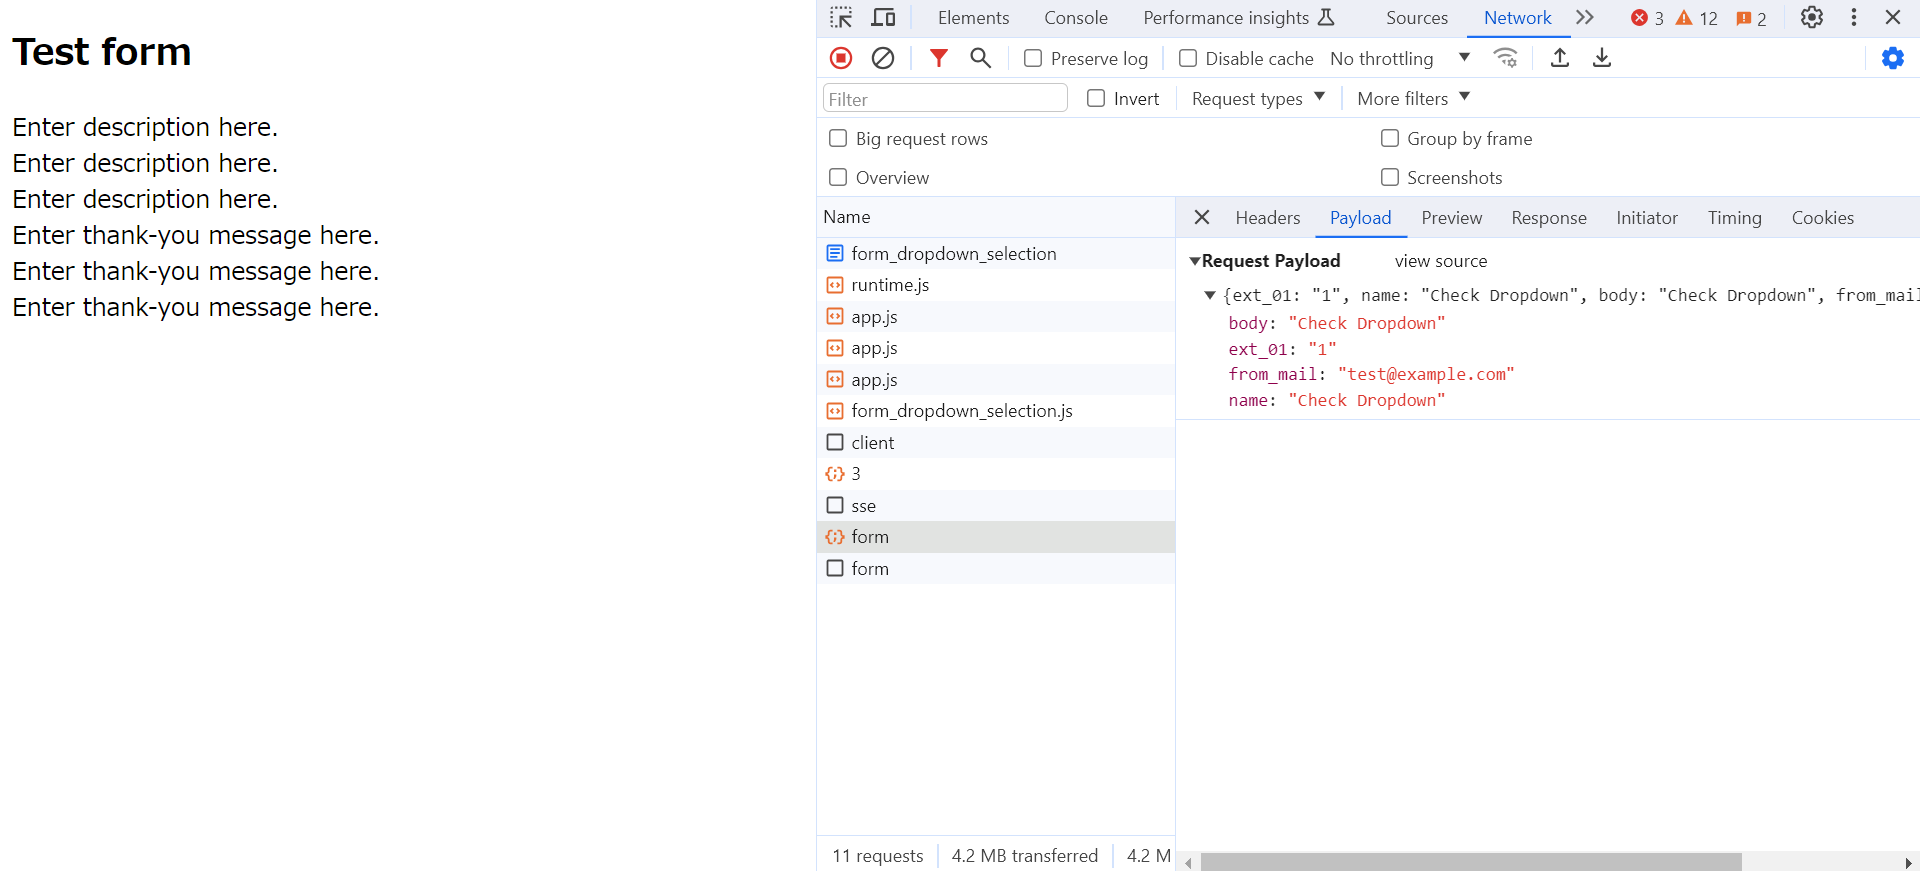
Submit the form and confirm that the response is registered in Kuroco.
In the development console, verify that the key selected in the select box is POSTed in the format "ext_01":"1".
Date
Next, let's add a date input field and verify the form
Setup
To set up a date input field, enter the values shown below in a blank custom entry:
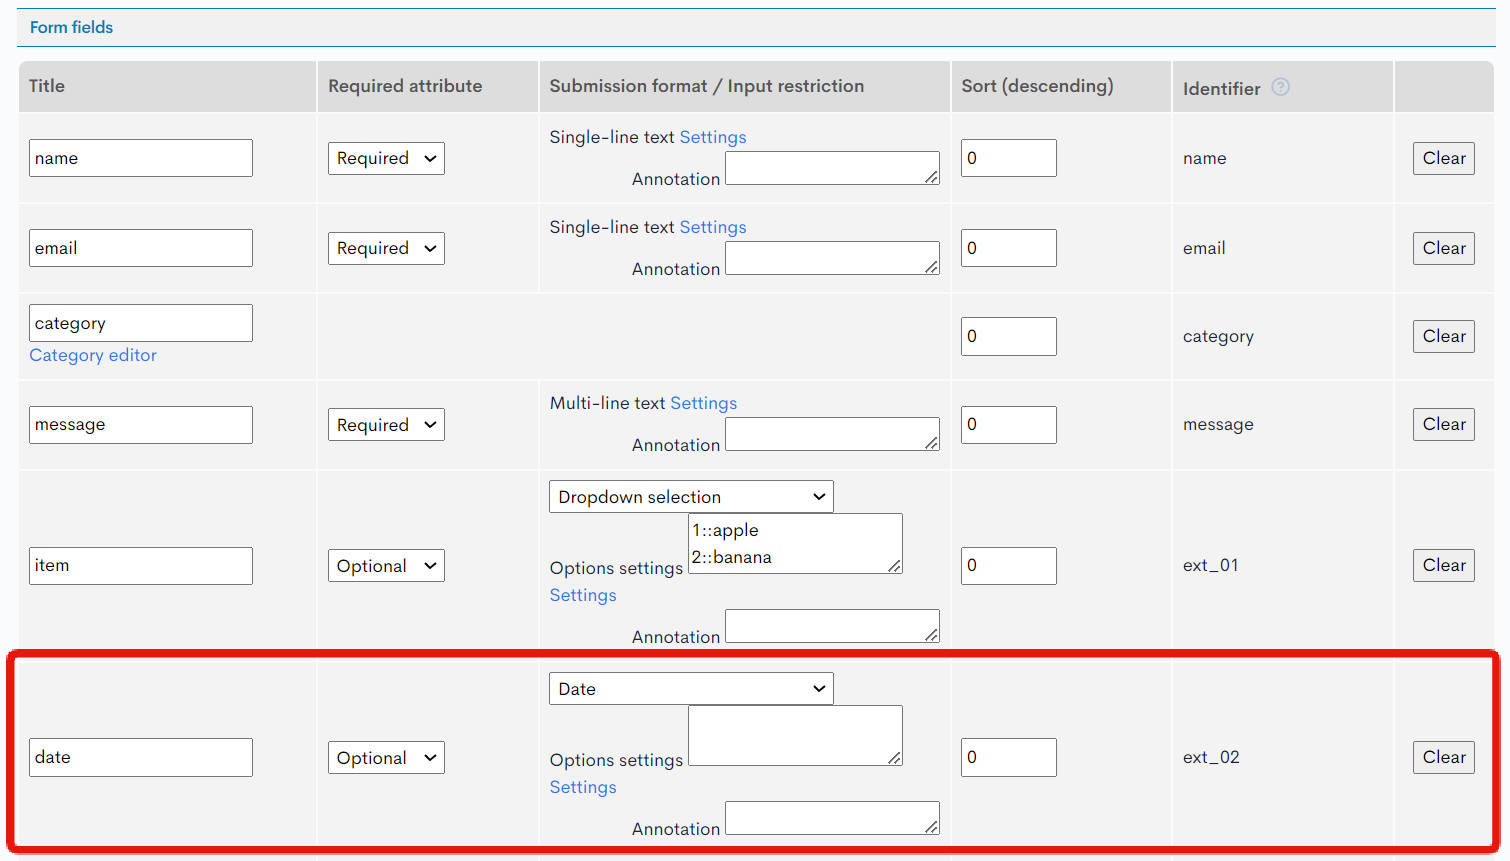
| Field | Input value |
|---|---|
| Title | date |
| Required attribute | Optional |
| Answer format / Input restriction | Date |
| Options settings | (Leave blank) |
When you are done, click [Update] near the bottom of the screen.
Similarly to before, let's use SwaggerUI to confirm the addition of the field and the data format for POSTing. As the date is to be POSTed in String format as Y-m-d, modify the index.vue accordingly to accommodate this.
- Nuxt2
- Nuxt3
loading...
loading...
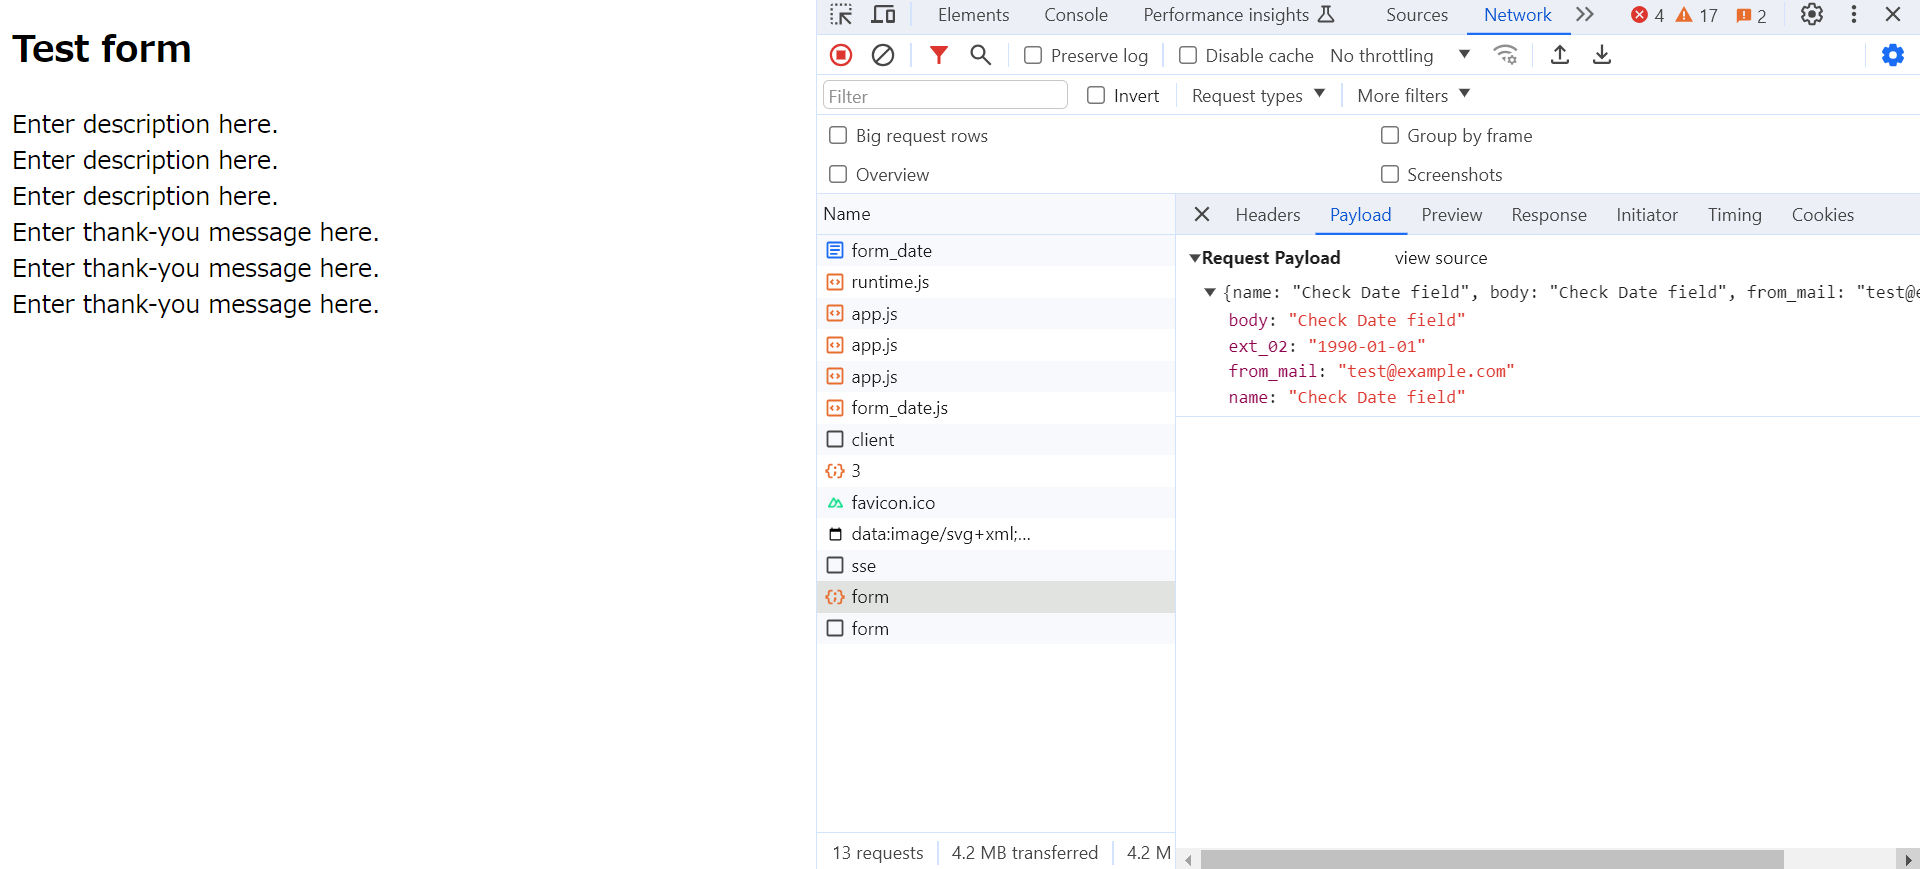
Select 1900/01/01 in the Date field, submit the form, and confirm that the response is successfully registered in Kuroco.
Validation check
field settngs can be validated in Kuroco. For example, let's set up a validation check for dates between 10 years ago and the present.
In the [Field settings] tab of the form editor, click [Settings] next to the custom "date" field.
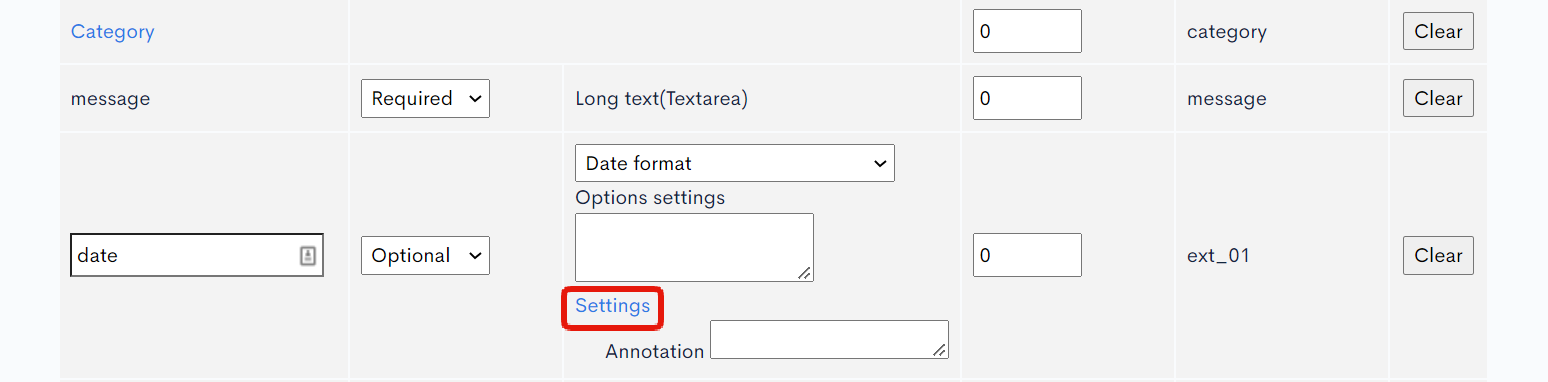 In the settings dialog, enter
 -10 years for the "Relative start offset" field under [Input type].
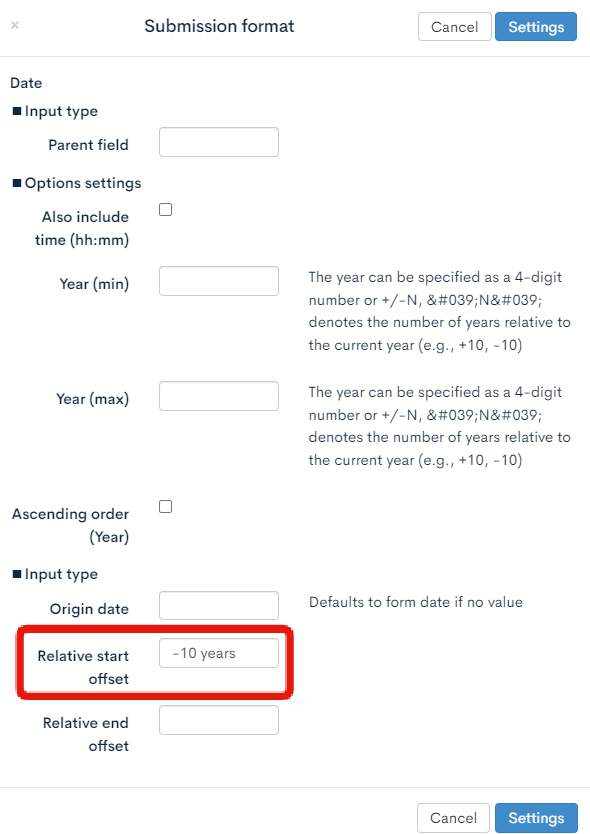
Refer to the reference guide List of available fields for the inquiry form: Date format for more information.
After you implement this validation check, entering a date over 10 years before the current date will result in an error. To test this, enter 1900-01-01 in the "date" field of the form page as before and click [submit].
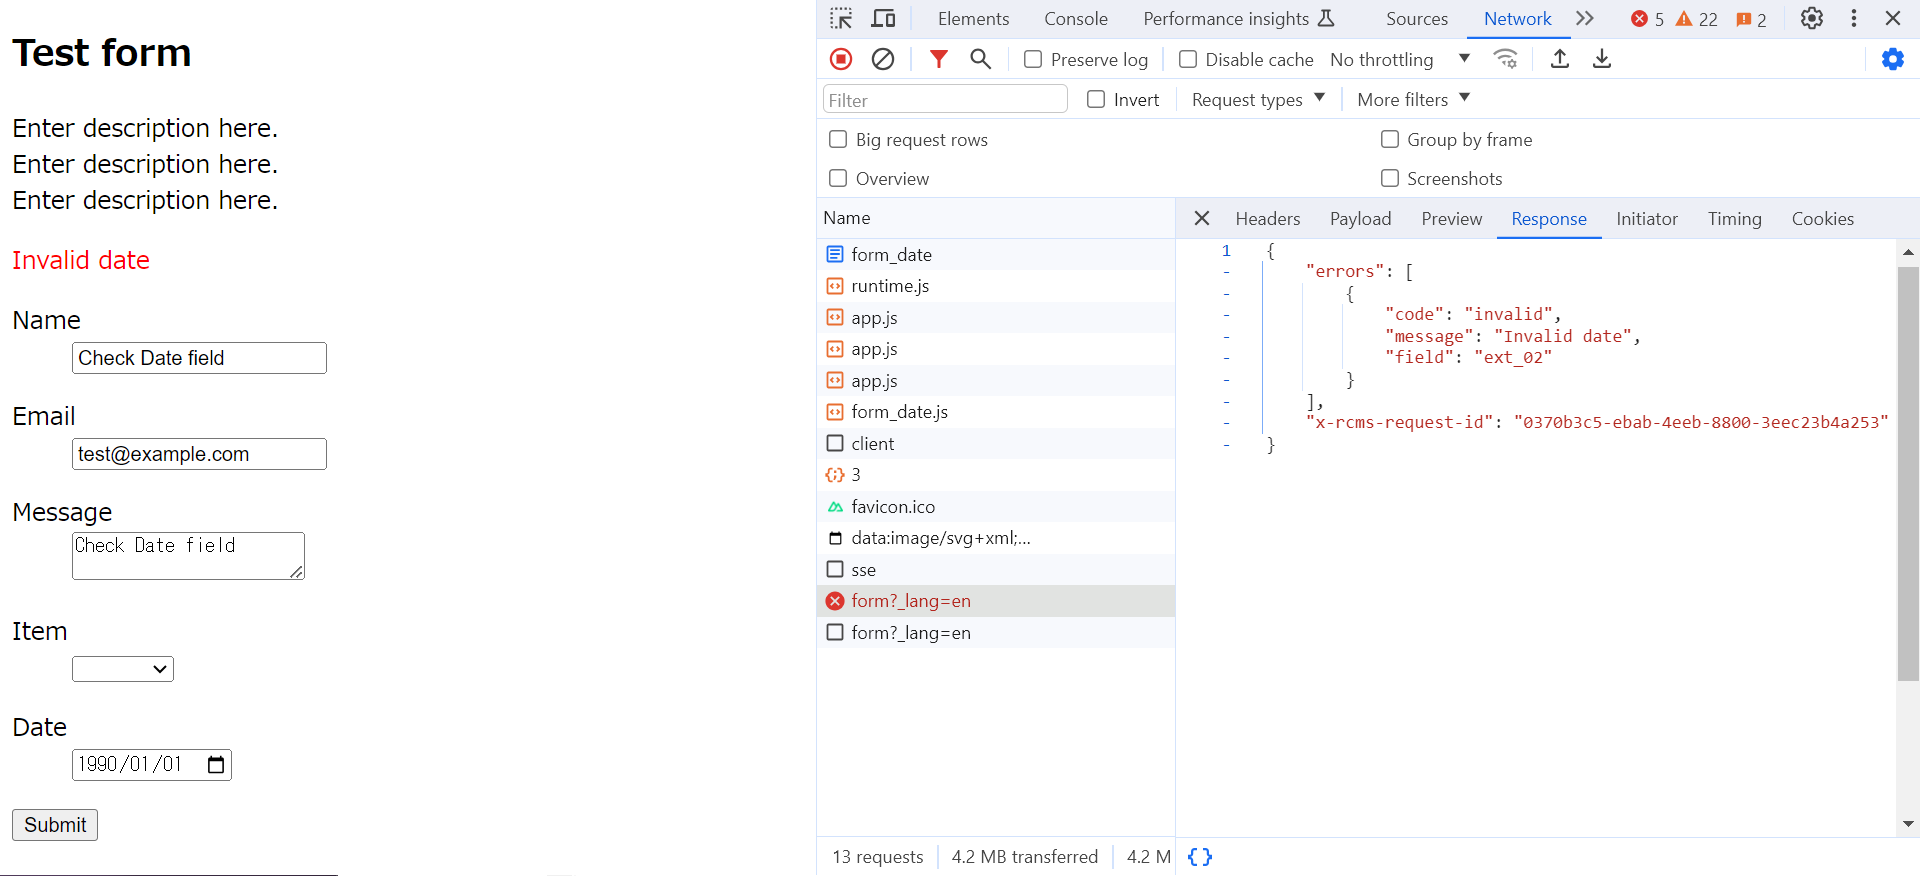
The validation on the Kuroco side is strictly backend validation. If you wish to perform additional validation on the frontend, you will need to implement it yourself.
When setting the Year (min) and Year (max) in the form field settings, you can obtain a list of selectable years in the InquiryForm::details.cols.ext_02.options of the response from InquiryForm. You can use this to restrict the selectable years or allow users to choose a year using a select box. For example, if the request to Kuroco's endpoint is in the format "ext_02":"1990-01-01", it is acceptable to input the date field with a any tag.
File upload
This field type allows you to upload and submit files in the inquiry form.
Setup
To set up a file upload field, enter the values shown below in a blank custom entry:
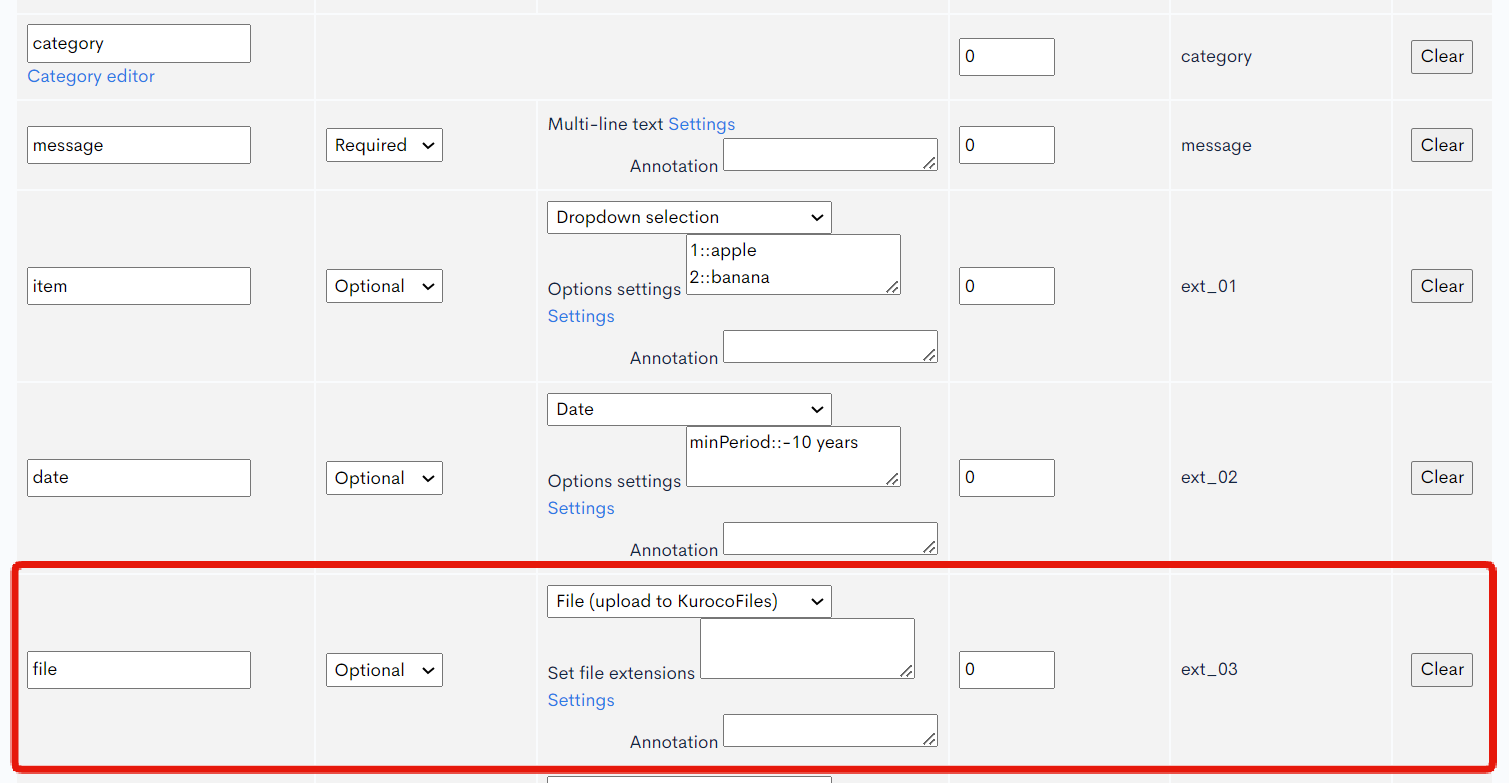
| Field | Input value |
|---|---|
| Title | file |
| Required attribute | Optional |
| Answer format / Input restriction | File |
| Options settings | (Leave blank) |
When you are done, click [Update] near the bottom of the screen to save these settings.
Create file upload endpoint
The implementation process is as follows:
- Upload your file to Kuroco.
- Submit the ID of the uploaded file.
In order to do that, you need to first create an endpoint to receive uploads. Select your target API in the sidebar menu and click [Add new endpoint] on the endpoint list screen.
Enter the following settings in the endpoint configuration dialog:
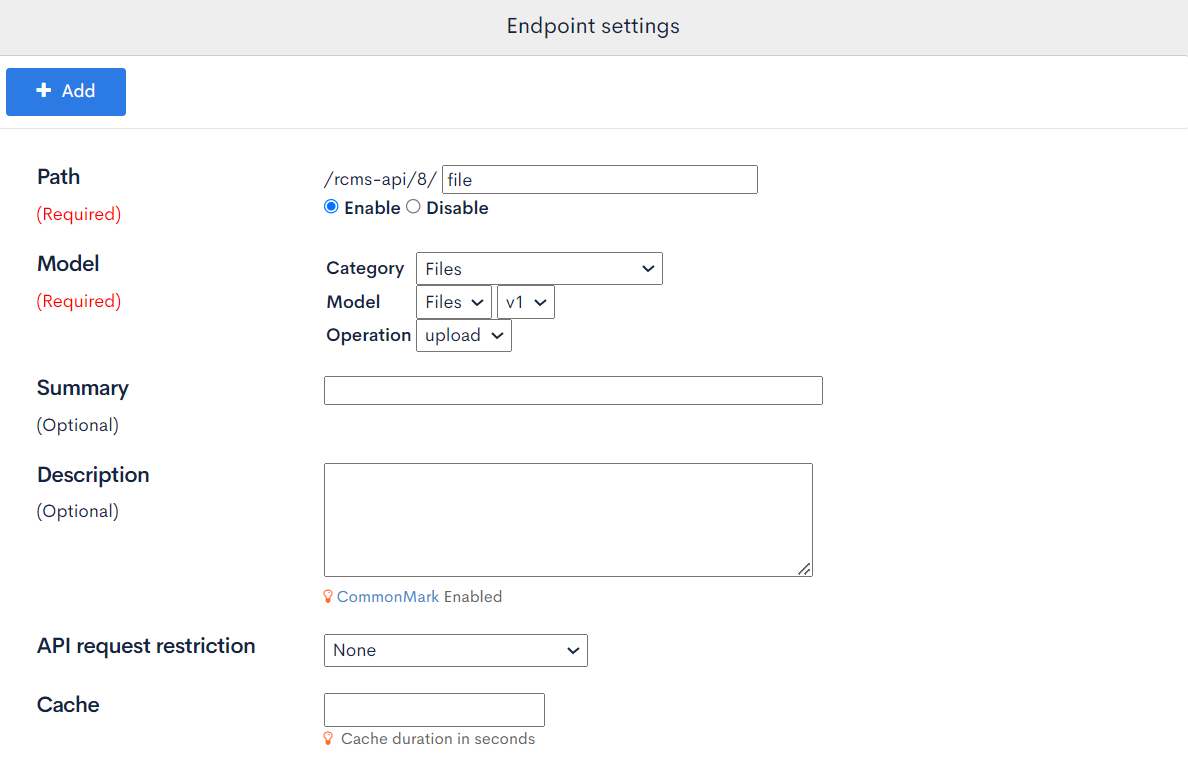
| Item | Setting |
|---|---|
| Path | file |
| Category | Files |
| Model | Files |
| Operation | upload |
| Authorization | None |
For simplicity, we will omit the authorization settings here.
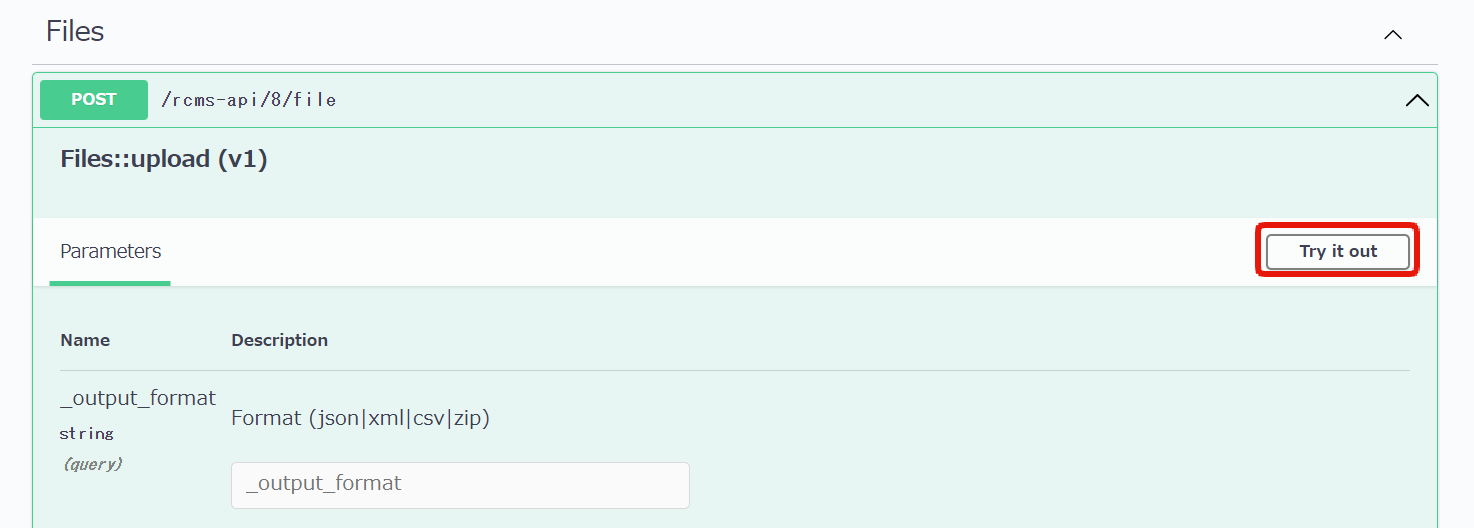
Swagger UI verification
The next step is to verify if Swagger UI can retrieve the new form definition. On the endpoint list screen, click [Swagger UI].
On the Swagger UI screen, select the file upload endpoint you created earlier.

Click [Try it out].
In the input field labeled "file", select a sample file from your local drive and click [Execute]. For this tutorial, we will use the logo image kuroco.png.
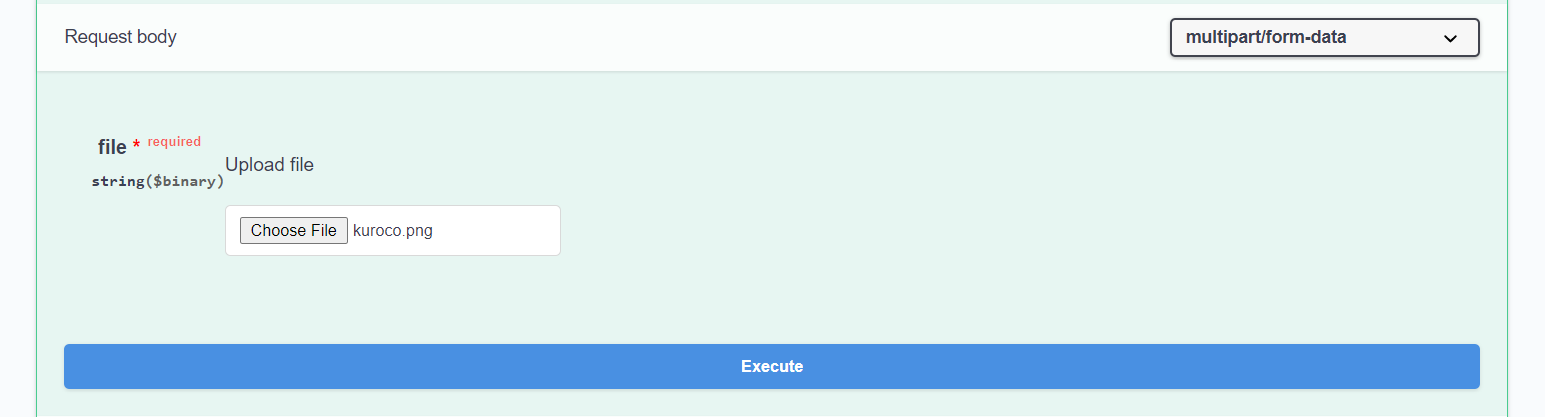
The file is uploaded and stored in a temporary location indicated by the file_id path.
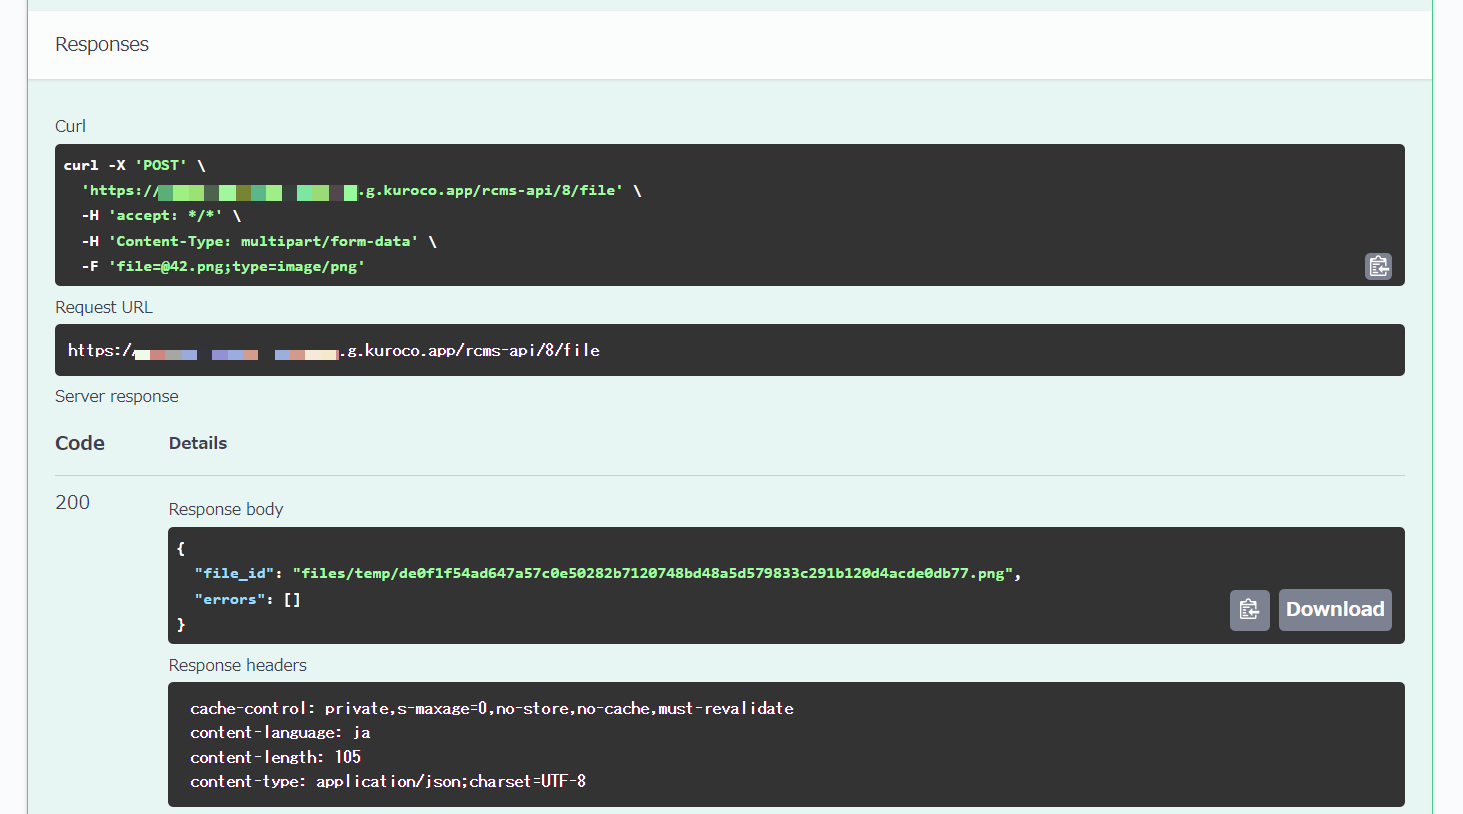
When uploading files, the specified header should be 'Content-Type: multipart/form-data'. Please be sure to specify this when performing a POST request from the frontend.
Moreover, accessing the file_id in the browser will display the uploaded image, allowing you to confirm that the file has been stored.
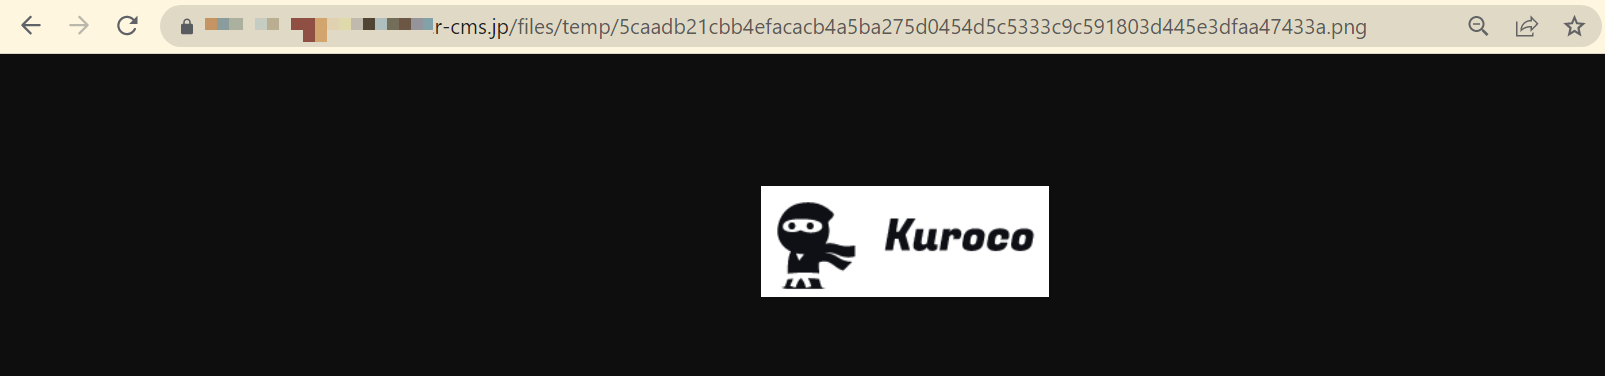
The URL for confirmation is ADMIN_URL + file_id.
Sending this file_id to the endpoint of InquiryMessage::send will result in the file stored in the temporary area being saved in KurocoFiles, associated with the corresponding response.
With this, the endpoint for the form is now complete.
Form modification and file submission
Next, update pages/form/index.vue.
The following is the updated code.
- Nuxt2
- Nuxt3
loading...
loading...
Let's actually upload an image and submit form data to confirm that the new [file] field is sent to Kuroco.
When uploading an image file from the front end, a request is sent to the Files::upload endpoint at the time of upload, and you can confirm that the file_id is obtained.
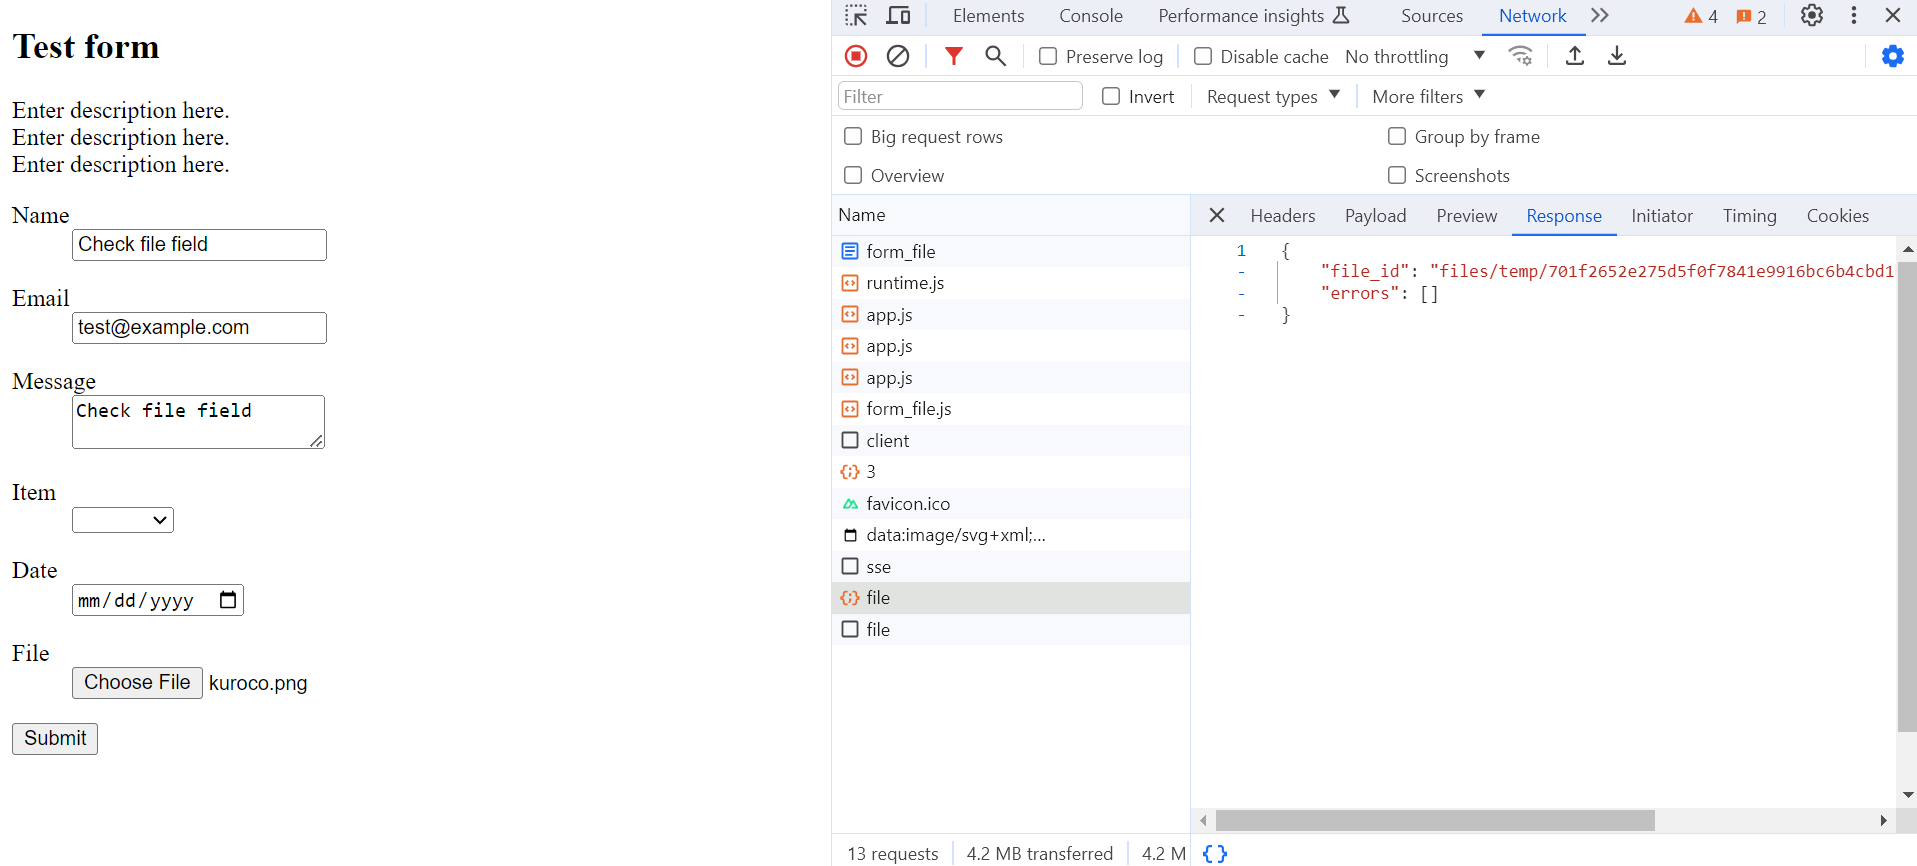
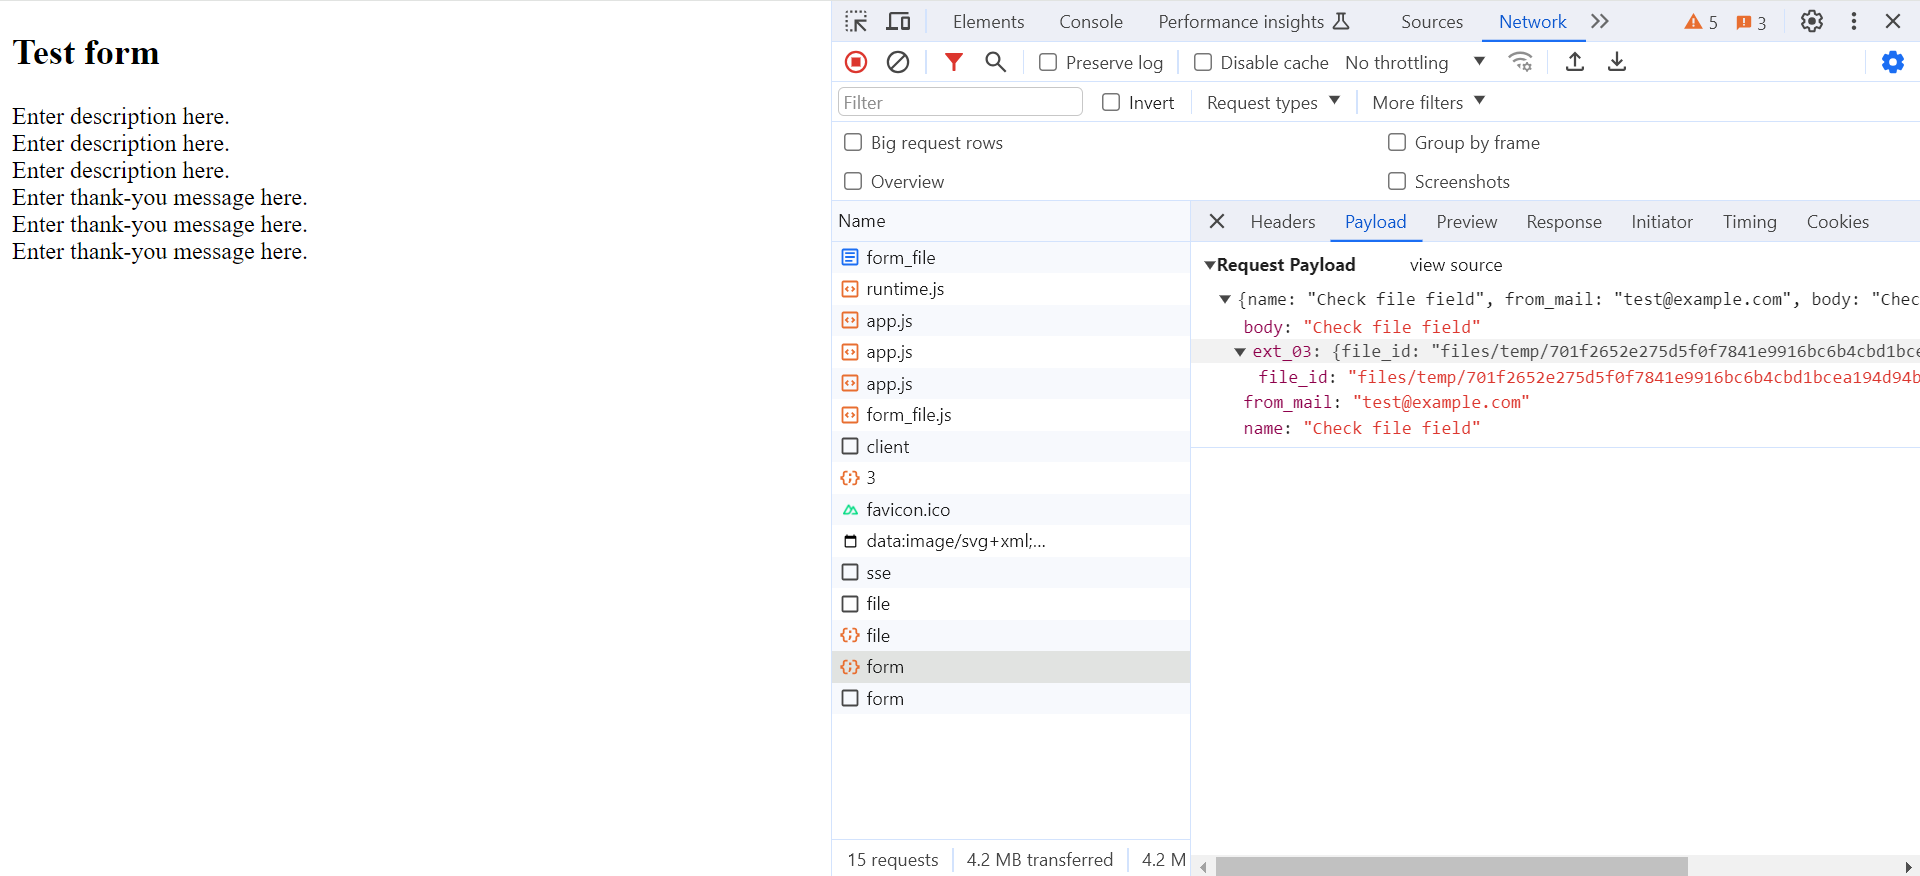
Next, enter the required information and click [submit]. You can confirm that the file_id is POSTed to the InquiryMessage::send endpoint.
Click the [Answers] tab from the [Forms] section in the admin panel to display the list of responses and confirm that the data has been added.
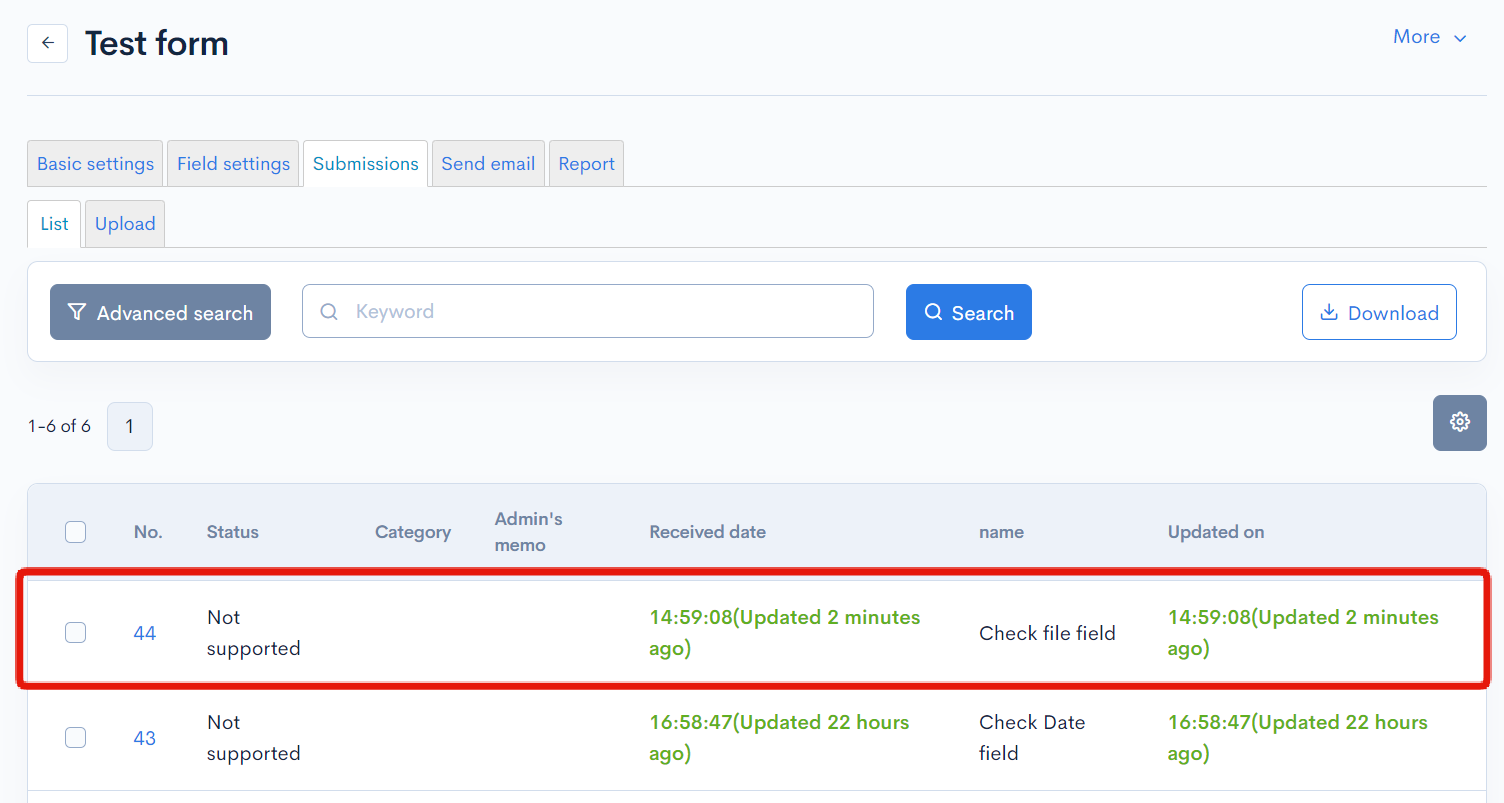
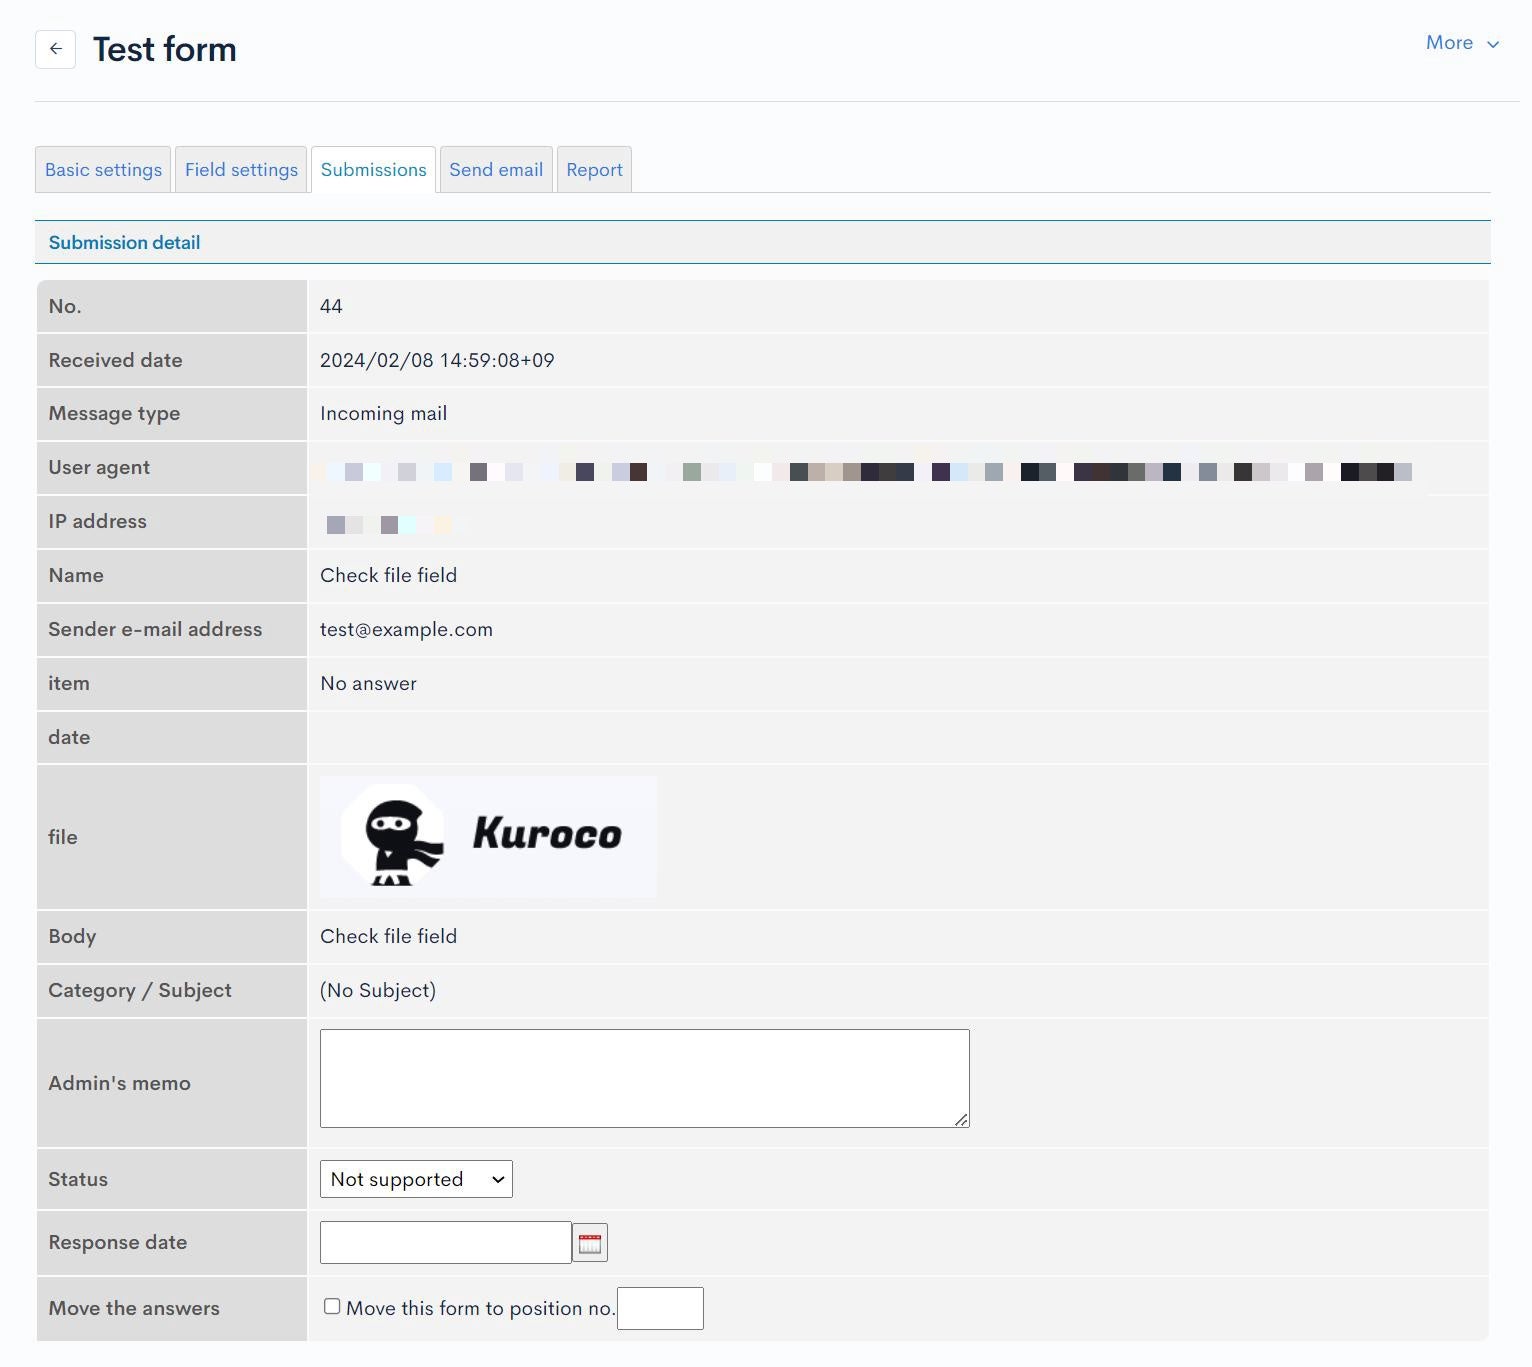
Click on [No.] (in this case, 31) to view the details, and you can confirm that the newly added [file] field and the value entered for that field are applied.
Reference
For the sake of simplification in this tutorial, HTML corresponding to each field in Kuroco is written on the front end. Therefore, if you change the field settings in Kuroco, you also need to update the front-end code.
If you want to dynamically change the front-end display based on Kuroco's field settings, please use the type included in the response of InquiryForm::details for branching.
For more details, refer to the corporate sample site repository:
https://github.com/diverta/front_nuxt_corporate/blob/main/pages/contact/index.vue
Related documents
Support
If you have any other questions, please contact us or check out Our Slack Community.