Auto Executing Github Actions with update on Contents data.
Overview
This tutorial explains how to setup and run GitHub actions on updation of Content. This also covers dispatch action with ApprovalFlow and via API.
What you’ll learn
Run GitHub actions when a content is updated, you will need to:
- Configure GitHub Workflow
- Create Content with GitHub Actions
- (Optional) Create Content with Approvalflow Workflow as well
- Create Content with API
Before you start
To use this tutorial, you should have already built your project with Kuroco and Nuxt.js and created a contents list page and configured Kuroco . If you have not yet done so, refer to the tutorials below:
This tutorial explains how to run GitHub actions when a content is updated with ApprovalFlow.
Configure GitHub Workflow
After you have connected to GitHub and setup the actions YAML file along with Kuroco Select, your GitHub setting screen should look like this.
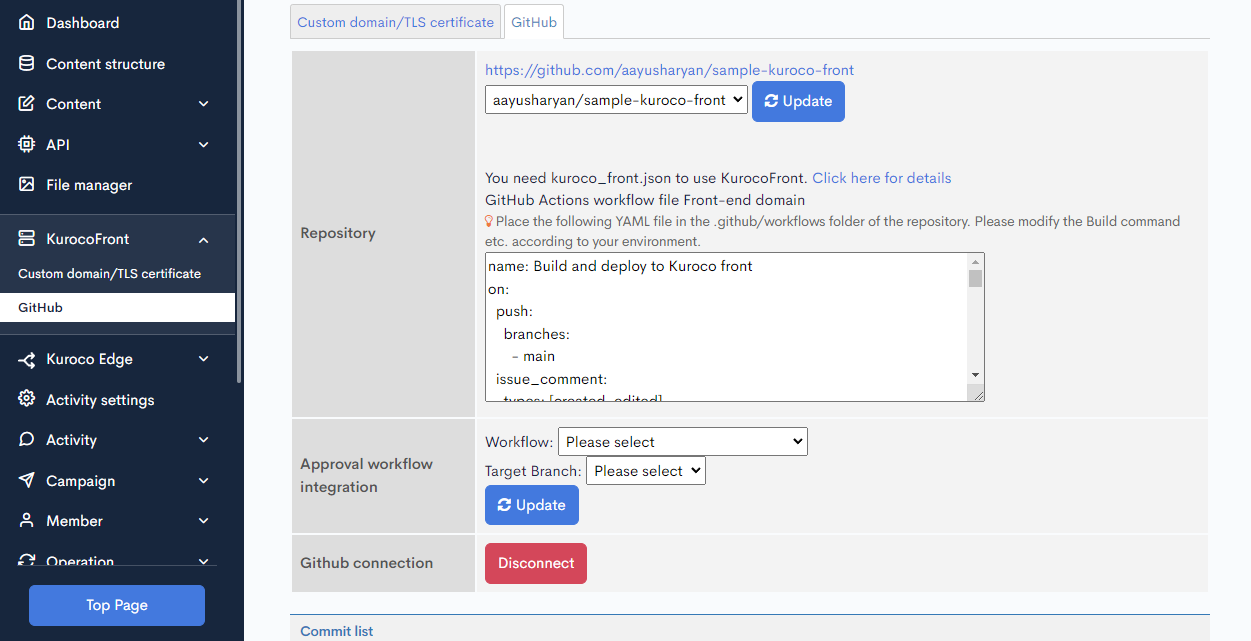
For GitHub Actions to work, the Workflow needs to be configured on GitHub Connection screen. Without that, Even if the Workflow is linked on the Content, it will not execute GitHub Actions.
You need to set the Workflow and Target branch here. Select the corresponding things based on your GitHub repository and click Update.

Create Content with GitHub Actions
Click on Contents from the side menu and select the Content Structure you want to link the Action to and click Add. You can also edit any existing content if you want to link Action Workflow with existing data, in that case it will run the GitHub Action after you have updated the Content.
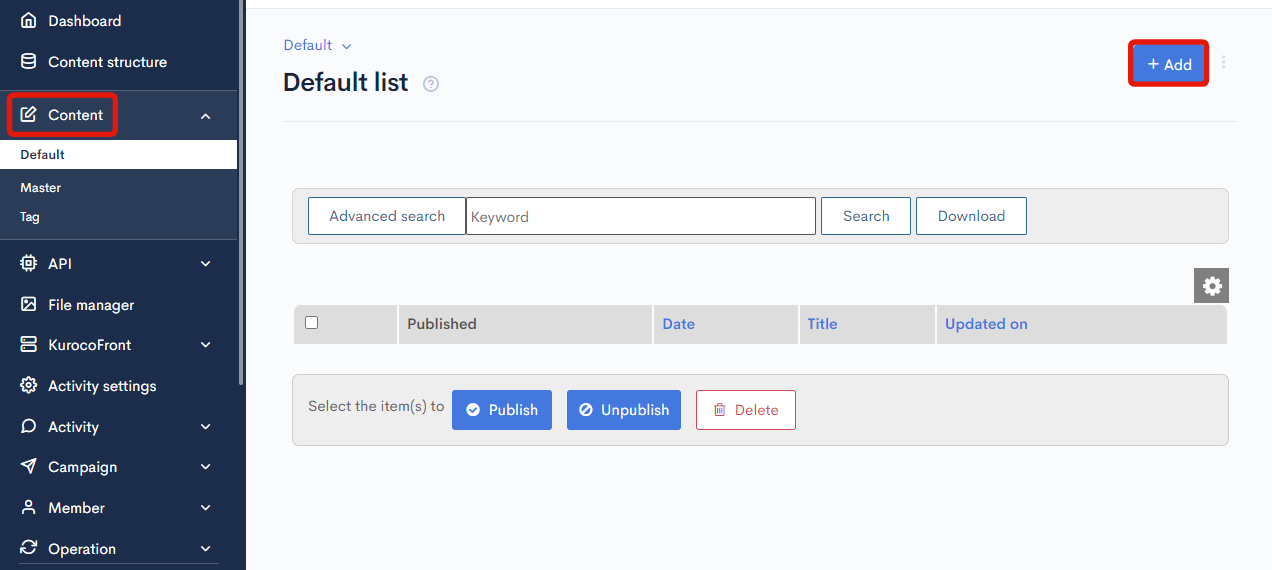
You need to select Workflow as Link value.

Once updated with Workflow as Link, you can see that the GitHub Actions is executed.

(Optional) Create Content with Approvalflow Workflow as well
GitHub actions can automatically run when a content is updated. If the workflow is configured on that content then the Action will run when the workflow is completed (all groups have approved and the content is published/updated).
1. Create a Workflow
To create a workflow, on the Side Menu, navigate to [Operation] > [Approval Workflow]. Here you can add a new workflow or edit if already created.
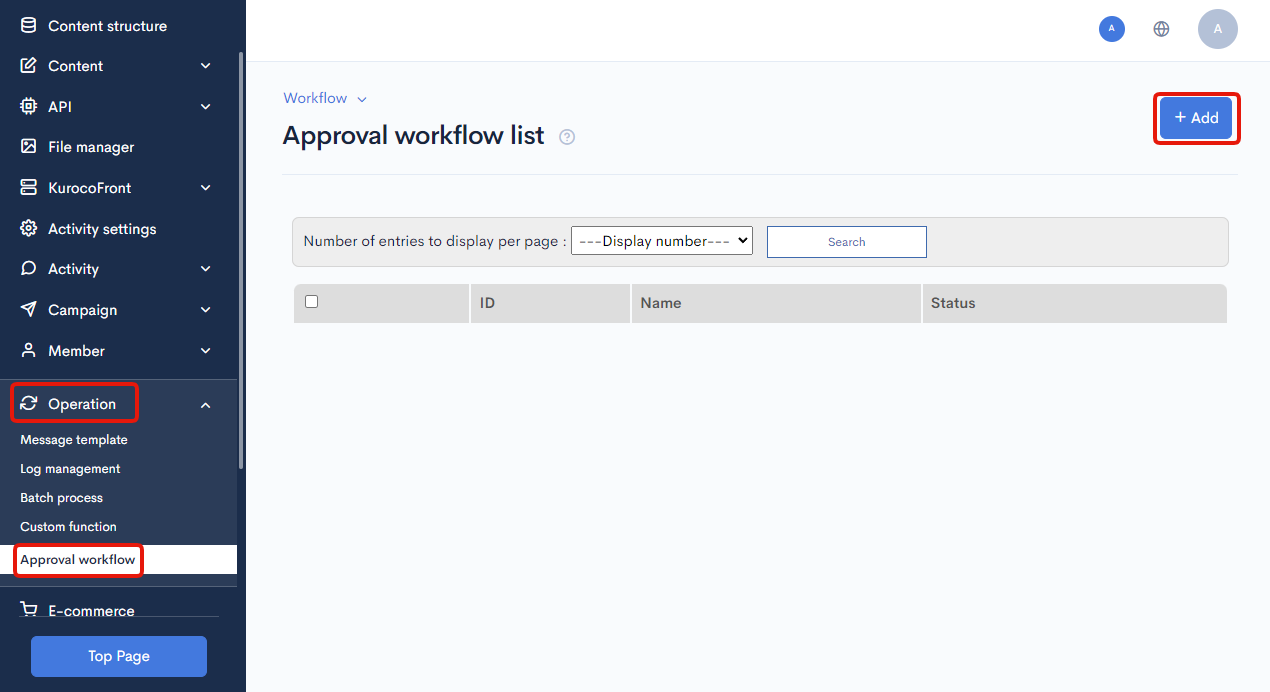
Then proceed to filling required information about the Workflow you want to set.
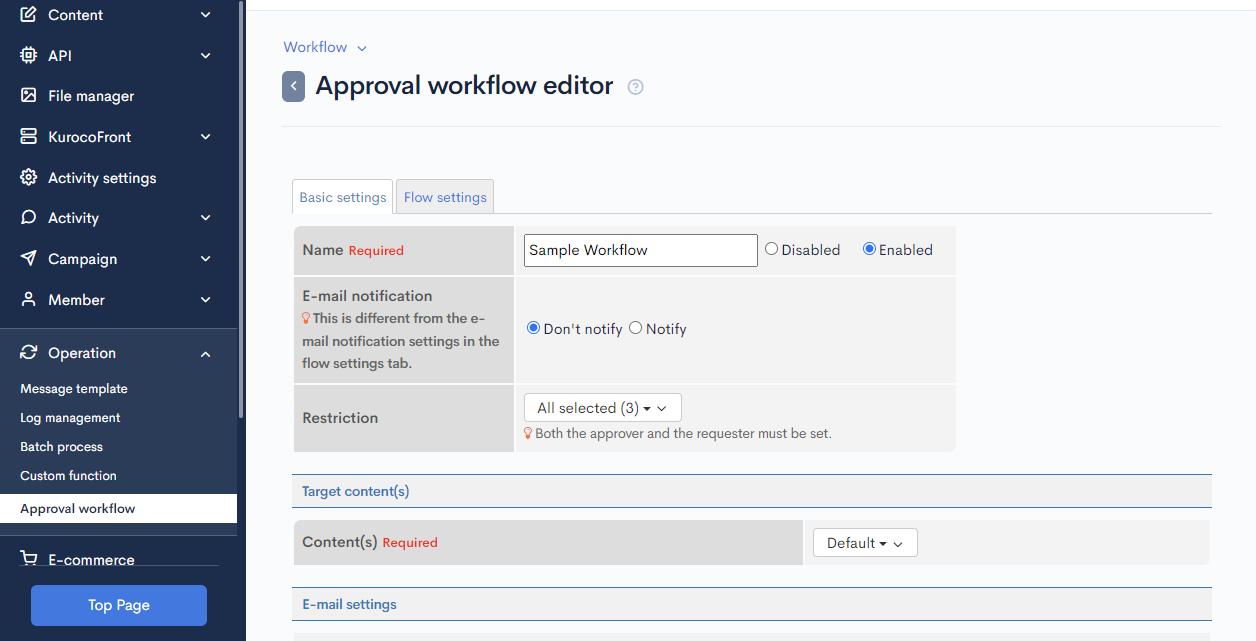
2. Configure Flow Settings
You need to set the flow settings on the path from create/update to published of any content.
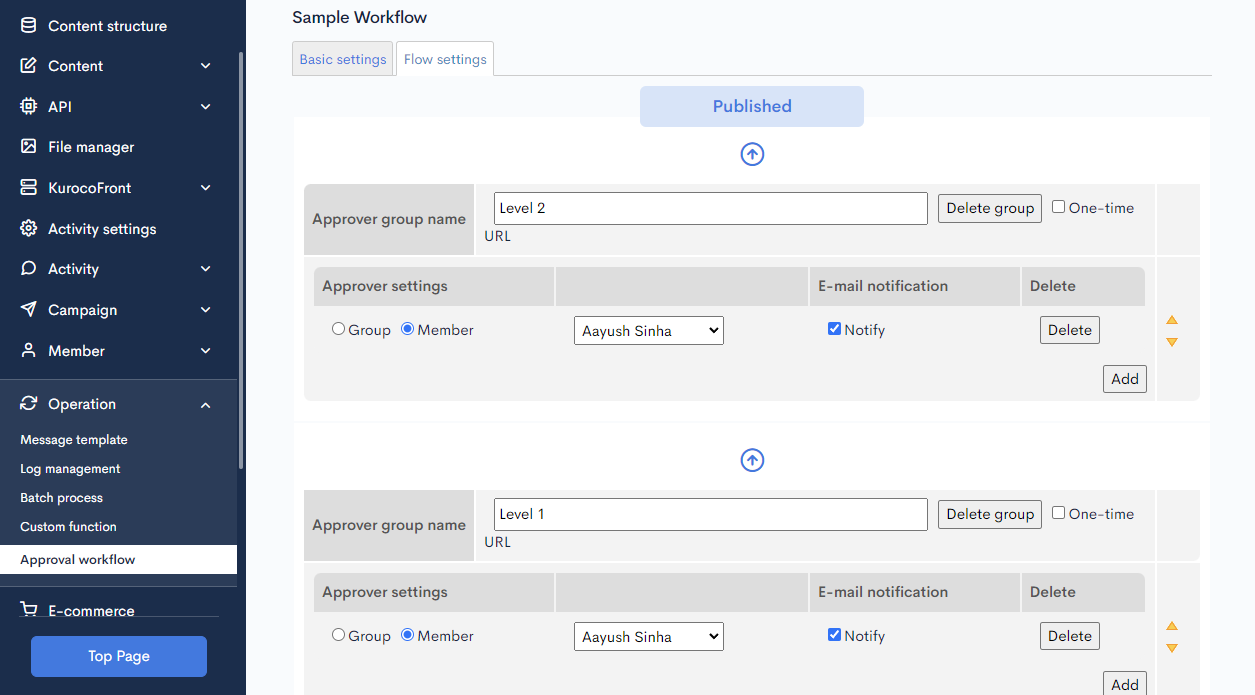
After the configuration of Workflow. You can proceed to content edit.
3. Create a new topic.
You need to Navigate to [Content] > Content Name. From there you can click on [Add] to create a new content.

4. Set GitHub Workflow and Approvalflow.
GitHub Workflow needs to be linked in order for the GitHub Action to be executed after the content is published. Therefore, Linking of GitHub Workflow is mandatory. You can optionally link Approvalflow Workflow if you want Approval before publishing of that content.
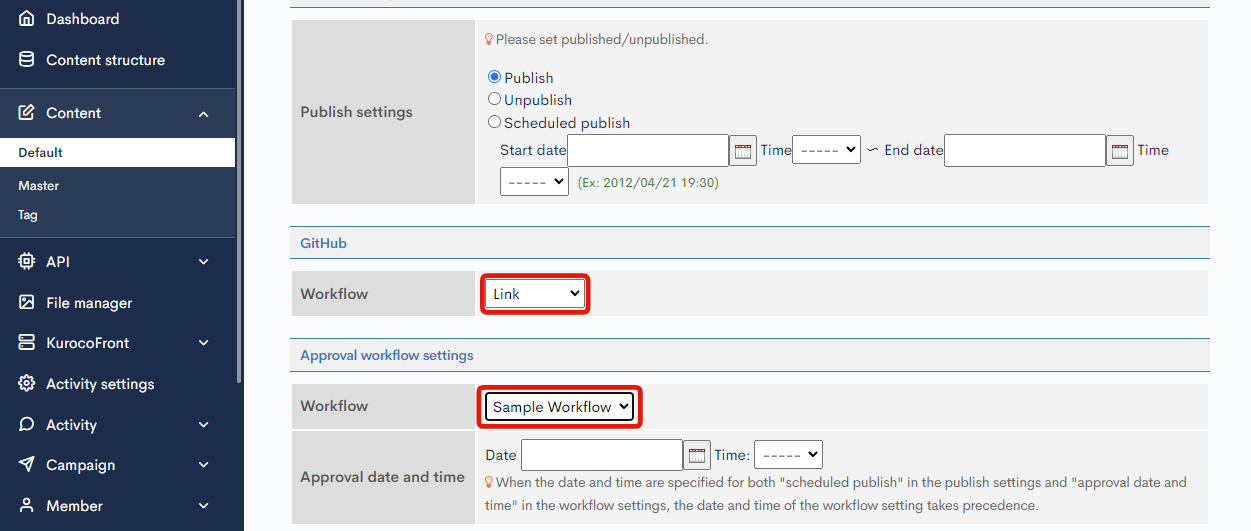
5. Update the Content
If the content is set with Approvalflow Workflow, then it will move to Pending Approval, otherwise it will be directly published and the GitHub Action will be executed.
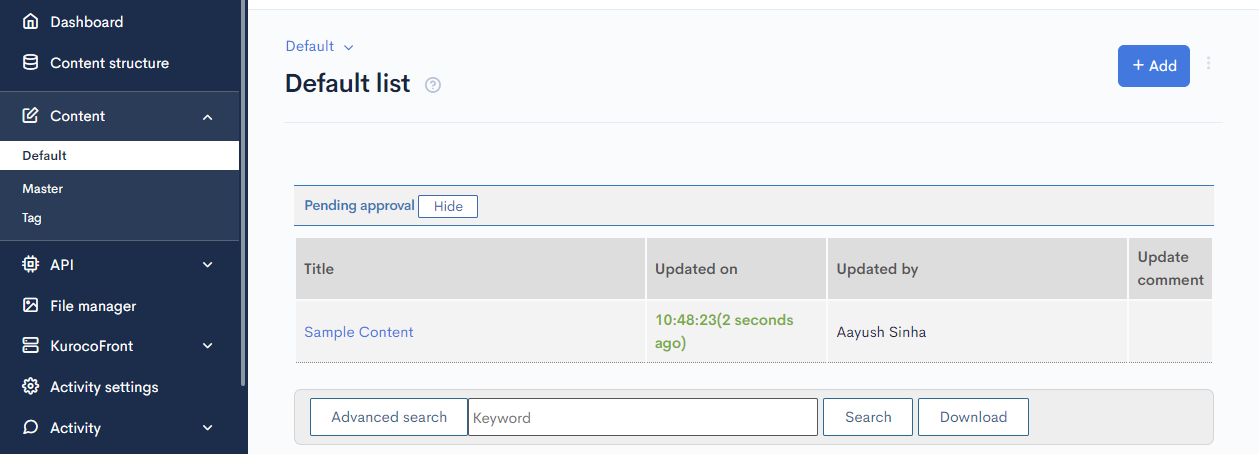
6. Confirm GitHub Actions run.
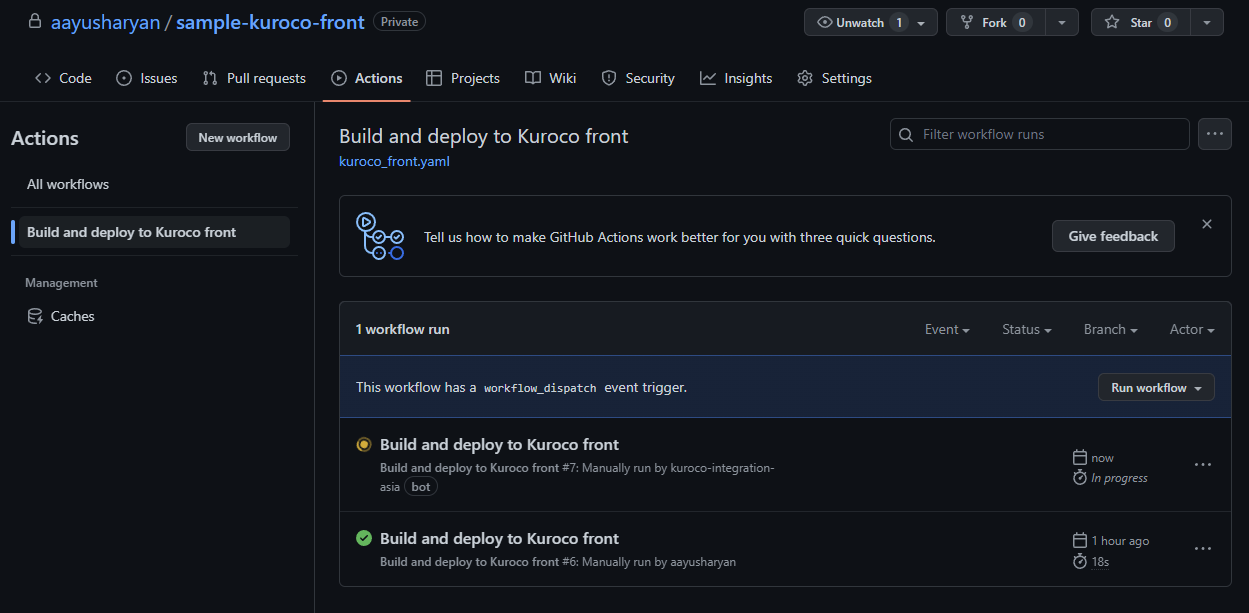
After setting of the Content, GitHub actions will run. They can be confirmed on GitHub as well on the Actions Tab.
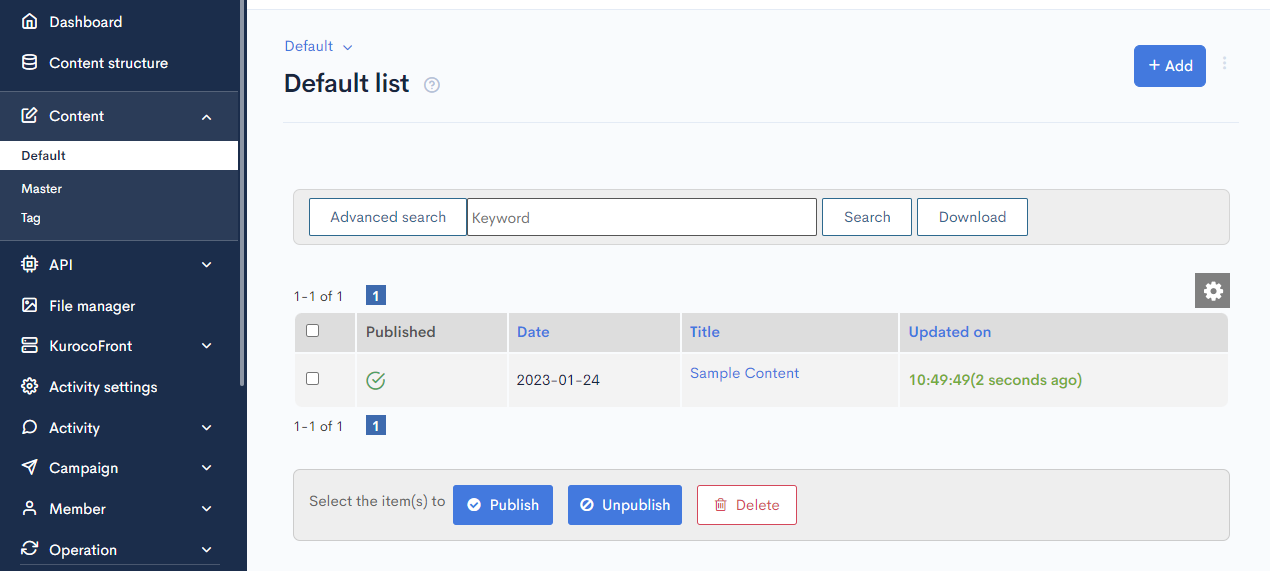
Create Content with API
With Headless Approach, the GitHub action can be configured to be executed when the content is updated, even when doing so via APIs. For this tutorial's simplicity, we will be using Contents API without Approvalflow. Documentation on adding content with Approvalflow can be found here.
1. Create a Content insert API.
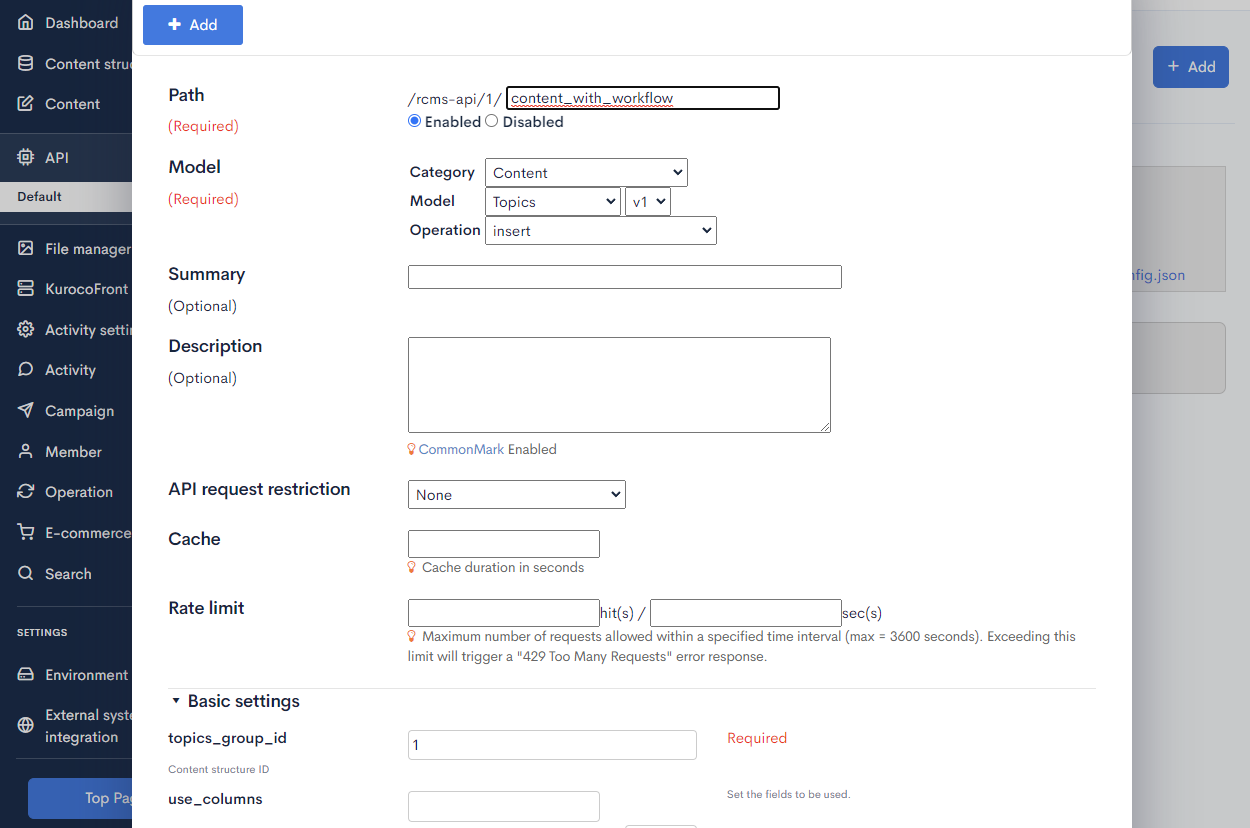
Go to the [API] and select the API from the side menu. Click on Add to Add a new Engpoint. You can enter information according to the following reference table.
| Setting | Value |
|---|---|
| Path | The Path of Endpoint. You can fill according to your requirement. |
| Model - Category | Select Content |
| Model - Model | Select Topics with version 1 (That is latest currently). |
| Model - Operation | Select the operation which you want to perform on the content. |
| topics_group_id | Enter the topics ID of Content. For this example, we are using insert operation. |
2. Send the Request.
To check the endpoint, you can go to Swagger UI. Select the newly created endpoing and click on Test. Here, if you pass dispatch_github_workflow with value as 1. This would configure content to execute GitHub action when it is published. If approvalflow is used, then the Action will be executed after Approvalflow is completed. If the content is set to unpublish or to be published at a later date then the GitHub Action will be executed only when the content is published. For simplicity of this tutorial, we will pass open_flg as 1 which would set the content to be published immediately on insert which would trigger the GitHub Action immediately on insertion of the content.

Here, we can see on the response that the content is added successfully.

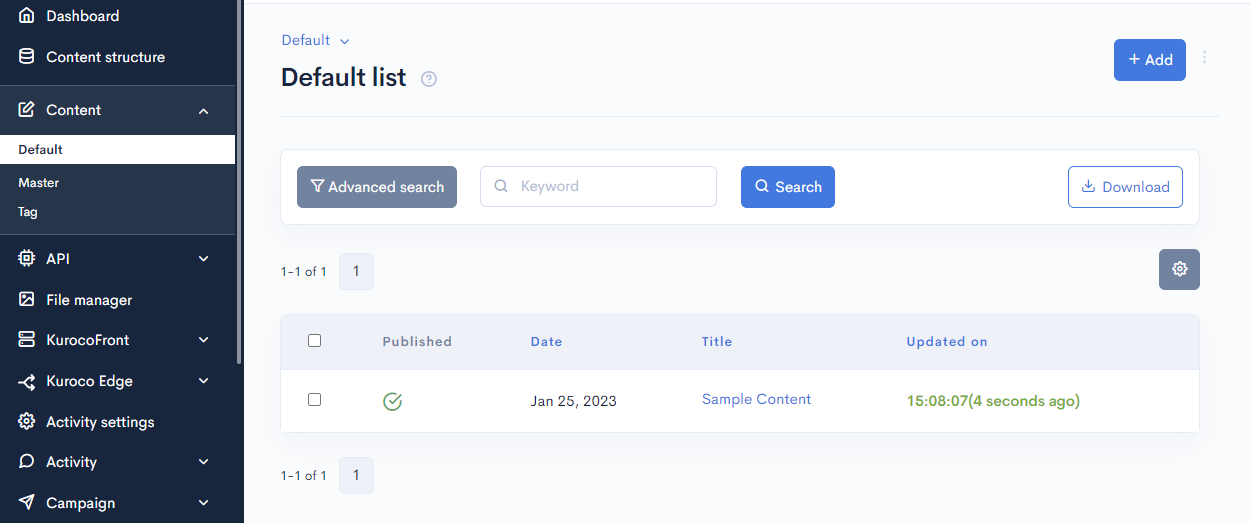
You can also go to that particular content list and confirm that the contend is updated. (In this case, inserted)
3. Confirm GitHub Actions run
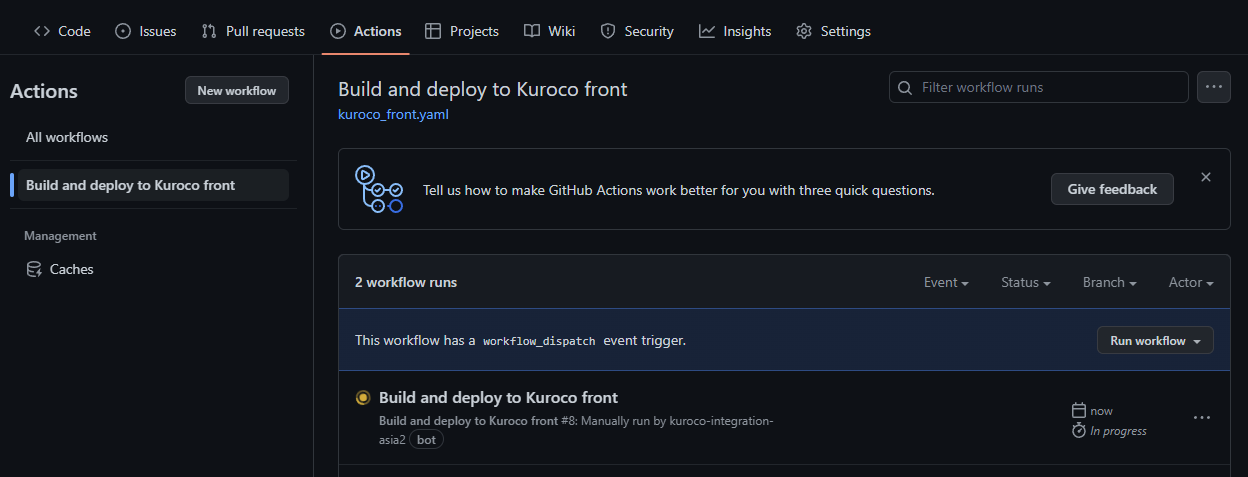
You can navigate to GitHub repository's Actions tab and confirm that the action is executed.
Support
If you have any other questions, please contact us or check out Our Slack Community.