Building a multi-language website
This tutorial explains how to build a multi-language website with your project using Kuroco.
Before starting this tutorial, you should have already built a Nuxt.js project with Kuroco. If you haven't done so, see Tutorial: Creating a content list page with Kuroco and Nuxt.js on how to build one.
1. Install package
In your terminal, go to the directory of the target project and execute the following command:
- Nuxt2
- Nuxt3
Install nuxt-i18n.
npm i nuxt-i18n
Install @nuxtjs/i18n
npx nuxi@latest module add i18n
2. Create a locales folder
Next, create a locales folder in the project directory and save the locale file for each language in JSON format. For this tutorial, we will create the files locales/en.json and locales/en.json to support English- and Japanese-language displays.
 The basic contents of the locale files are as follows:
{
  "links": {
    "home": "Home",
    "news": "News",
    "en": "English",
    "ja": "Japanese"
  },
  "home": {
    "title": "front_kuroco_sample_support"
  }
}
{
  "links": {
    "home": "ホーム",
    "news": "お知らせ",
    "en": "英語",
    "ja": "日本語"
  },
  "home": {
    "title": "フロントKurocoサンプル"
  }
}
(Note: Other items may be added as needed.)
3. Modify nuxt.config.js
Then, add the code below to the modules section of nuxt.config.js:
- Nuxt2
- Nuxt3
modules: [
   [
      'nuxt-i18n',
      {
        strategy: 'prefix_and_default',
        // Define the language options
        locales: [
          { code: 'ja', file: 'ja.json' },
          { code: 'en', file: 'en.json' },
        ],
        // Set the default language
        defaultLocale: 'ja',
        vueI18nLoader: true,
        lazy: true,
        // Specify the directory for the JSON file
        langDir: 'locales/',
      },
    ],
    ...
  ],
modules: [
    [
      "@nuxtjs/i18n",
      {
        strategy: "prefix_and_default",
        // Define the language options
        locales: [
          { code: "ja", file: "ja.json" },
          { code: "en", file: "en.json" },
        ],
        // Set the default language
        defaultLocale: "ja",
        vueI18nLoader: true,
        lazy: true,
        // Specify the directory for the JSON file
        langDir: "locales/",
      },
    ],
    ...
  ],
4. Multi-language support for the front-end
Next, we will create a language switcher button.
To make the code reusable, we will create a file named LanguageSwitcher.vue in the components folder and write the code there.
Create /components/LanguageSwitcher.vue as follows:
<template>
  <div>
    <nuxt-link :to="switchLocalePath('en')">{{ $t('links.en') }}</nuxt-link>
    |
    <nuxt-link :to="switchLocalePath('ja')">{{ $t('links.ja') }}</nuxt-link>
  </div>
</template>

<script>
export default {};
</script>
Next, modify the content of /pages/news/index.vue as follows to check the button:
The text set in the locale file can be displayed using {{ $t('news.title') }}.
 <template>
   <div>
-    <p>News List Page</p>
+    <LanguageSwitcher />
+
+    <h1 class="title">{{ $t('news.title') }}</h1>
     <div v-for="n in response.list" :key="n.slug">
       <nuxt-link :to="`/news/${n.topics_id}`">
         {{ n.ymd }} {{ n.subject }}
You can now see the language switcher button and the title displayed according to the selected language.
5. Multi-language support for the back-end (Kuroco)
Next, we will add multi-language support for the /news/ page created in Tutorial: Creating a content list page with Kuroco and Nuxt.js.
Enable multi-language settings
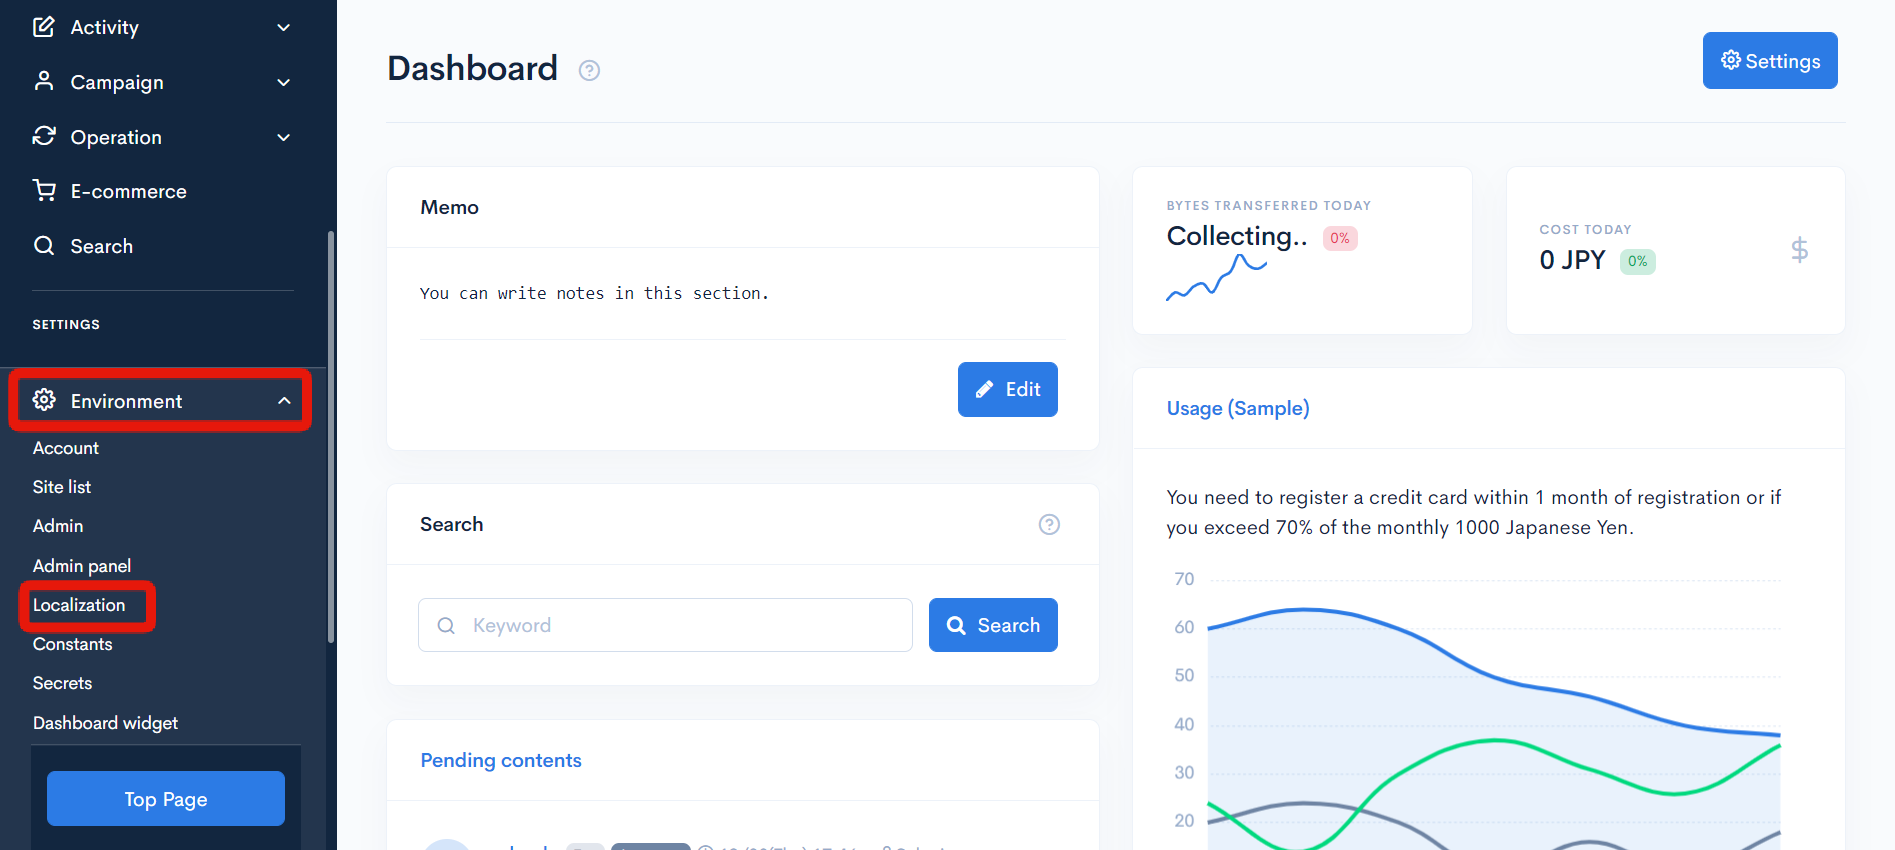
In the left sidebar menu of the Kuroco admin panel, click [Environment] -> [Localization].
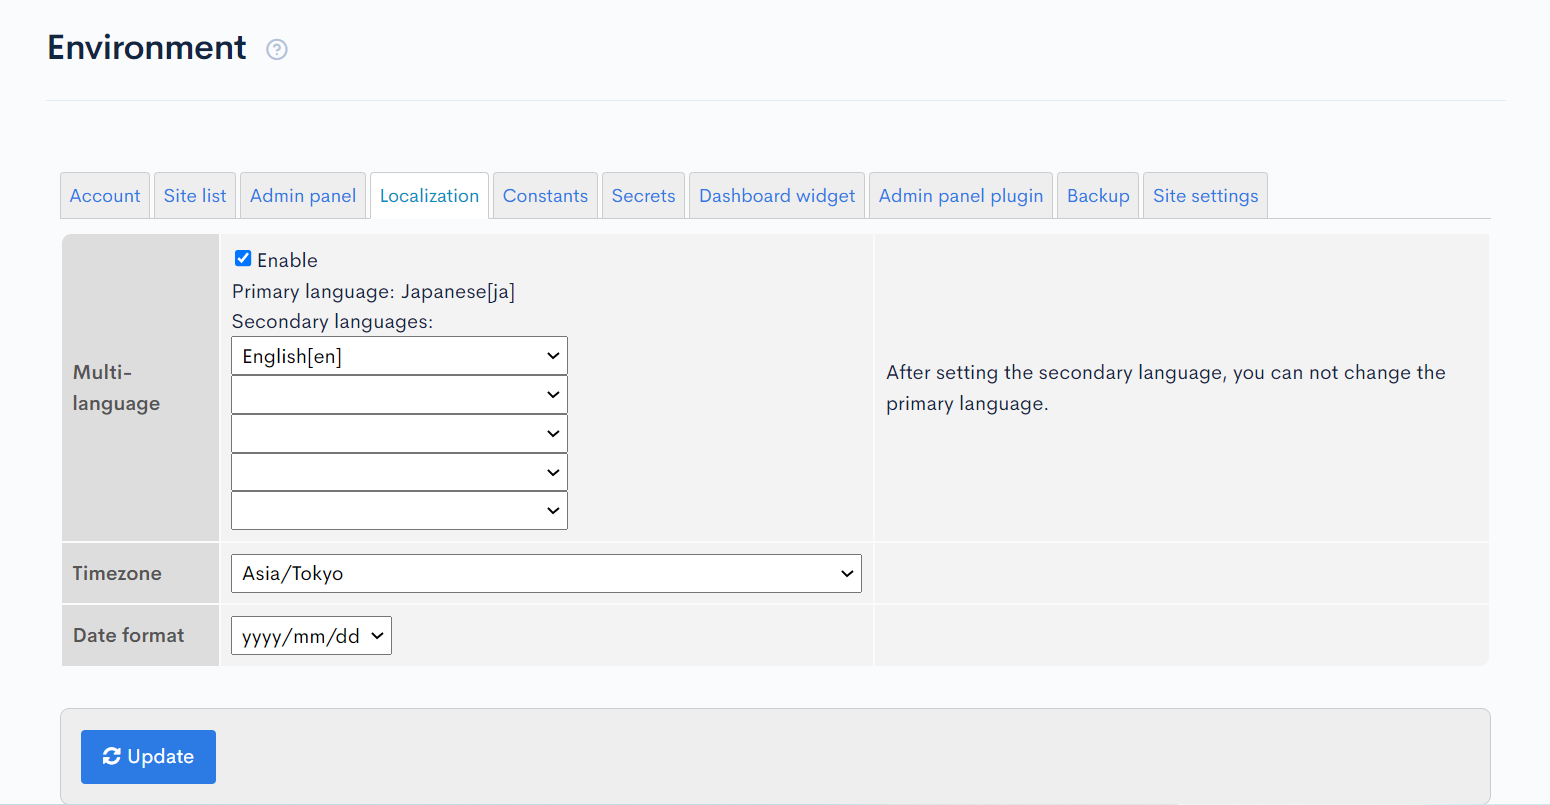
 In the
 Multi-language field, select your primary and secondary languages, and then click [Update].
Add secondary language content
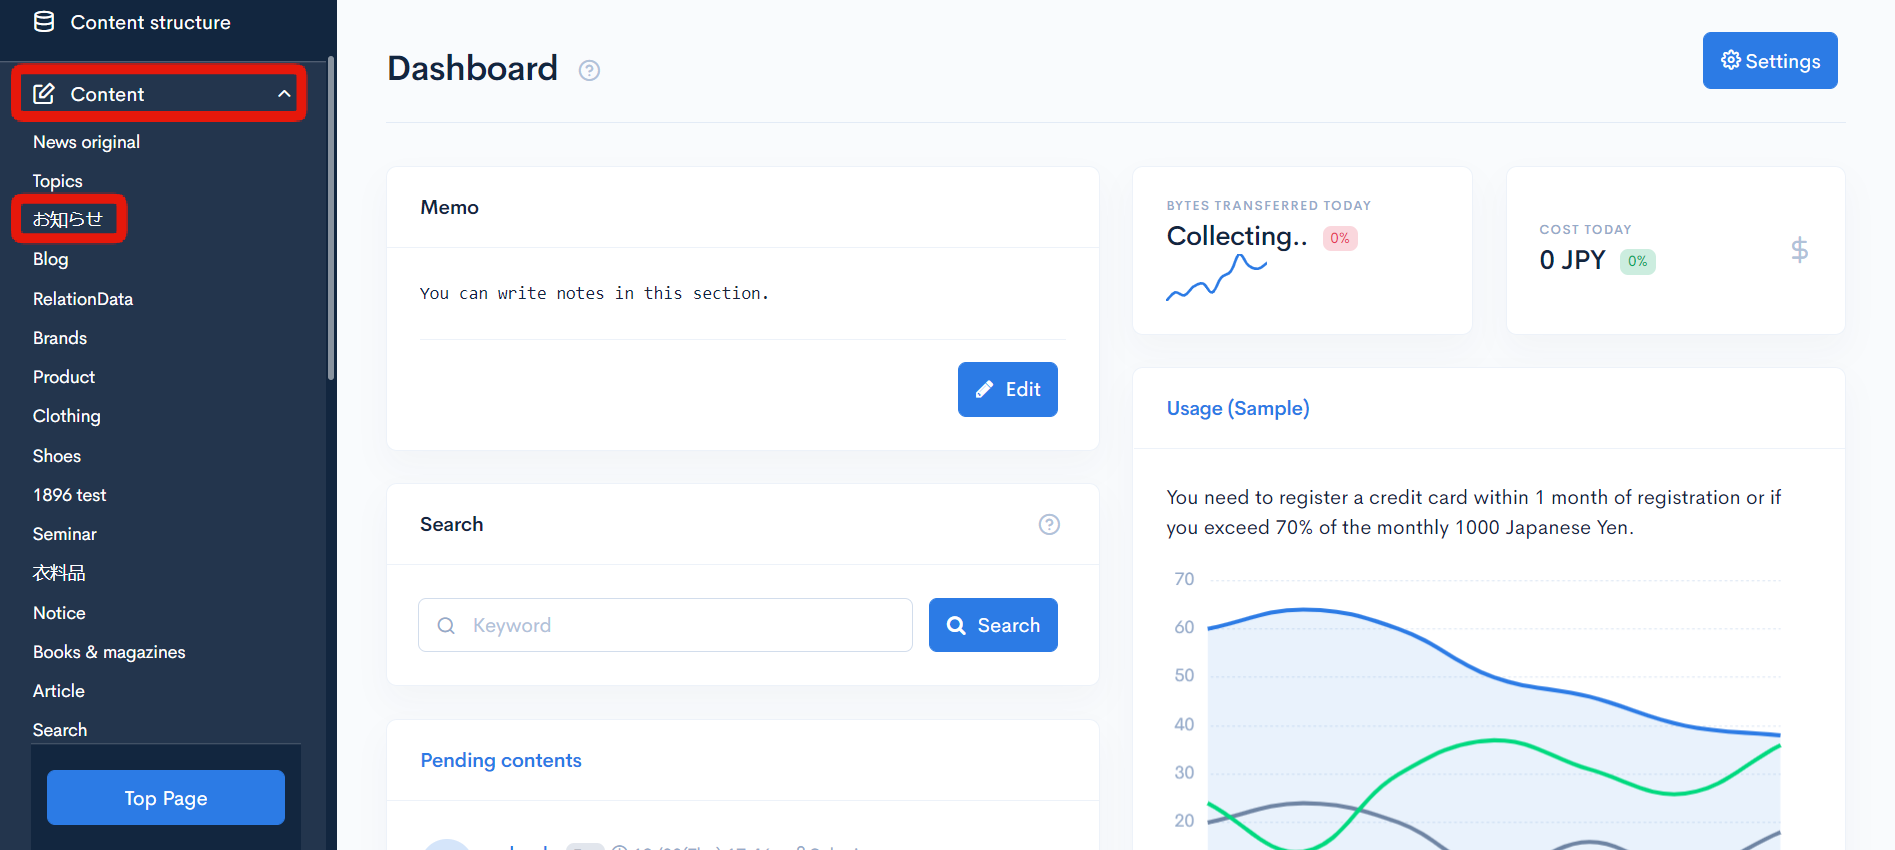
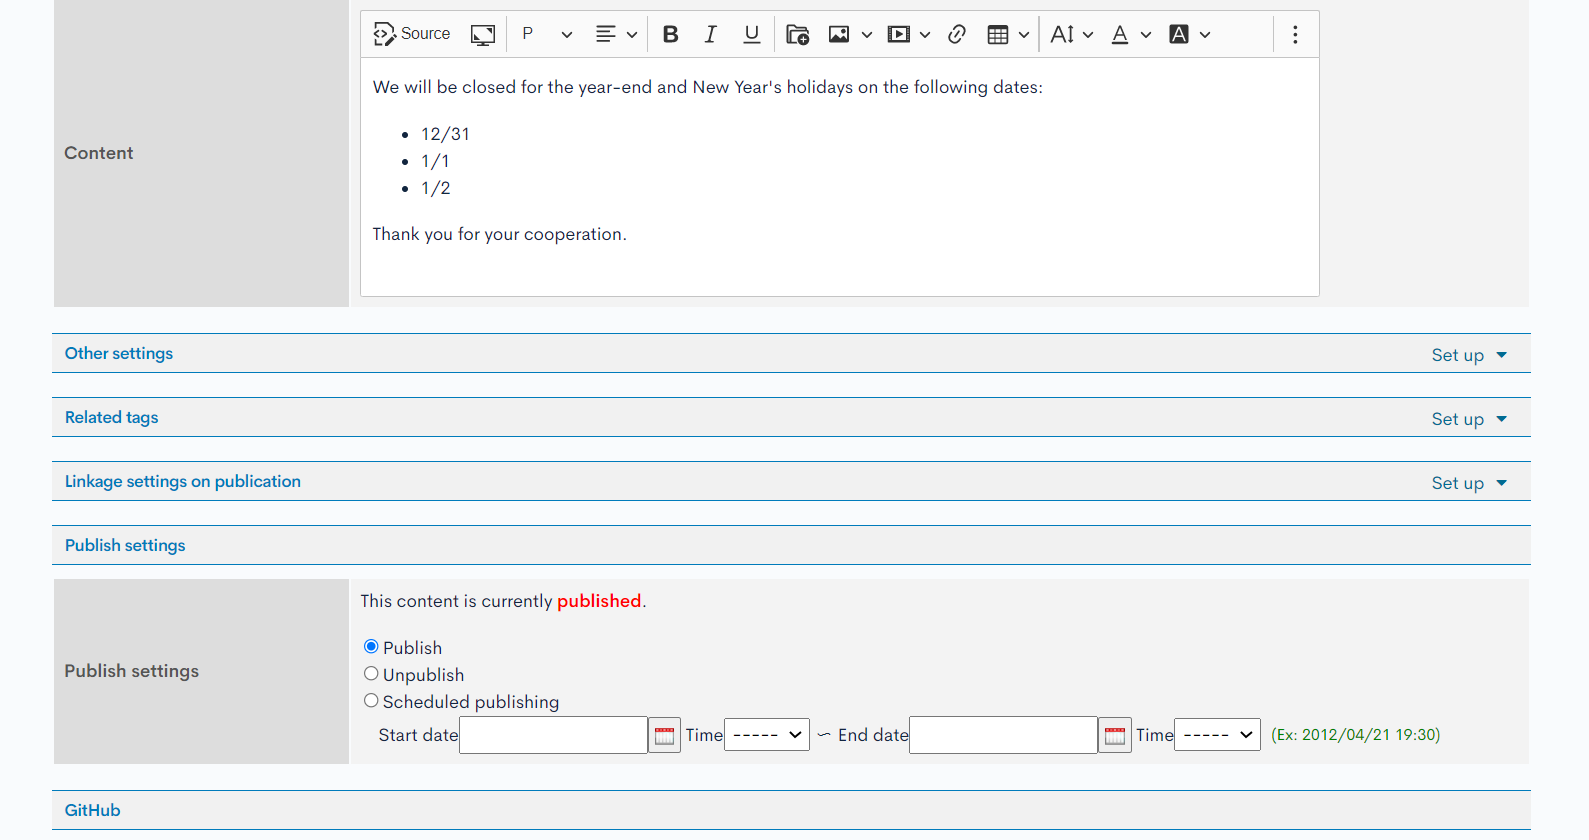
The next step is to add content in the secondary language. In the [Content] module, click the existing category [お知らせ].
 On the content list screen, click the title of the content you want to localize.
 If you have set up multiple languages in the localization module, the tabs for the secondary languages will be displayed on the content editor screen. Click the [English] tab.
 Enter the English version of the content and click [Update] to apply the changes.
 Repeat the above steps to add content in other secondary languages.
Verify the API response for each language setting
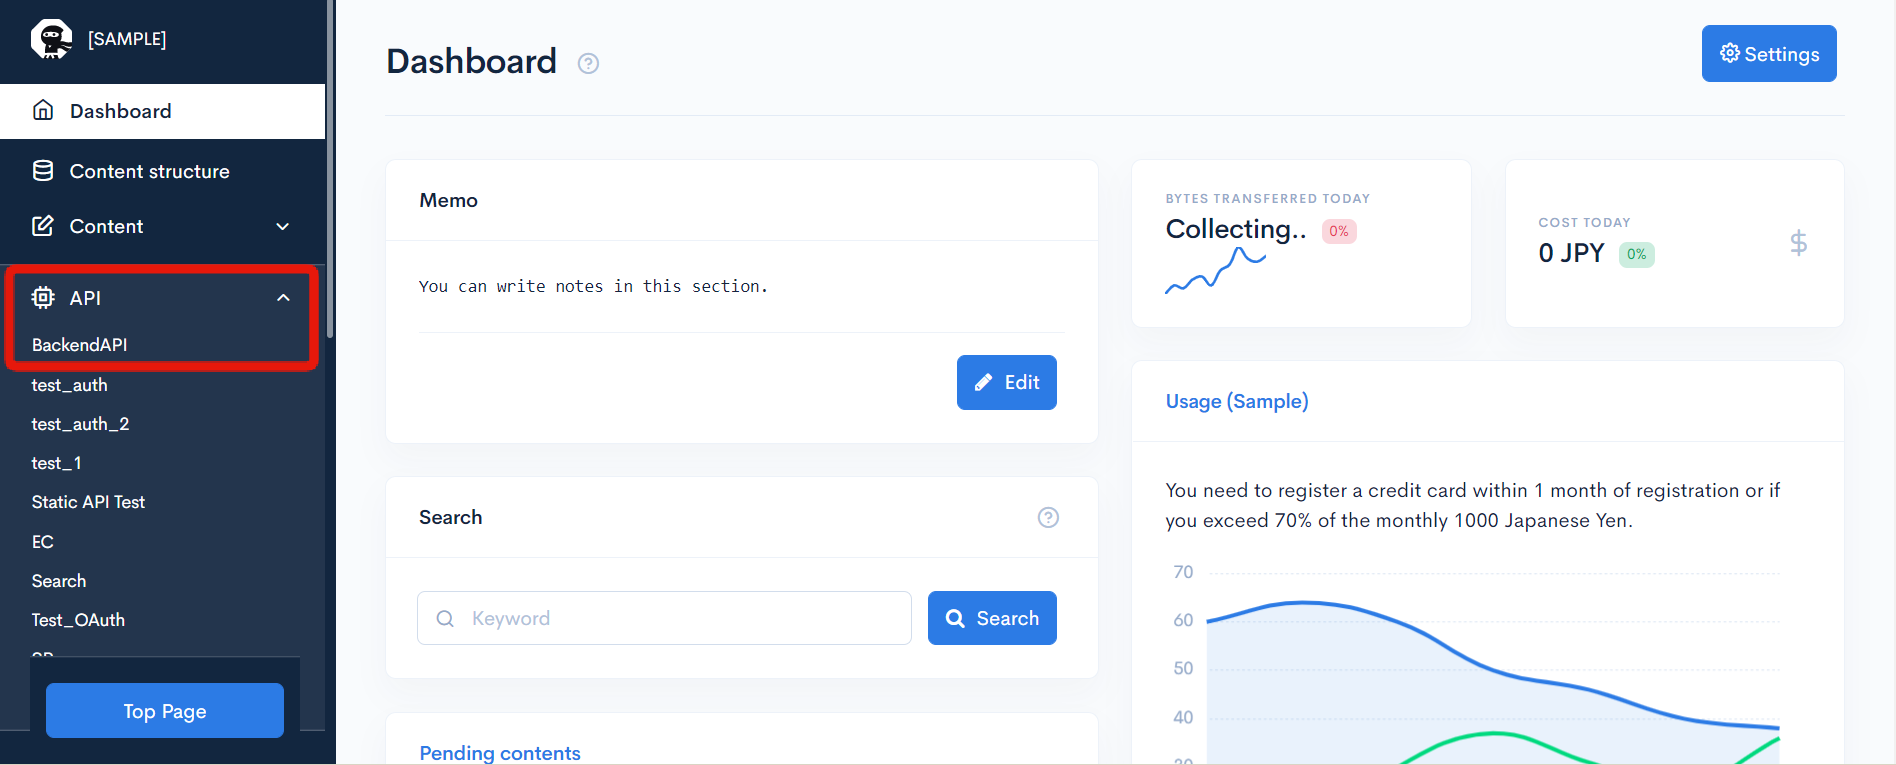
Verify the secondary language API response using Swagger UI. Under the [API] module, go to the endpoint list that contains news and newsdetail endpoints.
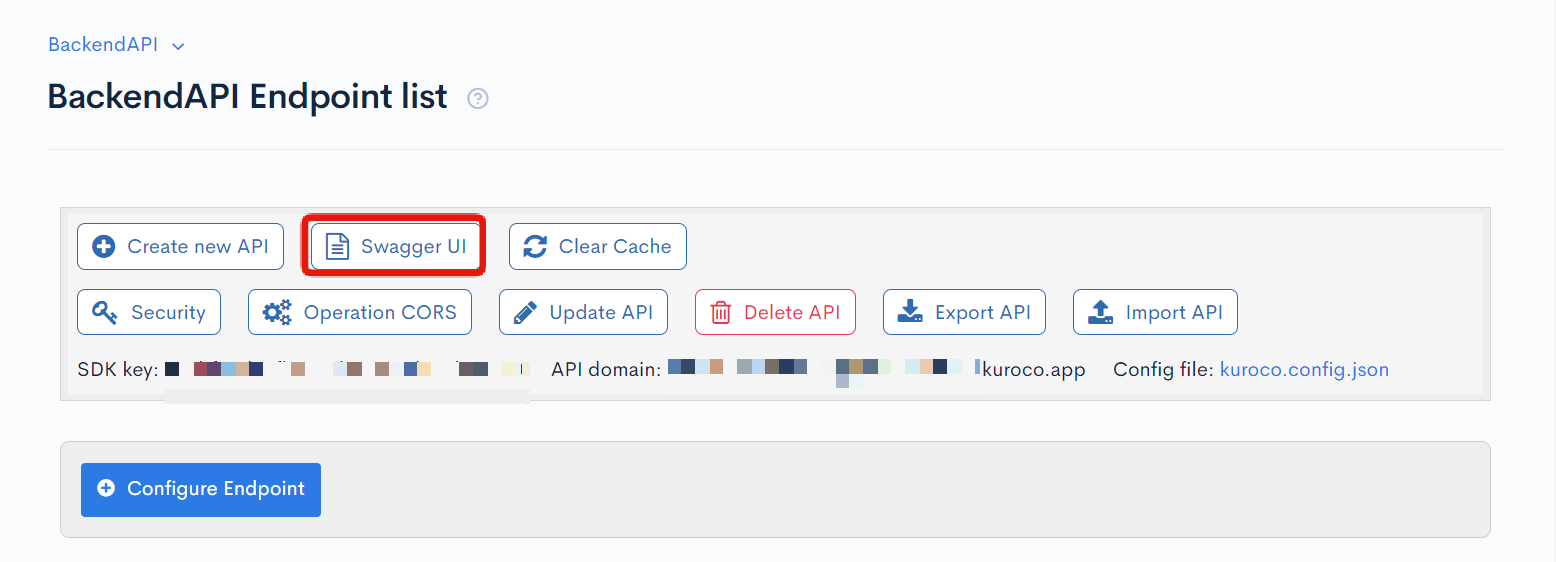
 On the endpoint list screen, click [Swagger UI].
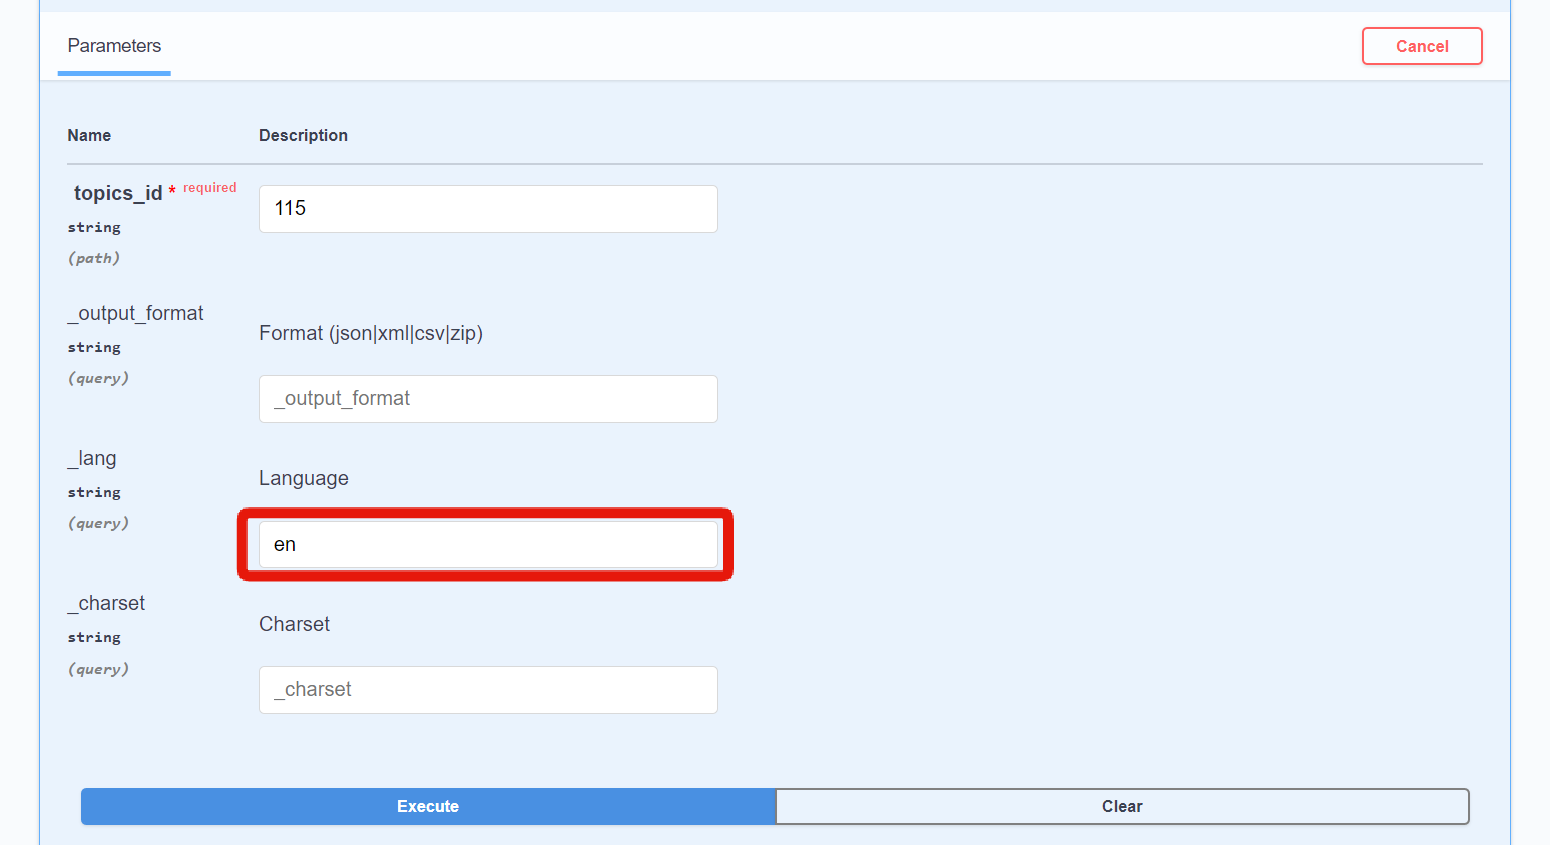
 Expand the Swagger UI for the
 newsdetail endpoint and click [Try it out].
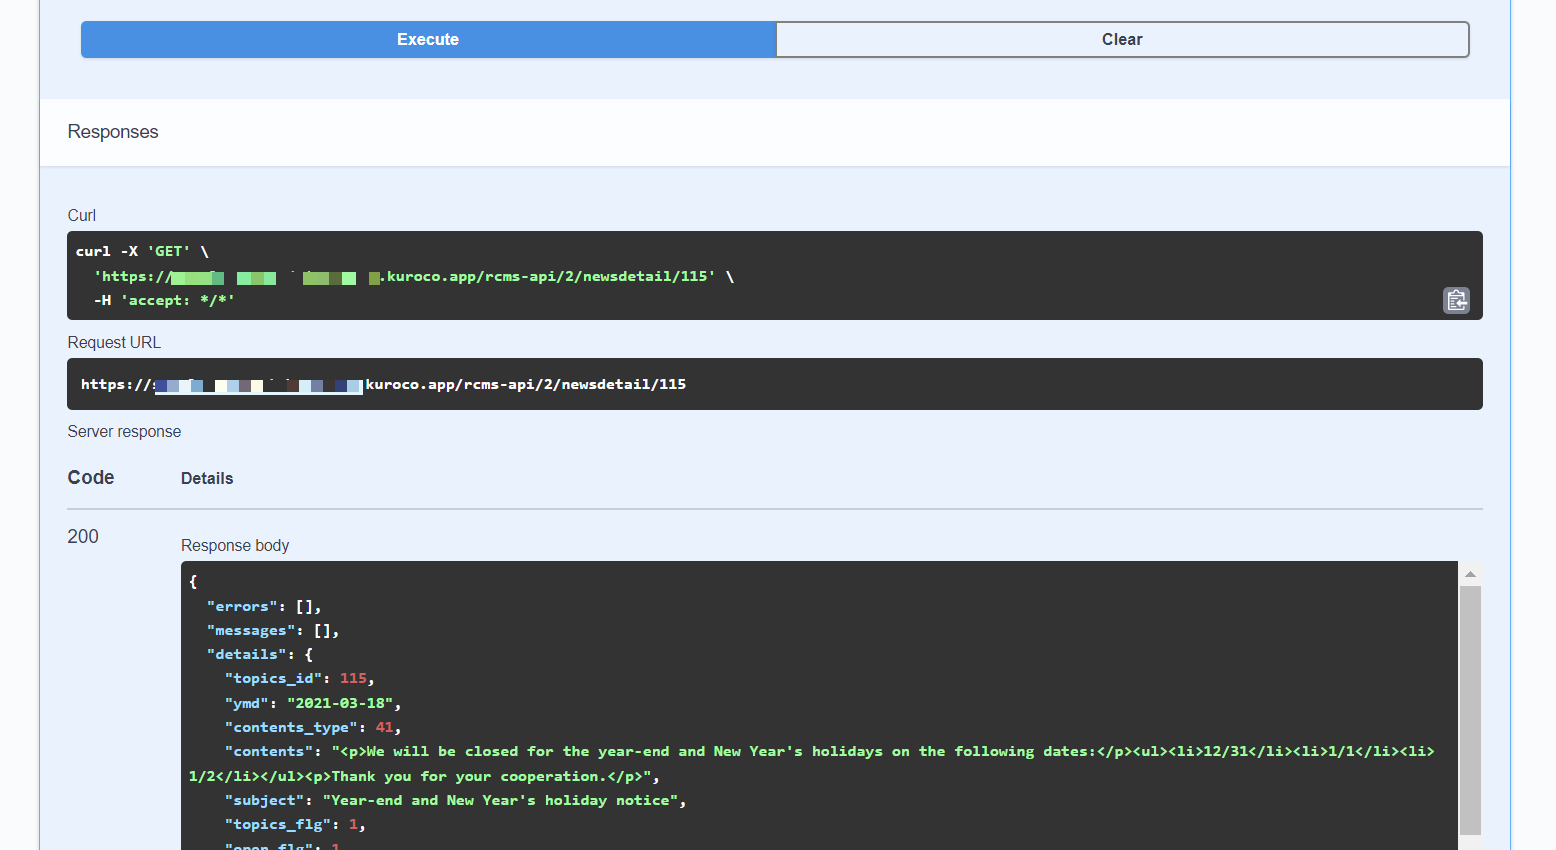
 Enter the topic ID and click [Execute].
 Verify the response in the primary language.
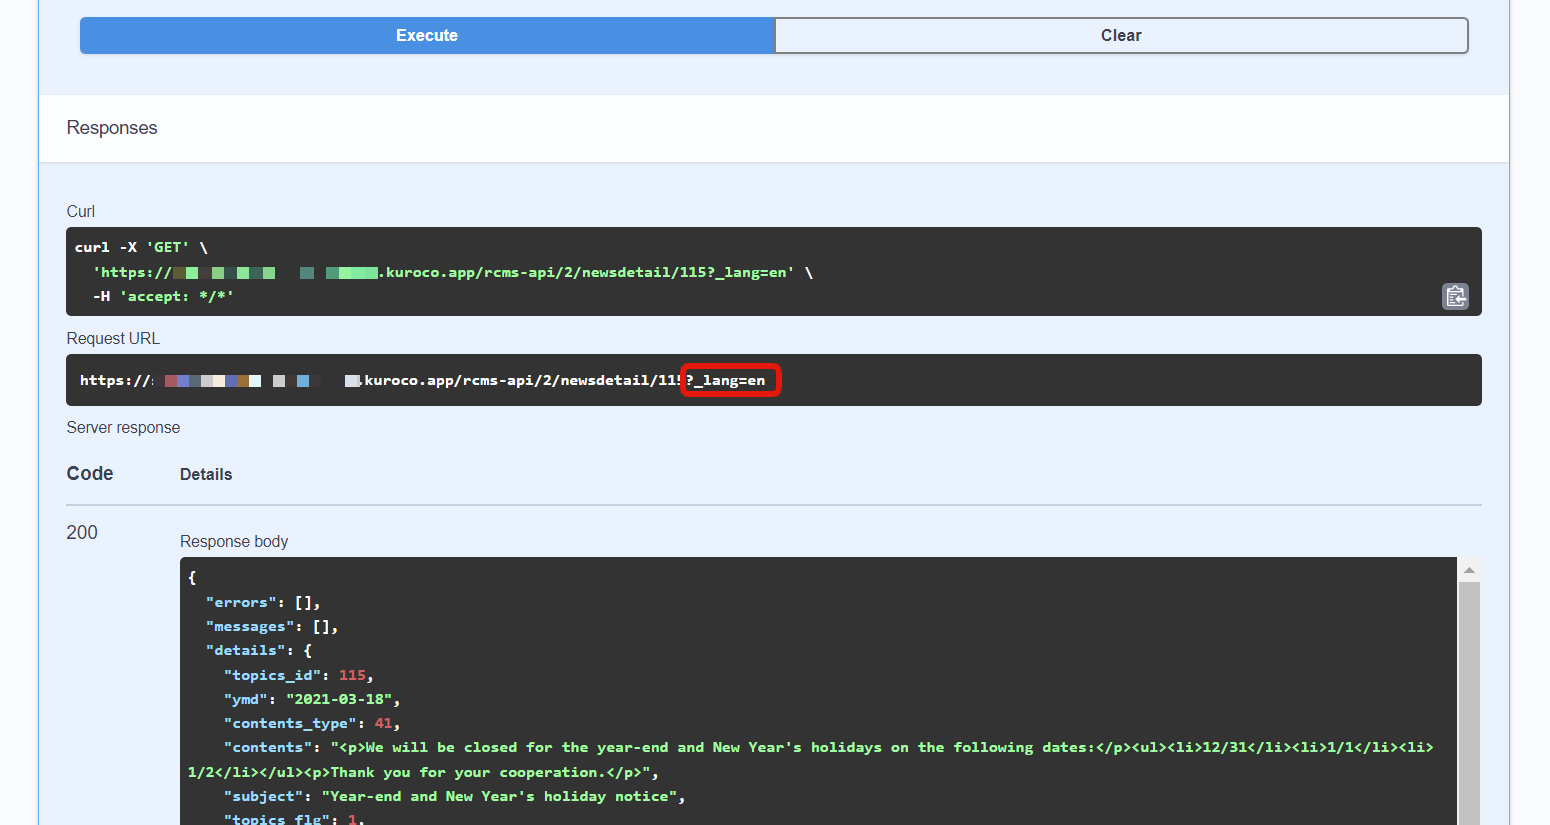
 Next, enter
 en in the _lang field and click [Execute].
 Then verify the response in the second language.
 As the request URL shows, you can add
 ?_lang=en after the endpoint to retrieve the English-language data.
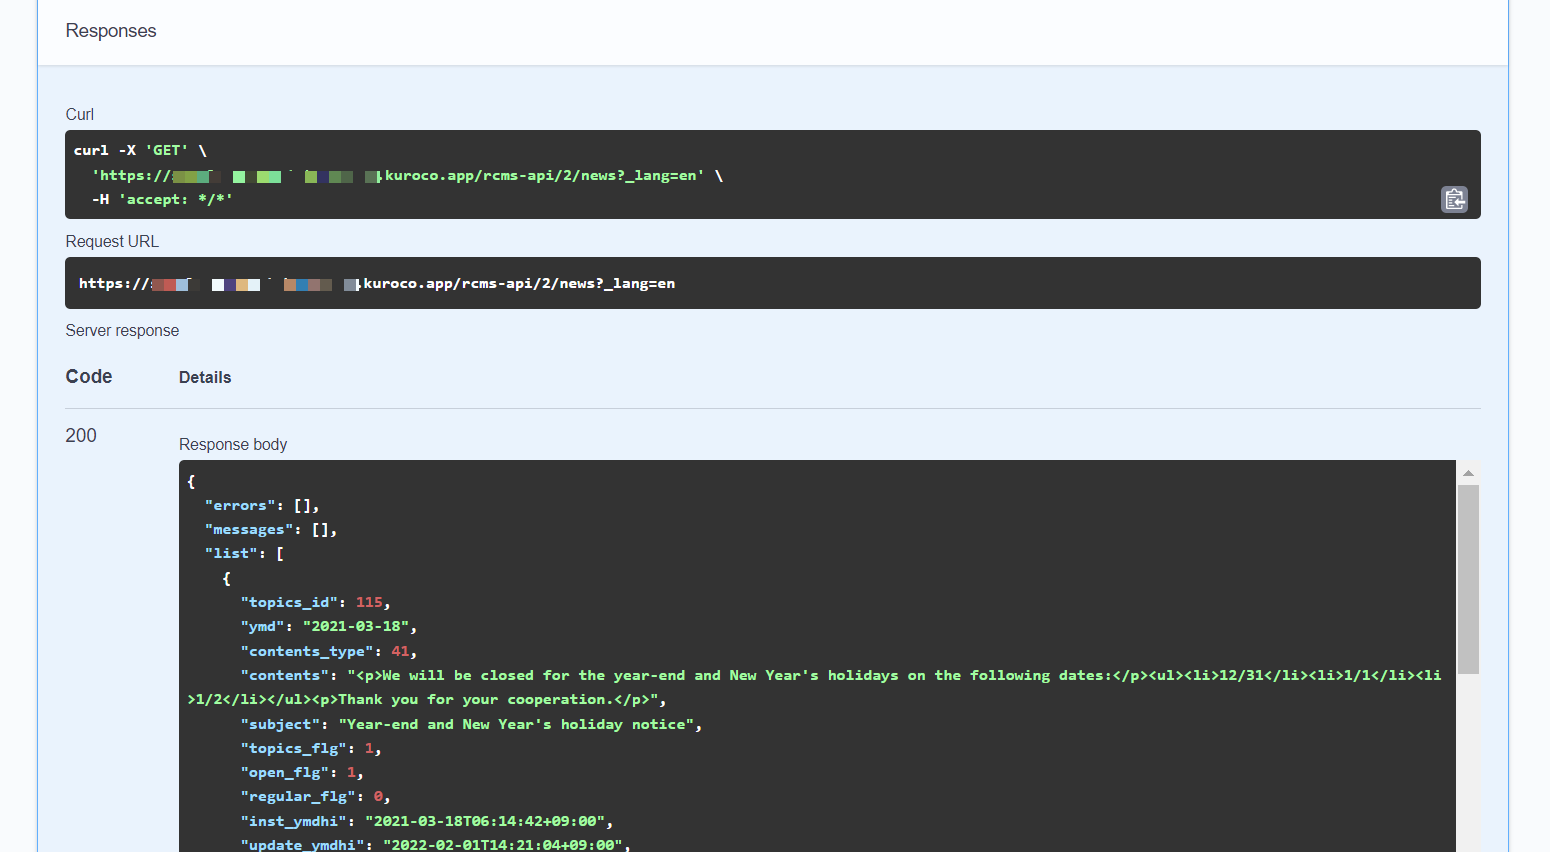
 Also, verify the response in the secondary language (en) for the
 news endpoint.
6. Front-end fixes
Finally, fix the description of the response from Kuroco's API to match the display language.
- Nuxt2
- Nuxt3
loading...
loading...
- Nuxt2
- Nuxt3
loading...
loading...
Substitute the request URL in the above code (/rcms-api/4/newsdetail/) with your own site.
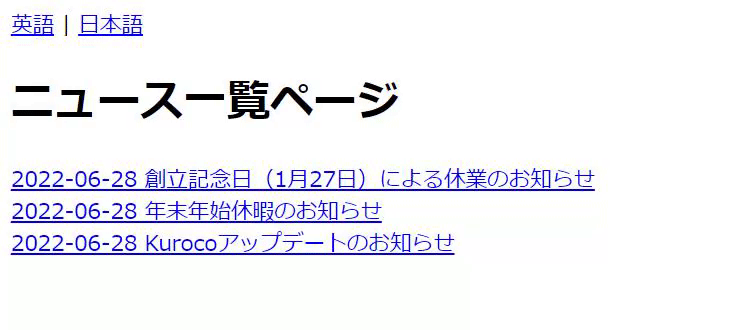
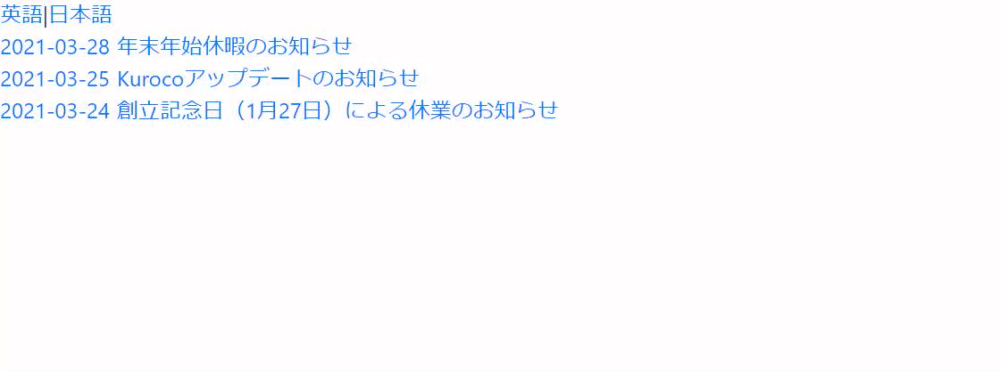
Verify the display on http://localhost:3000/news. You will be able to change the display language of the content using the buttons at the top of the page.
Related documents
Support
If you have any other questions, please contact us or check out Our Slack Community.