Setting up inquiry forms with Confirmation Page
Overview
In this tutorial, we will introduce how to create a form that includes a confirmation page for input content in a project using Kuroco. The form will be a simple one with only the default fields (name, email address, inquiry details). For the front-end code, we will use Nuxt.js.
For information on implementing additional fields, please refer to Setting up inquiry forms with Kuroco and Nuxt.js.
What you'll learn
You will learn how to create a form with a confirmation page using the following steps:
Prerequisites
This page assumes that you have already set up a project with Kuroco and Nuxt.js.
If you haven't done so yet, please refer to the following tutorial.
Kuroco Beginner's Guide
This tutorial is written with the following versions:
Nuxt2: v2.15.8
Nuxt3: v3.8.0
Creating the form
First, let's create a form to accept responses.
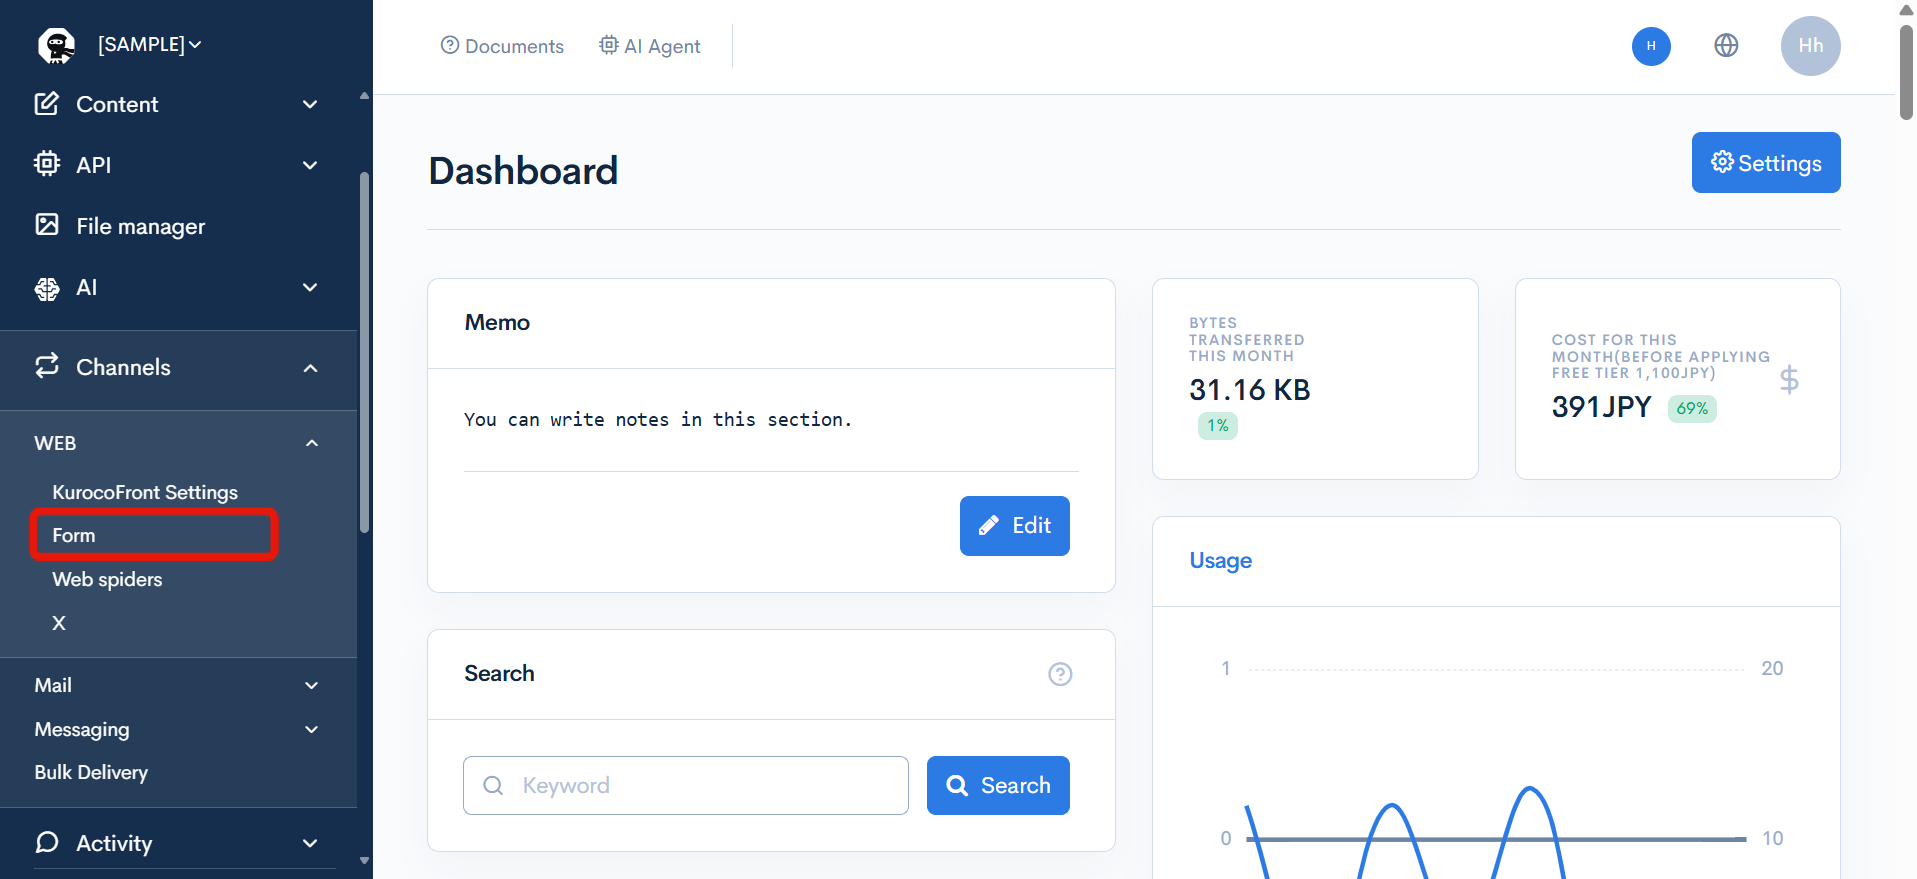
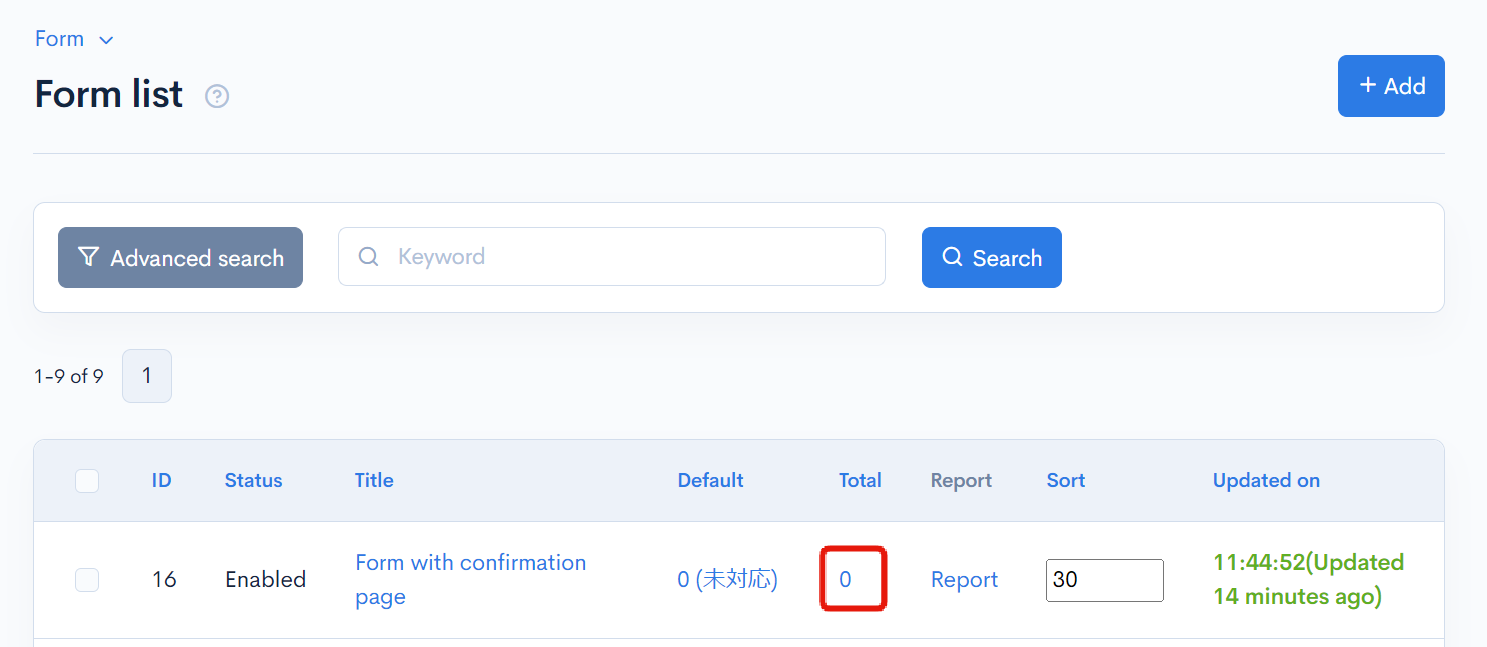
In the left sidebar menu, click [Channels] -> [WEB] -> [Form] to access the form list.
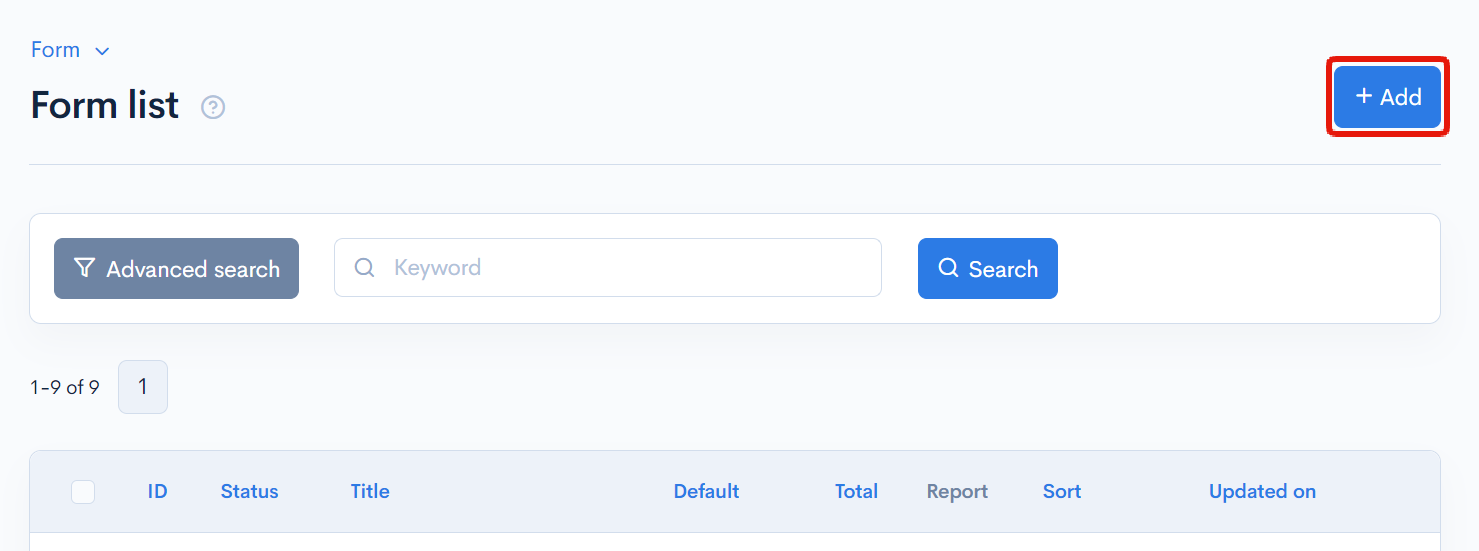
Click on [Add] in the form list.
Click [Add with default settings] to add the form.
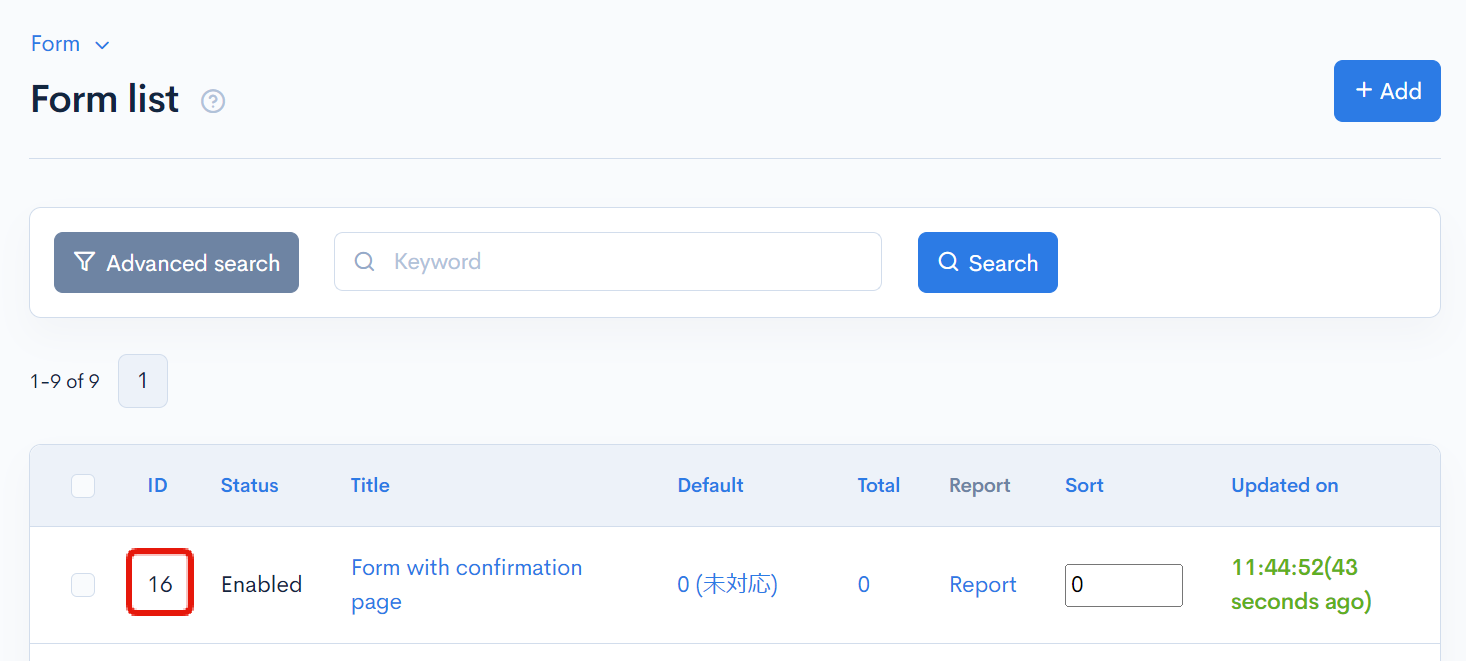
Make a note of the form ID as we will use it later.
Creating the endpoints
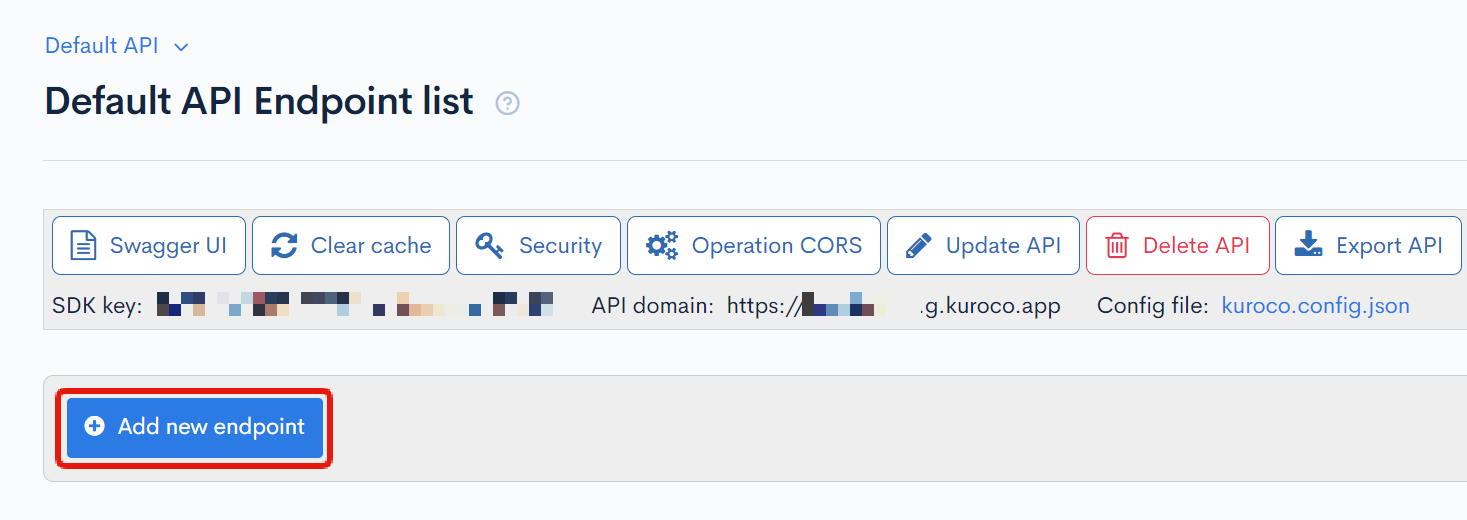
From the API page, click on "[Add New Endpoint]" to create two endpoints: one for performing form validation and another for submitting the form.
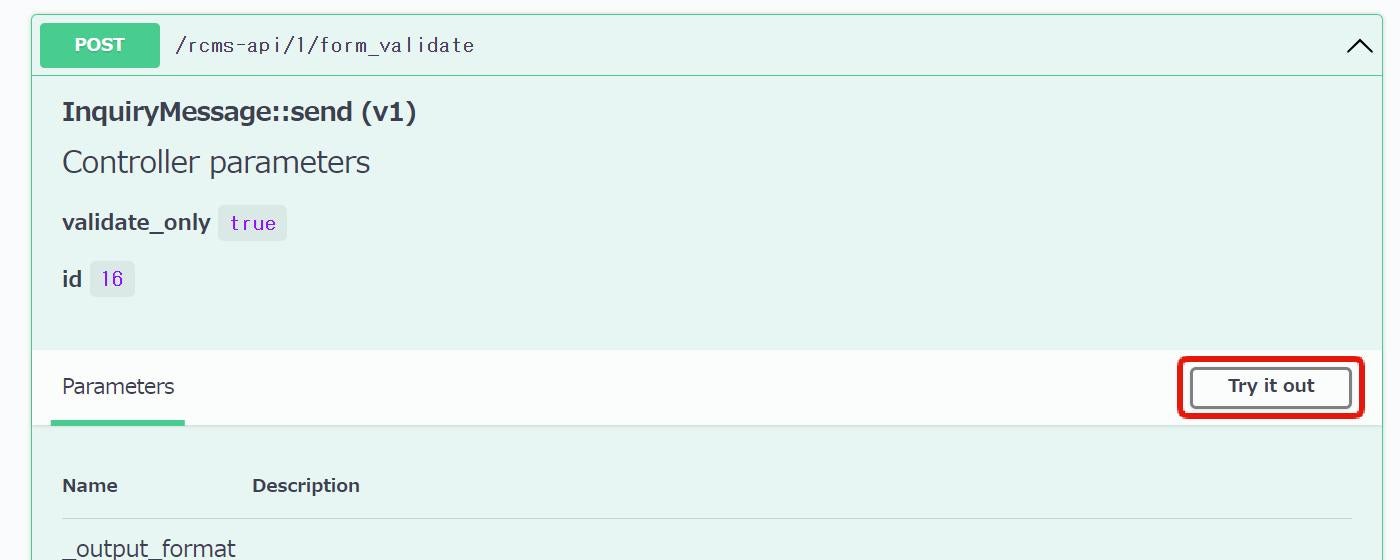
Endpoint for form validation
Create the endpoint with the following settings:
| Field | Setting |
|---|---|
| Path | form_validate |
| Category | Form |
| Model | InquiryMessage |
| Operation | send |
| id | ID of the form to be used (16) |
| validation_only | Check the box |
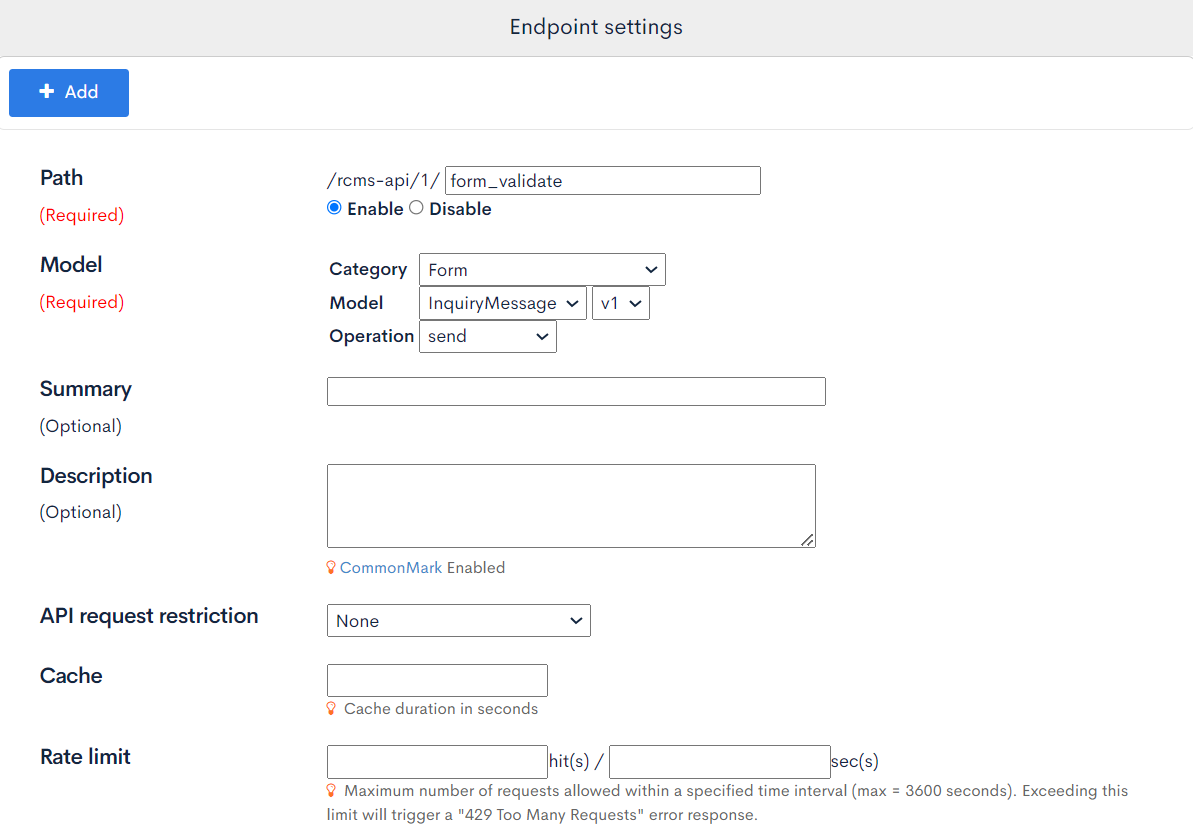
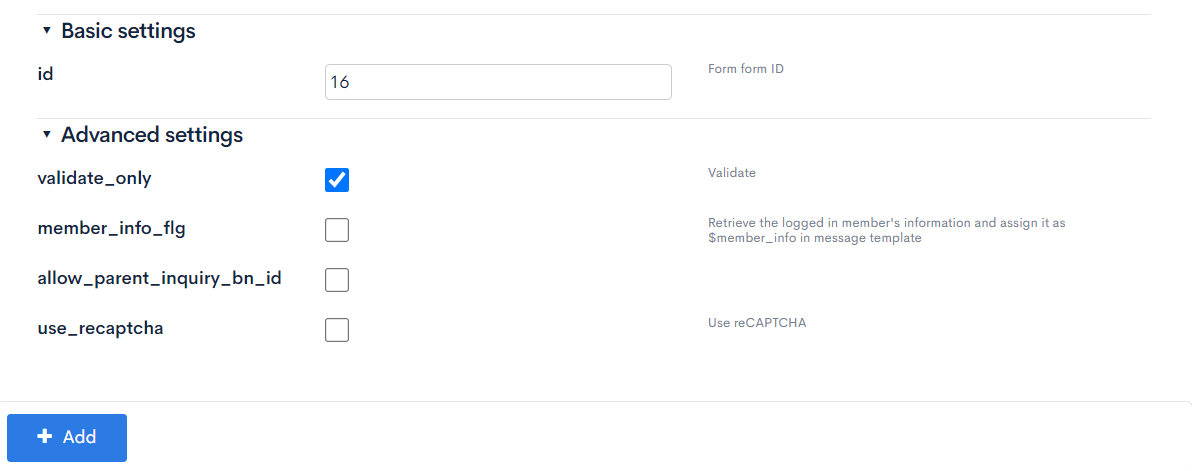
Click [Add] to create the endpoint after entering the information.
Endpoint for form submission
Create the endpoint with the following settings:
| Field | Setting |
|---|---|
| Path | form_send |
| Category | Form |
| Model | InquiryMessage |
| Operation | send |
| id | ID of the form to be used (16) |

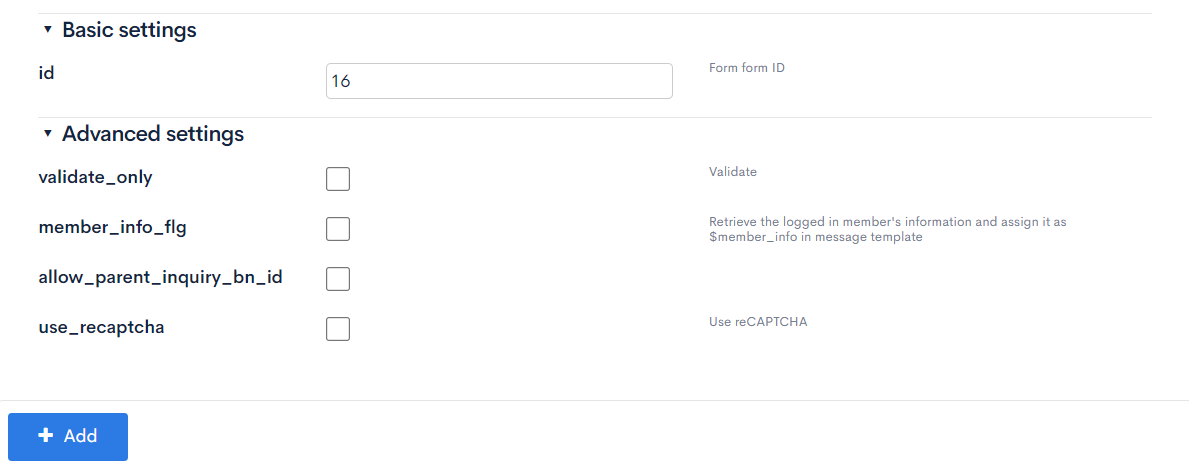
Click [Add] to create the endpoint after entering the information.
Checking with SwaggerUI
Use SwaggerUI to check if the endpoint for form validation is working.
Click [Swagger UI] on the API page.
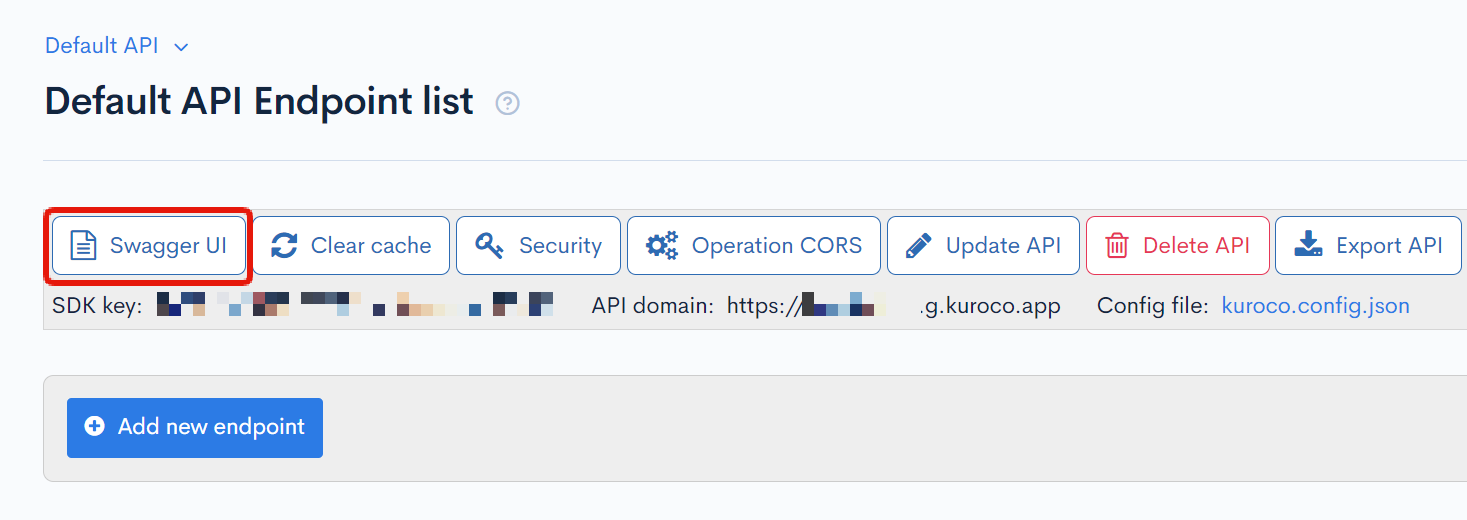
Select the /form_validate endpoint that was created earlier and click [Try it out].
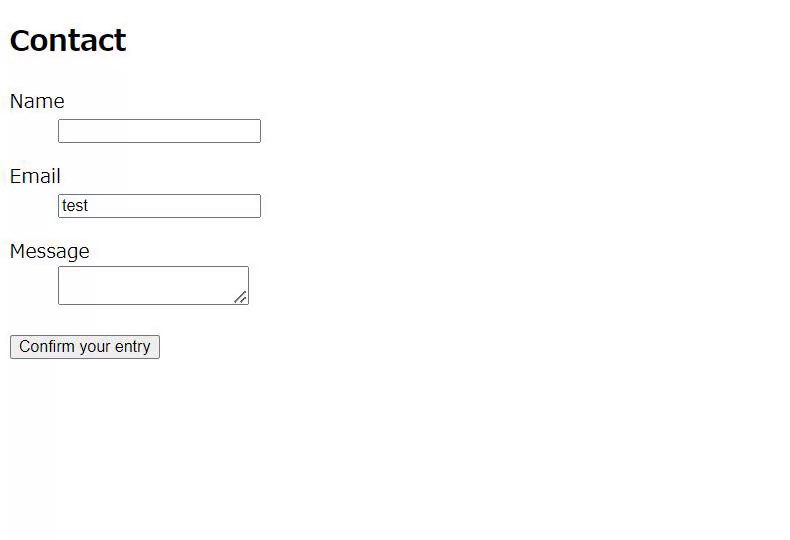
Enter the following in the Request body and click [Execute].
{
  "email": "test"
}
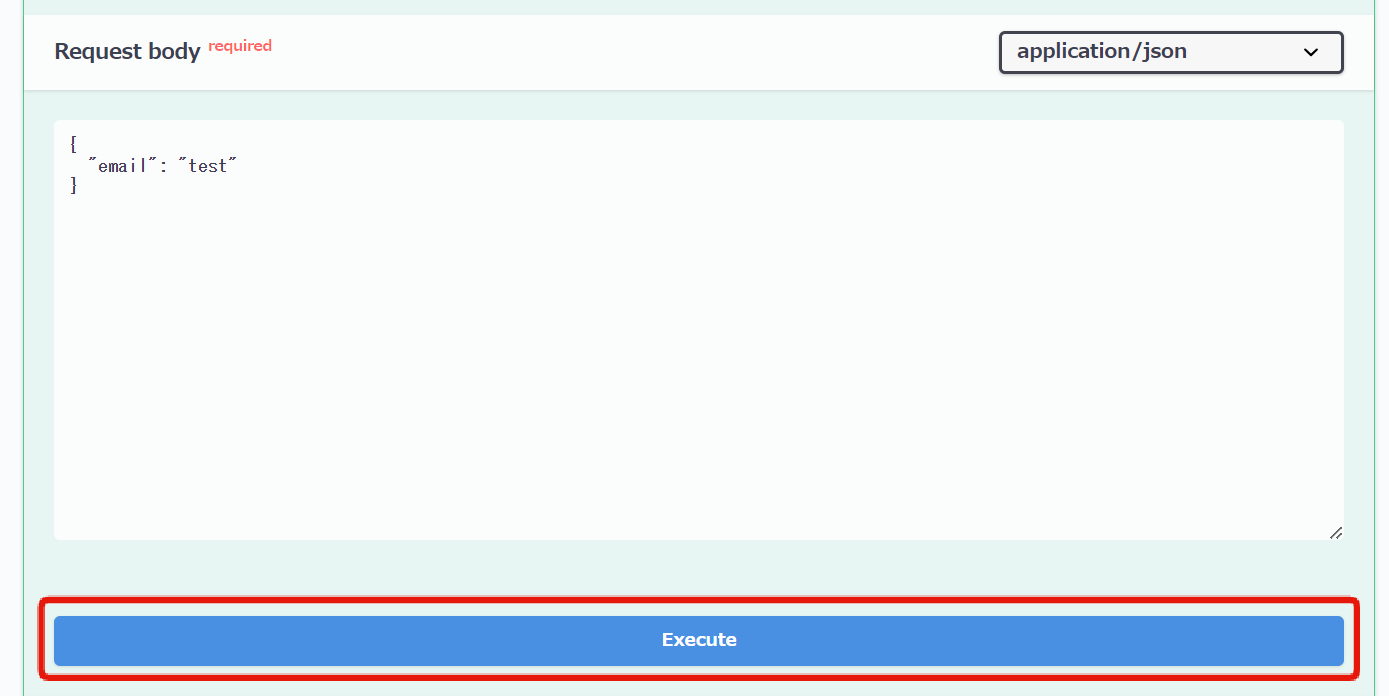
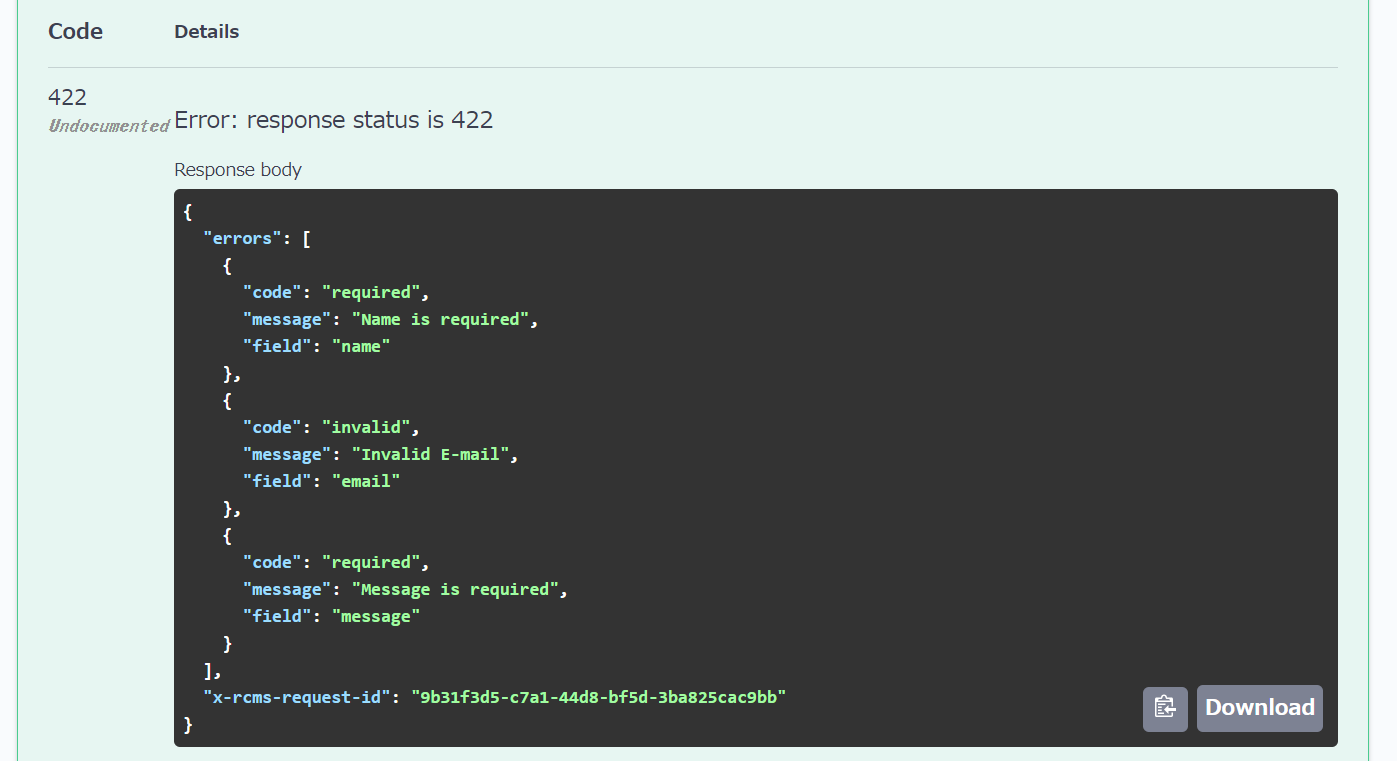
You can confirm that the response code 422 is returned and the error content is displayed in errors.
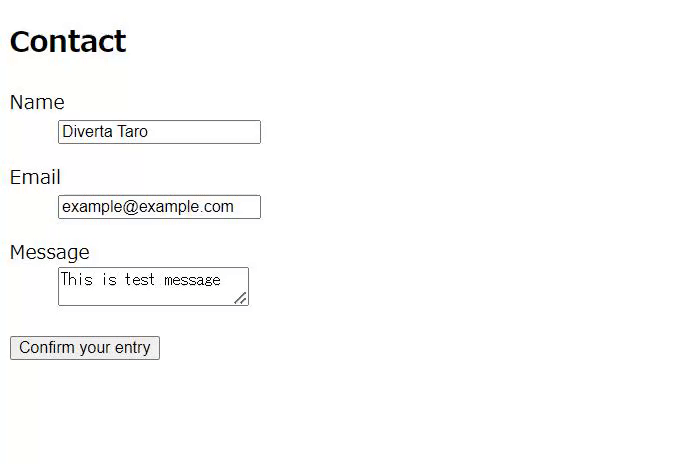
Next, enter the following in the Request body and click [Execute].
{
    "name":"Diverta Taro",
    "email":"example@example.com",
    "body":"this is test message"
}

A response code of 200 is returned, but id is null, confirming that the form response has not been added.
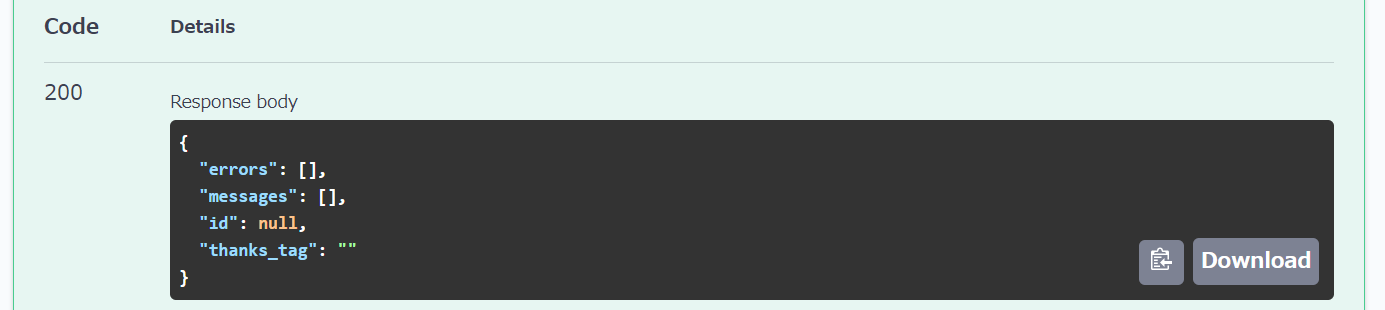
Using this, implement the frontend to display the confirmation screen when a request is sent to the validation endpoint and a response code of 200 is returned.
Implement the frontend
Add files
Add the form page with the following code.
- Nuxt2
- Nuxt3
loading...
loading...
Check in the browser
Next, check the page created earlier in the browser.
If the local server is stopped, run npm run dev and access http://localhost:3000/form_with_confirmation_page.
When you leave the required fields blank on the input screen and click [Confirm Input], an error will be displayed.
When you enter the necessary information and click [Confirm Input], the confirmation screen will be displayed. Please apply any design you like. On this screen, when you click [Submit], the inquiry will be sent.
That completes the creation of the inquiry form with a confirmation page.
Related Documents
Support
If you have any other questions, please contact us or check out Our Slack Community.