Implementing Pagination on Content List Page
When there are a large number of contents, it may be necessary to implement pagination to divide the content list into multiple pages.
Kuroco's topics list endpoint includes information such as the number of articles, current page, and total number of pages in the response, making it possible to implement pagination on the front end without calculating the page numbers.
This tutorial explains how to implement pagination on the content list page (news list) created in the tutorial "Creating Content List/Detail Page".
This page assumes that a project with Kuroco and Nuxt.js has been set up, and a content list page has been created.
If you have not set it up yet, please refer to the following tutorials.
Kuroco Beginner's Guide
Creating Content List/Detail Page
This tutorial is written with the following versions.
Nuxt2: v2.15.8
Nuxt3: v3.8.0
API Configuration
The API registration details are the same as in the tutorial "Creating Content List/Detail Page".
If you want to use the API created there, proceed to Setting the Number of Items per Page in Kuroco.
Perform Basic API Configuration
First, register the API.
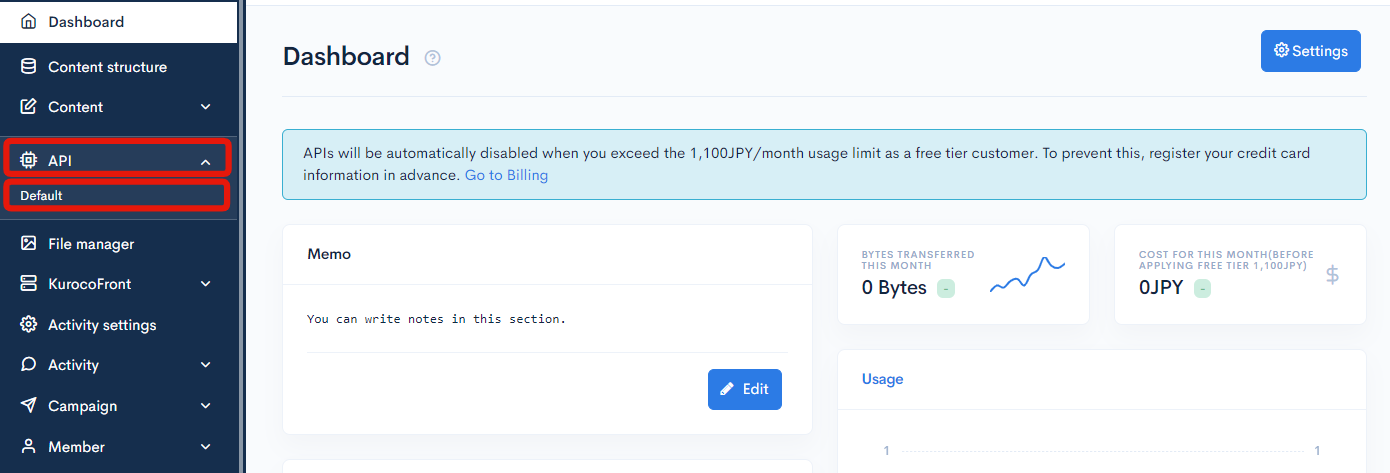
Click on [API] -> [Default] from the Kuroco admin screen.
Click on [Add].

Enter the title, version, and description, then click [Add].

After adding the API, proceed to configure the security settings.
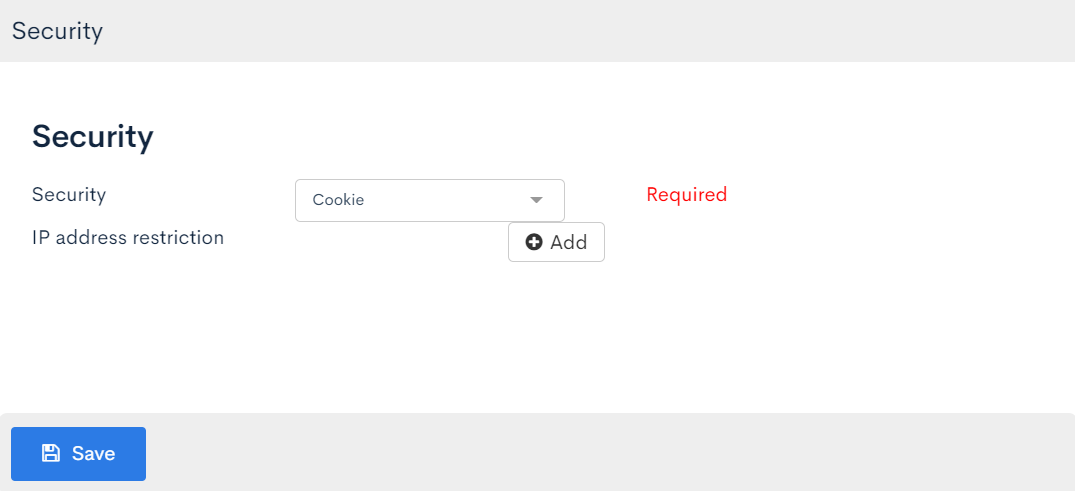
Click on [Security].

Select [Cookie] and click [Save].
 Note:
Note:
When using a cookie as a security token, if the API domain and frontend domain are different, there may be issues with third-party cookies, and authentication may not work in Safari, etc.
It is necessary to set the frontend and API domains with subdomain differences, so set the API domain using Custom Domain/TLS Certificate and change the API domain from the Account Settings.
(It works fine in Chrome, so it is recommended to build it in Chrome during development and testing stages.)
Configure CORS
Click on [Operation CORS].

Click [Add Origin] in CORS_ALLOW_ORIGINS and add the following:
http://localhost:3000/- Frontend domain
Click [Add Method] in CORS_ALLOW_METHODS and add the following:
- GET
- POST
- OPTIONS
Ensure that [Allow Credentials] is checked in CORS_ALLOW_CREDENTIALS.
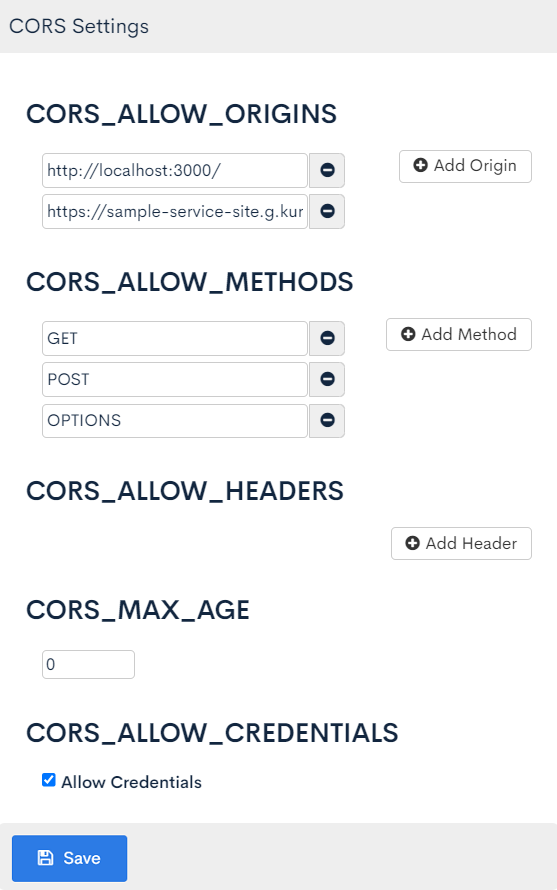
If there are no issues, click on [Save].
Setting the Endpoint
Next, we will create the following endpoints:
- News List Endpoint
- News Detail Endpoint
News List
Create the News List endpoint with the following settings:
| Field | Setting |
|---|---|
| Path | news |
| Category | Contents |
| Model | Topics |
| Operation | list |
| topics_group_id | Content definition ID where news is registered |


After completing the setup, click on "Add".
News Detail
Create the News Detail endpoint with the following settings:
| Field | Setting |
|---|---|
| Path | newsdetail |
| Category | Contents |
| Model | Topics |
| Operation | details |
| topics_group_id | Content definition ID where news is registered |


After completing the setup, click on "Add".
Setting the Number of Items per Page in Kuroco
Since the number of content items per page is fixed, you need to set the parameters in Kuroco's admin panel. Pass the page information to the endpoint as a parameter to receive responses for each page.
Navigate to the API page where you created the News List endpoint.

Click on [Update] for the News List endpoint (in this case, /rcms-api/7/news).

In the endpoint settings page, input the number of items per page in the cnt field. For example, input 4 and click on [Update].

Confirming Information Retrieval with Swagger UI
Next, let's confirm the responses from the endpoints.
Navigate to the API page where you created the News List endpoint.
Click on [Swagger UI].

Click on [Try it out] for the News List endpoint.

Input 1 in the pageID field.

Click on [Execute].
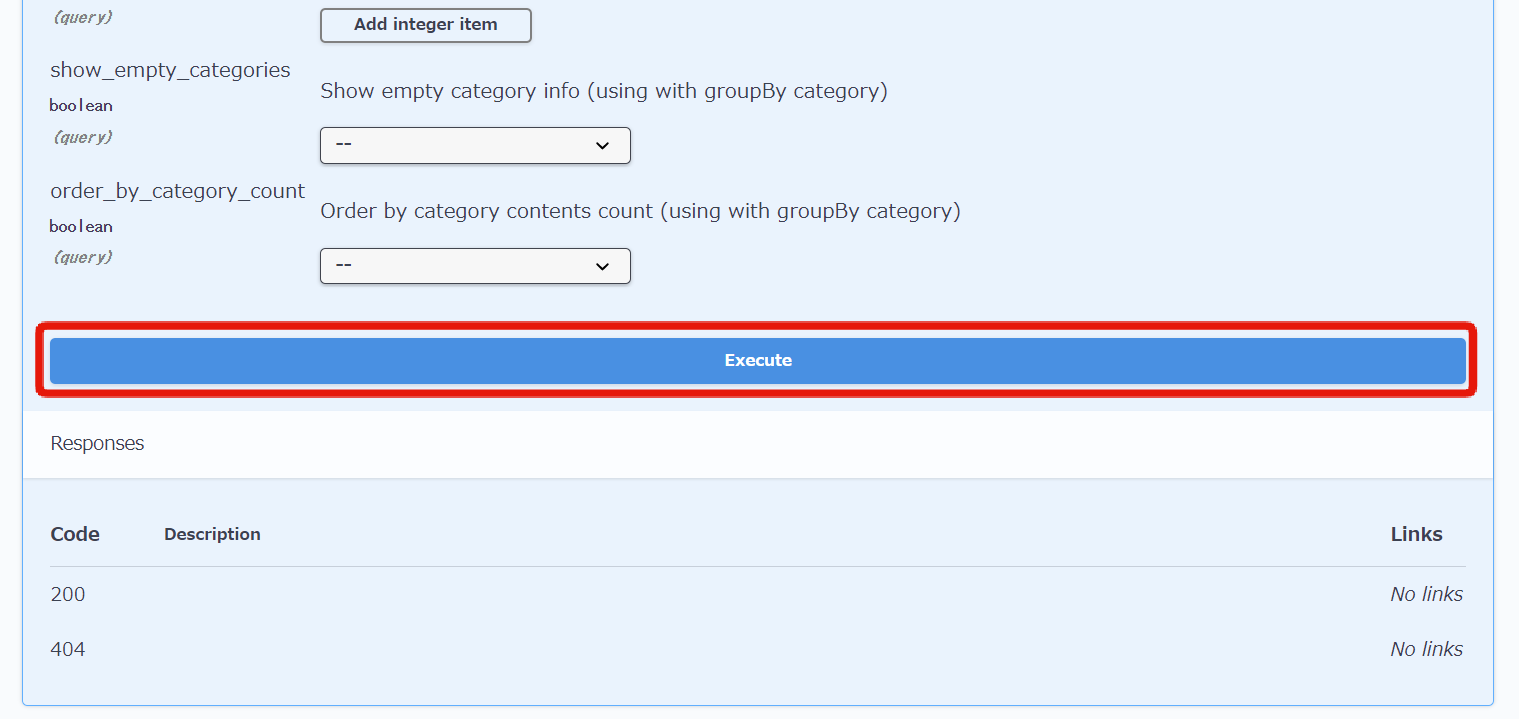
You will see the list of 4 items on the first page and information under pageInfo in the response.
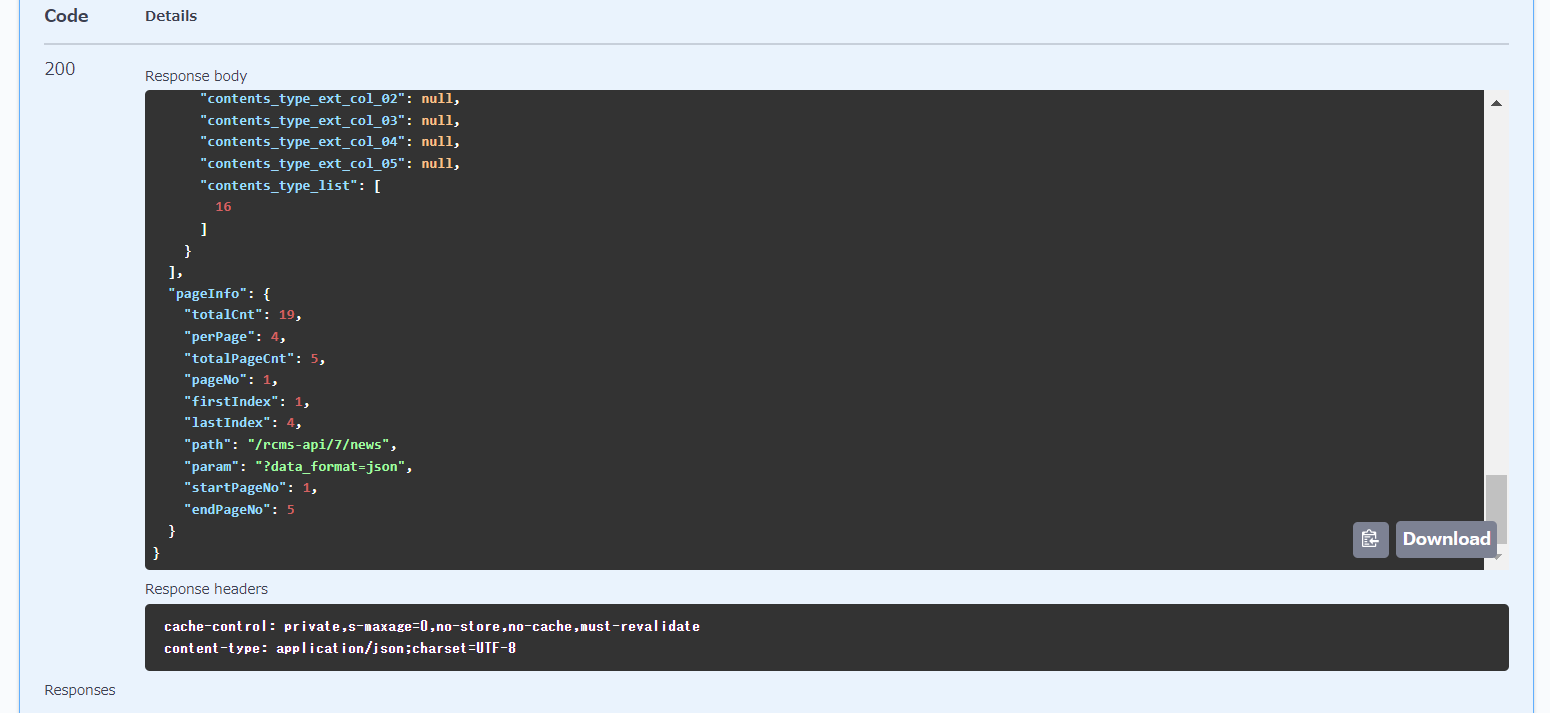
Similarly, input the page number in the pageID field and click on [Execute] to get the list and pageInfo response for each page. You can use this to implement pagination on the frontend.
Specify the current page information with parameters
Add the current page information as parameters to obtain corresponding responses for each page.
Create files with the following contents.
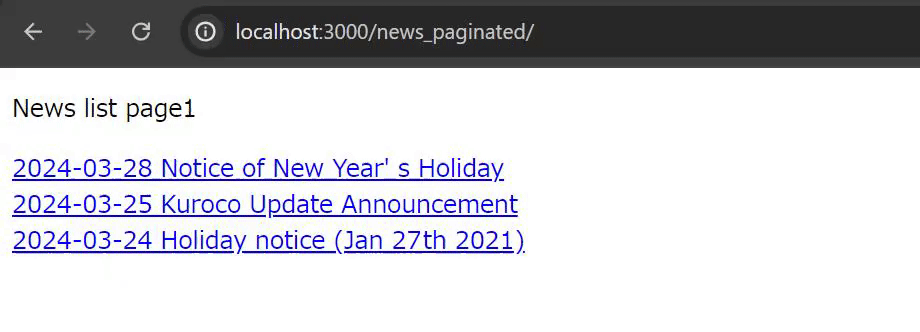
This time, files have been created so that pages can be displayed under the directory names /news_paginated/ and /news_paginated/slug/.
- Nuxt2
- Nuxt3
loading...
loading...
loading...
loading...
Please change /rcms-api/7/news and /rcms-api/7/newsdetail to your own endpoint URLs.
Similarly, please change the endpoint URLs in the source code to your own endpoint URLs.
By adding the query parameter ?page=2, you can confirm that the list of displayed news will change.
Display links for page navigation
Next, create the link section for navigating between pages.
Utilize the pageInfo in the response from the endpoint, which contains information about the current page number and the last page.
Here, we will modify the index.vue file as a simple example.
Also, to enable reuse of the link description part, create a file Pagenator.vue in the components folder and write the code there.
Add the following code to index.vue.
- Nuxt2
- Nuxt3
      </nuxt-link>
    </div>
+    <Pagenator v-bind="{ ...response.pageInfo }" />
  </div>
</template>
      </nuxt-link>
    </div>
+    <Pagenator v-bind="{ ...response.pageInfo }" @page-update="updatePage" />
  </div>
</template>
Create /components/Pagenator.vue as follows.
- Nuxt2
- Nuxt3
loading...
loading...
Links to each page have been added.

This concludes the explanation of how to implement pagination on a content list page using Kuroco and Nuxt.js.
Related documents
Support
If you have any other questions, please contact us or check out Our Slack Community.