How to implement member registration with authentication function
Overview
We will implement a registration with authentication function that sends an authentication email to the registered email address during new member registration. The link in the authentication email is used to access the registration screen, where the password is set to complete the registration process.
What you will learn
The registration with authentication function is implemented by the following the steps below.
- API settings
- Test the registration function with Swagger UI
- Adjust message template
- Implement the front end
Before you start
This page assumes that you have already built a project with Kuroco and Nuxt.js.
If you haven't built one yet, see the tutorial below.
This tutorial is written with the following versions:
Nuxt2: v2.15.8
Nuxt3: v3.8.0
API settings
First, we will create the API used by the registration function.
Set API basic settings
First, create a new API.
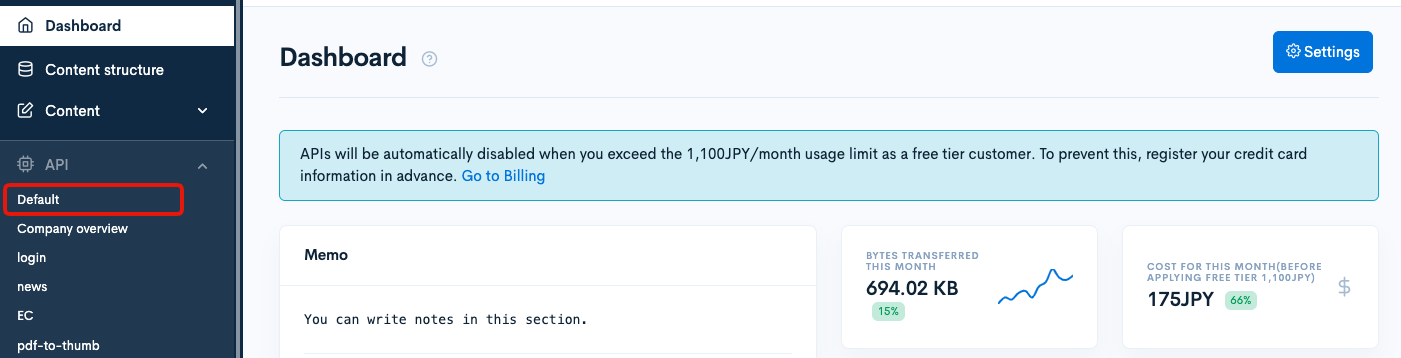
From the Kuroco admin panel, click [API]->[Default].
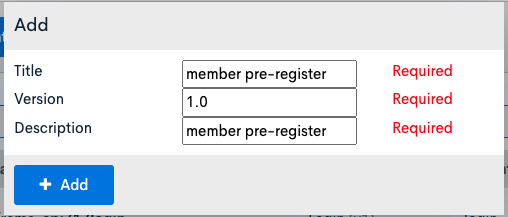
Click [Add].

Enter title, version, and description and click [Add].
You will be redirected to the new API page.
Next, you will need to configure the security settings.
Click [Security].

Select [Cookie] and click [Save].
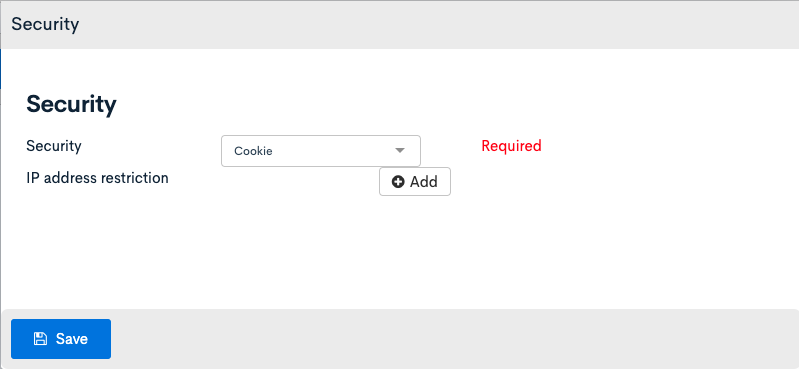
- Configure the security settings according to your needs. "Cookies" is used for this tutorial.
- When using cookies as security tokens, different API domain and frontend domains may cause authentication to not work on browsers such as Safari due to third-party cookies.
It is necessary to set the frontend and API domain with different subdomains, set up the API domain on Original domain/TLS certificate and change the API domain on Account Settings.
(It works fine in Chrome, so we recommend that you build in Chrome first during the development and testing phase).
Configure CORS
Click on [Operation CORS].

Click [Add Origin] of CORS_ALLOW_ORIGINS and enter the following:
http://localhost:3000- Frontend domain
- Admin panel URL
Click [Add Method] of CORS_ALLOW_METHODS and enter the following:
- GET
- POST
- OPTIONS
Confirm that [Allow Credentials] of CORS_ALLOW_CREDENTIALS is checked.
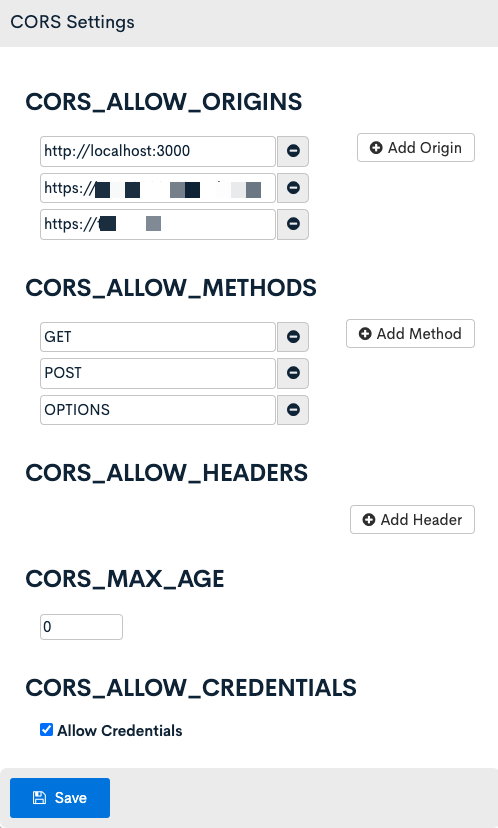
After finishing the configurations, click [Save].
Create endpoints
Next, we create following endpoints.
- Member registration endpoint
- Pending member registration endpoint
Member registration endpoint
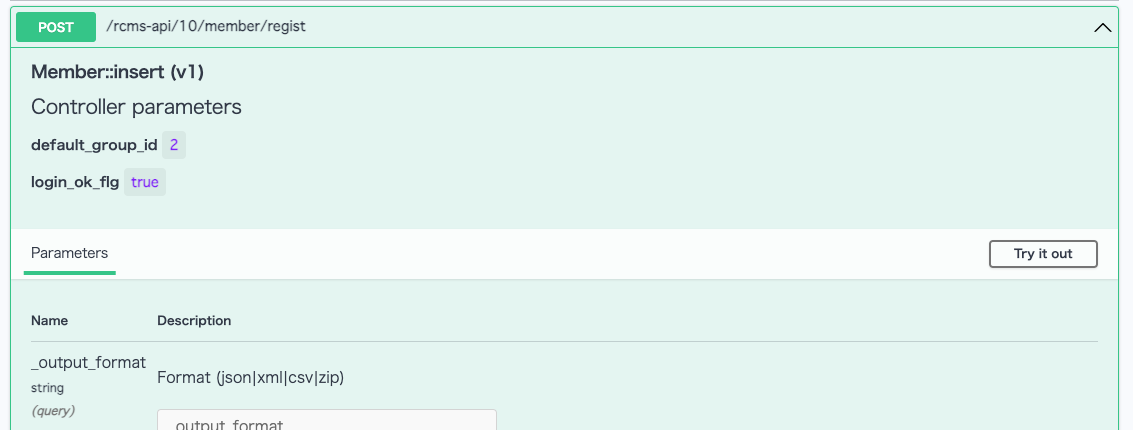
Create an endpoint for member registration with the following settings.
| Item | Settings |
|---|---|
| Path | member/regist |
| Category | Member |
| Model | Member |
| Operation | insert |
| default_group_id | Enter the member group ID to assign the user to when they register. You can check the group ID(s) on Group. |
| login_ok_flg | Enabled |

Click [Add] after finishing the above configuration.
Pending member registration endpoint
Create an endpoint for pending member registration as follows:
| Item | Settings |
|---|---|
| Path | member/invite |
| Category | member |
| Model | Member |
| Operation | invite |
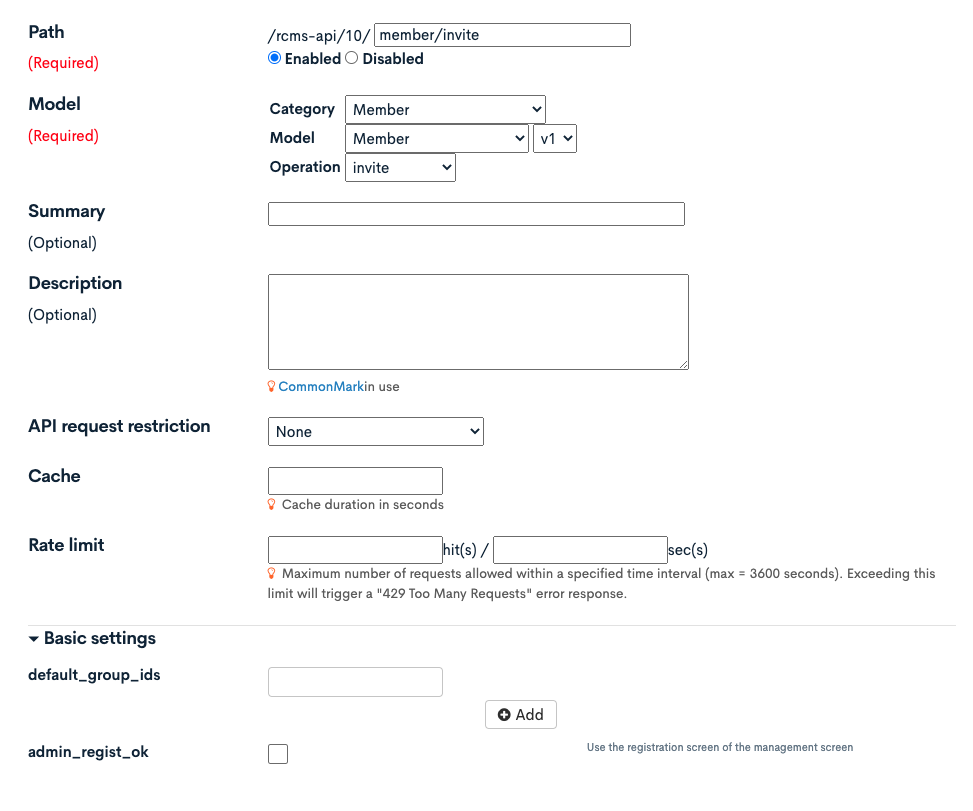
Click [Add] after finishing the above configuration.
Test the registration function with Swagger UI
After configuring API, we will test the registration function with Swagger UI.
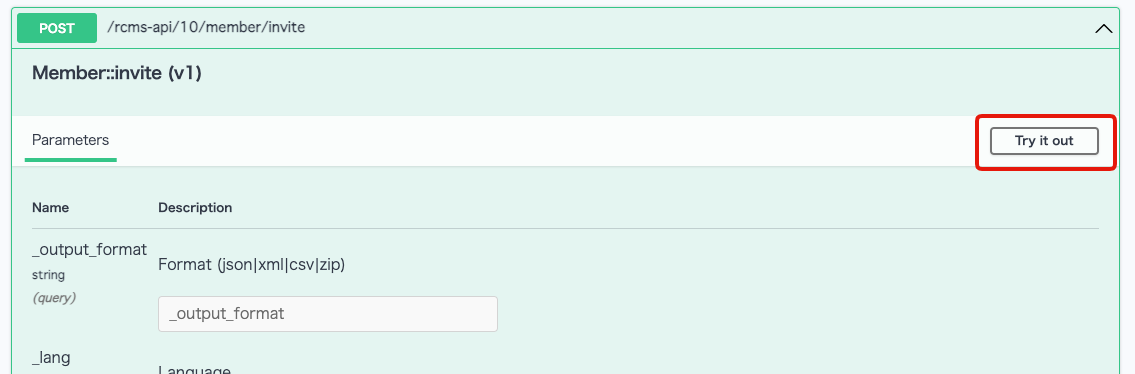
Send invitation email with Member::invite endpoint
Click [Swagger UI].

Click [/rcms-api/10/member/invite].

Click [Try it out].
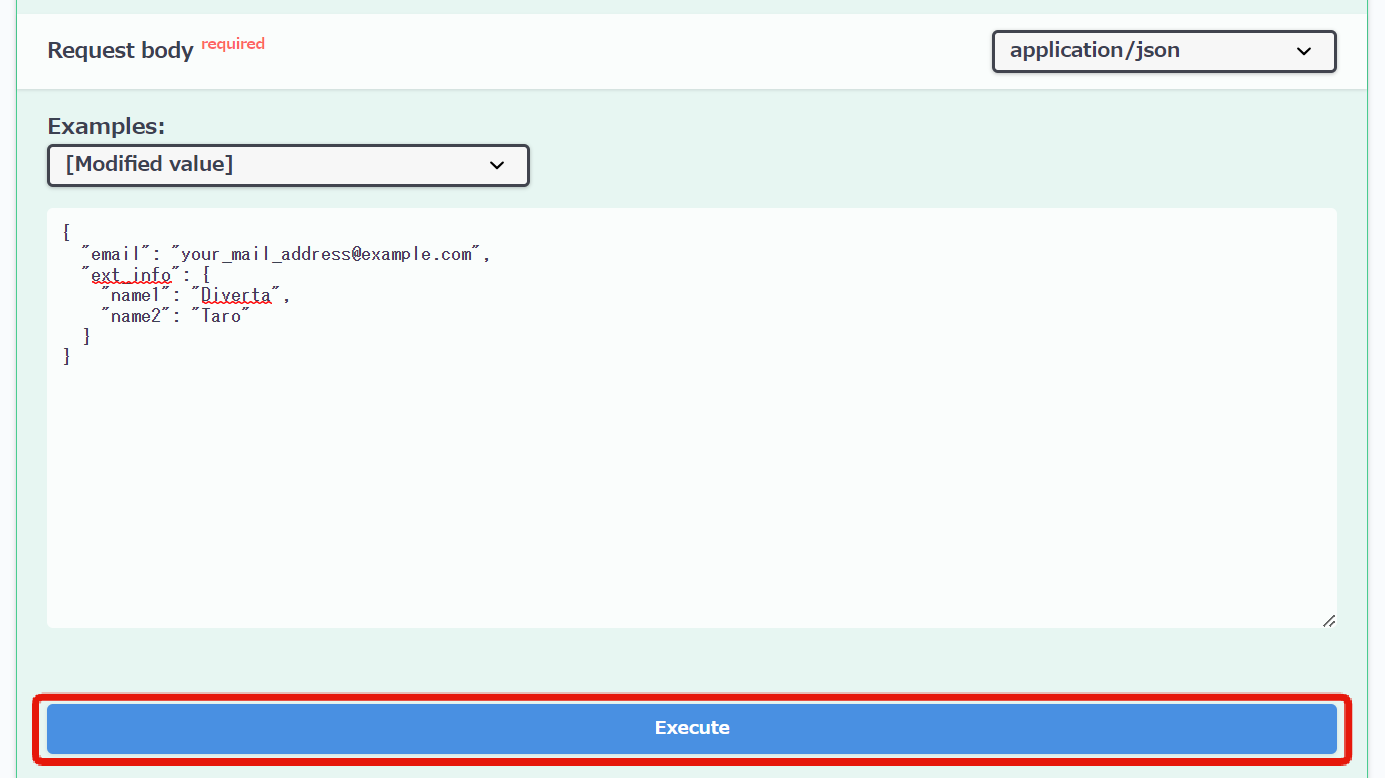
Enter the following data in the "Request body" and click [Execute].
{
  "email": "your_mail_address@example.com",
  "ext_info": {
    "name1": "Diverta",
    "name2": "Taro"
  }
}
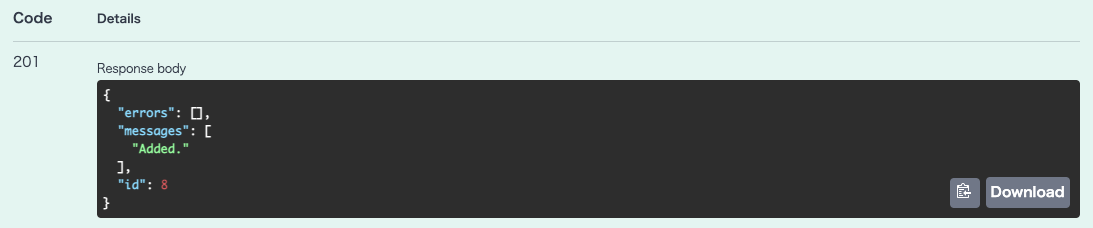
Verify that the response is returning the HTTP 200 OK code and a message saying the invitation email has been sent to the user.
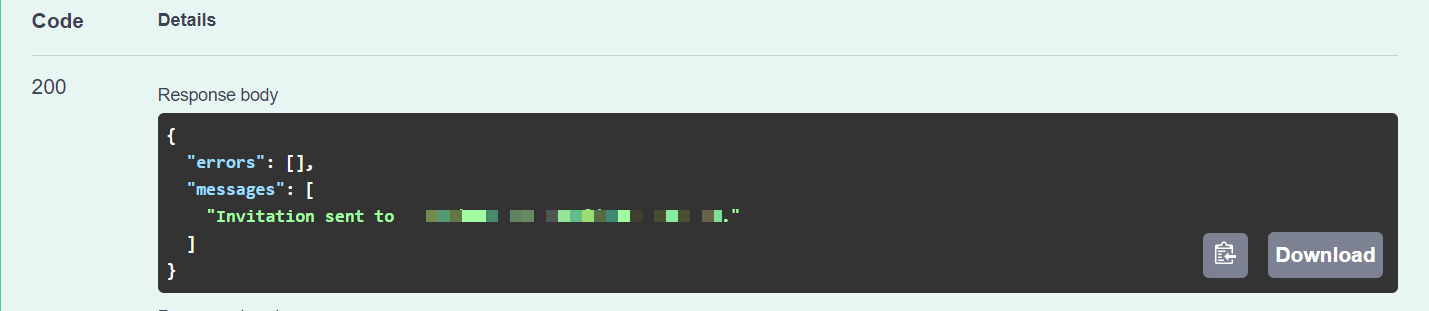
We will modify the email body later, so we will leave it as default for now.
Copy the "key" at the end of the URL as we will need it later.
Get pending member information using key
The key included in the pre-registration email has an expiration period. The default is 720 minutes (12 hours).
You can change the expiration period from [Environment] -> [Site settings] in the Member section under "Invitation e-mail validity period".
For more details, see Site settings.
Now post the issued key information to the Member::invite endpoint that you used to post the member information earlier.
Enter the following JSON data in the Request body of Member::invite and click [Execute].
{
  "email_hash": "YOUR_EMAIL_HASH"
}
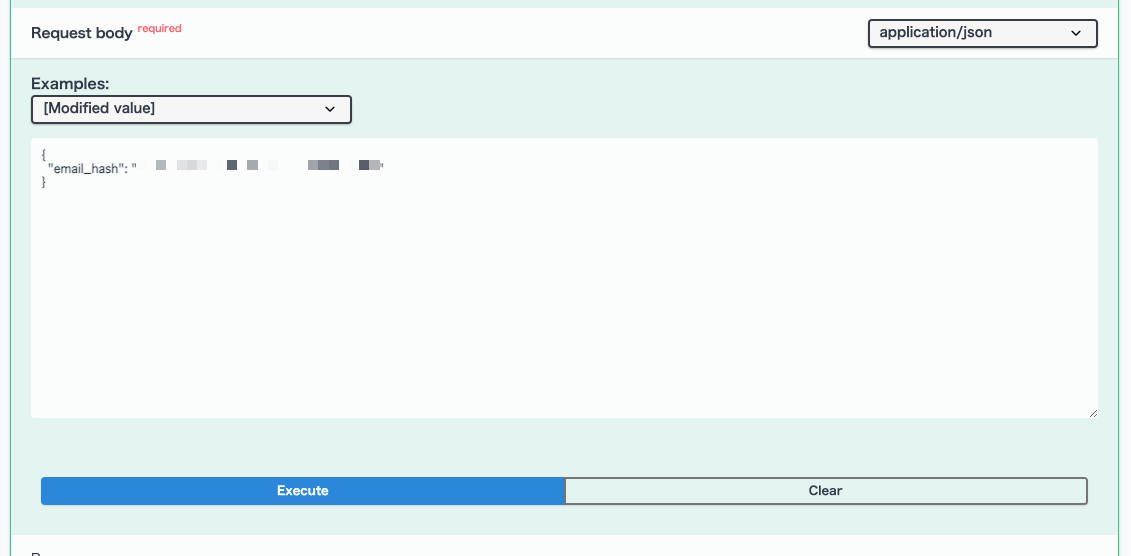
Replace YOUR_EMAIL_HASH with your own key which you saved in the previous step.
Then, you get the response of the member information of temporary registration status.
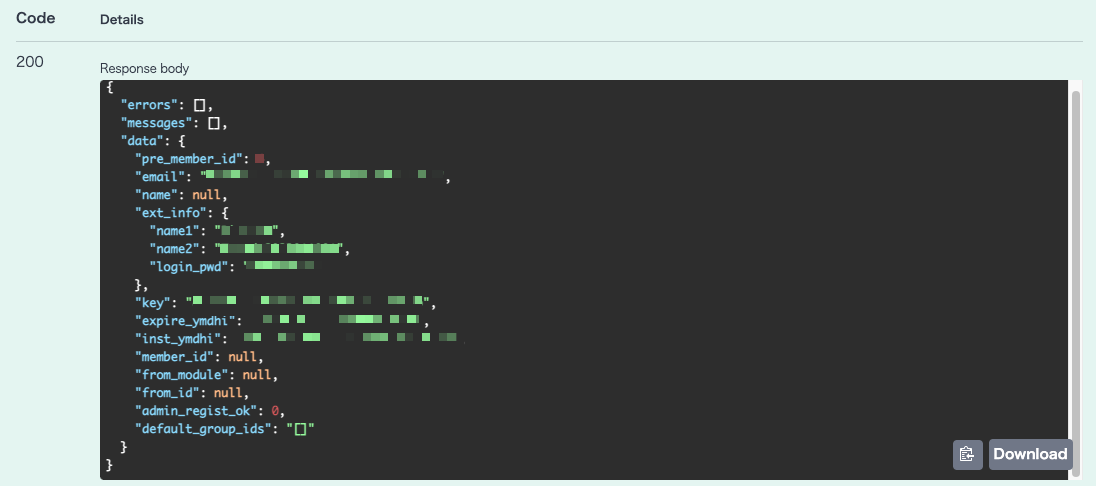
We will register the member using the above information.
Register a member using Member::insert endpoint
Finally, we make a request to the member registration endpoint with the obtained pending member information.
Click [/rcms-api/10/member/regist] on Swagger UI.

Click [Try it out].
Enter the following JSON data in the Request body and click [Execute].
The login password is intended to be entered on the registration page.
{
  "email": "your_mail_address@example.com",
  "name1": "Diverta",
  "name2": "Taro",
  "login_pwd": "PASSWORD"
}
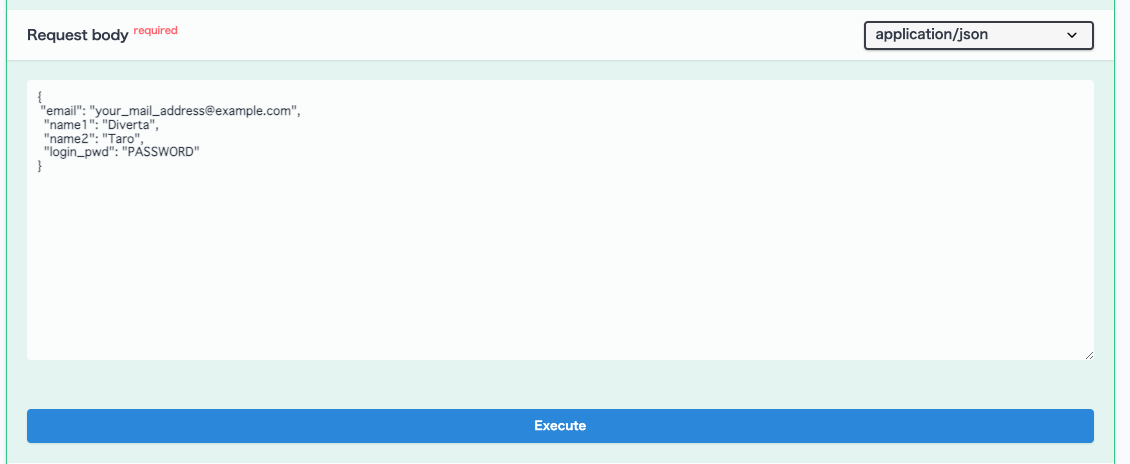
A new member should be created.
The above is the flow of the registration with authentication function. Next, we will implement this flow on the frontend.
Adjust message template
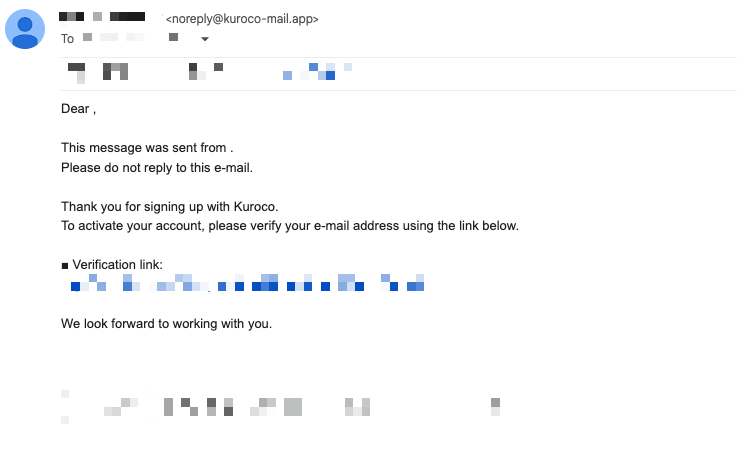
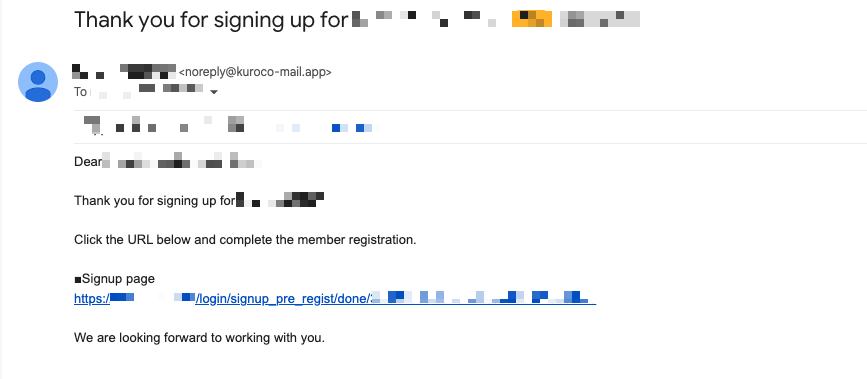
Before implementing the frontend, we will adjust the content of the email sent when the Member::invite endpoint is called.
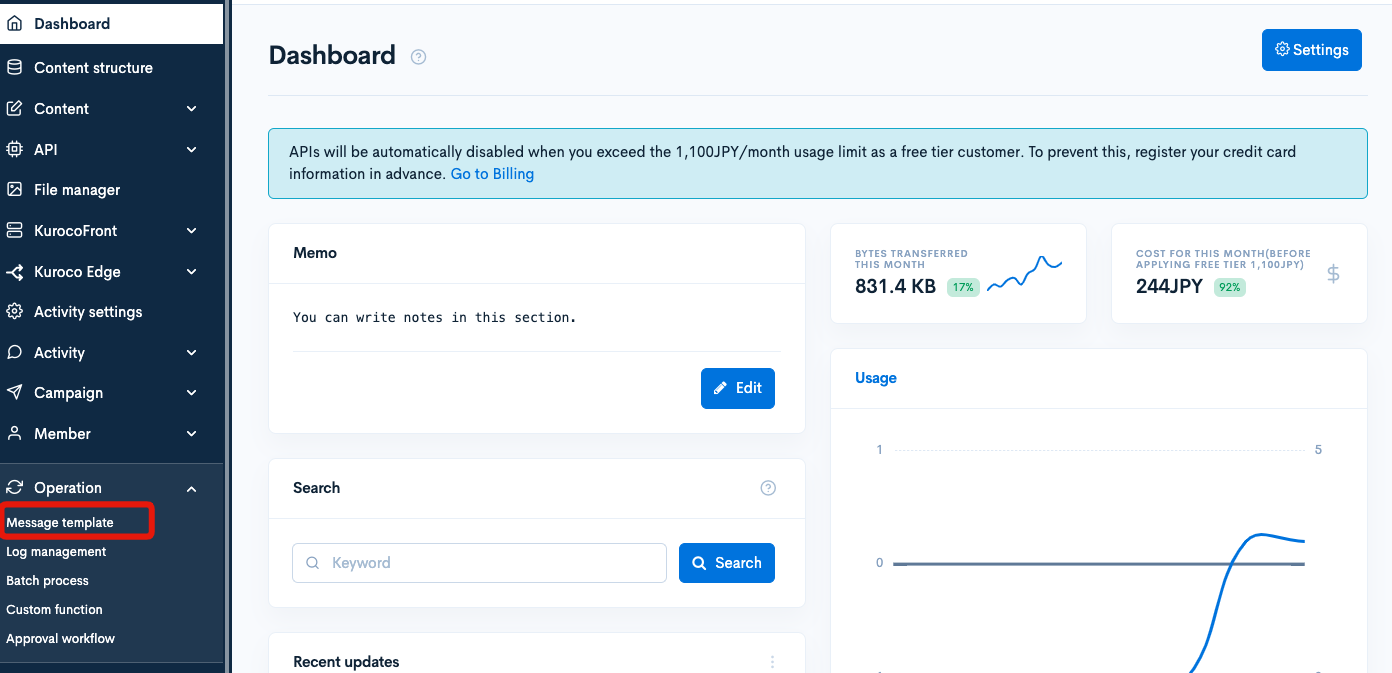
Click [Operation]->[Message template].
Search for the template with identifier member/pre_regist_thanks.
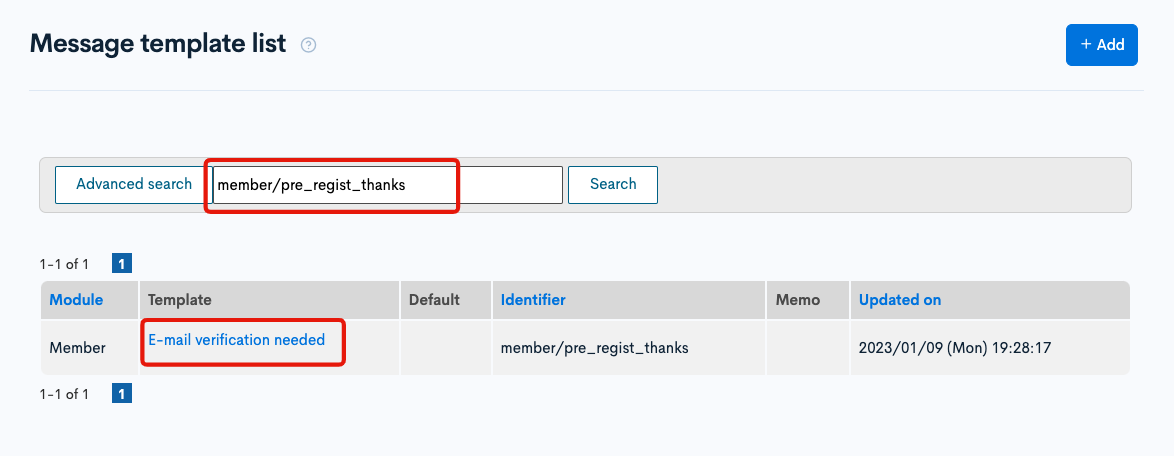
The message template editor page will be displayed, enter the following and click [Update].
RCMS-X-SUBJECT:Thank you for signing up for {$smarty.const.SITE_TITLE}
Dear {$ext_info.name1} {$ext_info.name2}

Thank you for signing up for {$smarty.const.SITE_TITLE}.

Click the URL below and complete the member registration.

■Signup page
{$smarty.const.ROOT_URL}/login/signup_pre_regist/done/?key={$preregist_key}

We are looking forward to working with you.

Implement the front end
Finally, we will implement a frontend that completes the feature setup above.
Create page for pre-registration
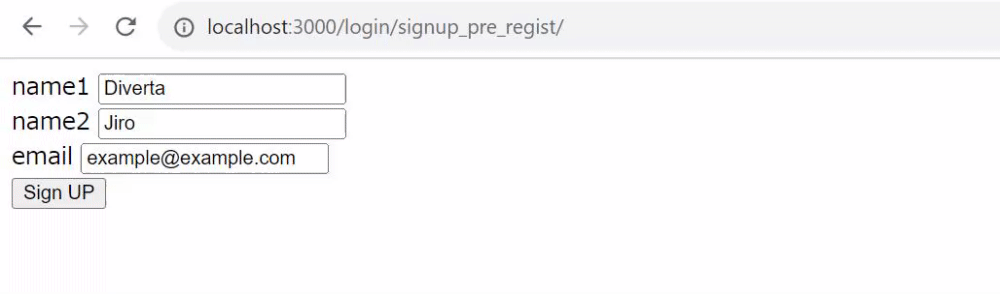
Create a file that can be displayed in the /login/signup_pre_regist/ directory.
- Nuxt2
- Nuxt3
loading...
loading...
Replace /rcms-api/33/member_invite with your own endpoint URL.
Create the main registration page
Ccreate a file that can be displayed in the /login/signup_pre_regist/done/ directory.
- If there is no key or if the number of digits in the key is different from expected, a 404 page will be displayed.
- The key will be POSTed to the Member::invite endpoint to retrieve information about the provisional member.
- The retrieved provisional member information and login_pwd will be sent to the Member::insert endpoint.
- Nuxt2
- Nuxt3
loading...
loading...
Replace /rcms-api/33/member_invite with your own endpoint URL.
Testing
Test and confirm that the member has been registered as expected.
Sending pending registration e-mail
Check the content of pending registration e-mail
Member registration

The implementation of member pending registration function is now complete.
Related Documents
Support
If you have any other questions, please contact us or check out Our Slack Community.