Setting up a new member registration form
This tutorial explains how to set up a new member registration form in a Nuxt.js project using Kuroco.
Before you start
This tutorial is written with the following versions:
Nuxt3: v3.8.0
Nuxt.js project build
Before starting this tutorial, you should have a ready-to-use Nuxt.js project. See Tutorial: Creating a content list page with Kuroco and Nuxt.js on how to build one.
API security
Kuroco provides several API security options.
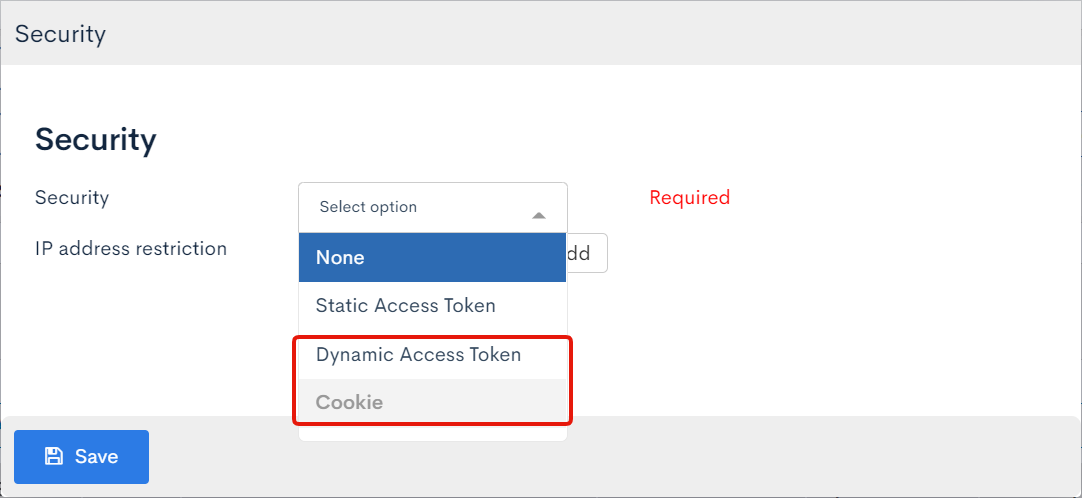 New member registration only works with the [Dynamic access token] or [Cookie] security settings.
For more information about these security options, see User guide: API security.
For details on how to verify the security types, see Tutorial: How to check the API security using Swagger UI.
Recommended browser
We recommend using Google Chrome as your browser, as this tutorial uses Chrome Developer Tools.
Implementing a dummy registration form
Now that you have all the prerequisites, you are ready to start making the new member registration form. First, implement a dummy signup process without API integration.
1. Create the registration form
To create the registration form, make a new file named pages/login/signup/index.vue. Paste the following code into it:
<template>
  <div>
    <div v-if="!signupDone">
      <form @submit.prevent="signup">
        <div>
          <label>prop1</label>
          <input
            v-model="user.prop1"
            name="prop1"
            type="text"
            placeholder="prop1"
          />
        </div>
        <div>
          <label>prop2</label>
          <input
            v-model="user.prop2"
            name="prop2"
            type="text"
            placeholder="prop2"
          />
        </div>
        <div>
          <button type="submit">Sign up</button>
        </div>
      </form>
    </div>
    <div v-if="signupDone">New member registration is complete.</div>
  </div>
</template>

<script setup>
import { ref } from "vue";

const signupDone = ref(false);
const user = ref({});

const signup = () => {
  console.log(JSON.stringify(user.value, null, "\t"));
  signupDone.value = true;
};
</script>

<style scoped>
form > div {
  margin: 8px;
  display: flex;
  flex-direction: row;
}
form > div > * {
  display: flex;
  flex-direction: row;
  flex-basis: 100px;
}
form > div > *:nth-child(1) {
  flex: 0 0 100px;
  padding-right: 8px;
}
form > div > *:nth-child(2) {
  min-width: 0;
  flex: 1 100 auto;
}
</style>
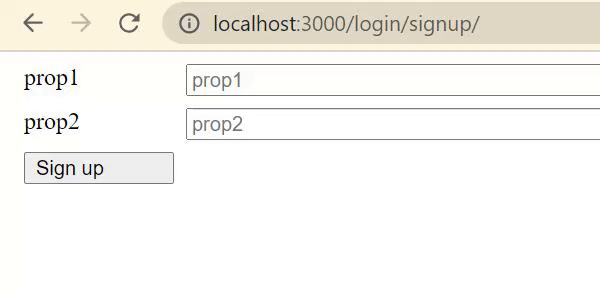
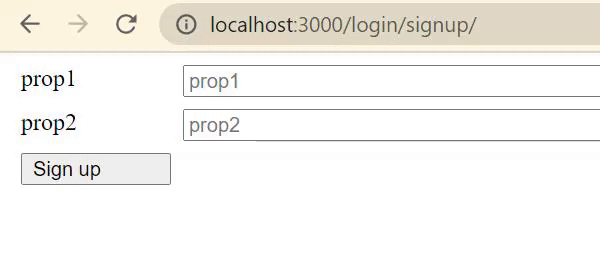
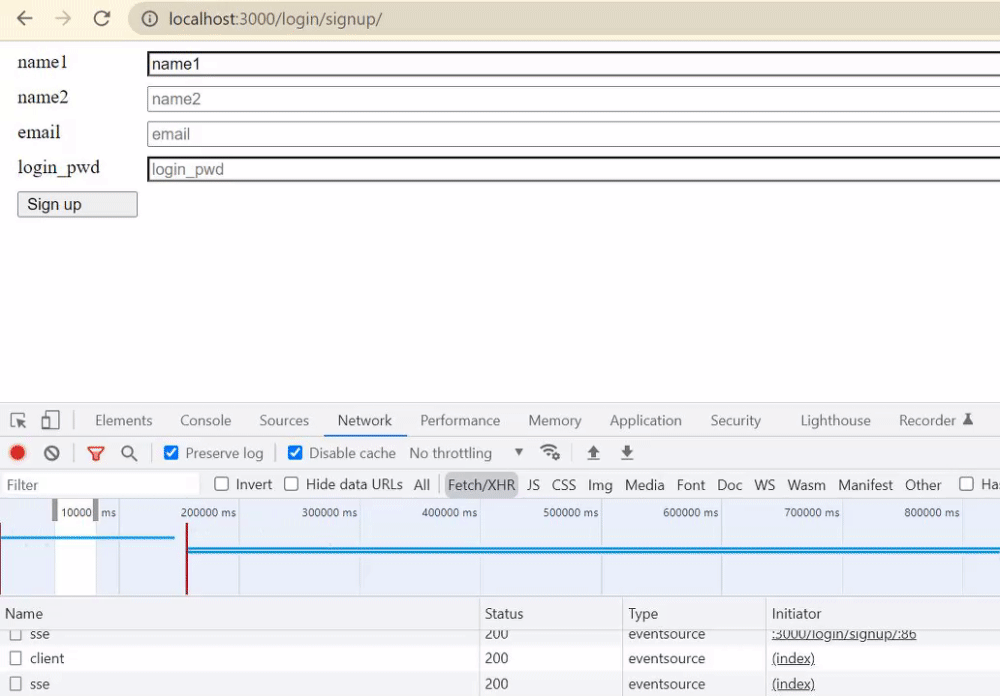
After saving the file, run npm run dev and go to http://localhost:3000/login/signup/. You will see a simple registration form. In the Chrome Developer Tools, open [Console]. Enter the following information and click [Sign Up]:
prop1:text1prop2:text2
The prop1 and prop2 values you entered will be displayed in the console log.
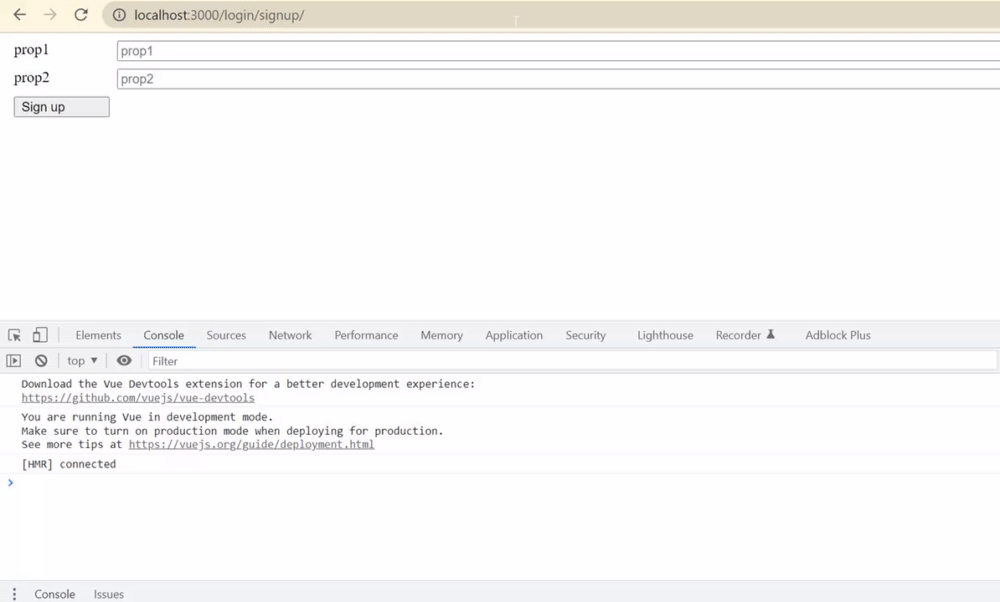 The output value of this log will be the actual new member registration requests to the API.
2. Configure the registration process
After creating the registration form, tentatively integrate the API as follows:
- Add another dummy process that makes a 1-second request.
- For successful requests, the webpage will display the message: "New member registration is complete."
To do this, modify pages/login/signup/index.vue as shown below.
index 92a23a3..c4be0d5 100644
--- pages/login/signup/index.vue
+++ pages/login/signup/index.vue
@@ -2,6 +2,9 @@
   <div>
     <div v-if="!signupDone">
       <form @submit.prevent="signup">
+        <p v-if="error" :style="{ color: 'red' }">
+          {{ error }}
+        </p>
         <div>
           <label>prop1</label>
           <input
@@ -34,10 +37,24 @@ import { ref } from "vue";

 const signupDone = ref(false);
 const user = ref({});
+const error = ref(null);
+const signup = async () => {
+  // Dummy request (success/fail after 1-second delay)
+  const shouldSuccess = true;
+  const request = new Promise((resolve, reject) =>
+    setTimeout(
+      () => (shouldSuccess ? resolve() : reject(Error("login failure"))),
+      1000
+    )
+  );

-const signup = () => {
-  console.log(JSON.stringify(user.value, null, "\t"));
-  signupDone.value = true;
+  try {
+    await request;
+    signupDone.value = true;
+  } catch (e) {
+    console.error(e);
+    error.value = "An error has occurred.";
+  }
 };
 </script>

 <style scoped>
 form > div {
     margin: 8px;
     display: flex;
     flex-direction: row;
 }
 form > div > * {
     display: flex;
     flex-direction: row;
     flex-basis: 100px;
 }
 form > div > *:nth-child(1) {
     flex: 0 0 100px;
     padding-right: 8px;
 }
 form > div > *:nth-child(2) {
     min-width: 0;
     flex: 1 100 auto;
 }
 </style>
After you sign up in the dummy form with your browser, you will see the message "New member registration is complete." after a 1-second delay.
3. Implement the error handling process
Next, verify what happens when registrations fail. In pages/login/signup/index.vue, change shouldSuccess = true to shouldSuccess = false.
diff --git pages/login/signup/index.vue pages/login/signup/index.vue
- const shouldSuccess = true;
+ const shouldSuccess = false;
Now you will see the message "An error has occurred." in red when you try to sign up on your browser.
 After you have verified the error message, change the text back to
 shouldSuccess = true.
Creating and verifying new member registration endpoints
4. Create an endpoint
On the Kuroco endpoint list management screen, click [Configure Endpoint].
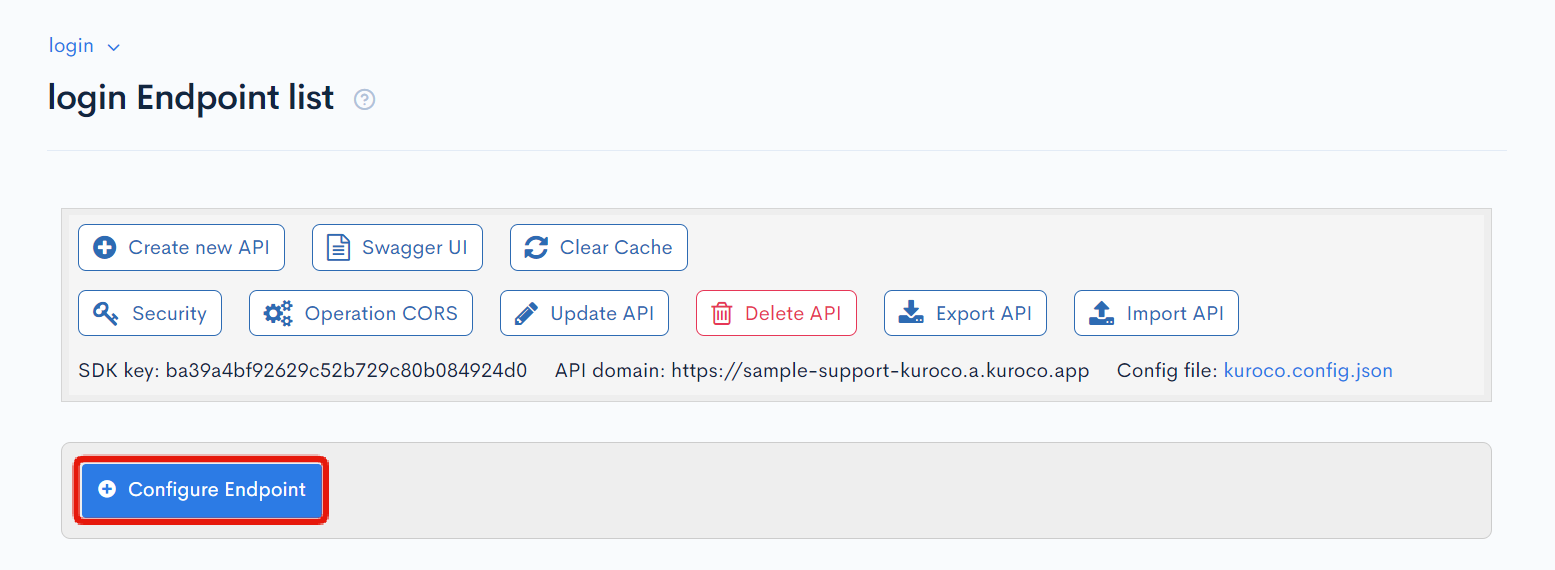 Set up the endpoint as follows and click [Add] to save it.

| Item | Setting | |
|---|---|---|
| Path | /rcms-api/(topic ID)/ | member/regist |
| Enabled/Disabled | Enabled | |
| Model | Category | Member |
| Model | Member: v1 | |
| Operation | insert | |
| Authorization | None | |
| Parameters | default_group_id | Enter the ID of the user group that new members will belong to. (See: User guide - Group for more information on user group IDs.) |
| login_ok_flg | 1 |
5. Verify the schema of the endpoint
On the endpoint list screen, click [Swagger UI].
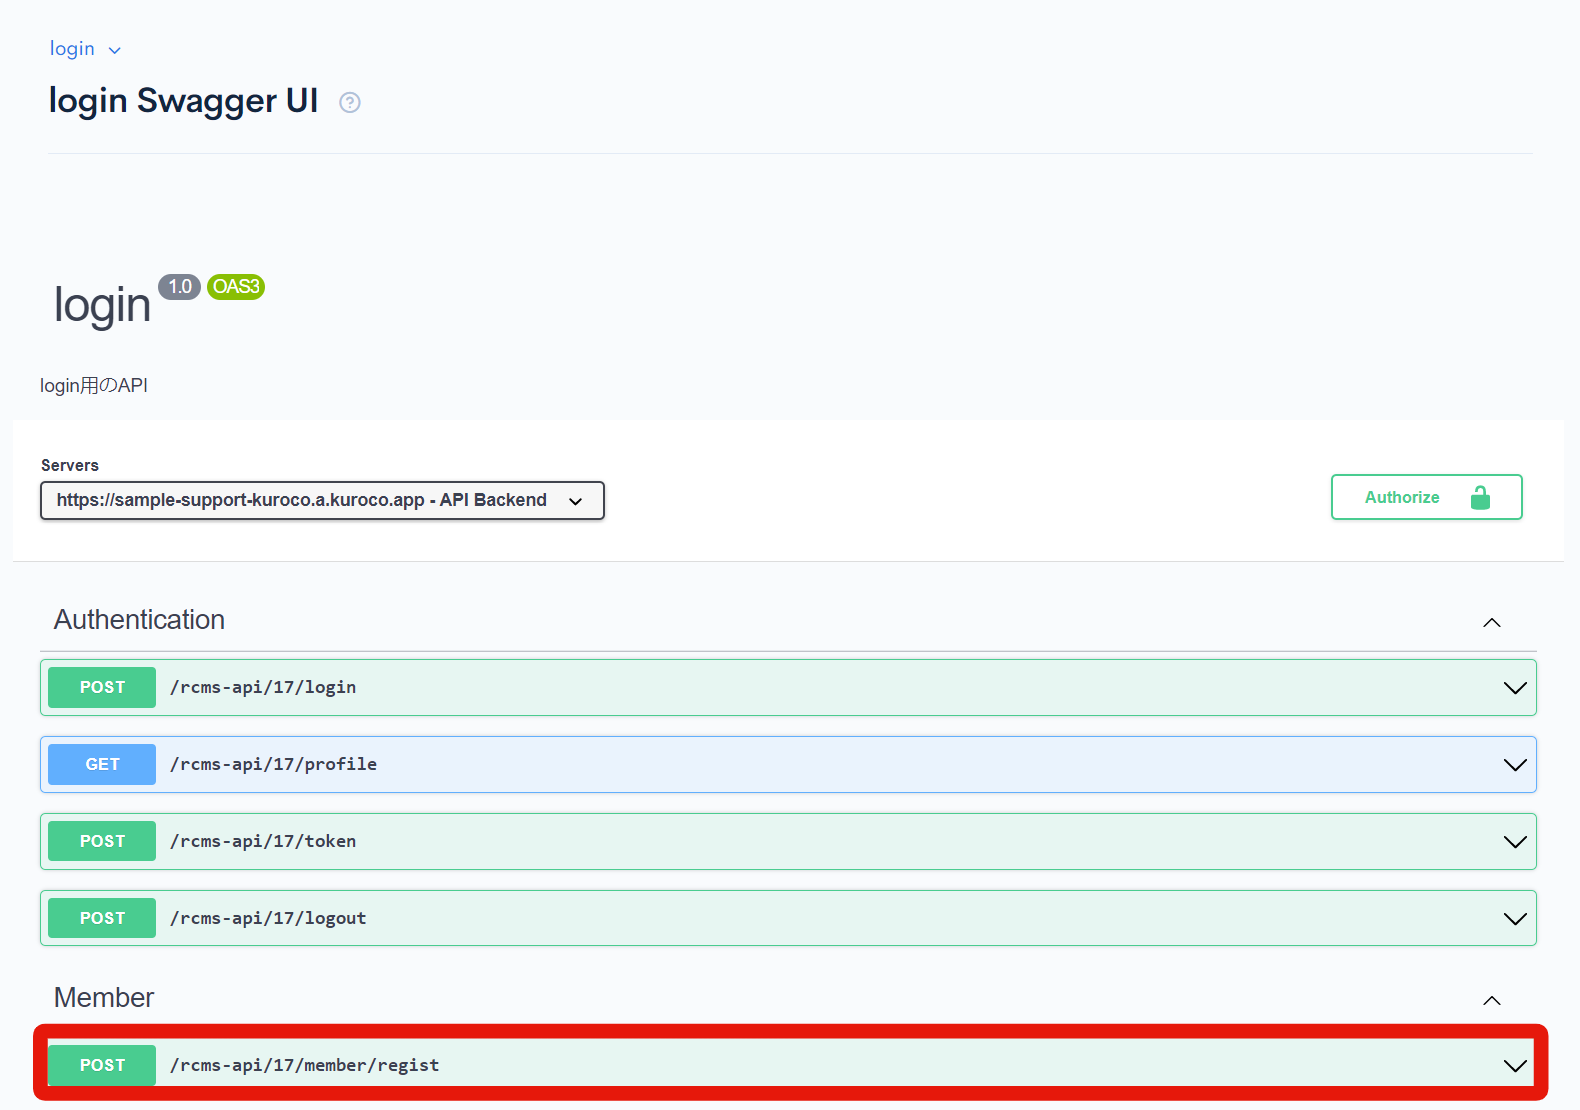
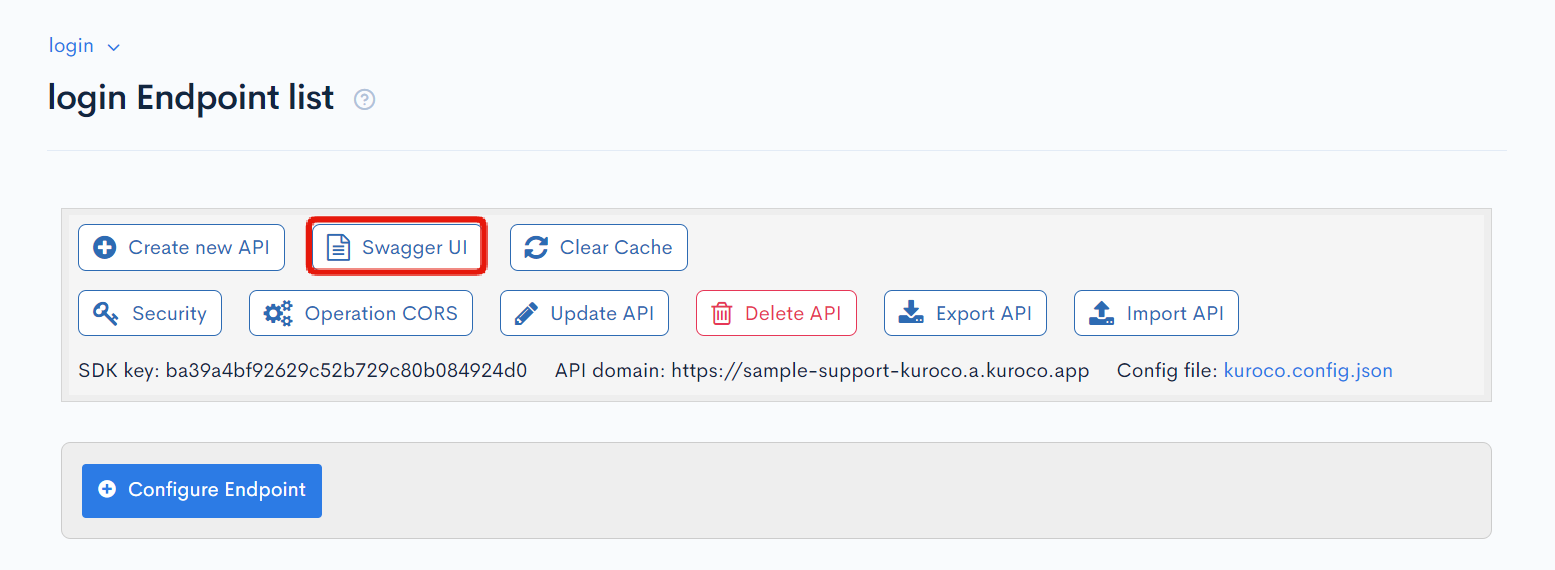 On the Swagger UI screen, click the endpoint you just created.
 Under "Request body", select [Schema] to display the schema of the data that can be passed to this endpoint.
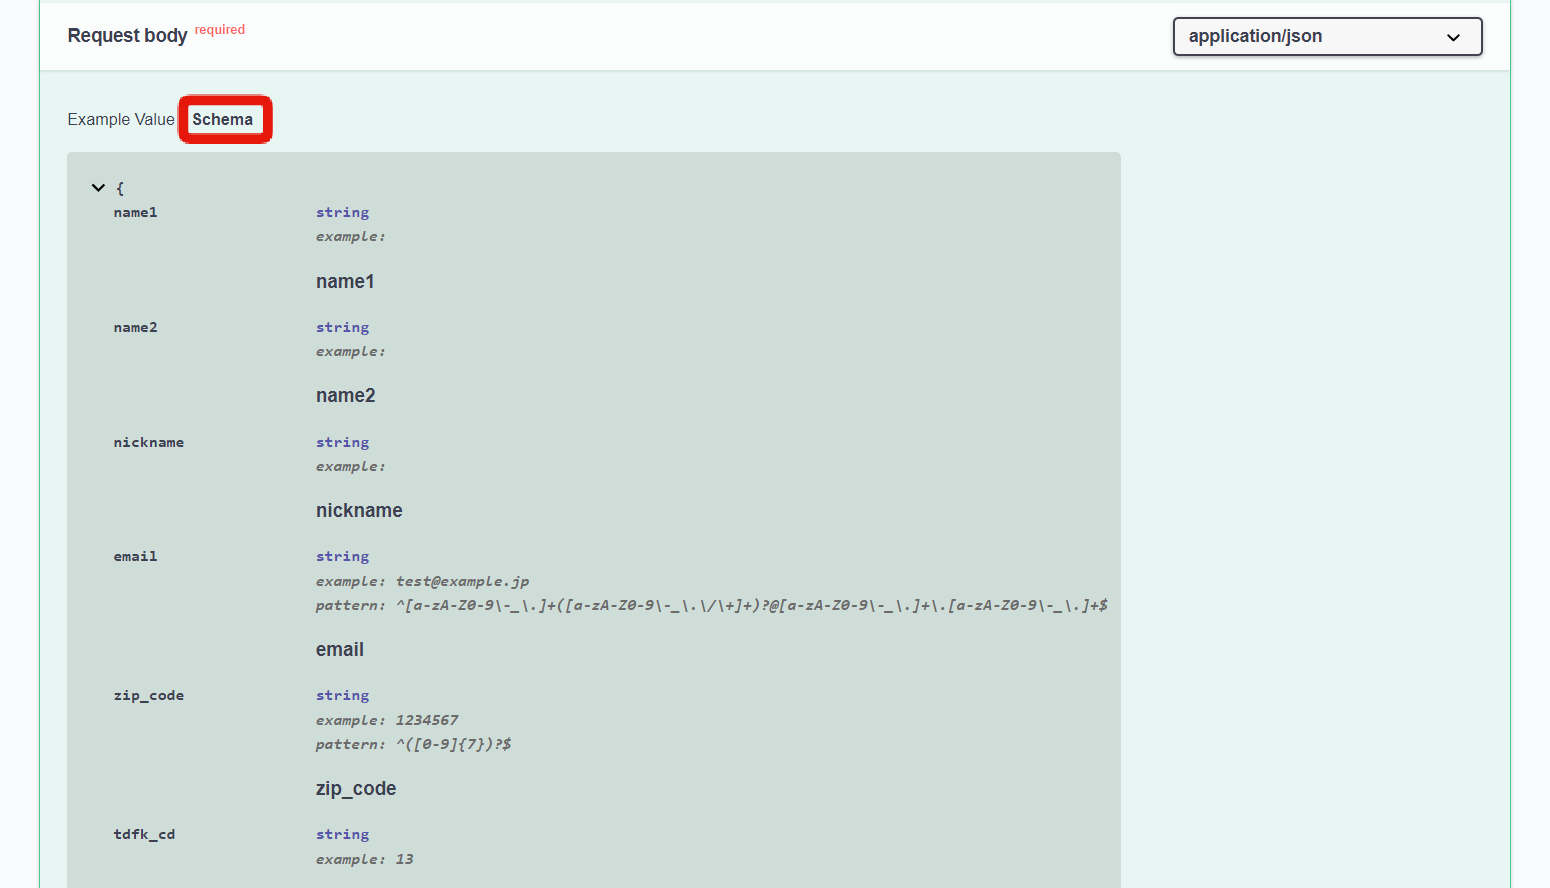 When making a POST request for new member registration data from the front-end, apply the items to be configured to the request body according to the above schema.
Implementing the new member registration form
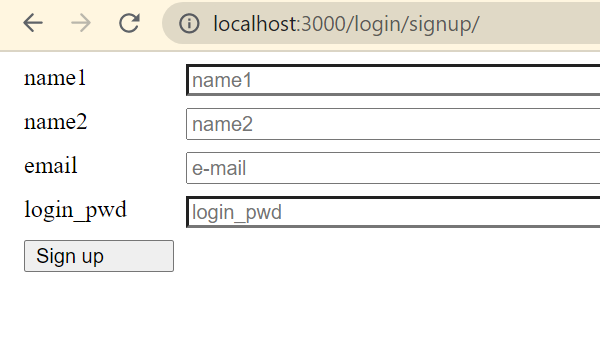
Now, you are ready to make the actual signup form. For this tutorial, use the following example items as the target data:
- Family name:
name1 - Given name:
name2 - E-mail address:
e-mail - Login password:
login_pwd
6. Modify pages/login/signup/index.vue
Once again, modify pages/login/signup/index.vue as follows:
diff --git a/pages/login/signup/index.vue b/pages/login/signup/index.vue
index c9aca24..f2bee20 100644
--- a/pages/login/signup/index.vue
+++ b/pages/login/signup/index.vue
@@ -7,12 +7,20 @@
           {{ error }}
                 </p>
                 </p>

         </p>

         <div>
-          <label>prop1</label>
+          <label>name1</label>
           <input
-            v-model="user.prop1"
-            name="prop1"
+            v-model="user.name1"
+            name="name1"
             type="text"
-            placeholder="prop1"
+            placeholder="name1"
           />
         </div>
         <div>
-          <label>prop2</label>
+          <label>name2</label>
           <input
-            v-model="user.prop2"
-            name="prop2"
+            v-model="user.name2"
+            name="name2"
             type="text"
-            placeholder="prop2"
+            placeholder="name2"
+          />
+        </div>
+        <div>
+          <label>email</label>
+          <input
+            v-model="user.email"
+            name="email"
+            type="email"
+            placeholder="email"
+          />
+        </div>
+        <div>
+          <label>login_pwd</label>
+          <input
+            v-model="user.login_pwd"
+            name="login_pwd"
+            type="password"
+            placeholder="login_pwd"
           />
         </div>
         <div>
Similarly, verify the webpage display.
7. Implement the API request/handling
From here on, the content to be handled will differ depending on the API security settings. Verify which of the following settings you are using and proceed accordingly:
A. Cookies
If you are using cookies, modify the new member registration form as shown below:
diff --git a/pages/login/signup/index.vue b/pages/login/signup/index.vue
index f2bee20..da12179 100644
--- a/pages/login/signup/index.vue
+++ b/pages/login/signup/index.vue
@@ -57,17 +57,24 @@ const signupDone = ref(false);
 const user = ref({});
 const error = ref(null);
 const signup = async () => {
-  // Dummy request (success/fail after 1-second delay)
-  const shouldSuccess = false;
-  const request = new Promise((resolve, reject) =>
-    setTimeout(
-      () => (shouldSuccess ? resolve() : reject(Error("login failure"))),
-      1000
-    )
-  );
-
   try {
-    await request;
+    const config = useRuntimeConfig();
+
+    // New member registration request using useFetch
+    const response = await fetch(
+      `${config.public.apiBase}/rcms-api/17/member/regist`,
+      {
+        method: "POST",
+        headers: {
+          "Content-Type": "application/json",
+        },
+        body: JSON.stringify(user.value), // Use the form content as the request body
+      }
+    );
+
+    if (!response.ok) {
+      throw new Error("Failed to register");
+    }
     signupDone.value = true;
   } catch (e) {
     console.error(e);
Replace the 17 in '/rcms-api/17/member/regist' with your own API ID, which can be found on the endpoint list screen.
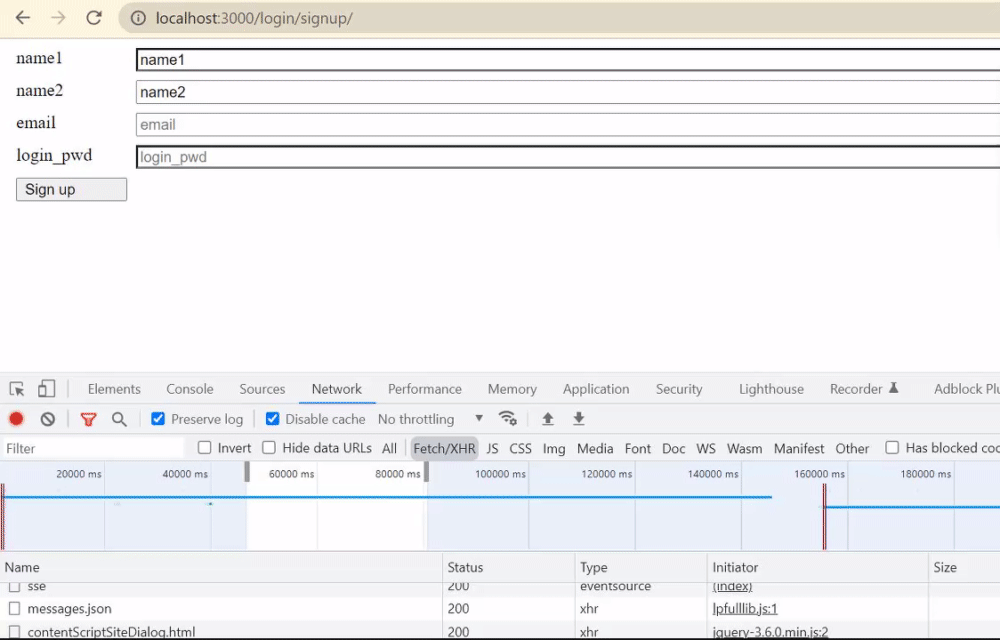
 Fill in the registration form and click [Sign up].
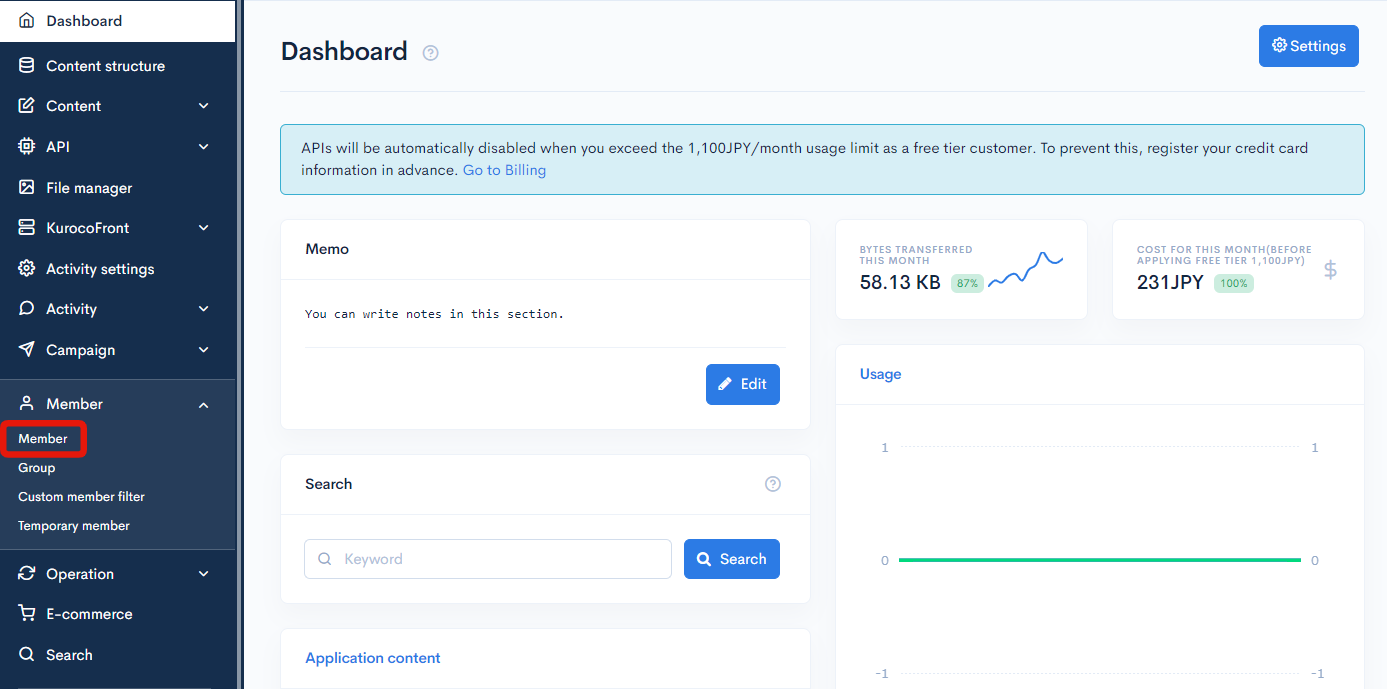
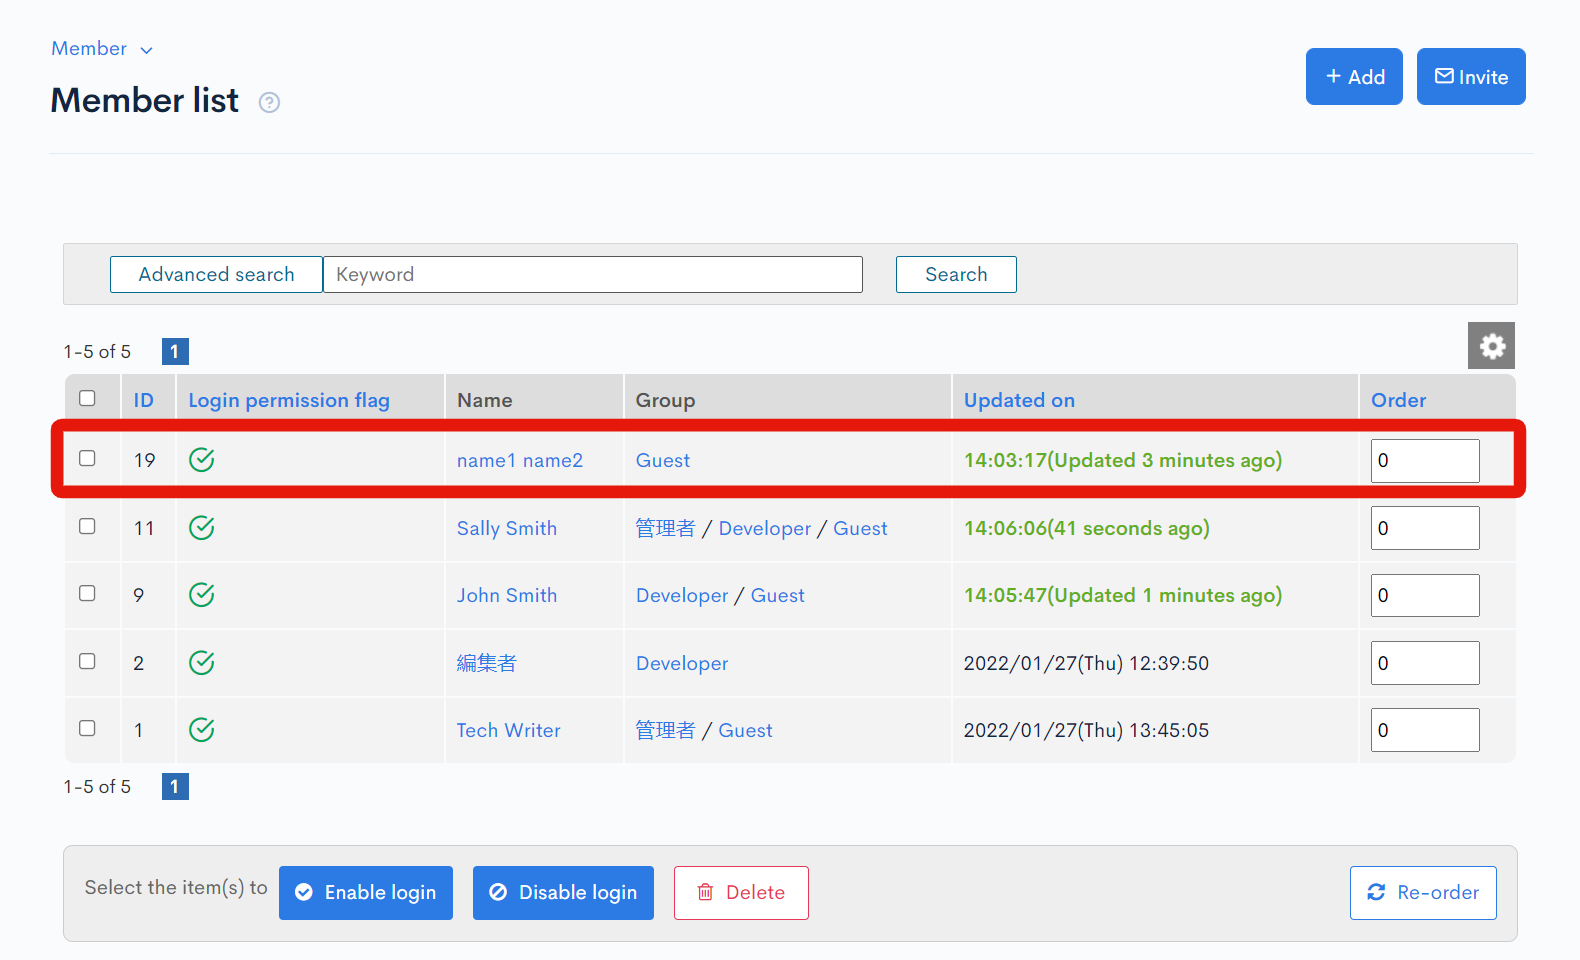
 Then, verify the registration. In the Kuroco administration screen sidebar menu, click [Member] -> [Member].
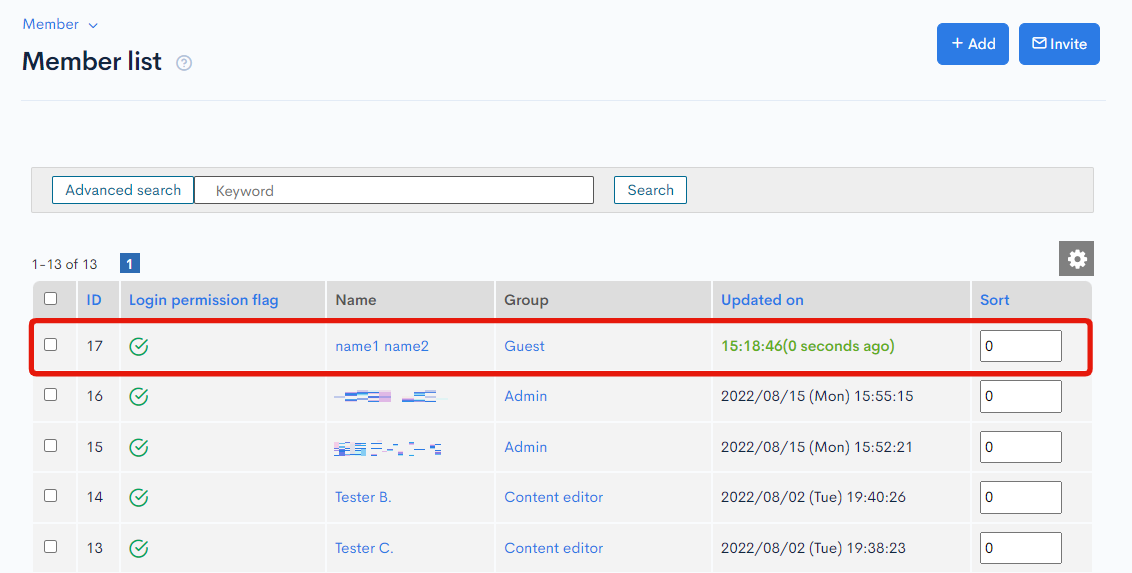
On the member list screen, verify the new member account.
B. Dynamic access token
To access secure endpoints with a dynamic access token, the token value must be sent in the request header. This is also true in this case (request sent by AnonymousUser). Therefore, in the endpoint requests for new member registrations, the previously obtained AnonymousToken must be included in the custom header.
In order to do so, modify the registration form as follows:
diff --git a/pages/login/signup/index.vue b/pages/login/signup/index.vue
index f2bee20..68670bc 100644
--- a/pages/login/signup/index.vue
+++ b/pages/login/signup/index.vue
@@ -52,22 +52,48 @@

 <script setup>
 import { ref } from "vue";
+import { useRuntimeConfig } from "#app";

 const signupDone = ref(false);
 const user = ref({});
 const error = ref(null);
 const signup = async () => {
-  // Dummy request (success/fail after 1-second delay)
-  const shouldSuccess = false;
-  const request = new Promise((resolve, reject) =>
-    setTimeout(
-      () => (shouldSuccess ? resolve() : reject(Error("login failure"))),
-      1000
-    )
-  );
-
   try {
-    await request;
+    const config = useRuntimeConfig();
+
+    // Get AnonymousToken
+    const tokenRes = await fetch(`${config.public.apiBase}/rcms-api/17/token`, {
+      method: "POST",
+      headers: {
+        "Content-Type": "application/json",
+      },
+      body: "{}", // Empty object for AnonymousUser token request
+    });
+    const tokenData = await tokenRes.json();
+    const anonymousToken = tokenData.access_token.value;
+
+    // Create a custom header containing AnonymousToken.
+    const customHeaderConfig = {
+      headers: {
+        "X-RCMS-API-ACCESS-TOKEN": anonymousToken,
+      },
+    };
+
+    // Send new member registration request
+    const response = await fetch(
+      `${config.public.apiBase}/rcms-api/17/member/regist`,
+      {
+        method: "POST",
+        body: JSON.stringify(user.value), // Use the form content as the request body
+        headers: {
+          "Content-Type": "application/json",
+          ...customHeaderConfig.headers,
+        },
+      }
+    );
+    if (!response.ok) {
+      throw new Error("Failed to register");
+    }
     signupDone.value = true;
   } catch (e) {
     console.error(e);
Replace the 17 in '/rcms-api/17/member/regist' with your own API ID, which can be found on the endpoint list screen.
Fill in the registration form and click [Sign up].
 Then, verify the registration. In the Kuroco administration screen sidebar menu, click [Member] -> [Member].
On the member list screen, verify the new member account.
 This concludes the tutorial on setting up a new member registration screen for your Nuxt.js project using Kuroco.
For clarity, we introduced the setup for a very simple sign-up form. In actual use, you may need to include more complex components such as form validation and e-mail authentication processes. Nevertheless, we hope the above tutorial can serve as an introduction to the basic user registration flow.
Related documents
Support
If you have any other questions, please contact us or check out Our Slack Community.