Setting up a web crawler
Overview
This tutorial explains how to use Kuroco's web crawler to crawl external web pages and import the collected content into Kuroco.
The web crawler is a feature where a bot (crawler) visits the web pages you specify, collects text, images, and files, and imports them into Kuroco content. You can convert the collected content into Kuroco RAG vector data to use in AI responses, or combine it with change detection to send update notifications.
Running the web crawler generates API requests to register crawl results and update the execution status, and API request charges apply.
The number of API requests varies depending on the settings and execution results. Check the actual number of requests in the API request log. For details on usage and pricing calculations, see Usage.
In this tutorial, you crawl the update section of the Kuroco documentation site (https://kuroco.app/docs/update/), excluding the release notes (release-note-*). With this configuration, only two pages are crawled: Kuroco release roadmap and About Kuroco version management.
What you will learn
After completing this tutorial, you will be able to:
- Create a web crawler that specifies the web pages to collect
- Create a content structure to store the crawl results and link it to the crawler
- Run a crawl manually and check the history and collected results
- Understand how to use crawl results in AI responses and update notifications
Prerequisites
- Kuroco account: You need a valid Kuroco account. If you do not have an account yet, please register from the free trial.
Configuring the crawler
First, create a web crawler that defines the web pages to collect.
1. Open the web spiders list
In the admin panel, click [Channels] -> [WEB] -> [Web Spiders].
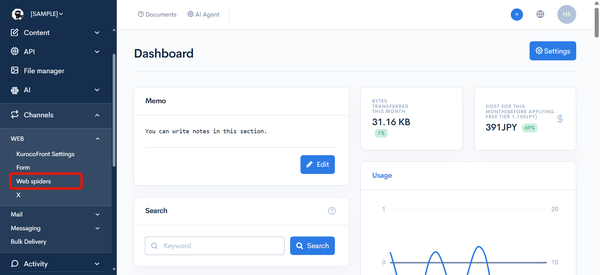
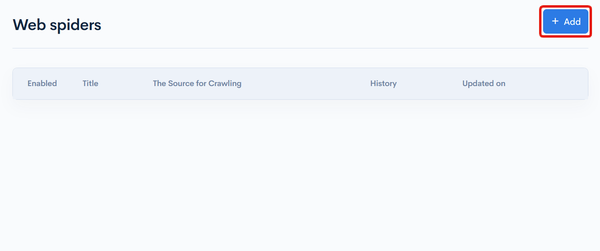
The web spiders list is displayed. Click [+ Add] in the top right to open the web spider editor.
2. Enter the basic settings
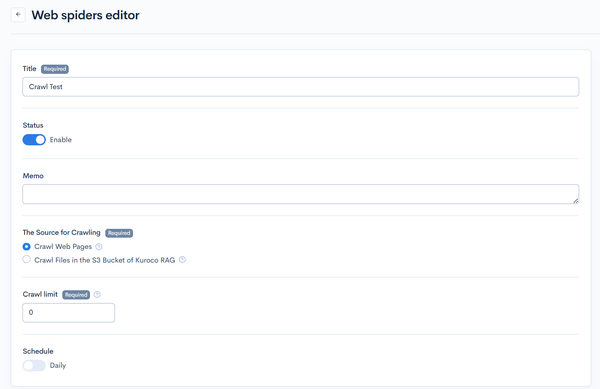
Set the following under [Basic Settings].
| Item | Value |
|---|---|
| Title | Crawl Test (any identifier) |
| Status | Turn on "Enable" |
| The Source for Crawling | Select "Crawl Web Pages" |
| Crawl Limit | Leave as 0 (unlimited) |
3. Enter the collection settings
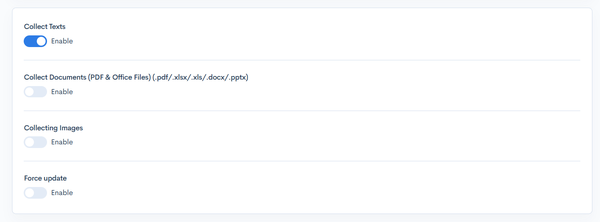
Since this example collects text, turn on [Collect Texts]. To collect files or images as well, also turn on [Collect Documents (PDF & Office Files)] or [Collecting Images].
4. Enter the website crawling settings
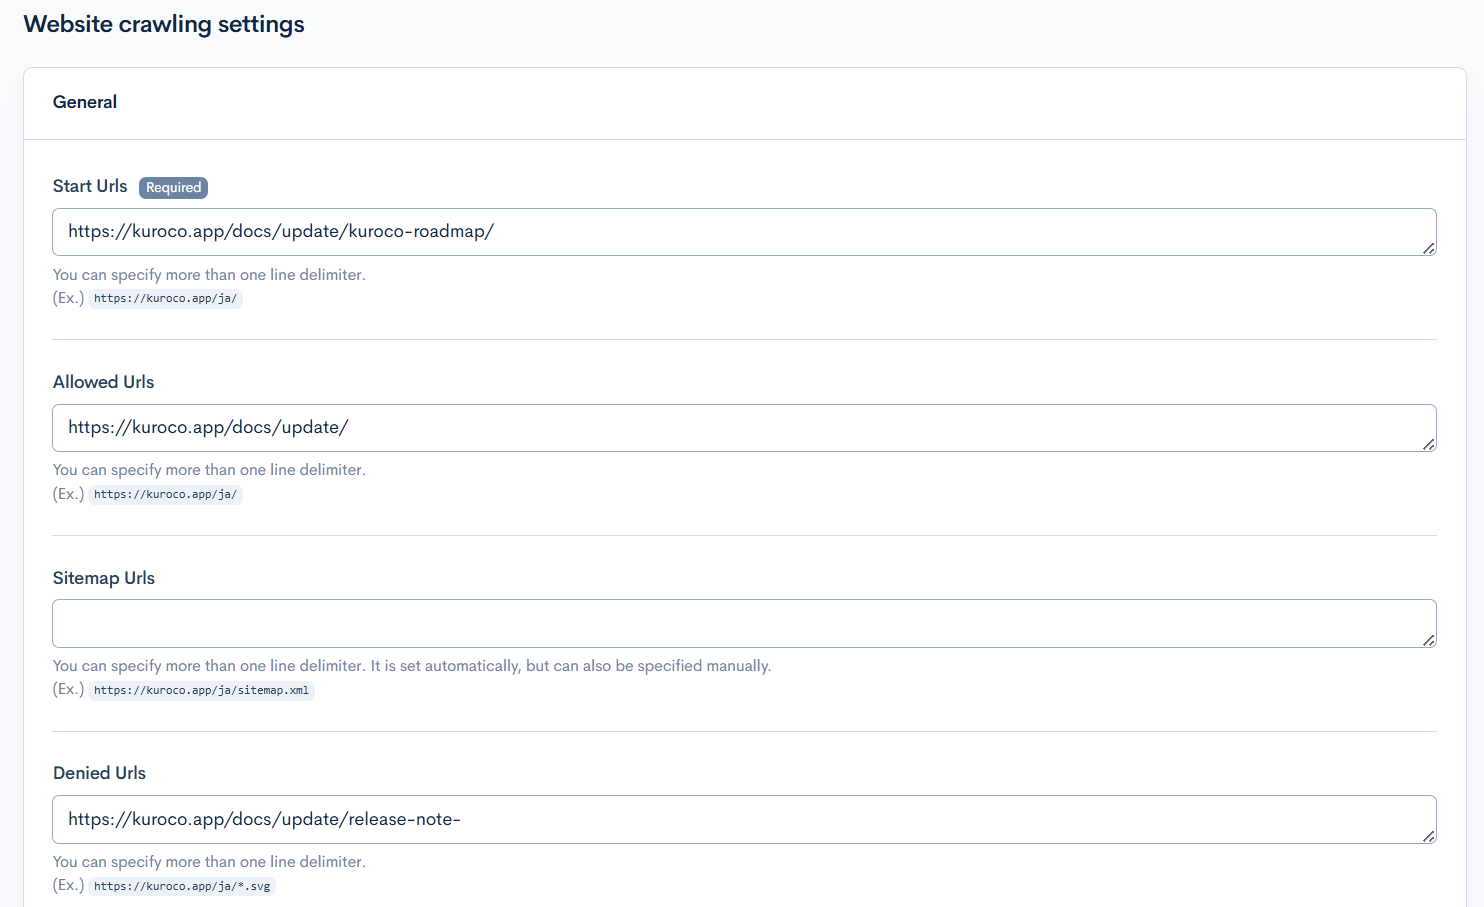
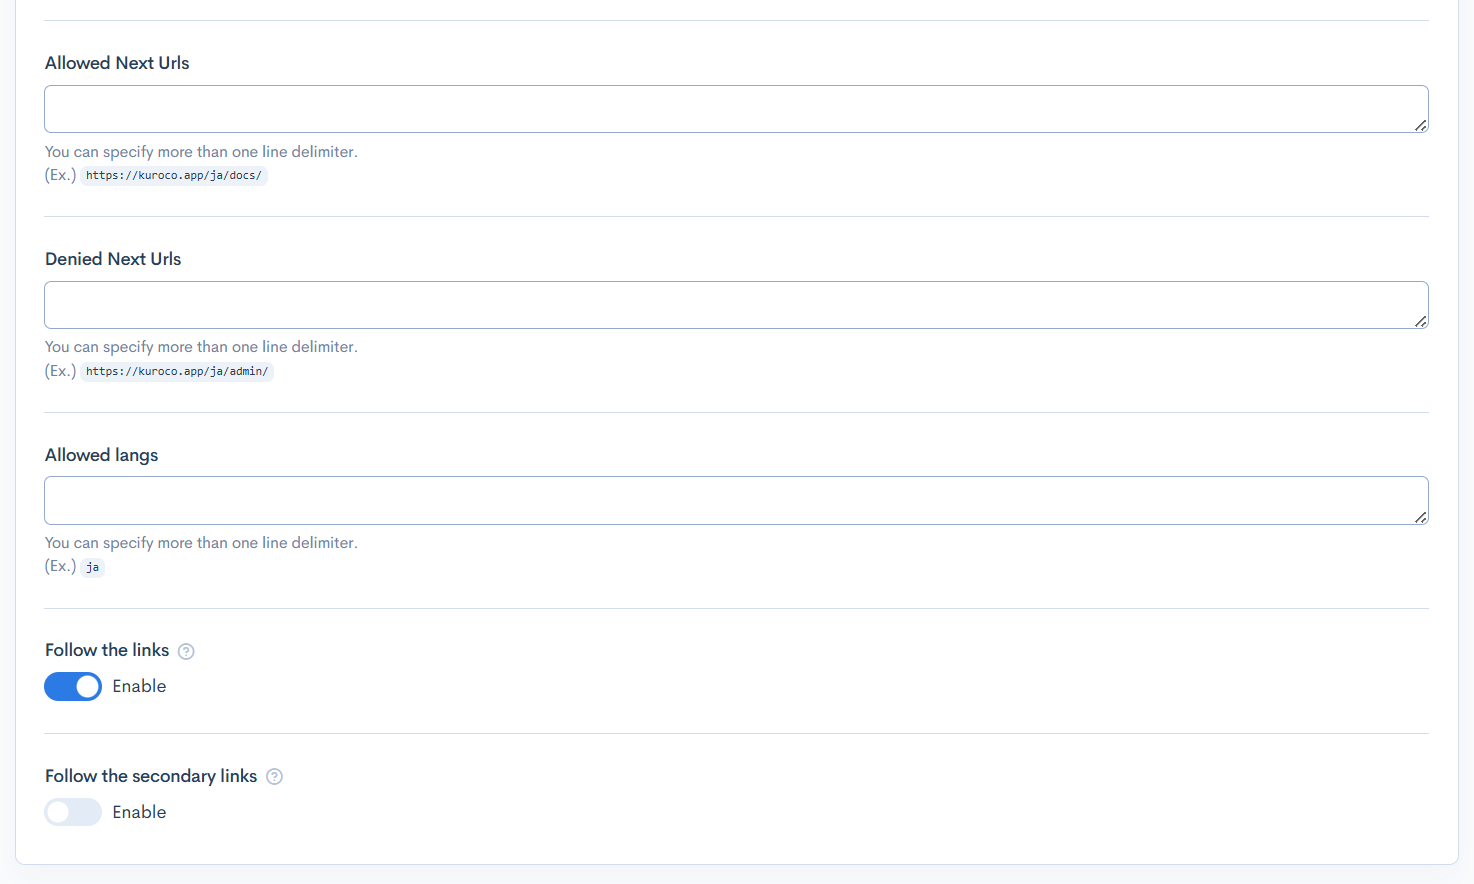
When you select "Crawl Web Pages" as the source, the [Website crawling settings] are displayed. In this example, set the following.
| Item | Value |
|---|---|
| Start Urls | https://kuroco.app/docs/update/kuroco-roadmap/ |
| Allowed Urls | https://kuroco.app/docs/update/ |
| Denied Urls | https://kuroco.app/docs/update/release-note- |
| Follow the links | Turn on |
The crawl starts from [Start Urls] and follows links in the page with [Follow the links]. [Allowed Urls] limits the target to pages under /docs/update/, and [Denied Urls] excludes the release notes (release-note-*).
5. Save
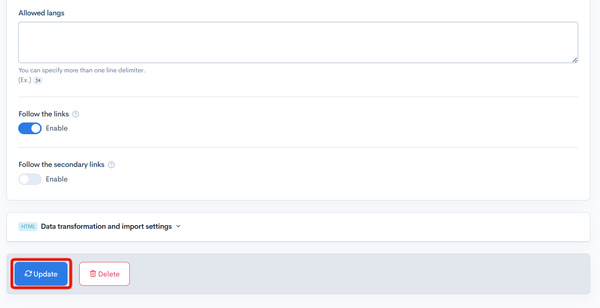
Scroll to the bottom of the page and click [Update] to save.
Configuring the content structure
Next, create a content structure to store the crawl results and link it to the crawler you created.
1. Add a content structure
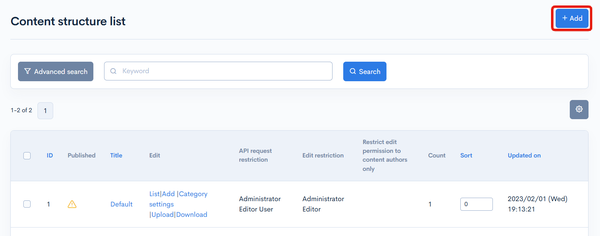
Open [Content structure] in the left sidebar and click [+ Add] in the top right.
2. Set the data type to "Crawling"
Enter a content structure name, and on the [General] tab, select "Crawling" for [Data type]. The items required to store crawl results are added automatically, so do not change the item settings.
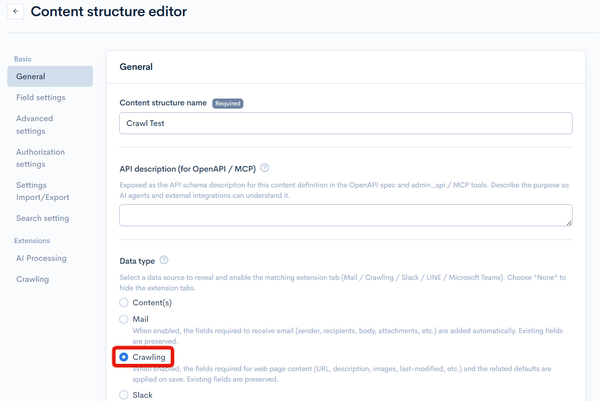
The [Crawling] tab is displayed in the left sidebar when you select "Crawling" for [Data type]. If it is not selected, the tab is not displayed.
3. Configure the linked crawler
Click [Crawling] in the left sidebar and set the following.
| Item | Value |
|---|---|
| Enable web page | Turn on |
| Crawler settings | Select the crawler created in "Configuring the crawler" |
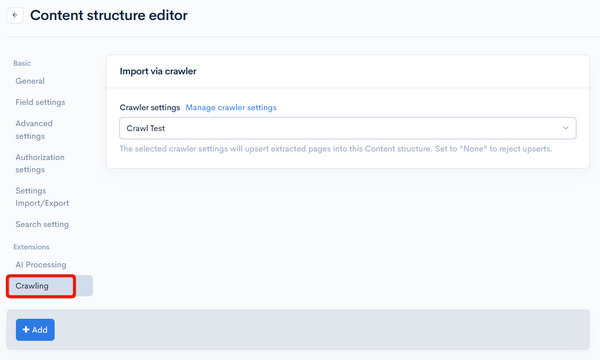
Click [+ Add] to save. After saving, items such as Contents, URL, Hash Value, Language, Images, and last-modified are added automatically.
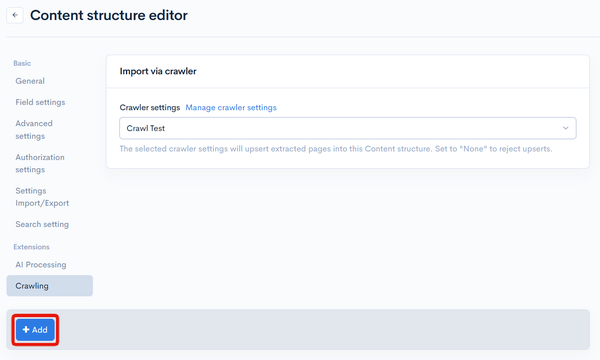
Only crawlers that have already been created are shown under [Crawler settings].
Verifying the crawl
Running the crawl
Once the linkage with the content structure is complete, run a crawl manually to check the results.
In the left sidebar, click [Channels] -> [WEB] -> [Web Spiders], then click the title of the crawler you created to open the editor.
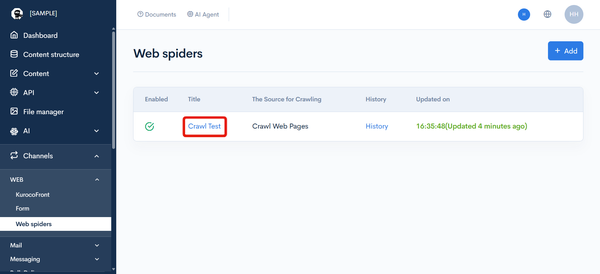
Click [Run the crawler] in the top right.
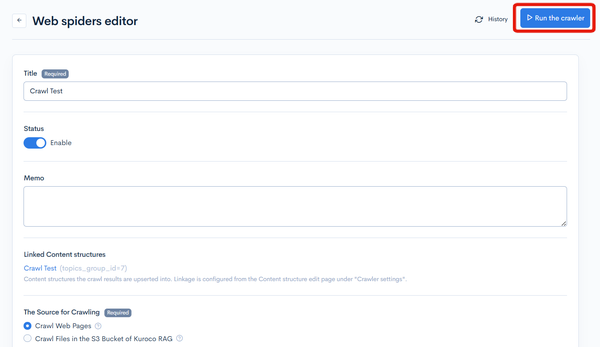
Enabling the status does not trigger an immediate run. For the first verification, use the [Run the crawler] button to run it manually.
Checking the history
Click [History] in the top right of the web spider editor to view the execution history.
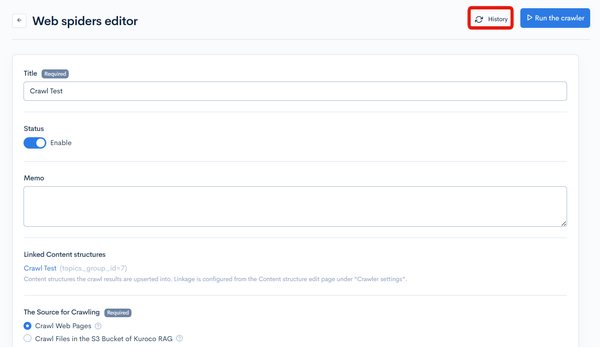
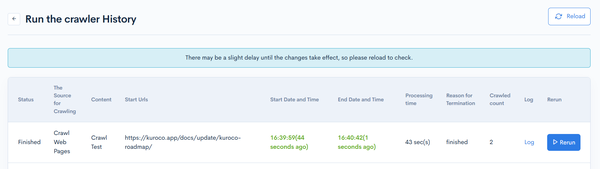
There may be a delay before results appear, so click [Reload] to check the latest status. The run is successful when the status changes to complete and the crawl count is displayed. With this configuration, two pages are crawled: [Kuroco release roadmap] and [About Kuroco version management].
Checking the content
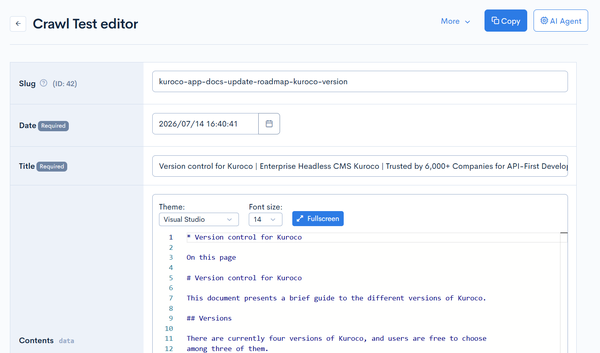
In the left sidebar, click the linked content. You can confirm that the crawled pages have been registered as content.
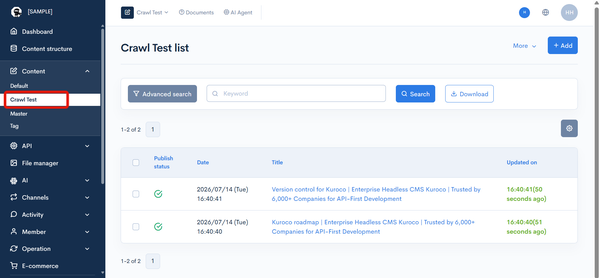
Open each content item to confirm that the body converted to Markdown format, the URL, and other fields are stored.
The web crawler includes a change detection mechanism, so pages whose content has not changed since the previous crawl are not updated on re-crawl. To forcibly update all pages, turn on [Force Update] under the crawler's [Basic Settings].
Use cases for crawl results
Using them in AI responses
Crawled content can be converted into Kuroco RAG vector data, so you can use it with the AI/RAG features. For example, based on content crawled from a product documentation site, AI can answer user questions.
- Confirm that vector data has been generated under [AI] -> [Vector Data].
- Configure the chatbot API and specify the crawled content structure as the data source.
For how to configure the chatbot, see the following documents:
Using them for update notifications
By combining the change detection mechanism with custom functions, you can build an update notification mechanism. For example, if you set {sendmail} or {slack_post_message} in a content structure's custom function trigger, you can send a notification when a crawled page changes.
If you want to run crawls automatically at a finer frequency, you can combine the Smarty plugin {kick_spider} with a batch process. For details, see kick_spider.
Related documents
Support
If you have any other questions, please contact us or check out Our Slack Community.