Using reCAPTCHA for password reminders
Overview
reCAPTCHA is a feature provided by Google free of charge. It can protect websites from malicious spam posts when registering information on contact forms and other web pages.
This tutorial explains how to integrate reCAPTCHA v2 into a password reminder.
Prerequisites
- It is assumed that you have completed the tutorial on How to Use a Password Reminder/Reset and have a basic understanding of the password reminder process.
- reCAPTCHA v2 will be used.
Obtaining an API Key
To use reCAPTCHA with Kuroco, you need to first obtain an API key from Google reCAPTCHA.
※ Please note that you need a Google account to use reCAPTCHA. If you do not have an account, please create one on the Google Account Creation Page.
First, access Google reCAPTCHA and click [Get Started].
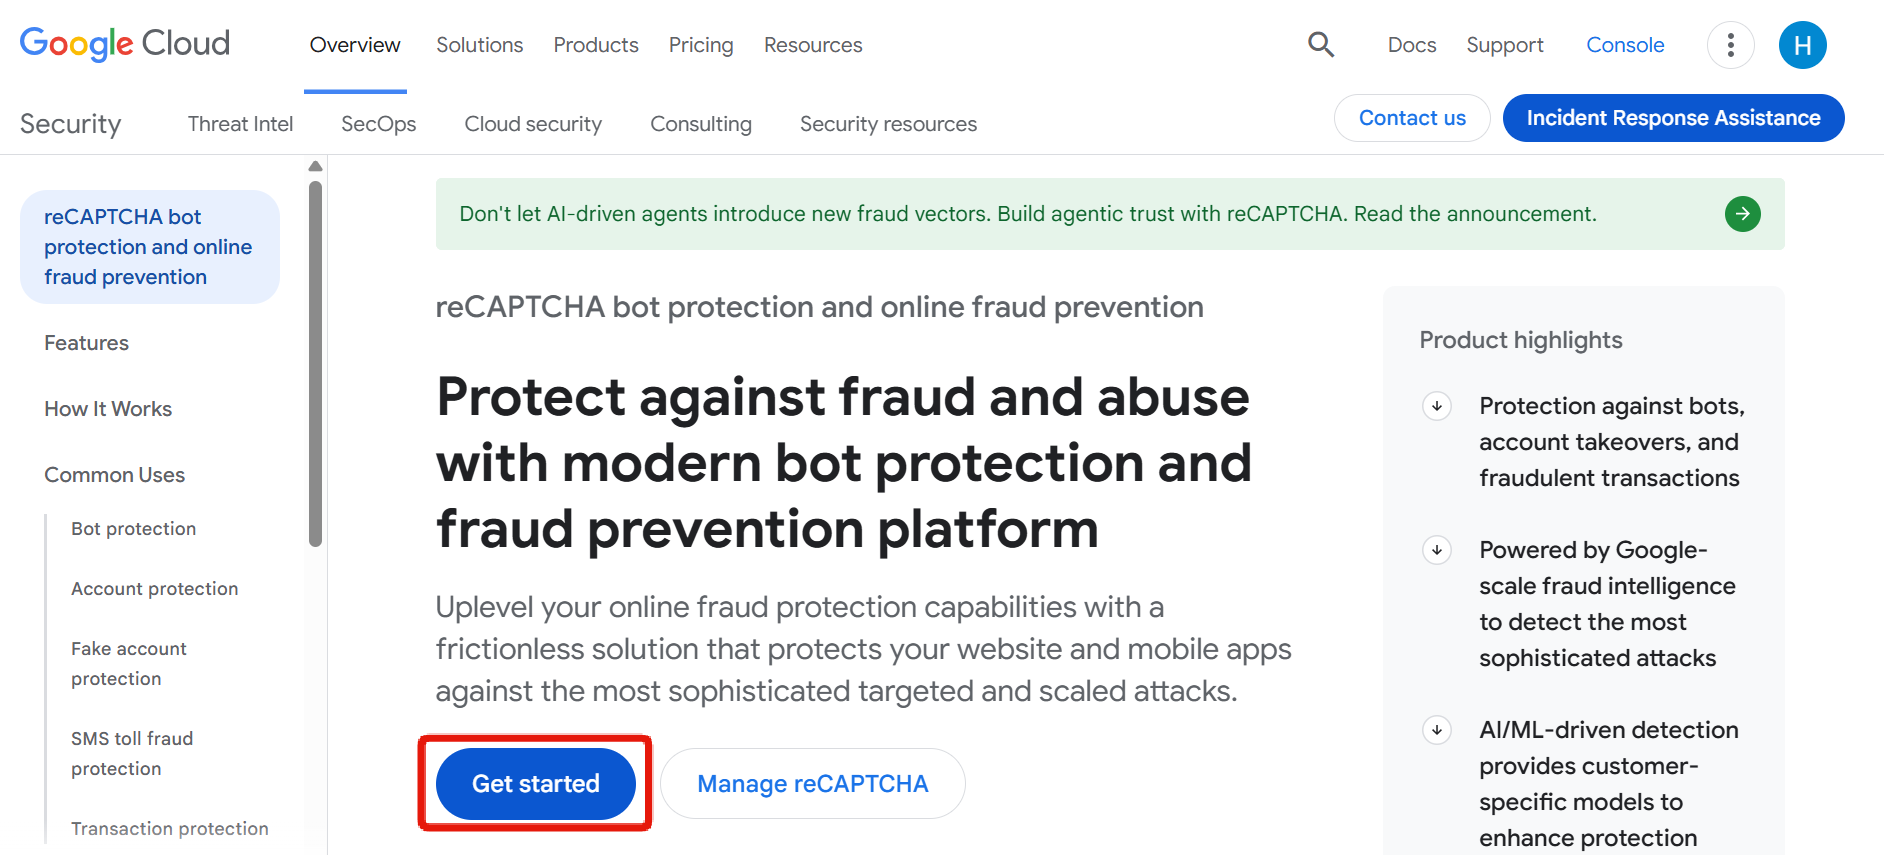
The site registration screen will appear. Fill in the required information.
| Field | Description |
|---|---|
| Label | Enter a clear name for your site. |
| reCAPTCHA Type | Select reCAPTCHA v2. Also, select the "I'm not a robot" checkbox. |
| Domains | Enter the frontend domain without the "https://" prefix. Example: sitekey.g.kuroco-front.app |
If you want to test in a local environment, add localhost to the domain.
Read the terms of service and if there are no issues, check "I agree to the reCAPTCHA Terms of Service" and click [Submit].
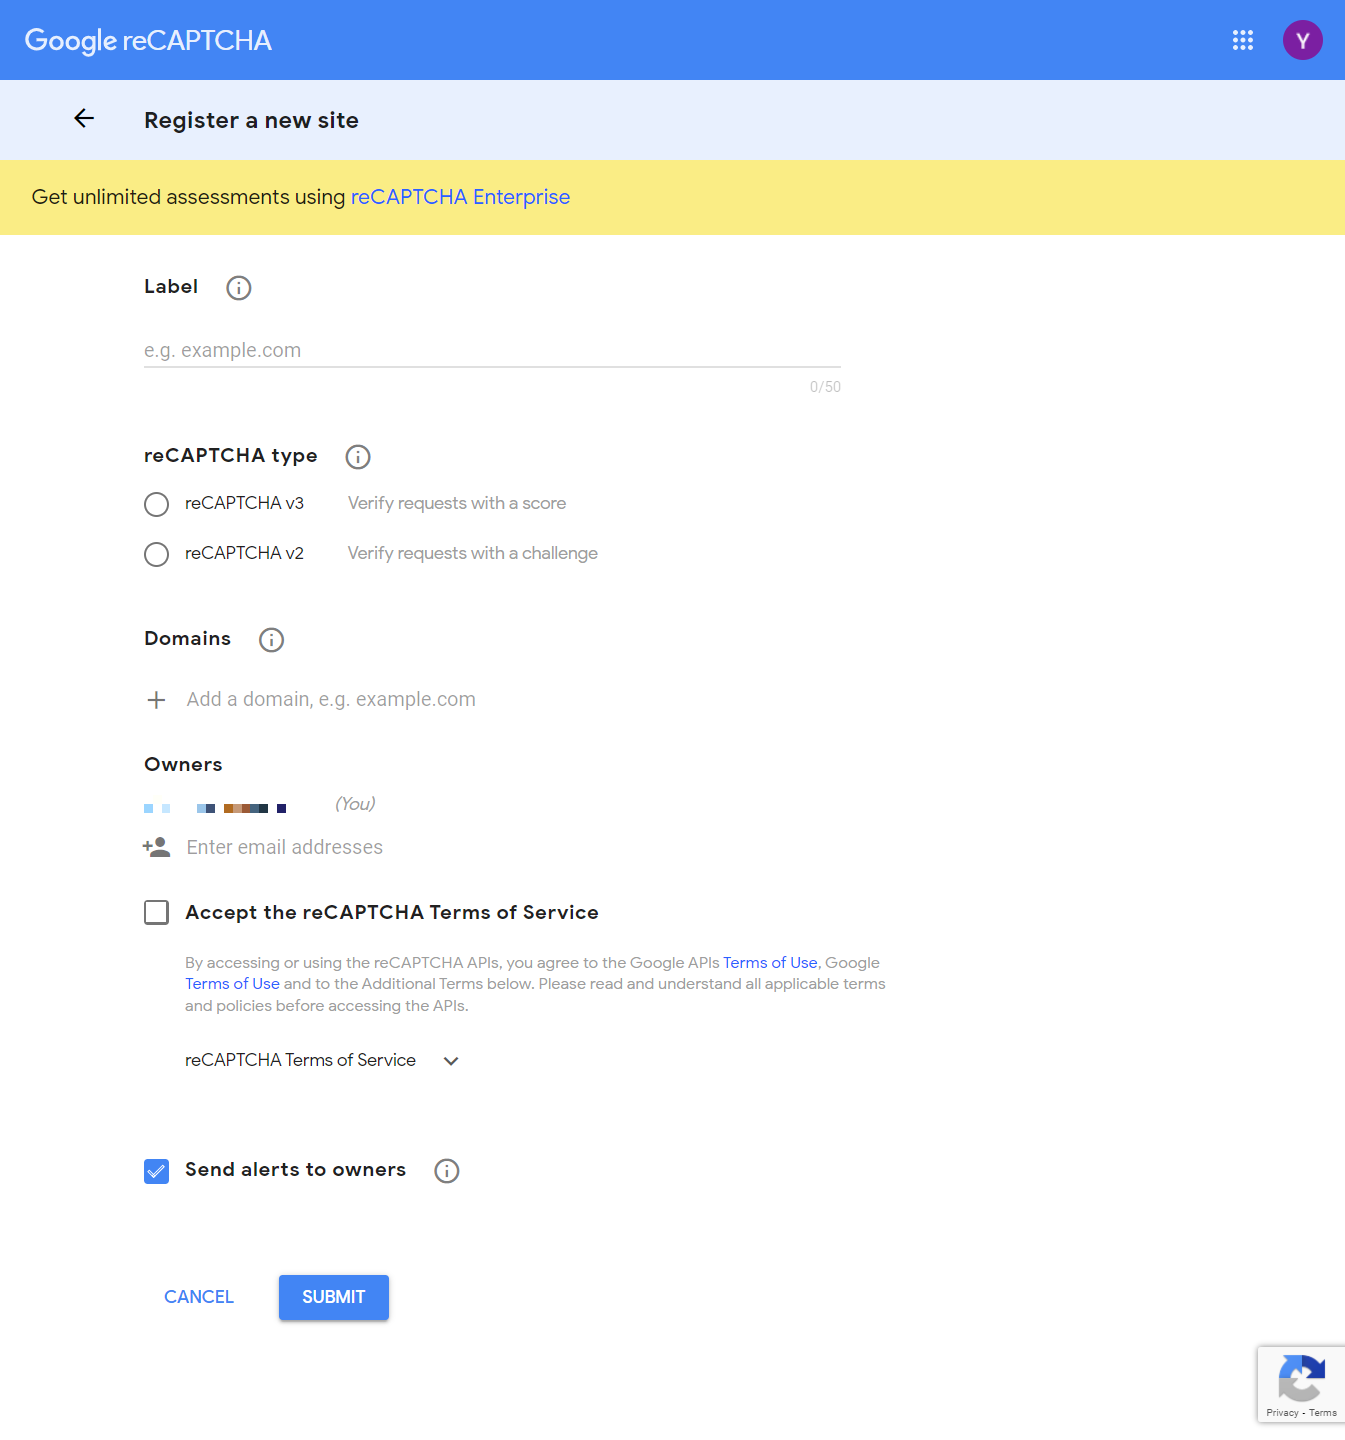
Once submitted, the "Site Key" and "Secret Key" will be displayed.
Copy these keys as they will be used in the Kuroco settings.
This completes the configuration on the Google reCAPTCHA page.
Kuroco Configuration
Next, we will configure Kuroco on the Kuroco management screen. Please log in to your Kuroco management screen.
Integrating with reCAPTCHA
Click on [External System Integration] -> [reCAPTCHA].
In the site management screen, enter the site key and secret key.
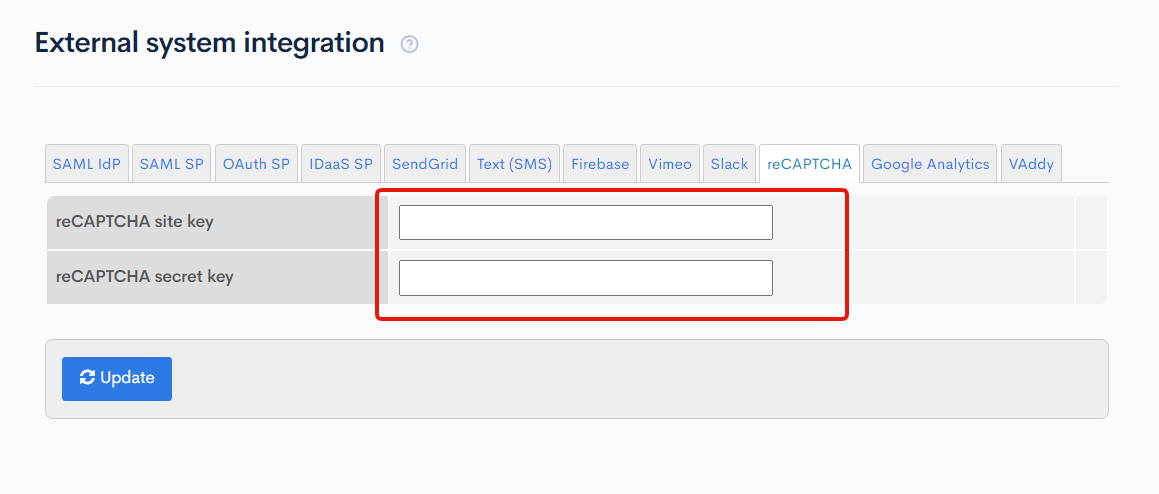
| Field | Description |
|---|---|
| reCaptcha Site Key | Enter the value of the obtained site key. |
| reCaptcha Secret Key | Enter the value of the obtained secret key. |
After completing the settings, click [Update] at the bottom of the screen.

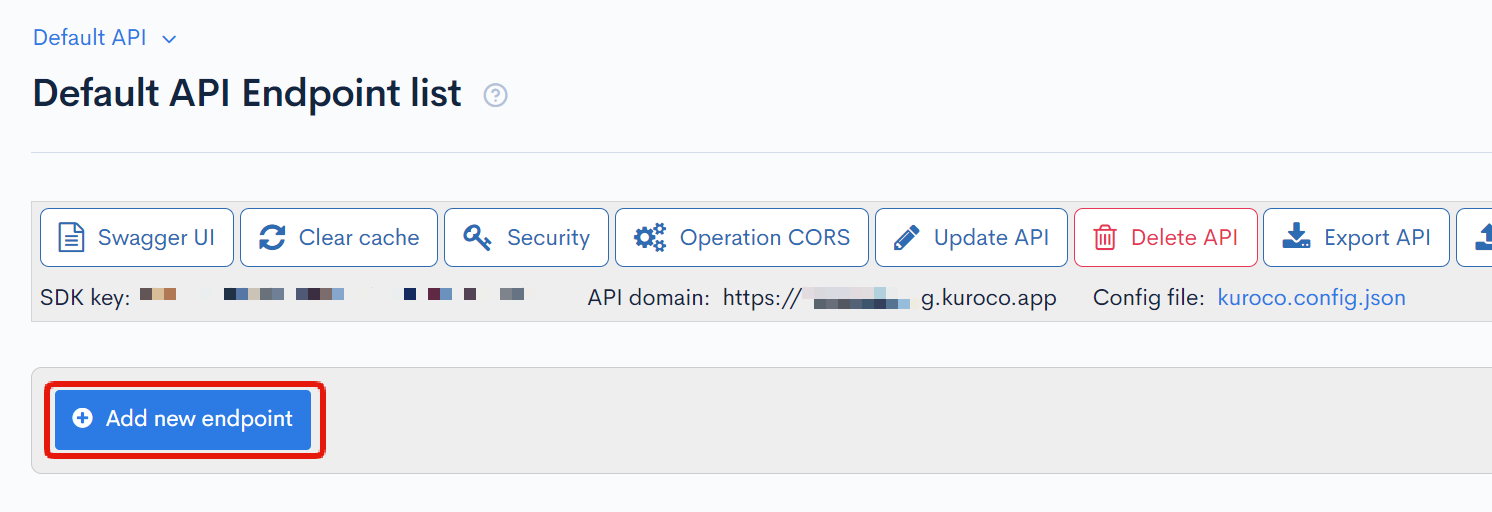
Adding an Endpoint
Next, create an endpoint. Go to the endpoint list screen and create an endpoint for the password reminder that uses reCAPTCHA.
Click [Add New Endpoint].
Configure it as follows:
| Item | Value |
|---|---|
| Path | reminder_with_recaptcha |
| Category | Authentication |
| Model | Login |
| Operation | reminder |
| use_recaptcha | Check |
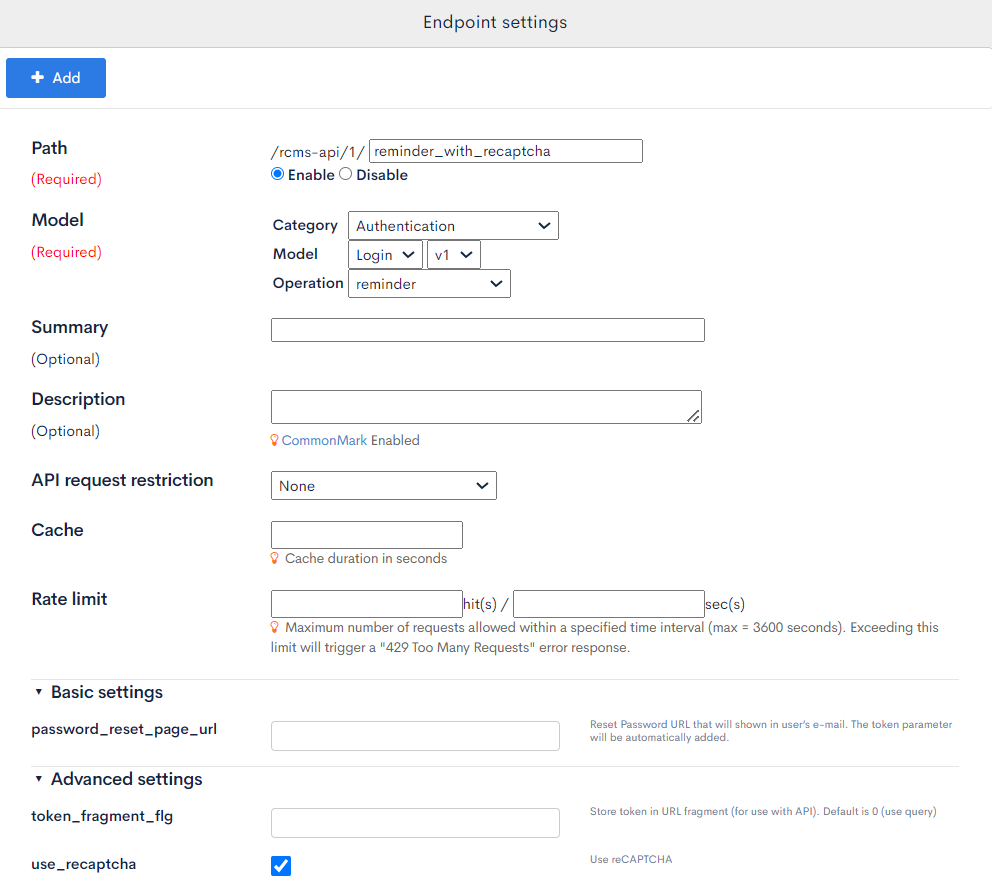
Once the settings are done, click on [Add] to add the endpoint.
Checking with Swagger
Next, check if the endpoint has been set up correctly using Swagger UI.
From the endpoint list screen, click on "Swagger UI".
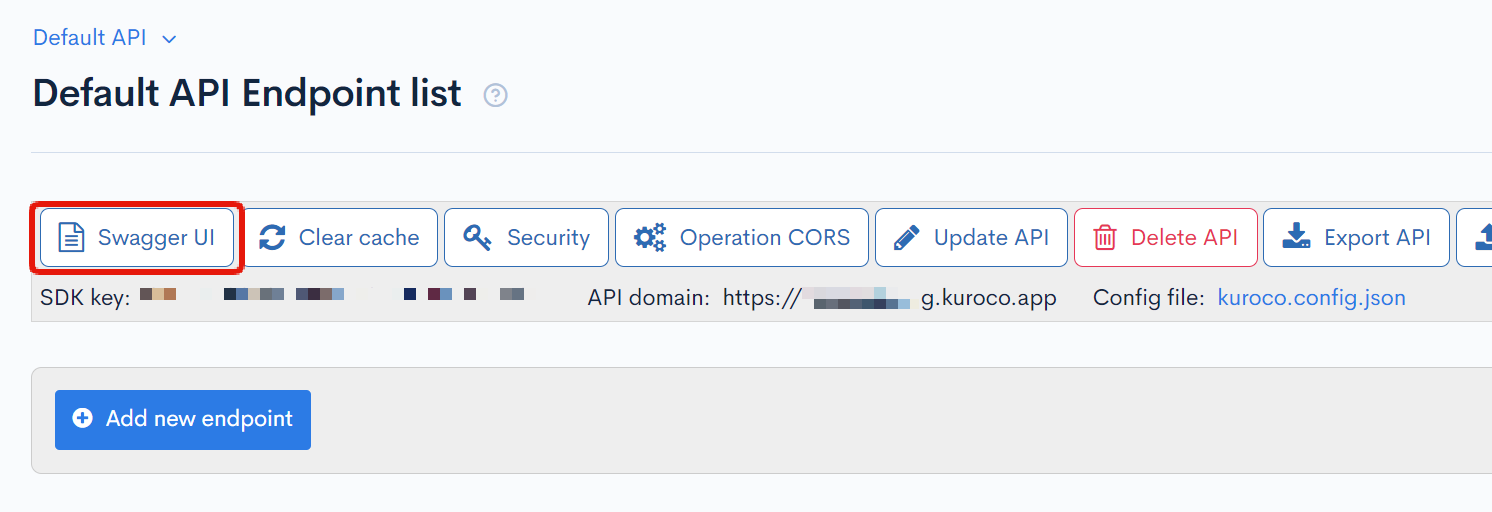
Click on the endpoint that was set up earlier.

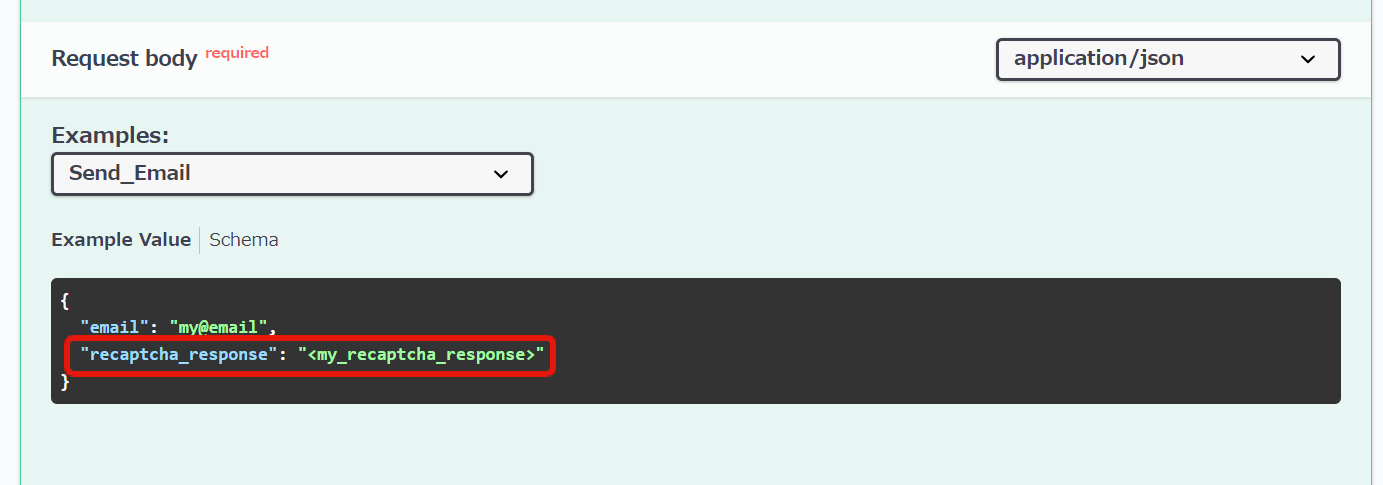
Make sure that the Request body's Example Value includes the field "recaptcha_response".
The configuration in the Kuroco management screen is now complete.
Front-end Implementation
Here is an example of how to implement reCAPTCHA authentication.
Installing the reCAPTCHA module
First, install the reCAPTCHA module for Nuxt.
Run the following command in the terminal:
npm i @nuxtjs/recaptcha
Modifying nuxt.config.js
Next, add reCAPTCHA to nuxt.config.js. Add the following to the modules: section of nuxt.config.js:
  modules: [
    '@nuxtjs/recaptcha',
  ],
Also, add the following to the modules:
 recaptcha: {
    hideBadge: true,
    language: 'ja',
    siteKey: 'reCAPTCHA_SITE_KEY',
    version: 2,
    size: 'normal'
  },
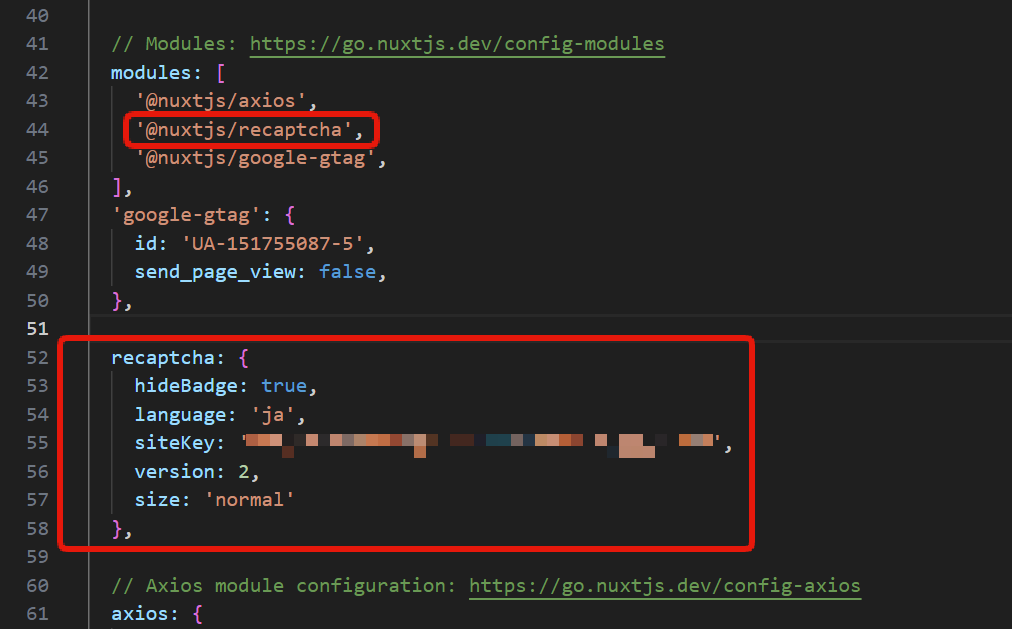
Replace reCAPTCHA_SITE_KEY with the site key you obtained earlier.
Implementing the authentication component
Create an authentication component. In this example, create a file named inquiry-recaptcha.vue under /components/inquiry.
<template>
  <recaptcha @error="onError" @success="onSuccess" @expired="isExpired" />
</template>
<script>
export default {
  methods: {
    onError() {
      this.$emit('update:is-succeeded', false);
    },
    onSuccess() {
      this.$emit('update:is-succeeded', true);
    },
    isExpired() {
      this.$emit('update:is-succeeded', false);
    },
    async fetchResponse() {
      let response;
      try {
        response = await this.$recaptcha.getResponse();
      } catch (error) {
        response = '';
      }
      this.$emit('update:is-succeeded', !!response);
      return response;
    }
  }
}
</script>
Creating the password reminder page
Next, use the above authentication component in the password reminder page where you want to introduce reCAPTCHA. In this example, we created /pages/form/index.vue as follows:
Use await this.$refs.recaptcha.fetchResponse() to get the recaptcha_response and send it to Kuroco along with the entered email address using POST.
After sending, you need to call await this.$recaptcha.reset().
loading...
The above code is a minimal and simplified version.
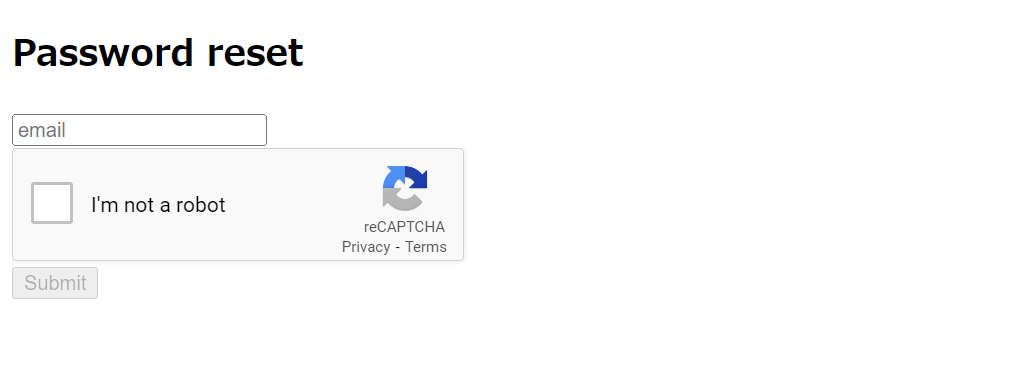
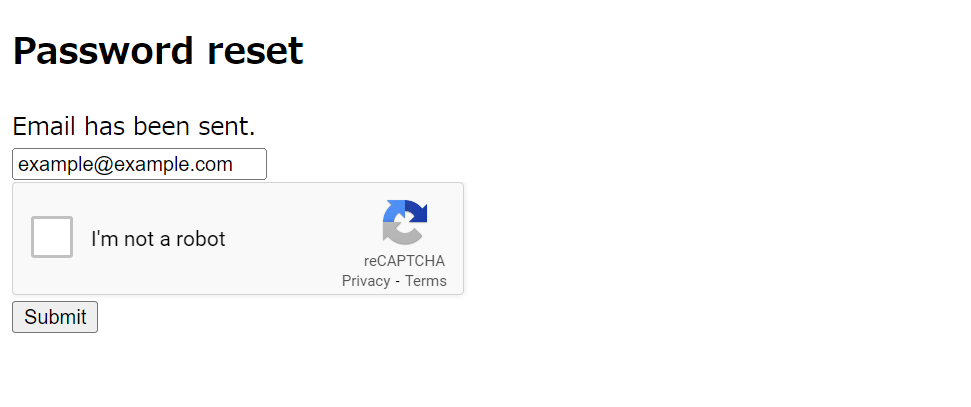
When you check the password reminder screen, reCAPTCHA is displayed as shown below.
Verification Process
When you check the "I'm not a robot" checkbox, the Submit button becomes clickable. Upon clicking the Submit button, the recaptcha_response is posted to Kuroco along with the form data, and the provided token is automatically validated. If a valid value is passed, the form submission will be completed, and a temporary password for password reset will be sent to the entered email address.

The email for the password reminder can be edited using the template with the identifier login/reset_password in the message template.
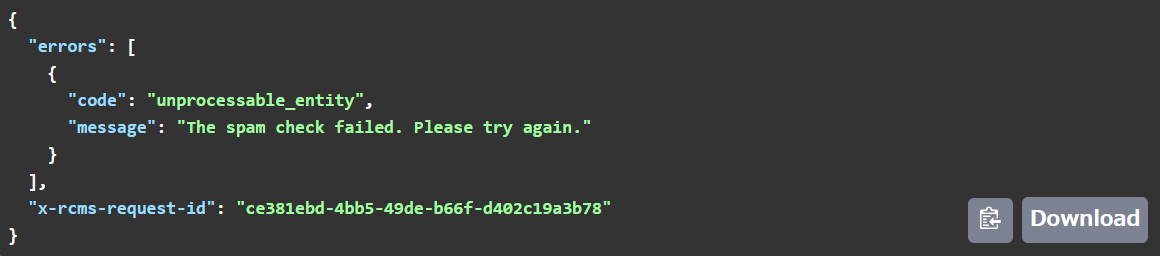
If an invalid value is passed, an error like the following will be returned.
This completes the configuration of reCAPTCHA.
For this basic explanation, we have provided a simple example of the setup process. For more detailed setup instructions for reCAPTCHA, please refer to the following Google documentation. Google Developers reCAPTCHA v2
Related documents
Support
If you have any other questions, please contact us or check out Our Slack Community.