How to link Google Analytics
You can link Kuroco with Google Analytics using Google OAuth2.0 authentication information.
This tutorial explains how to set up the connection from Kuroco's management screen, obtain GoogleClientID and GoogleClientSecret required for the connection, and set up the front-end.
Note: There may be some outdated details on this tutorial due to specification changes by Google. Kindly refer to Google for the latest information.
Create Google Analytics account
First, create your account and properties on Google Analytics.
Tracking ID is required to link Kuroco and Google Analytics.
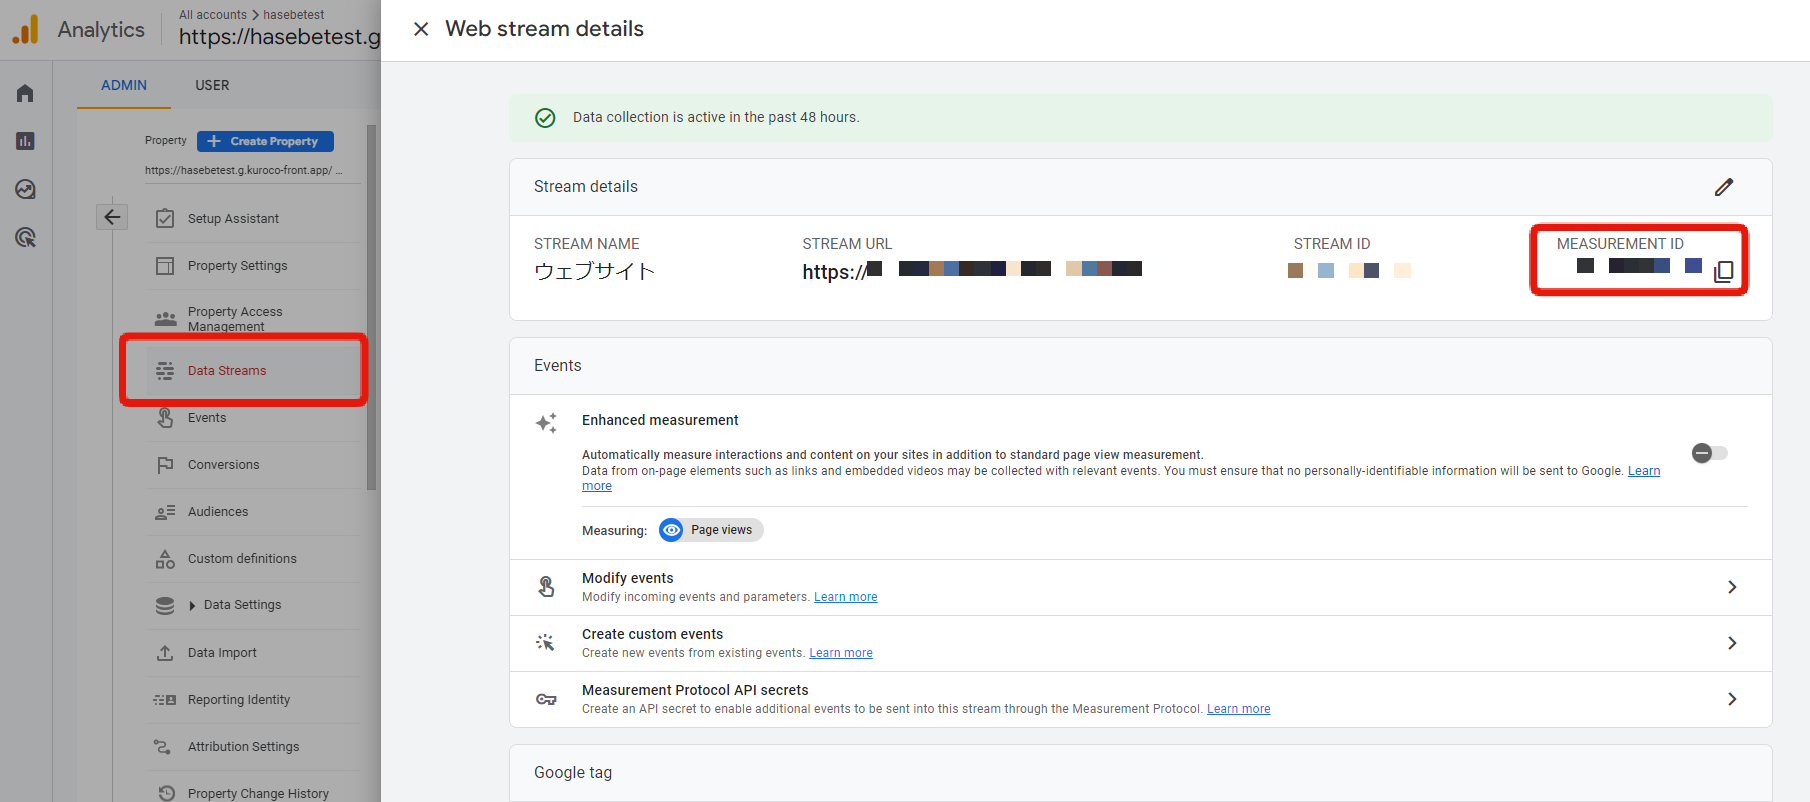
How to check the tracking ID
Please click on [Admin] -> [Property] -> [Data Streams] from the Google Analytics management screen.
You will be able to see the detailed view of the data stream, so please copy the Tracking ID.
Issue Google OAuth 2.0 Client ID
This section shows how to issue the Google OAuth 2.0 Client ID which is required to link Kuroco and Google account.
(If you already have client ID and client secret, skip this section and go to the next step Link Kuroco with Google Analytics to connect Kuroco and Google account.)
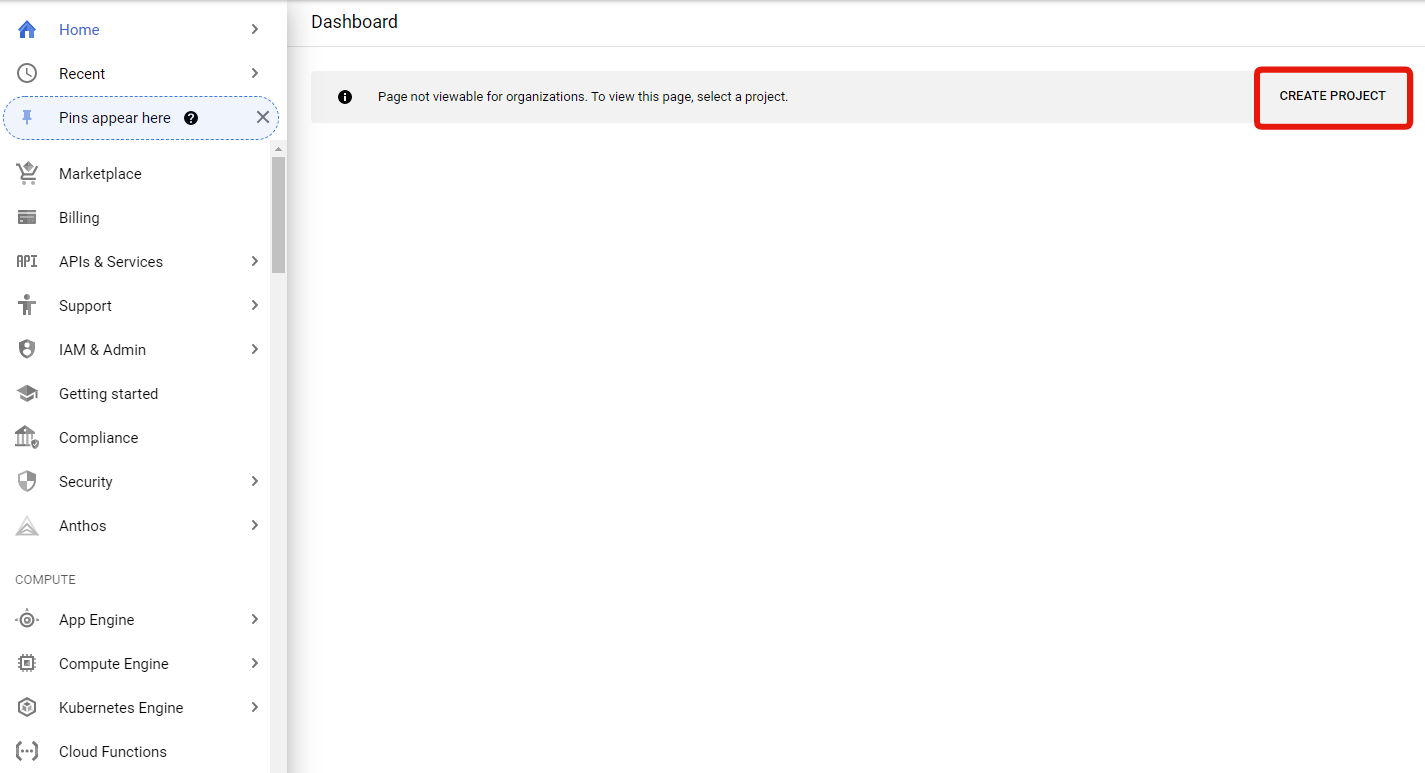
1. Create a project on Google Cloud Platform
Access Google Cloud Platform and click [Create project].
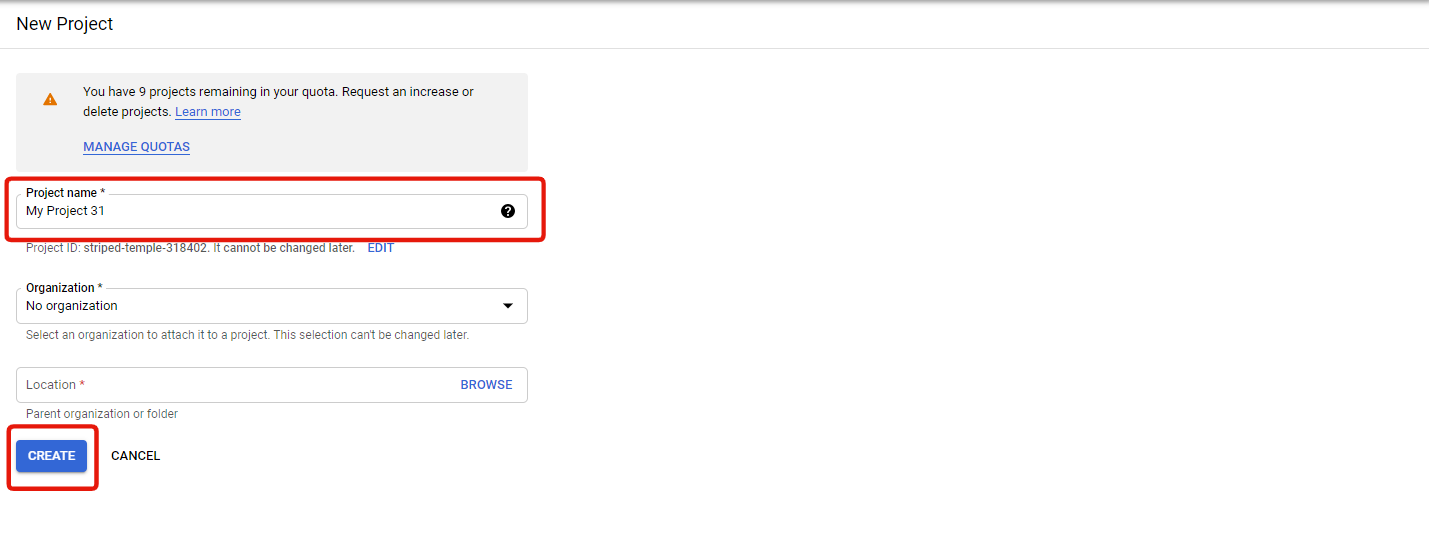
 Enter a project name and click [Create].
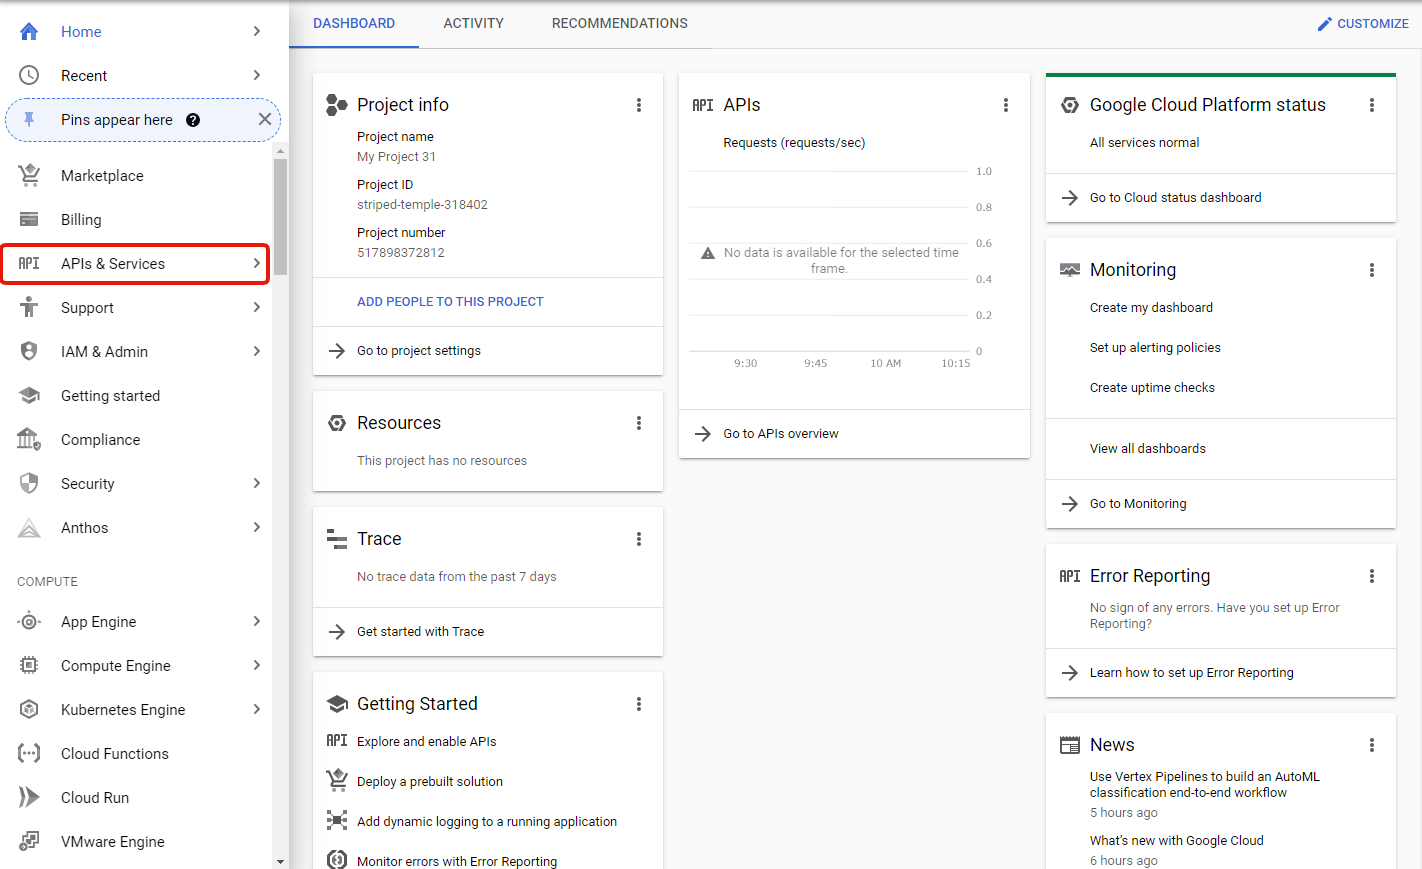
 2. Enable Analytics API
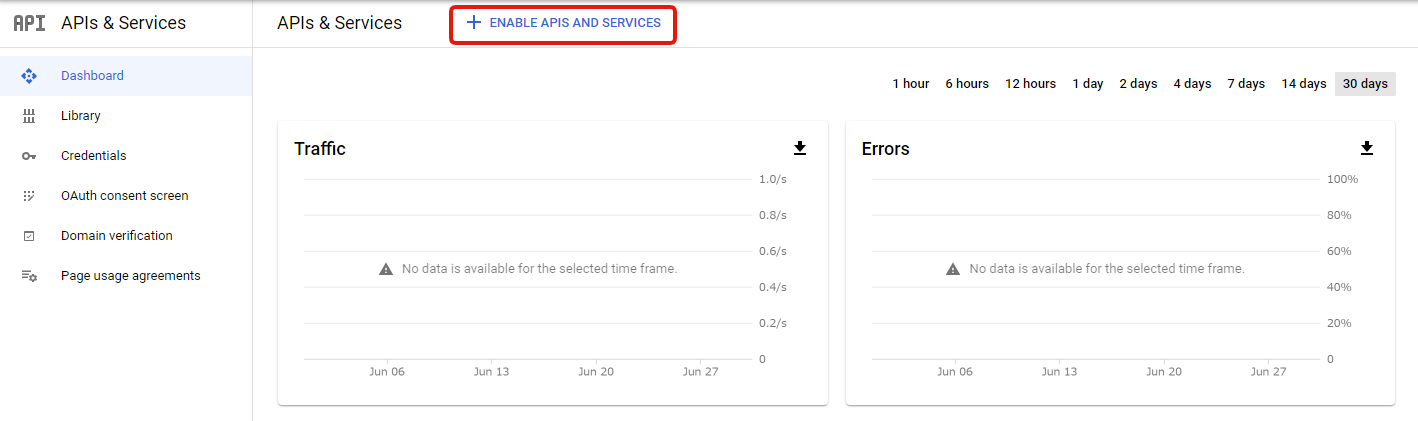
Click [APIs & Services] on the side menu.
 Click [ENABLE APIS AND SERVICES].
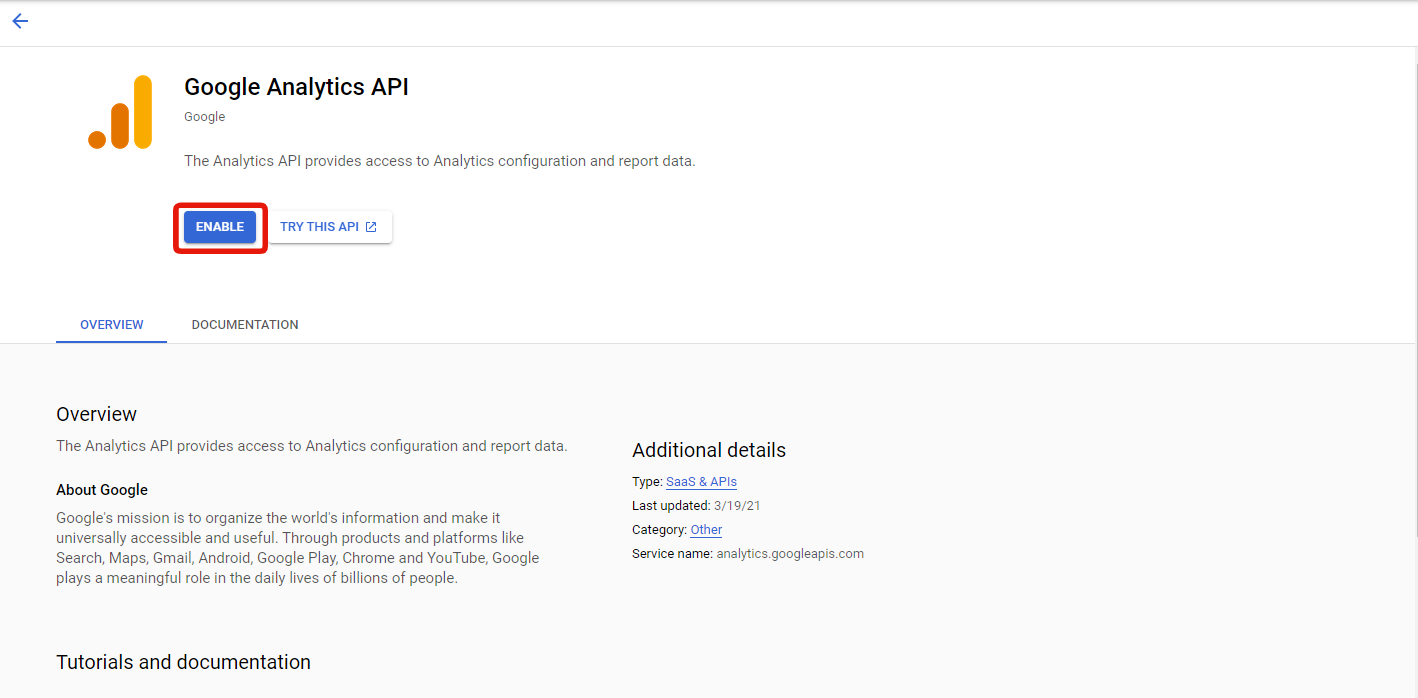
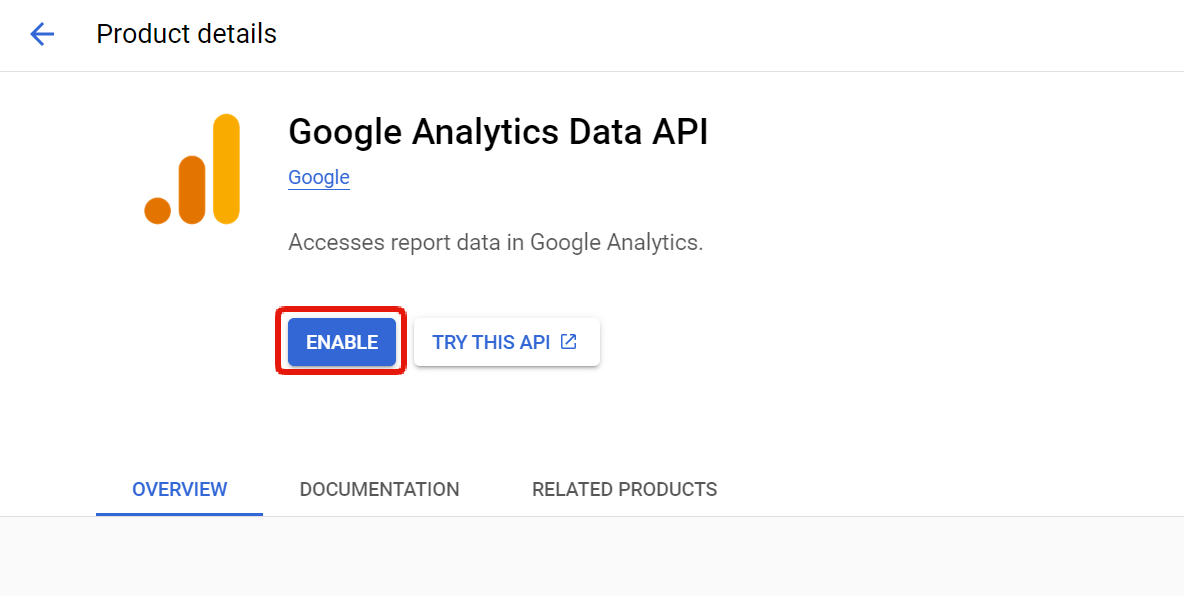
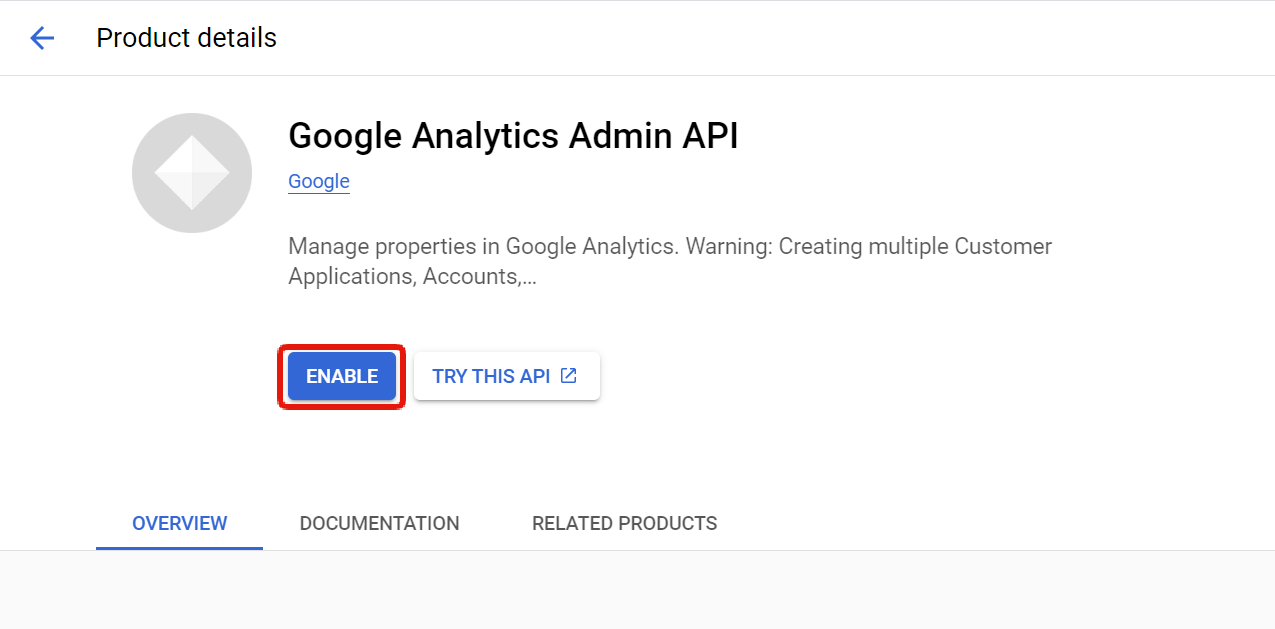
You will see the API library, so please find and enable "Google Analytics API", "Google Analytics Data API" and "Google Analytics Admin API".
If you are integrating with GA4, there is no need to enable "Google Analytics Reporting API."
3. Create OAuth consent screen
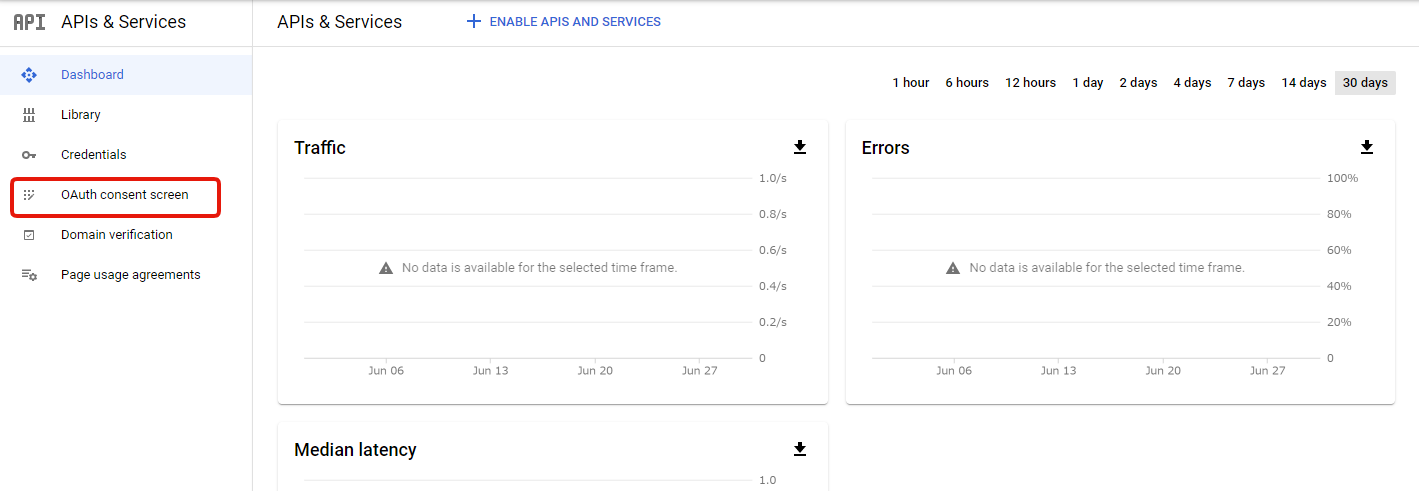
Go to "APIs & Services" page again and click [OAuth consent screen] on the side menu.
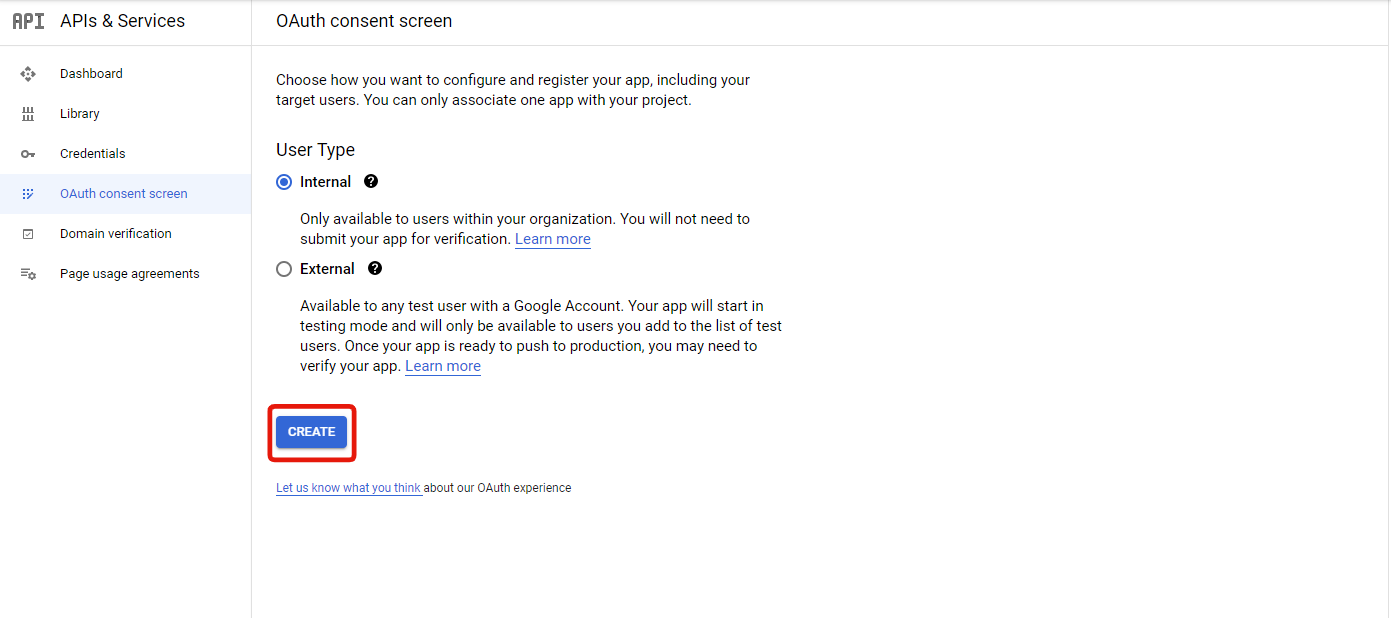
 Select User Type and click [Create].
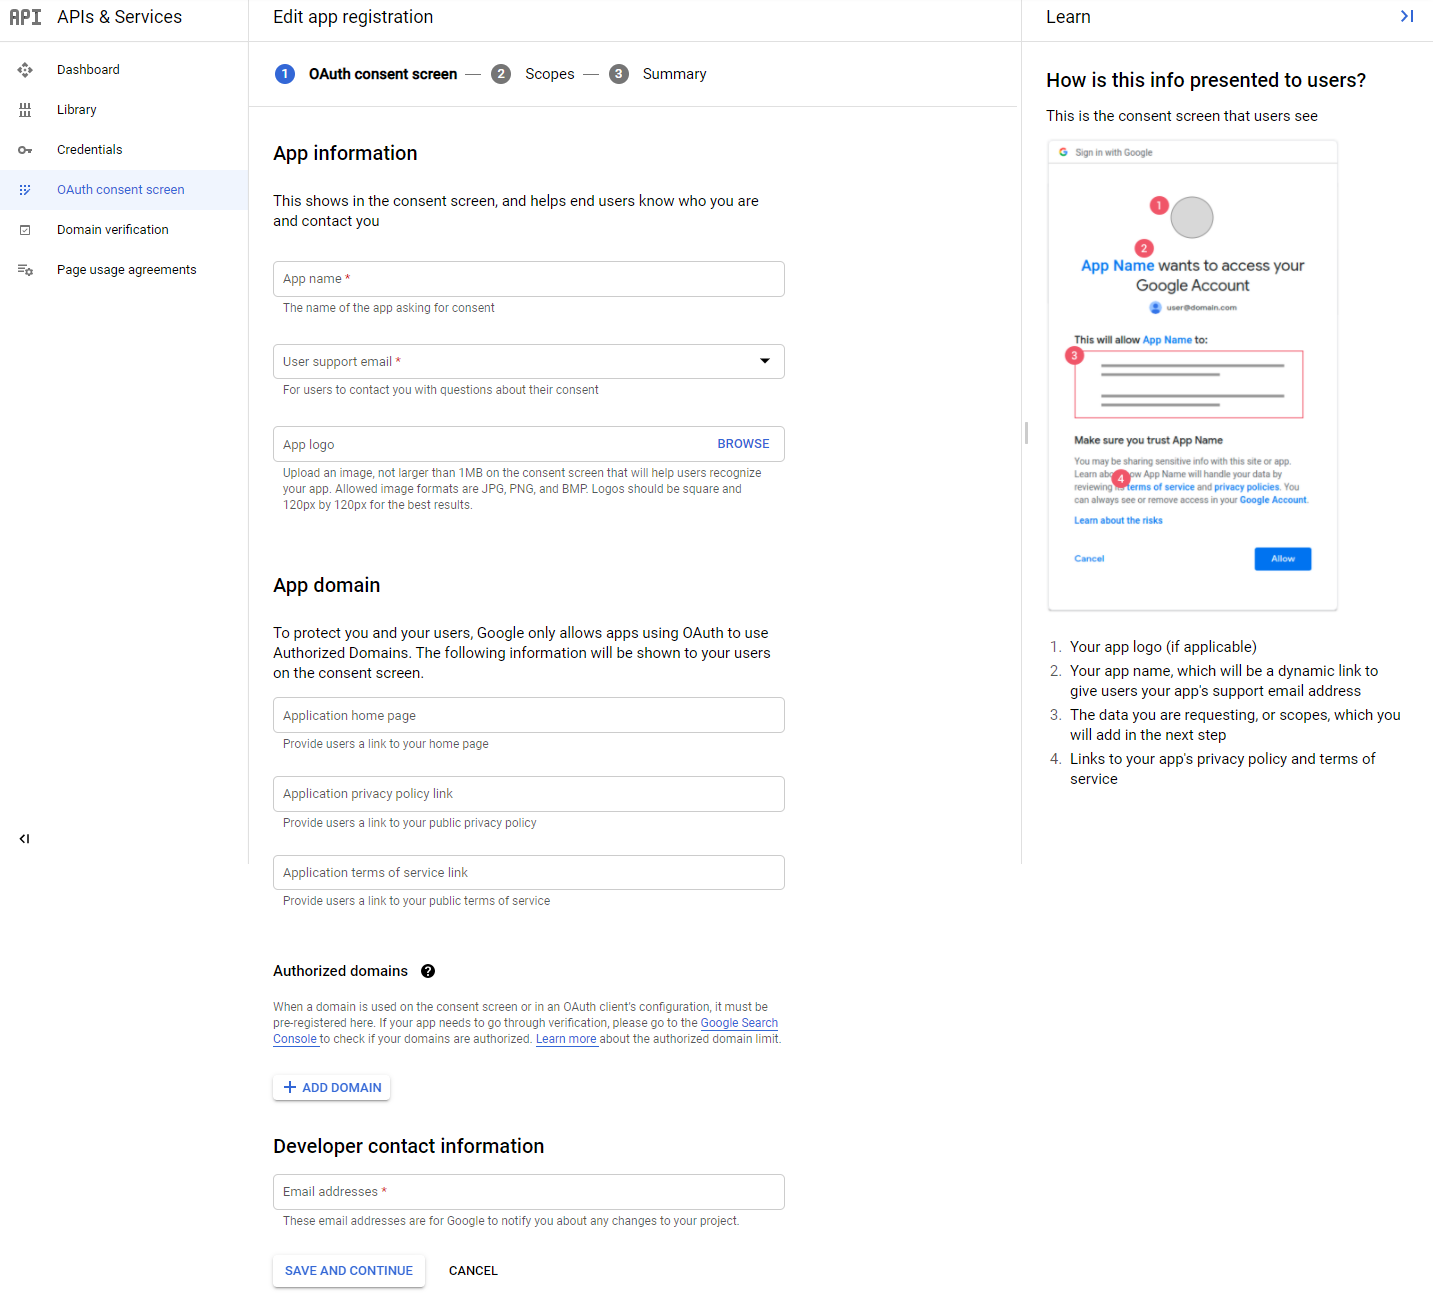
 Enter the required information and create an OAuth consent screen.
 4. Create OAuth client ID
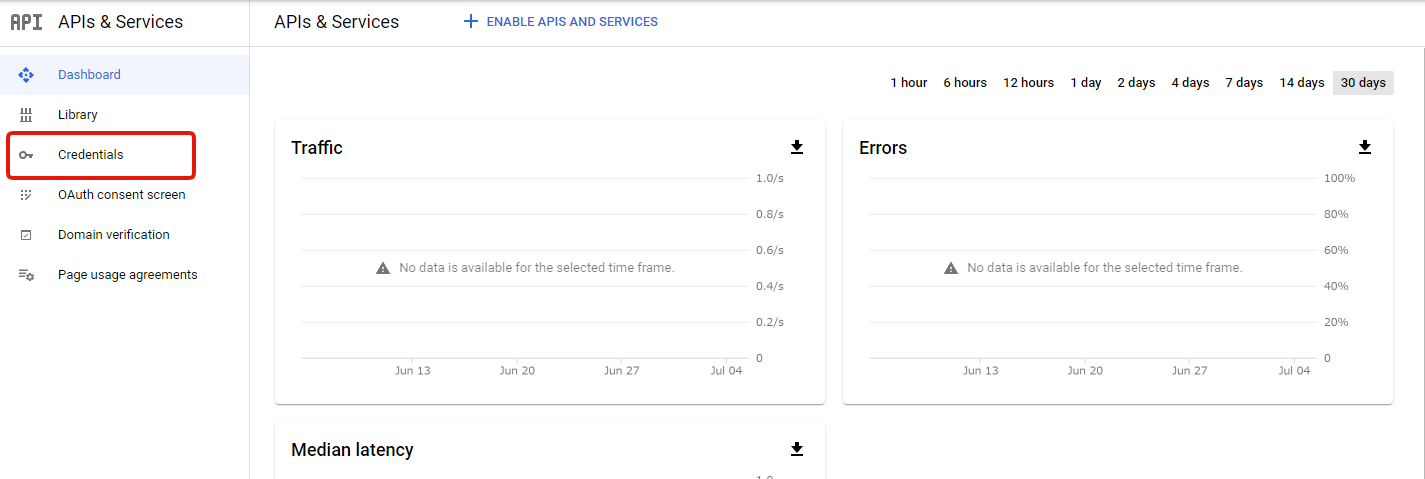
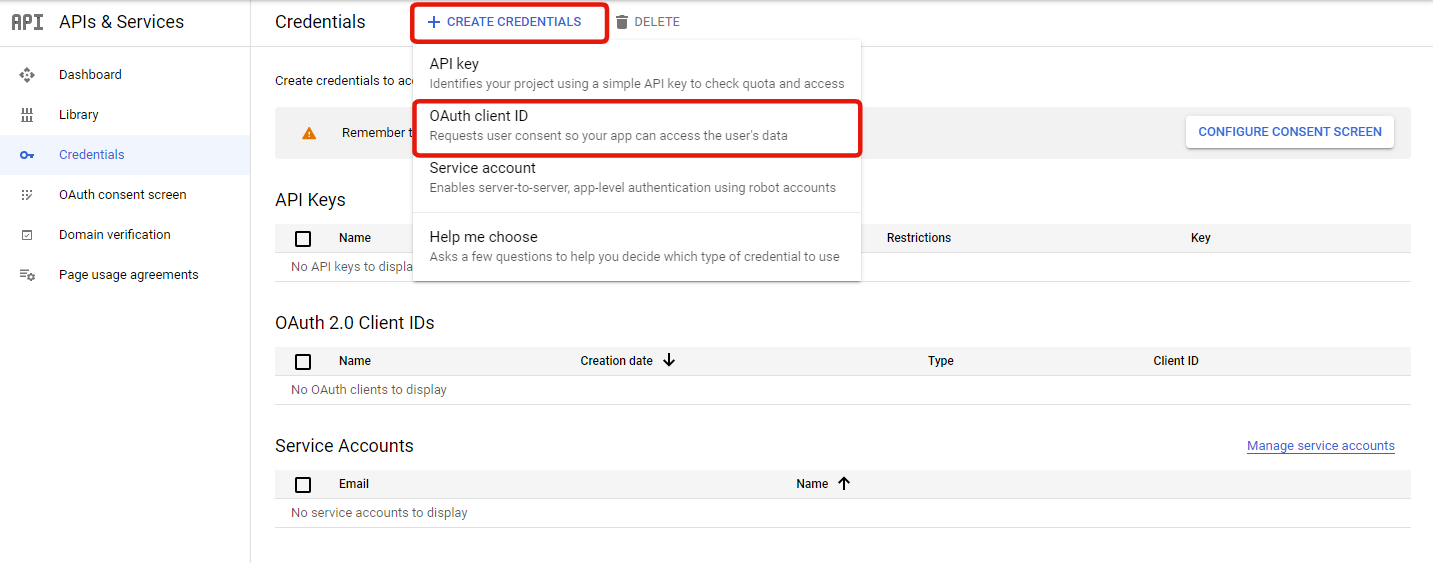
Click [Credentials] on the side menu of APIs & Services page.
 Click [CREATE CREDENTIALS] -> [OAuth client ID].
 Enter the required information on the OAuth client ID creating page and click [CREATE].
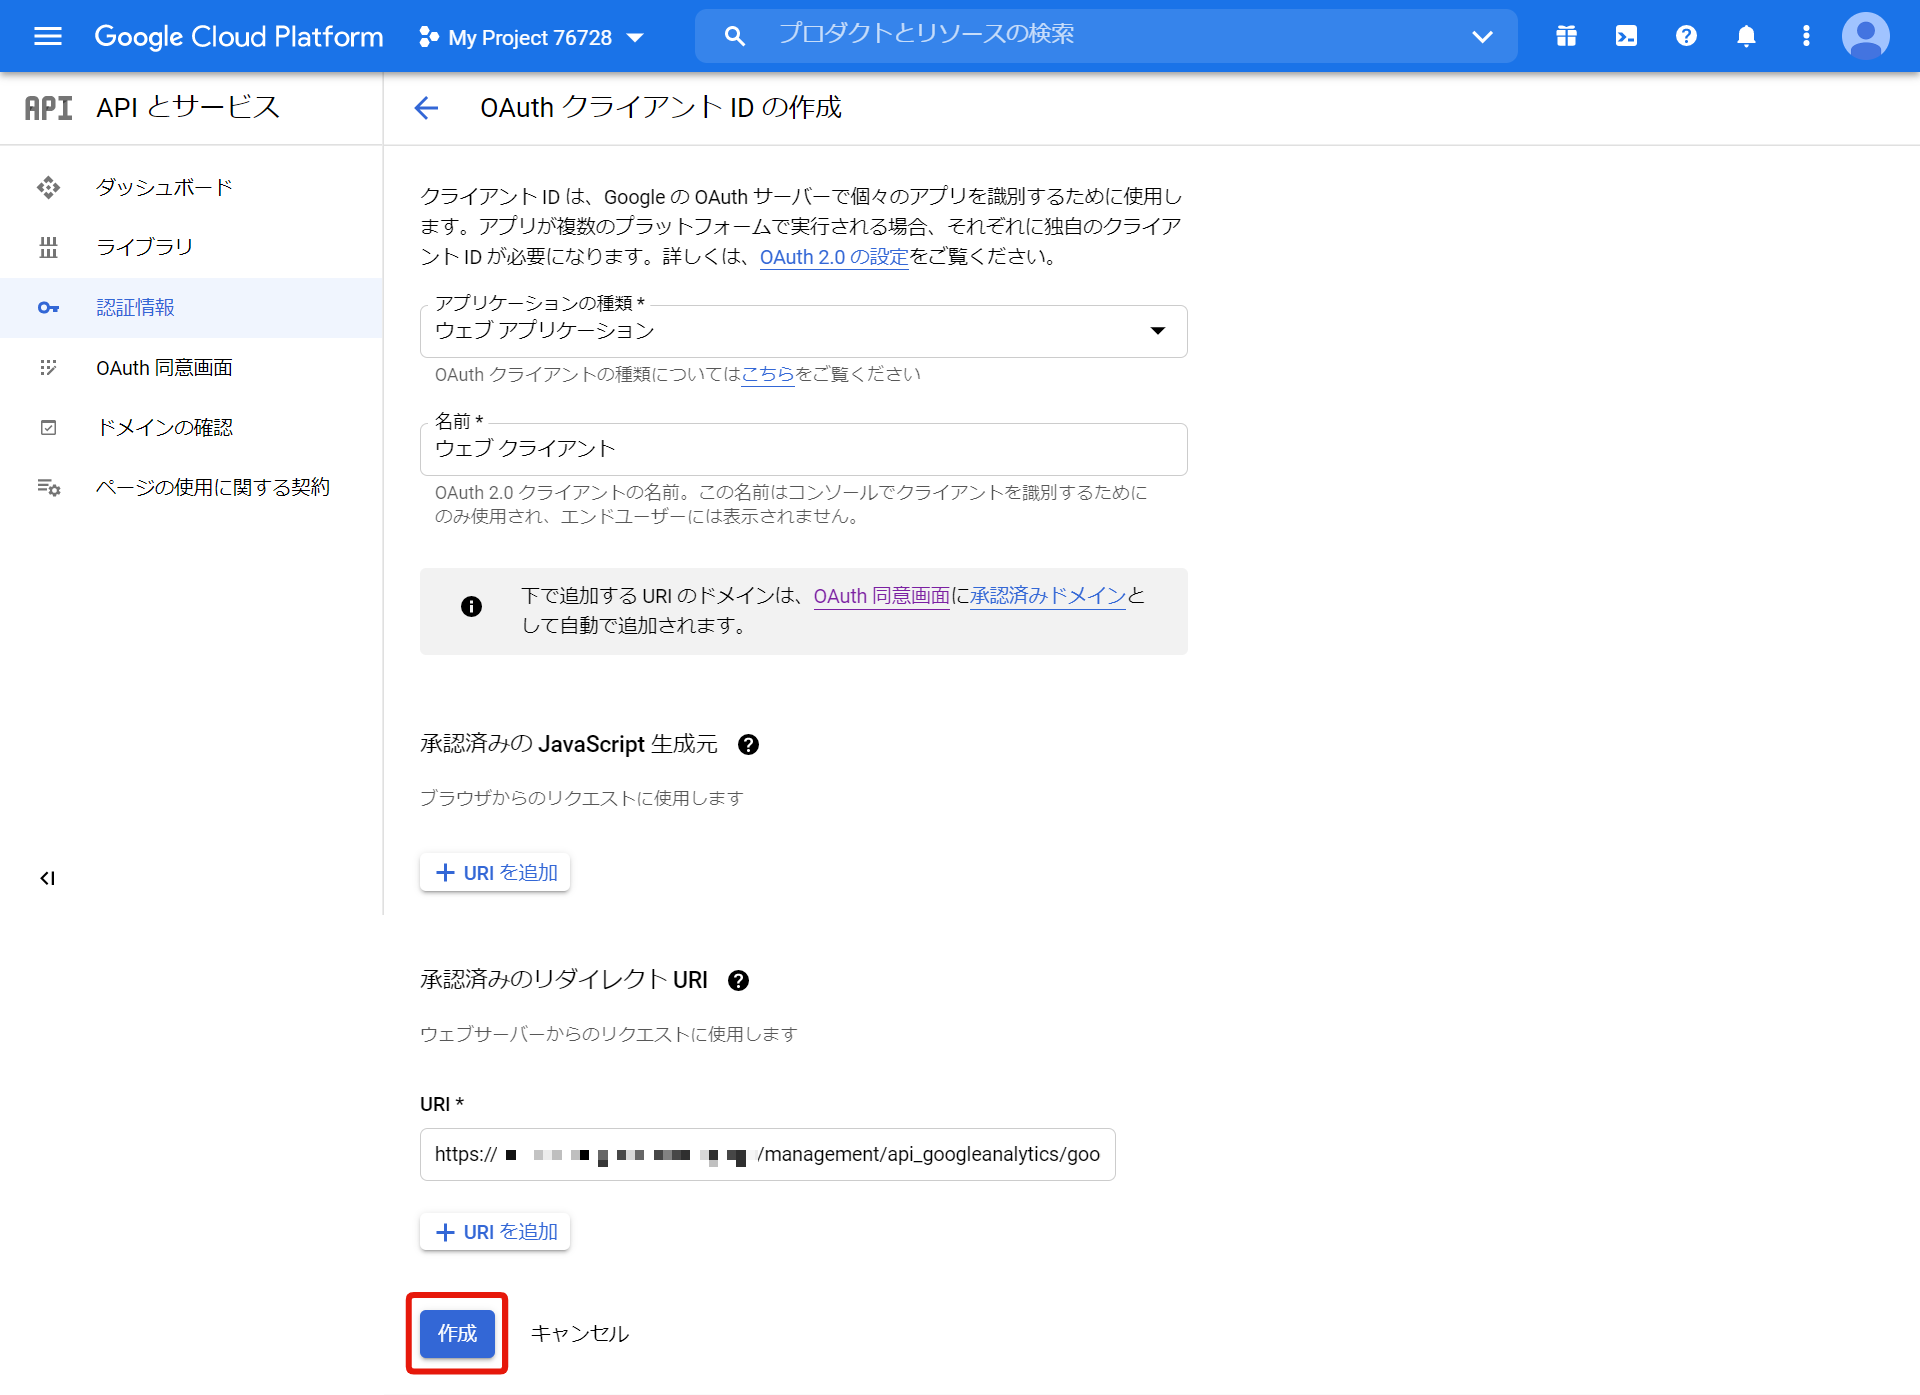
- Select "Web app" for the "Application type".
- For the "Authorized redirect URIs", enter the one which you can find on Kuroco's Google Analytics.
 5. Confirm GoogleClientID and GoogleClientSecret
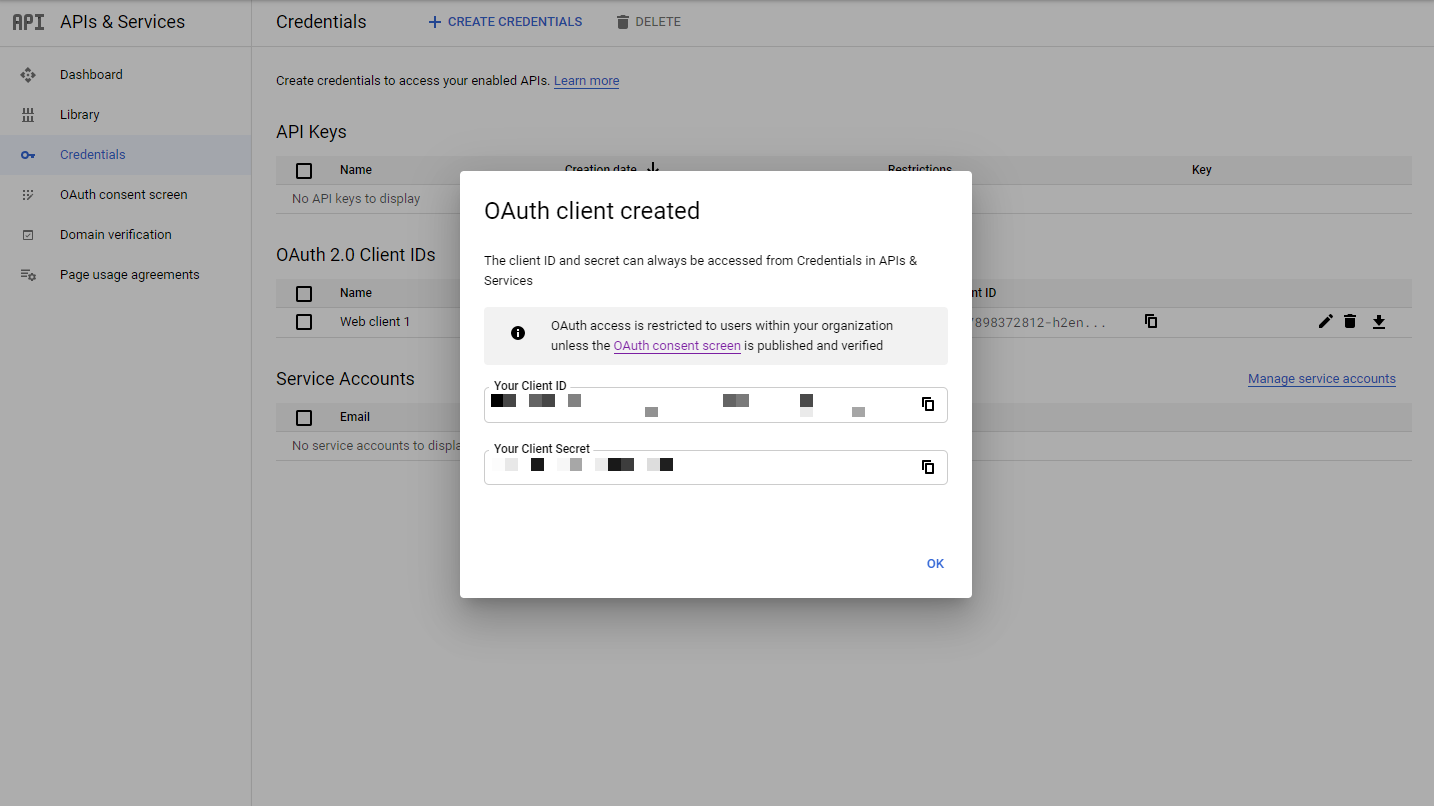
Click on the pencil icon to view the client ID created in the authentication credentials.
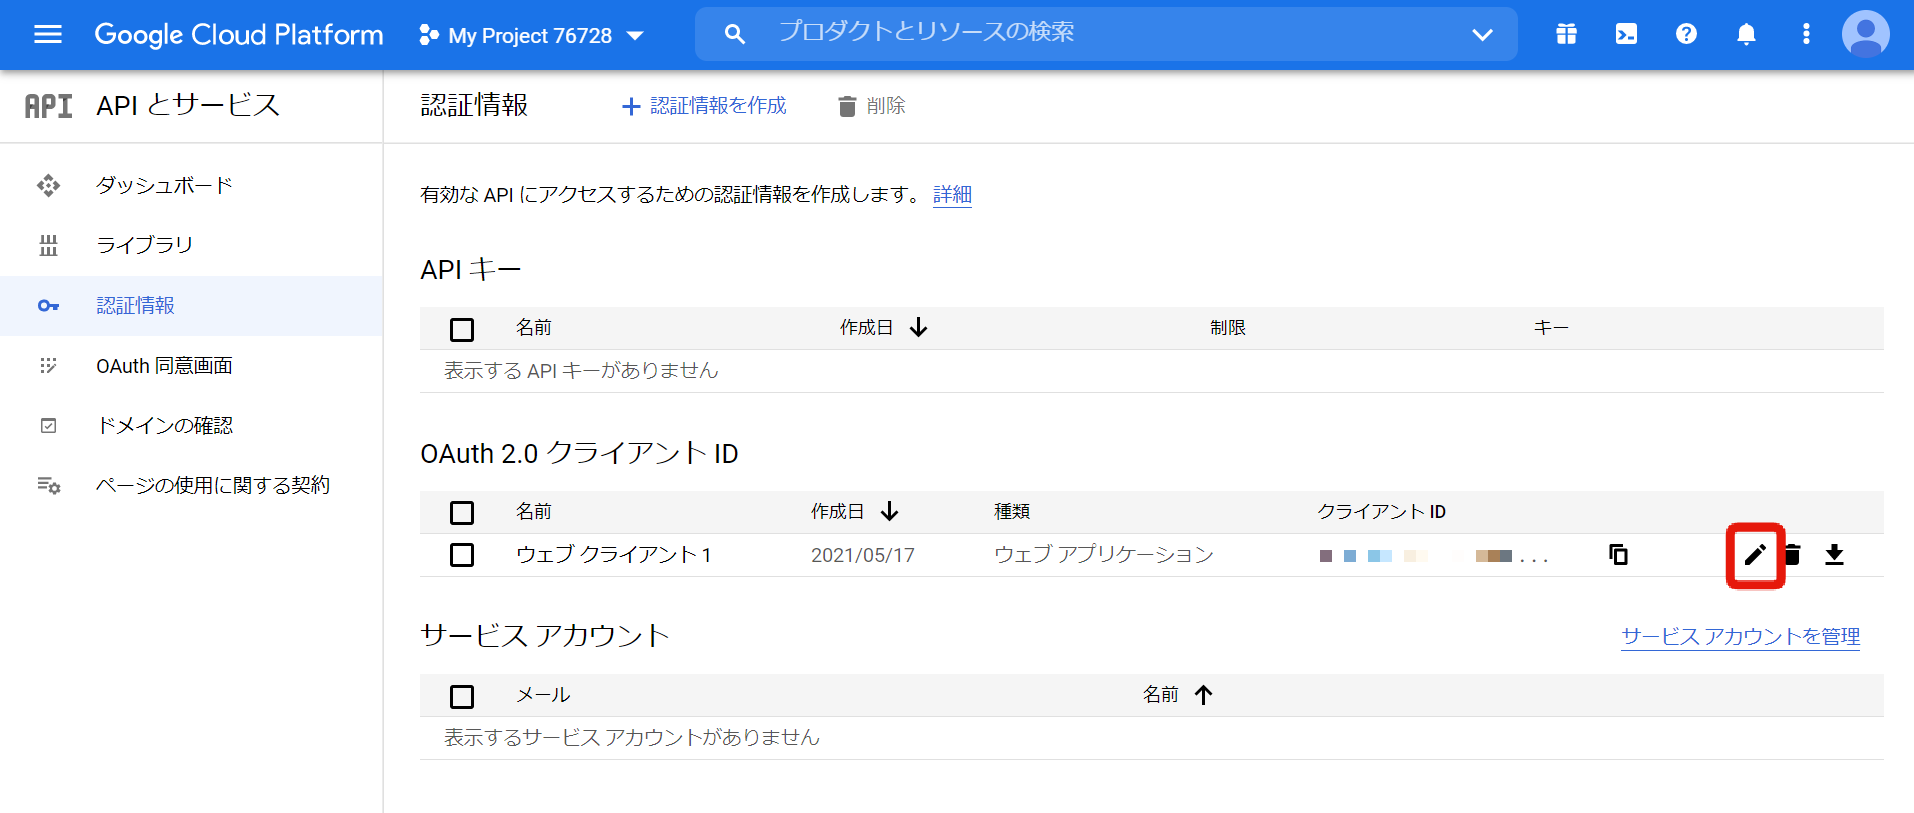
Confirm the client ID and Client Secret.
Link Kuroco with Google Analytics
1. Access Kuroco's Google Analytics setting page
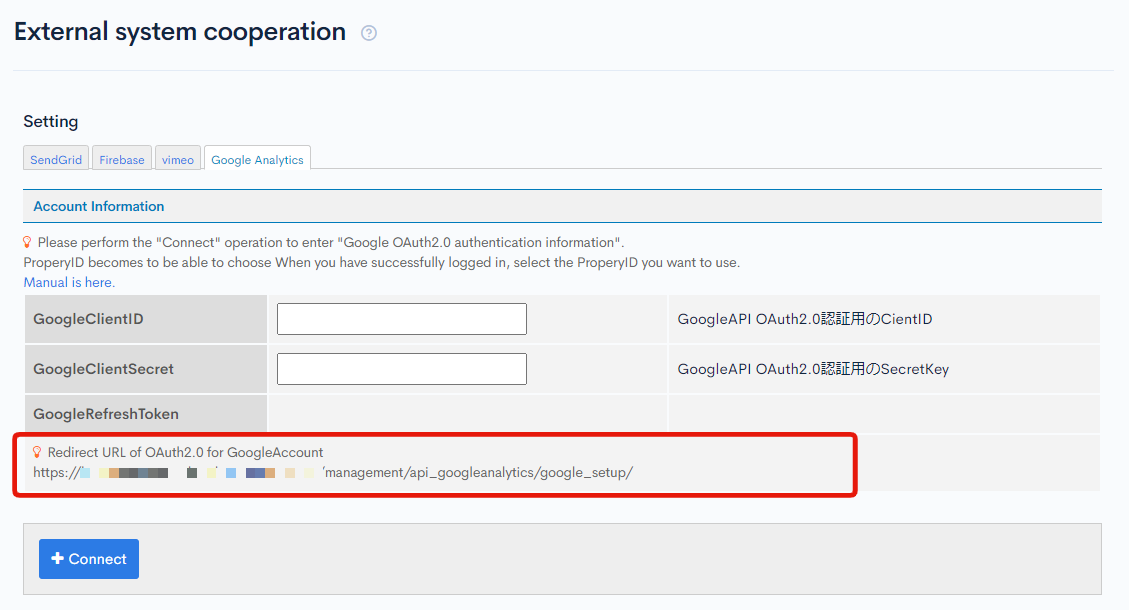
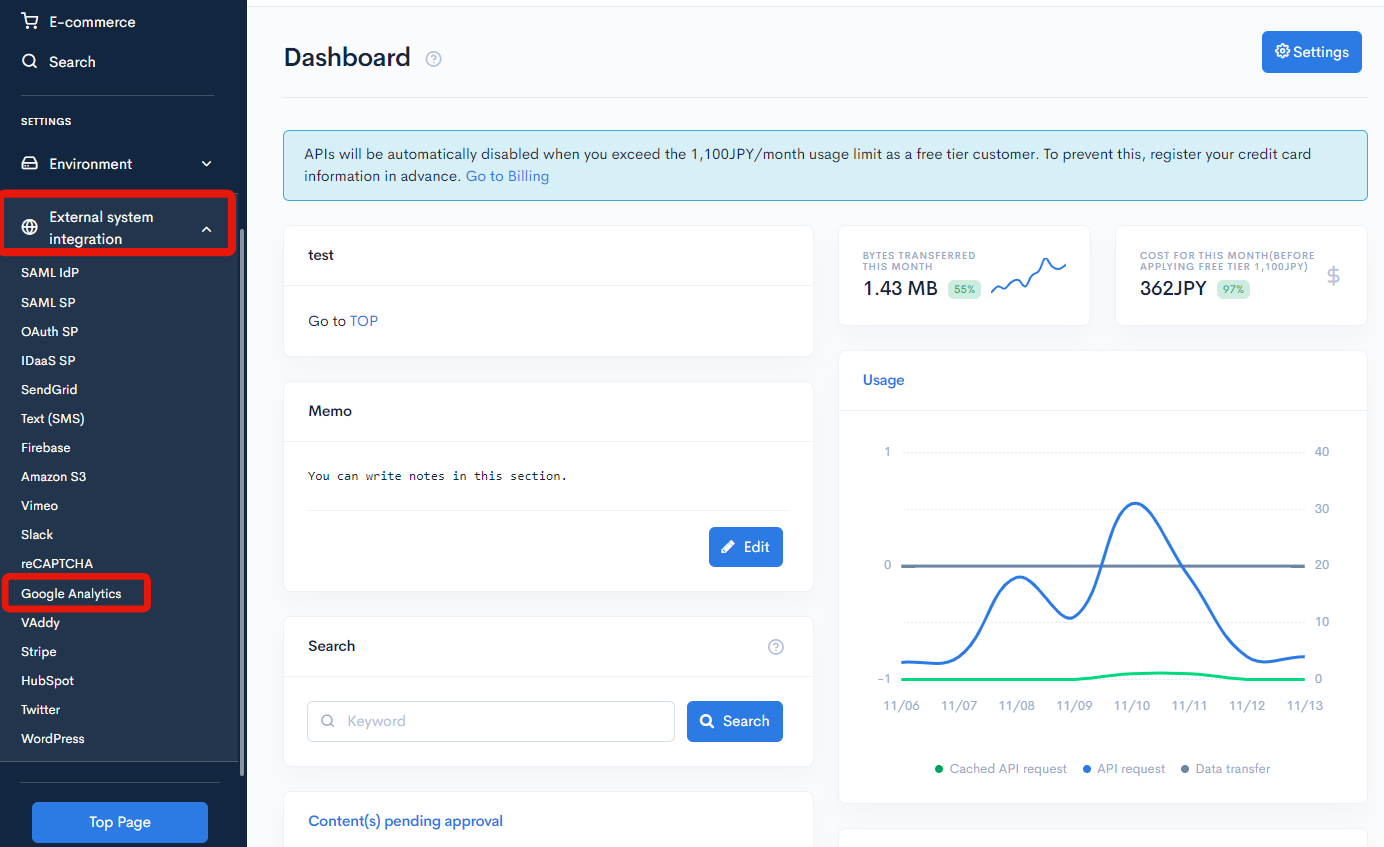
Access the Kuroco management page and click [External system cooperation] -> [Google Analytics] on the side menu.
2. Connect to Google account
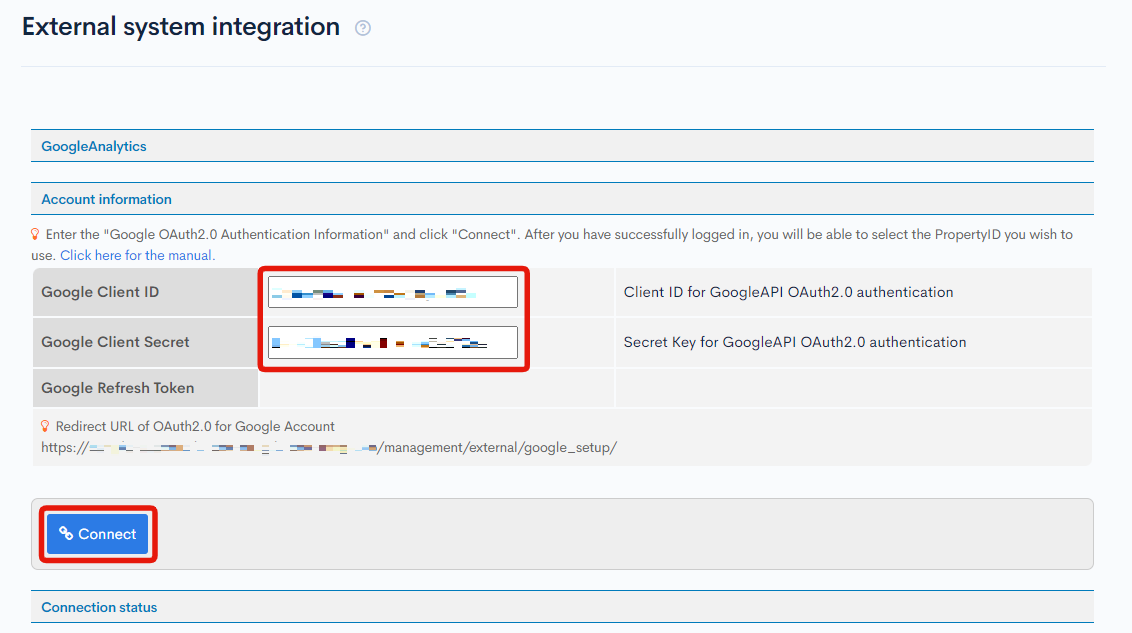
Enter the GoogleClientID and GoogleClientSecret and click [Connect].
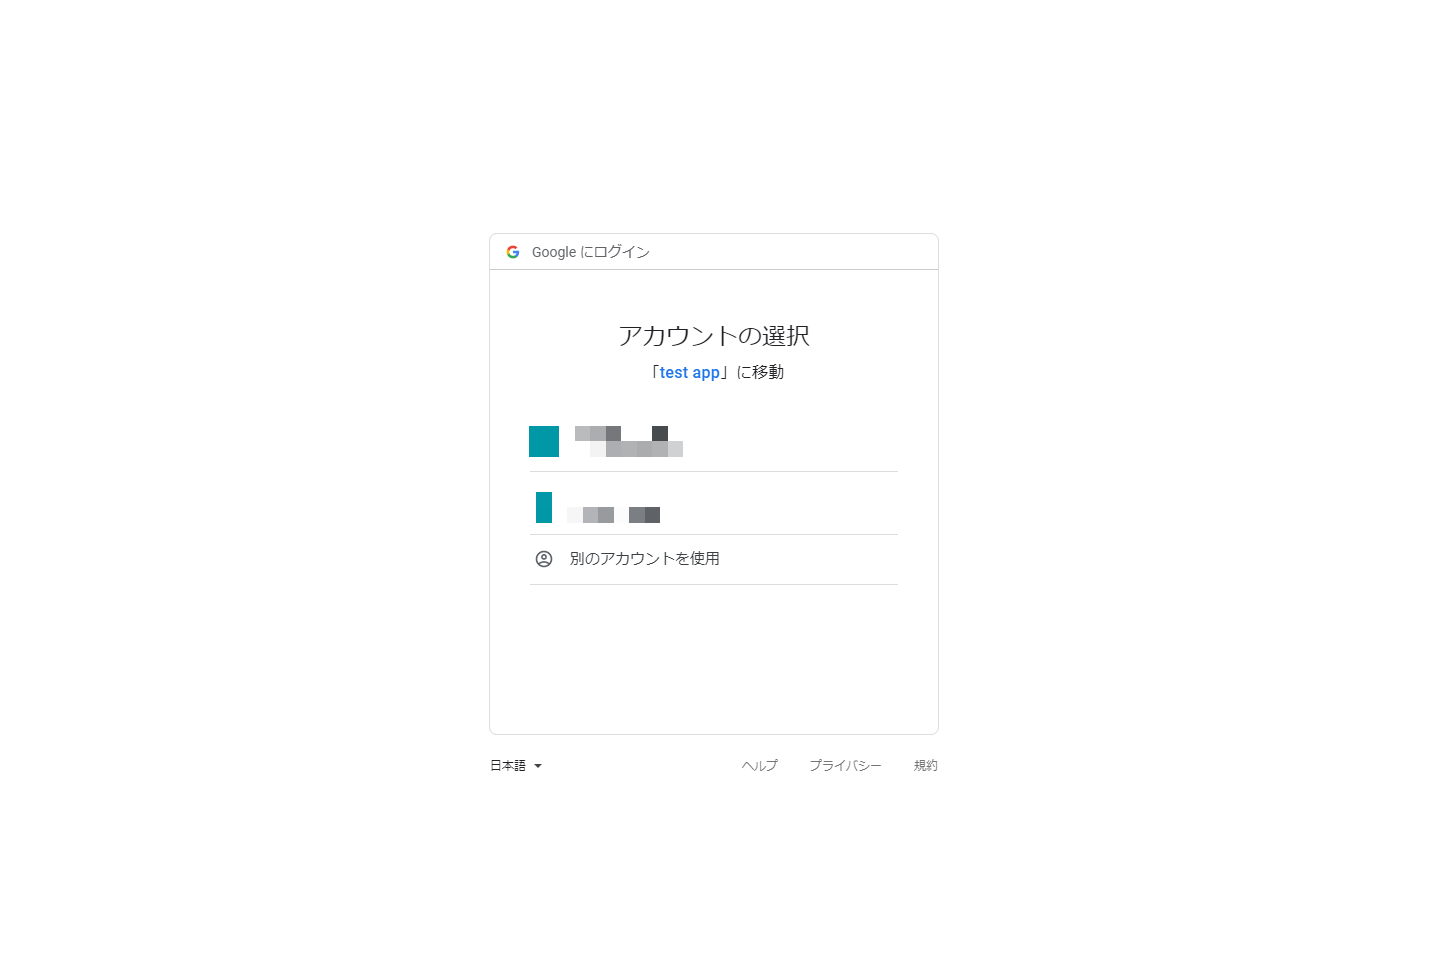
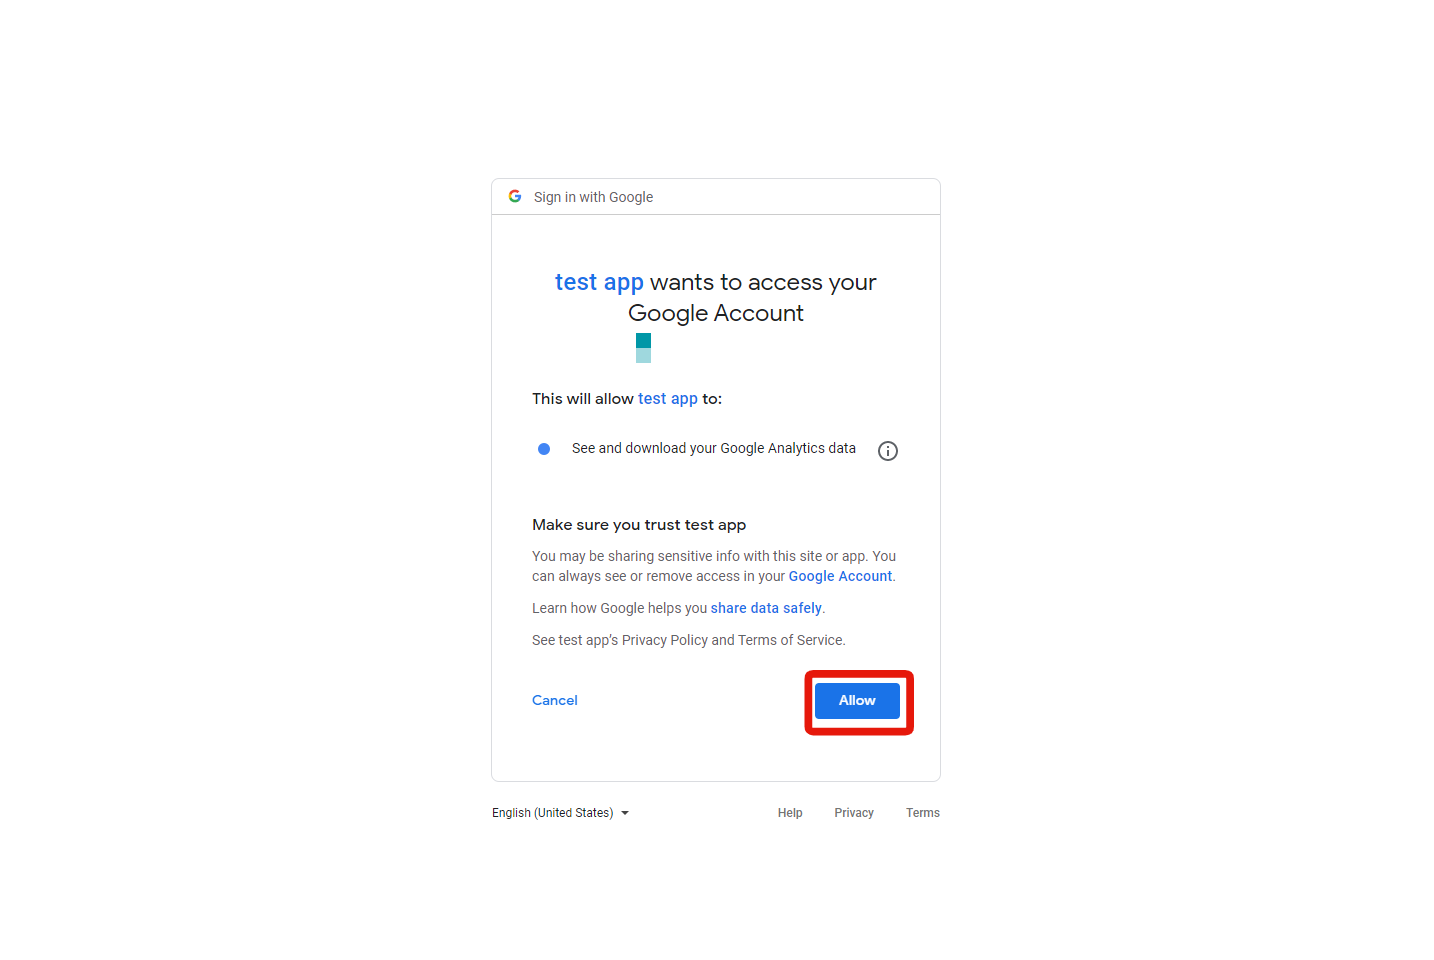
You'll be taken to Google's login screen, so log in with the same account previously used on Google Analytics.
 Click [Allow] on the OAuth consent screen.
 Once successfully authenticated, you will be returned to the Kuroco screen and you can log in again.
 3. ProfileID setting
You can select the Profile ID after the Google account is authenticated successfully. Select the ProfileID and click [Update].
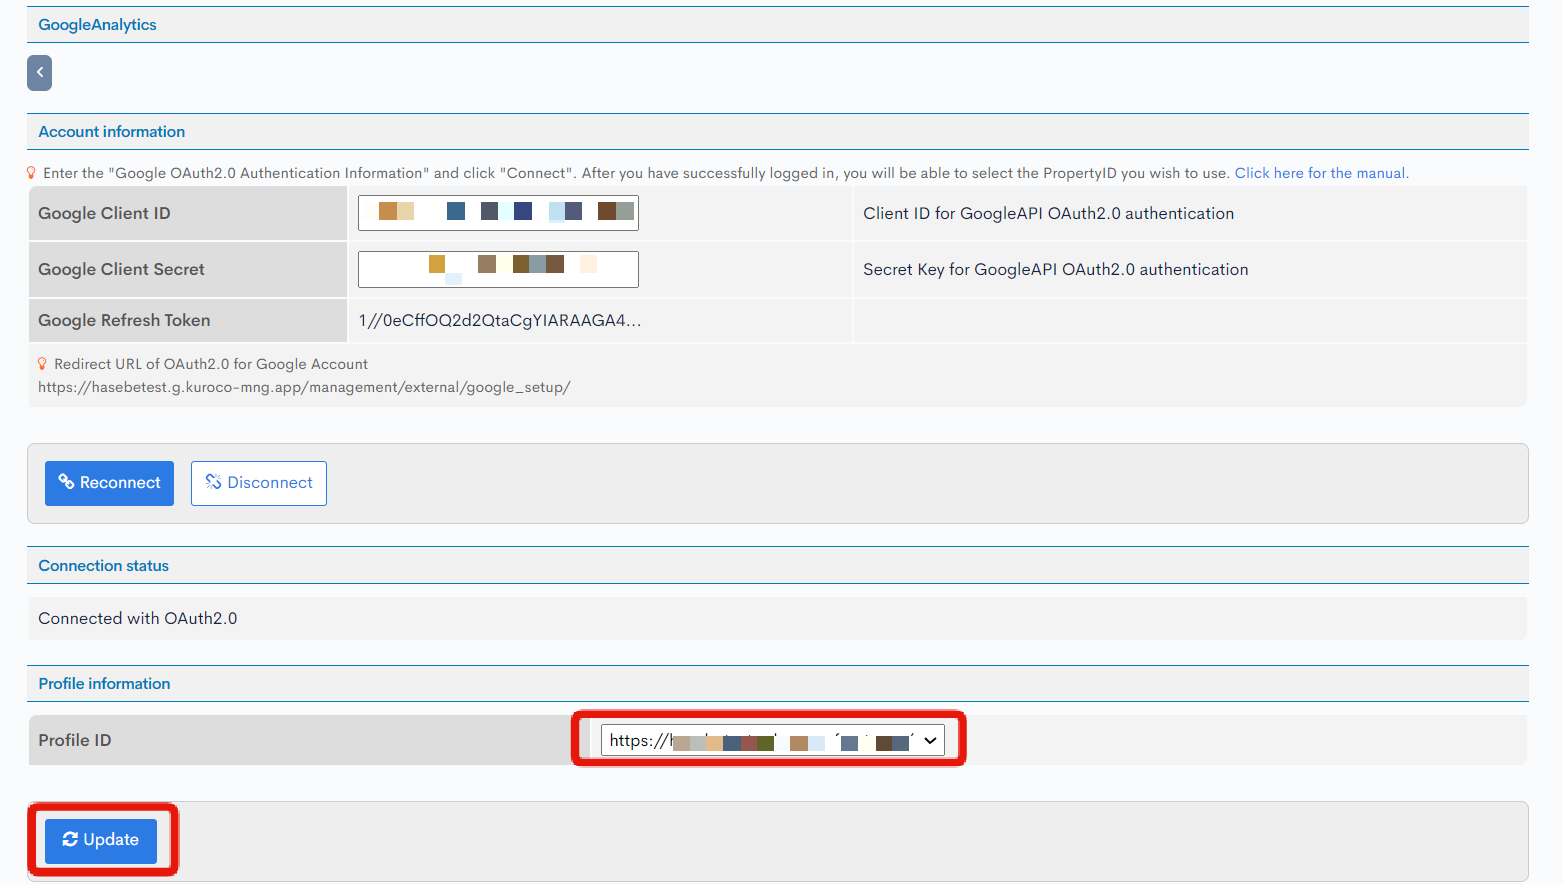
Regarding the ProfileID displayed in Kuroco:
Depending on the settings of Google Analytics and Google Cloud Platform, you may see options for both Google Analytics 4 properties and Universal Analytics properties. Please note that Universal Analytics is no longer available, so please select the Google Analytics 4 property.
The integration with Google Analytics is now complete.
Set up Google Analytics on the front-end
At last, let's set up Google Analytics on the front-end.
In this tutorial, we use Nuxt.js to set it up.
In this document, there is a sample of directly specifying the GA4/GTM tracking ID in the nuxt.config.js file. However, in practice, it is desirable to define it in environment-specific env files and load it from there.
not using GTM
Install @nuxtjs/google-gtag
Install in your project @nuxtjs/google-gtag which is the module for Google Analytics.
Execute the following:
npm install --save @nuxtjs/google-gtag
Add module to nuxt.config.js
Let's configure Google Analytics in nuxt.config.js.
Open nuxt.config.js and add the following:
  modules: [
    '@nuxtjs/google-gtag'
  ],
  'google-gtag': {
    id: "G-XXXXXXX",
    debug: false
  },
Replace G-XXXXXXX with your own tracking ID.
Using GTM
Install @nuxtjs/gtm
Install the Google Analytics module '@nuxtjs/gtm' for your project. Execute the following:
npm install --save @nuxtjs/gtm
Add the module to nuxt.config.js
Configure Google Analytics settings in nuxt.config.js by adding the following:
modules: [
  '@nuxtjs/gtm'
],
gtm: {
  id: 'GTM-XXXXXXXX',
  pageTracking: true,
  send_page_view: false,
},
Setting send_page_view to false will prevent the page_view event from being sent on the first page load, and only the nuxtRoute event will be sent. If you use nuxt-link for page transitions and want to convert the nuxtRoute event to a page_view event using GTM for GA tracking, set this option to avoid double tracking for nuxtRoute and page_view events.
Configuring GTM
Set up "Google Analytics GA4 Settings" and "nuxtRoute Tag" in GTM to trigger the page_view event.
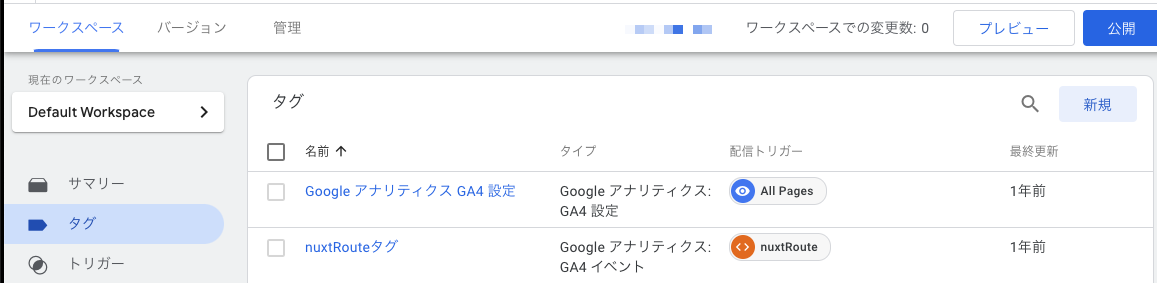
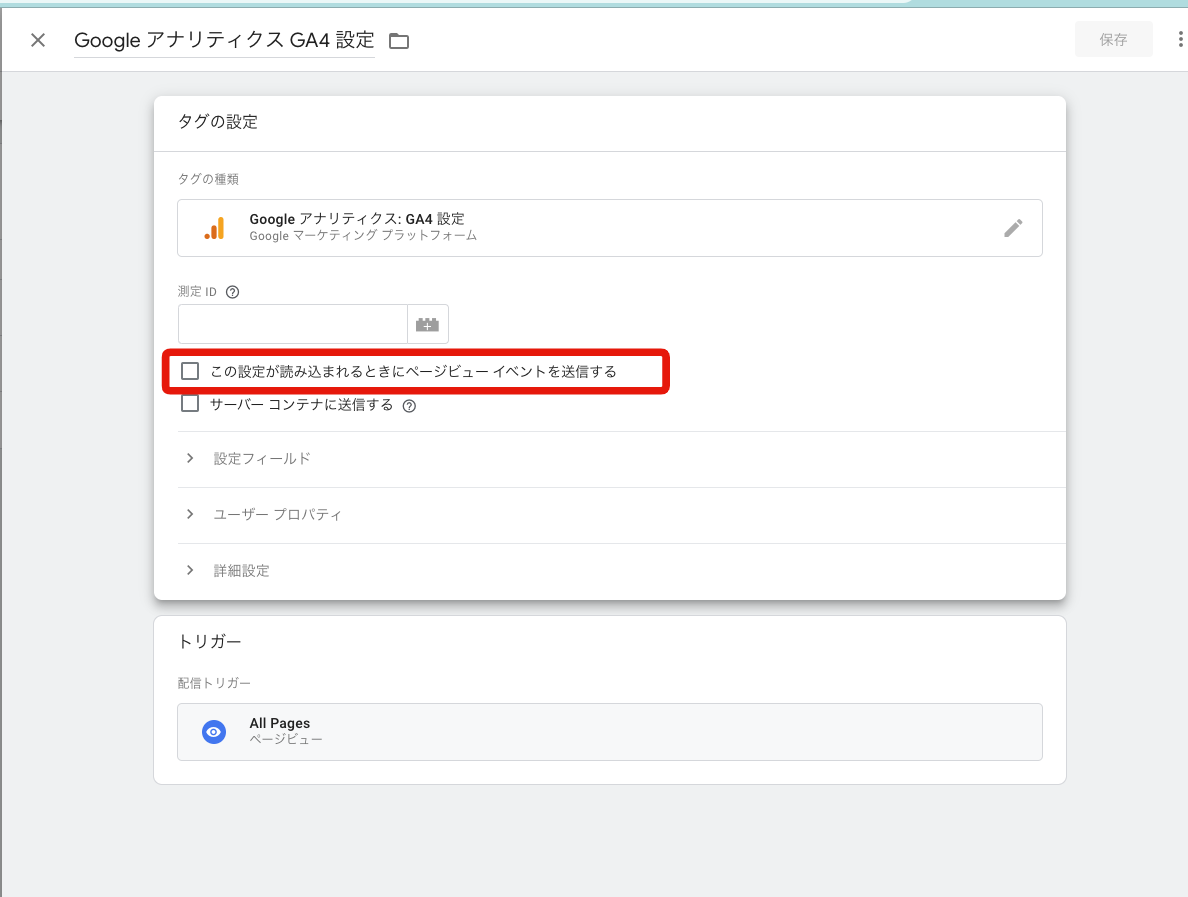
Google Analytics GA4 Settings
If you want to measure only the page_view event in Nuxt, do not check the box above, and instead configure the nuxtRoute event to trigger the "page_view" event.
Checking "Send a page view event when this configuration is loaded" will send the page_view event to GA when this configuration is loaded.
Configuring the nuxtRoute Event (Triggering the page_view event on page transitions using nuxt-link)
Trigger

Tag

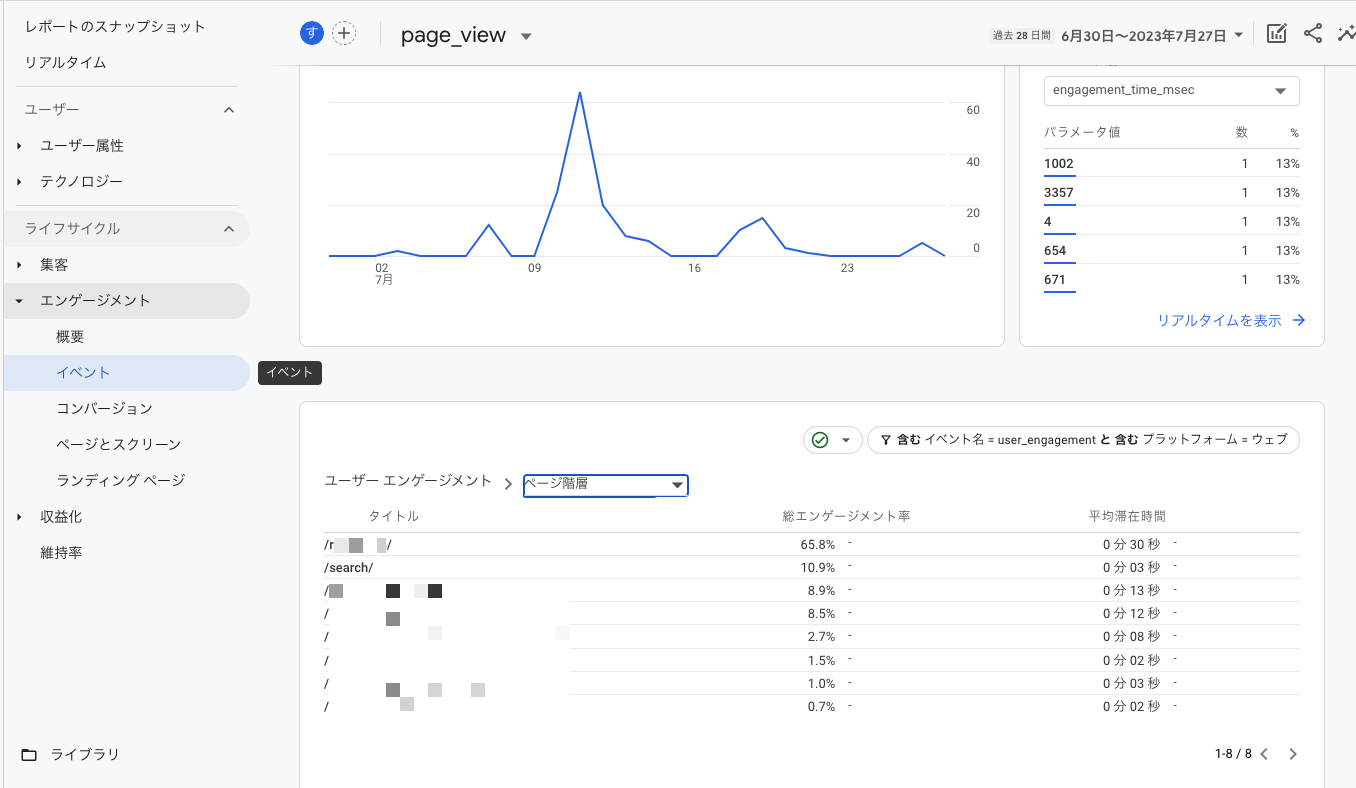
Confirm the connection on Google Analytics
Access Google's admin page and confirm that the access information is fetched properly.
[Reports] -> [Realtime]
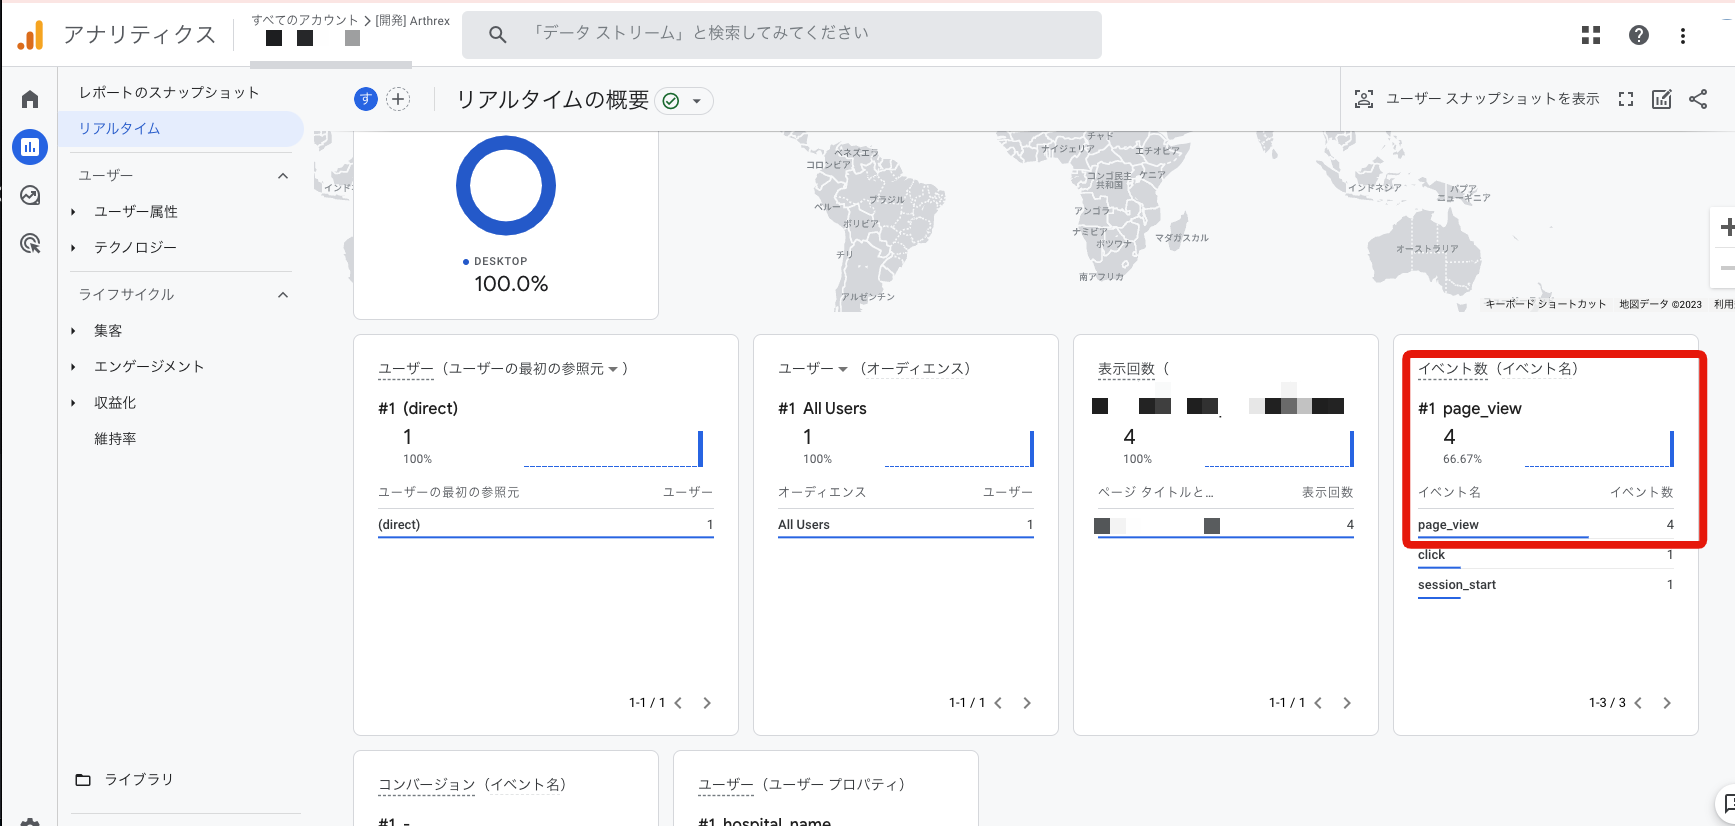
[Engagement] -> [Events]
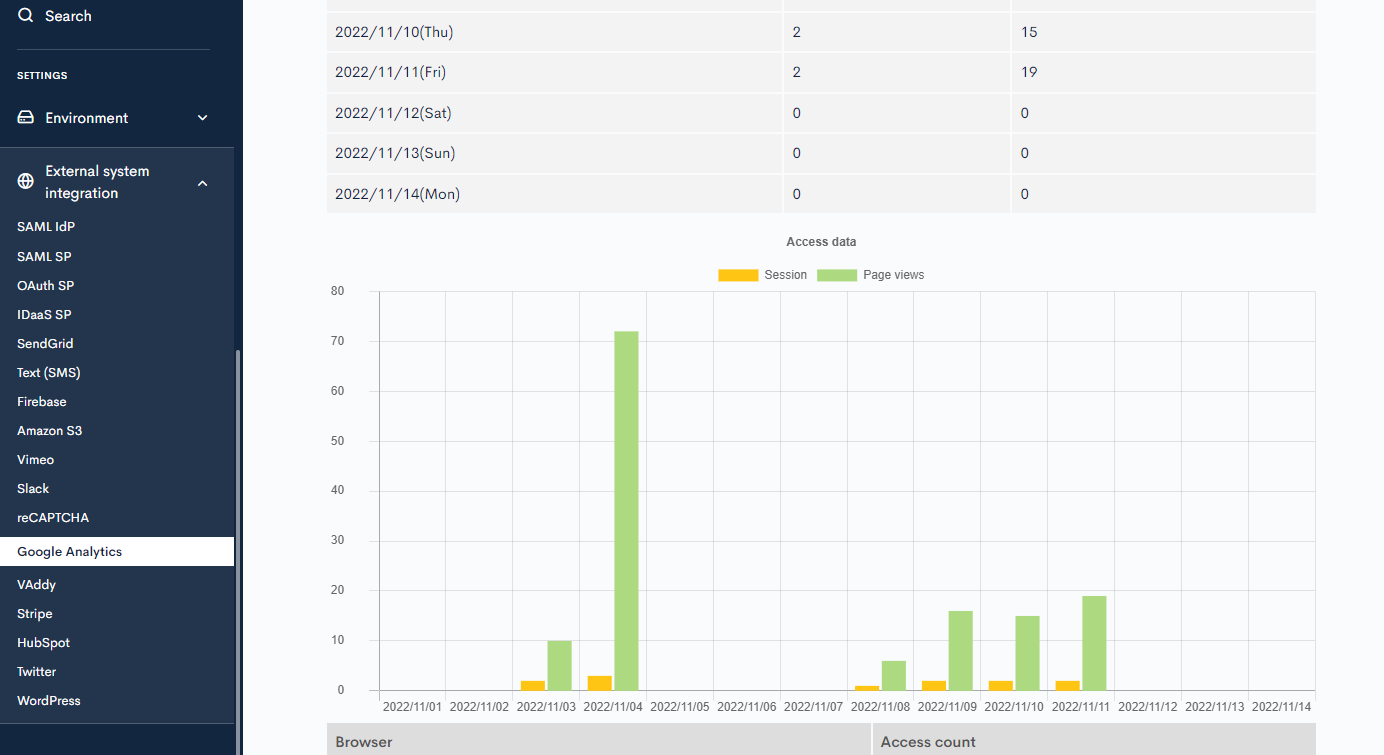
Confirm the access information on Kuroco management page
Access Kuroco's management page and click [External system cooperation] -> [Google Analytics] on the side menu.
You can see that the access information is fetched properly.
Related documents
Support
If you have any other questions, please contact us or check out Our Slack Community.