How to link with SendGrid
By linking Kuroco with SendGrid, you can set the reply and the notification email from the system to any email address.
Without SendGrid, the notification email address will be "noreply@kuroco-mail.app".
This tutorial explains how to integrate with SendGrid on the Kuroco management page and how to change the email address.
Note: Due to changes in the SendGrid specifications, the SendGrid API KEY acquisition method may differ from this tutorial. For details, please check the latest information on Send Grid.
SendGrid's setting
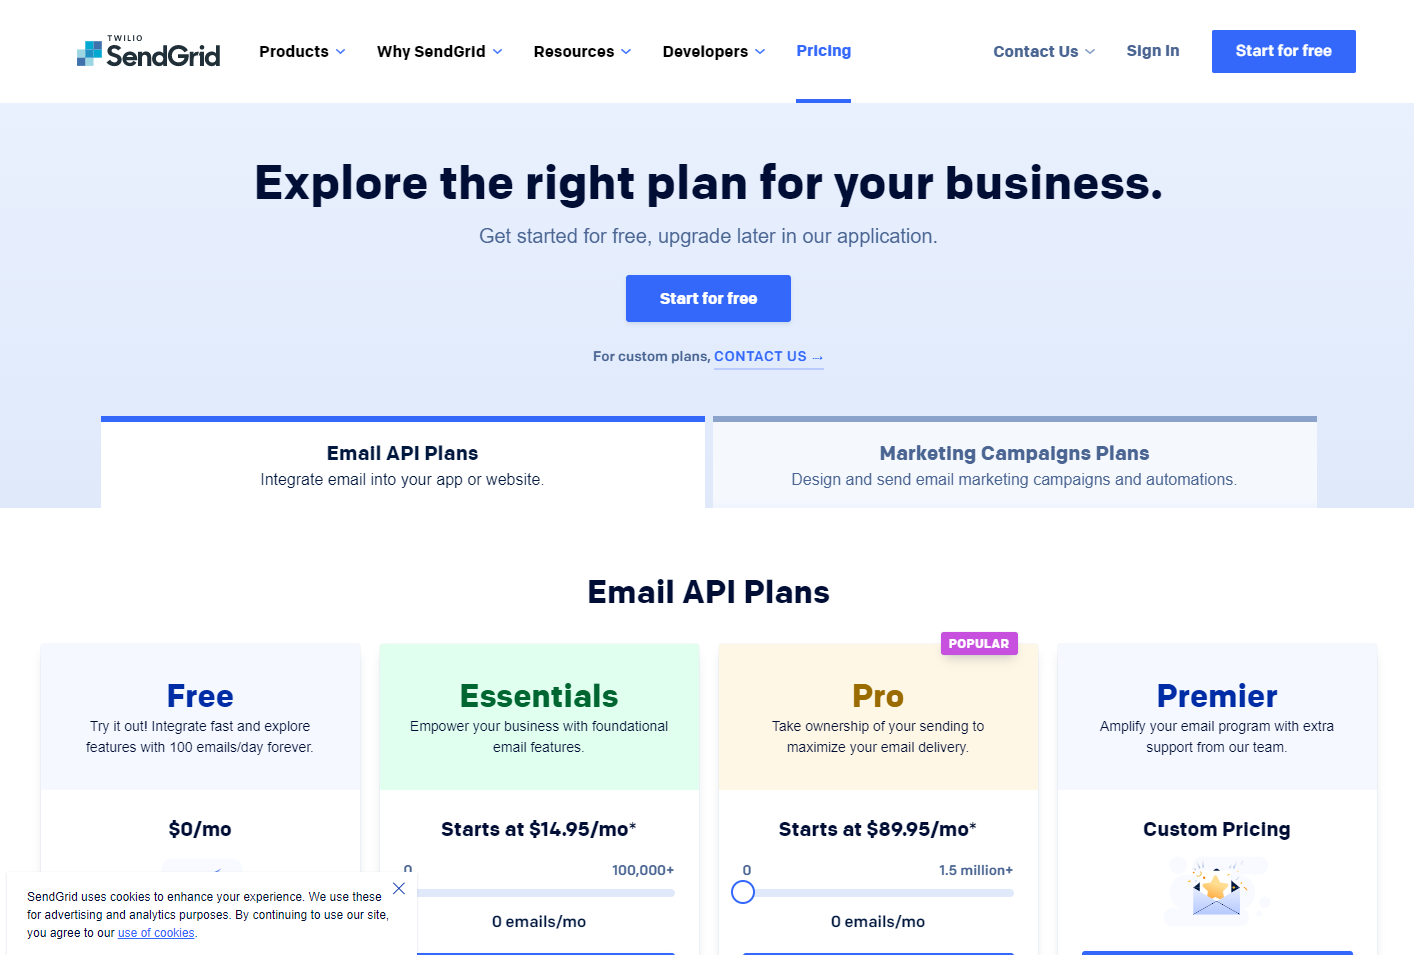
1. Create an account
First, check the plan on SendGrid and create your account.
2. Authenticate sending domain
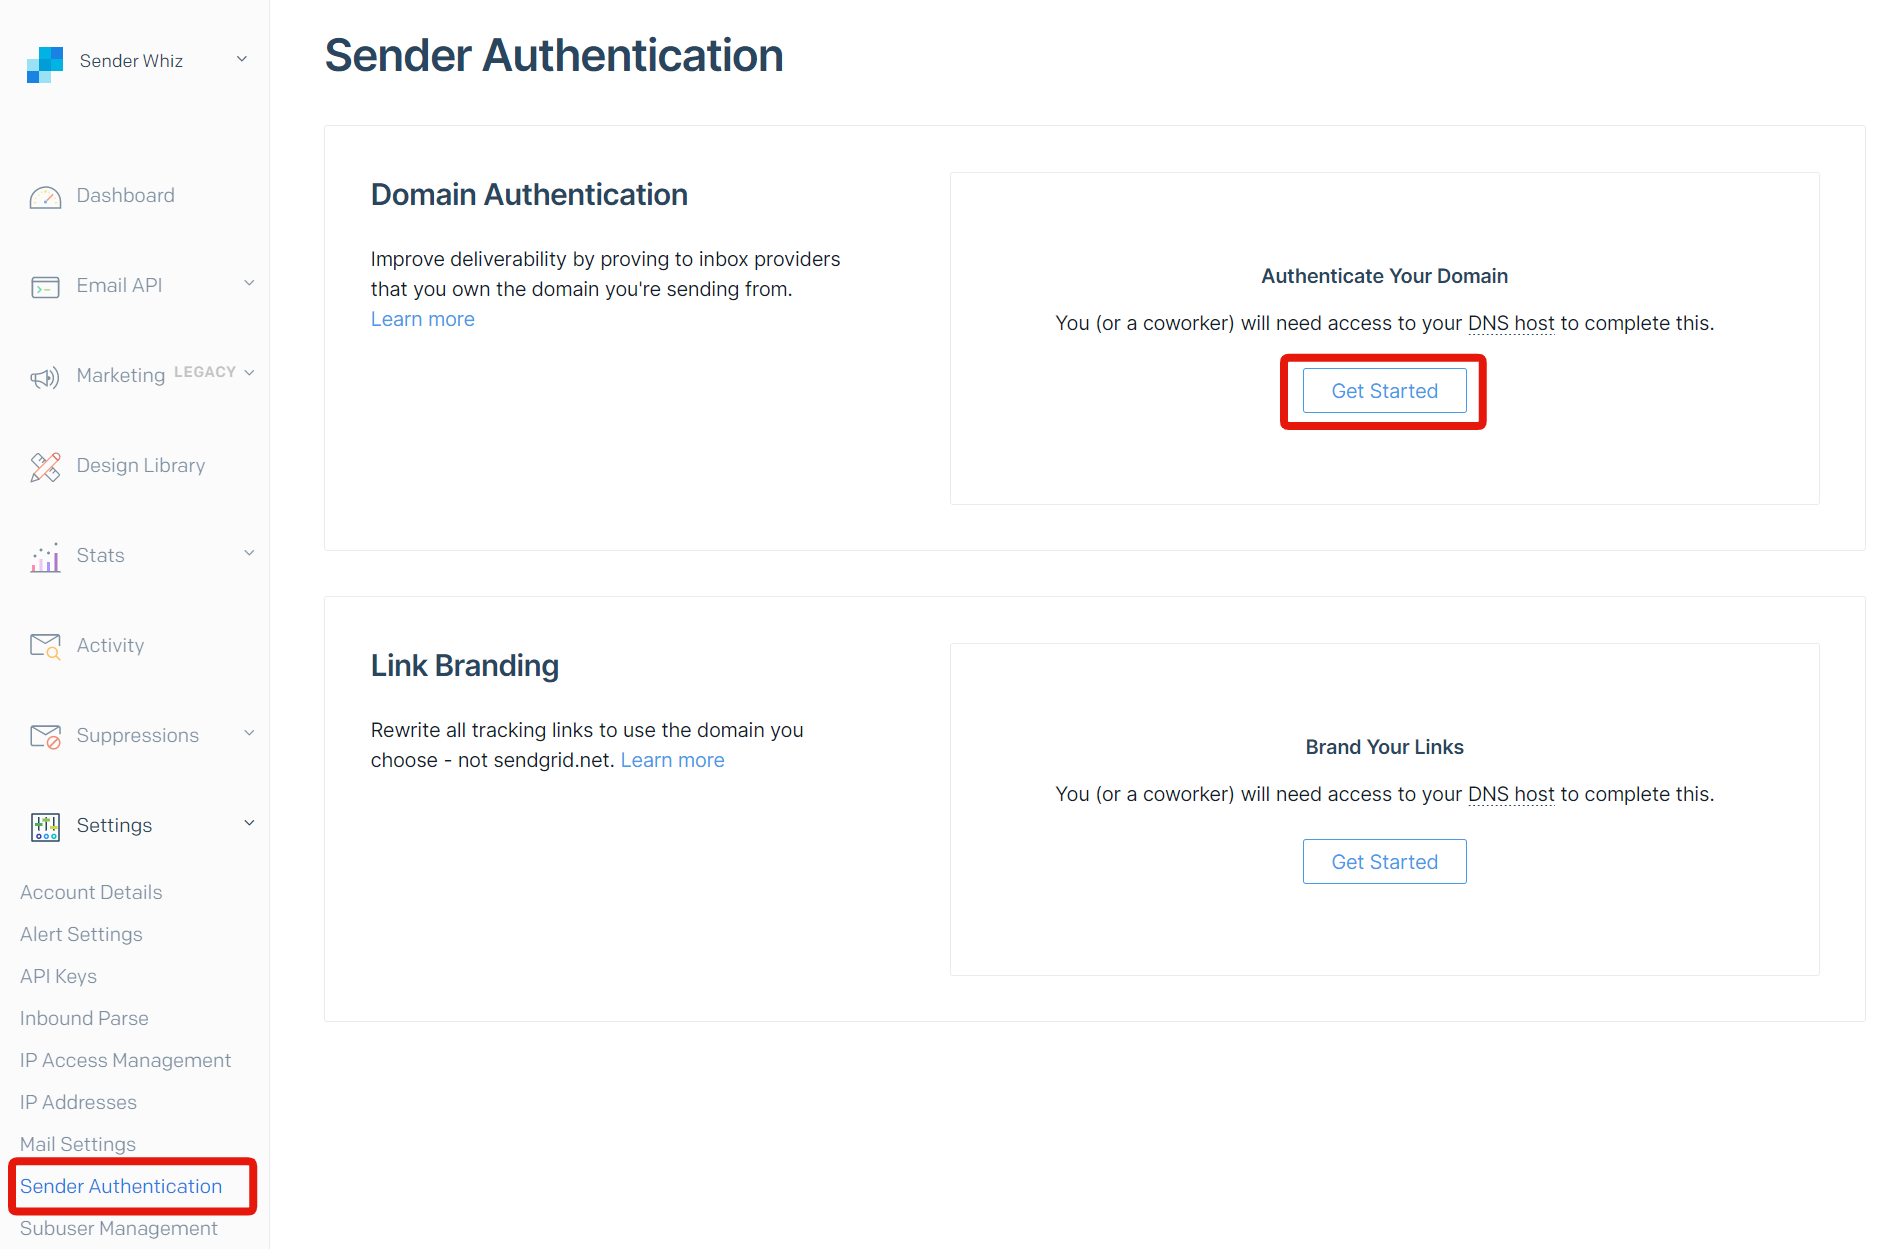
Set up domain authentication referring to SendGrid tutorial and set up domain authentication.
After login your dashboard page, access [Settings] -> [Sender Authentication] and click [Get started] in the domain authentication section.
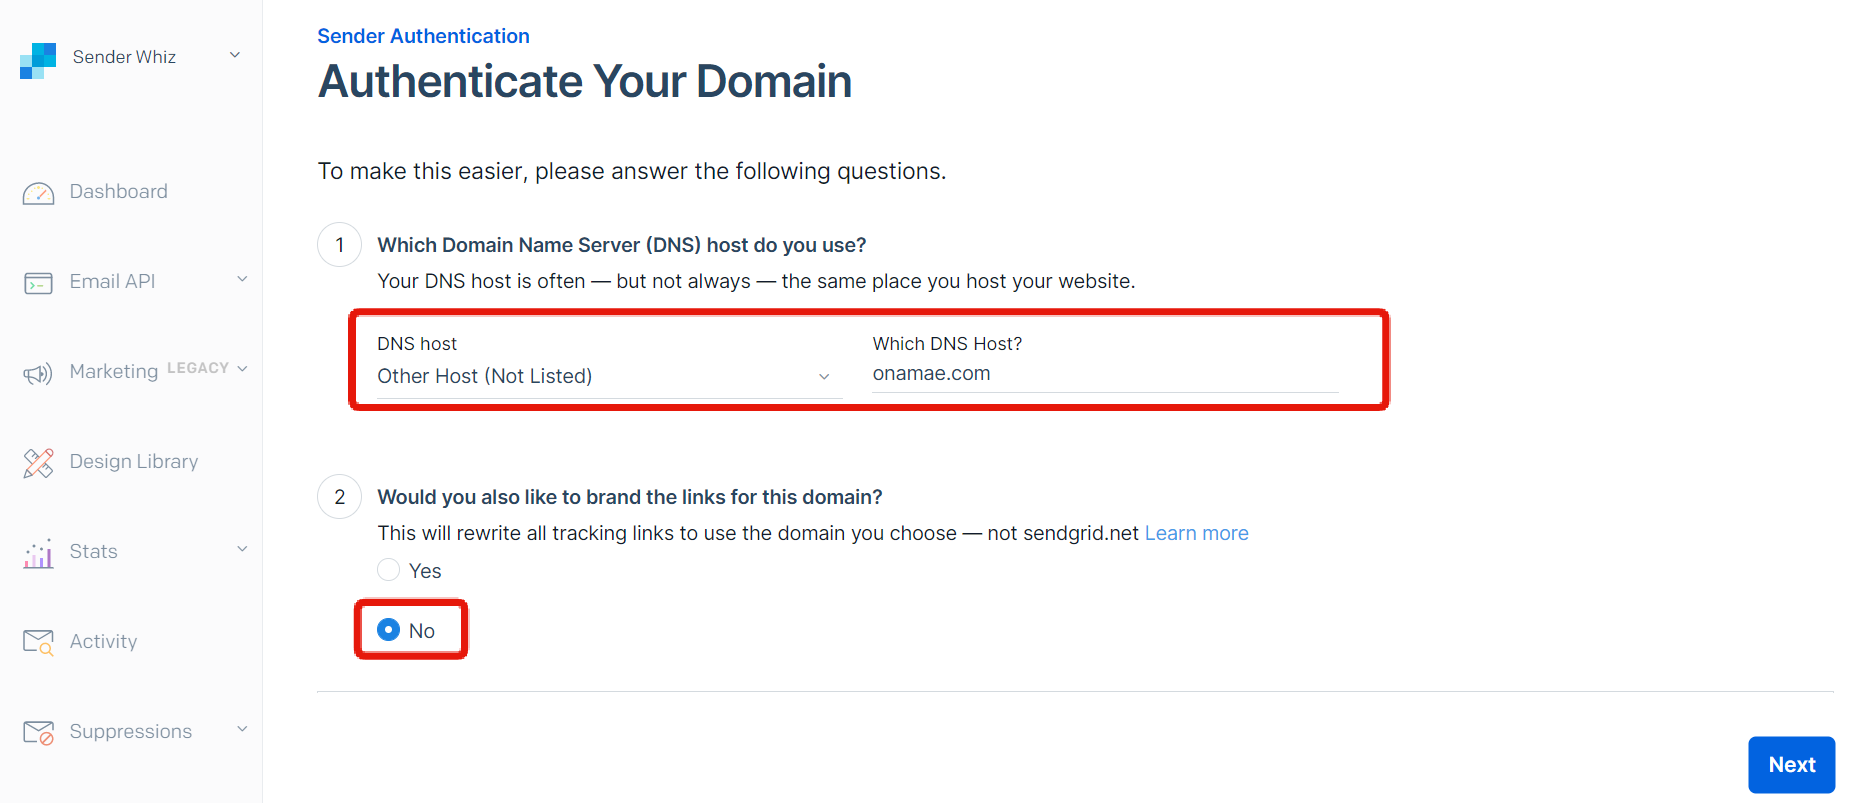
 Select the DNS host you are using on 1, select "No" for 2(link branding) and click [Next].
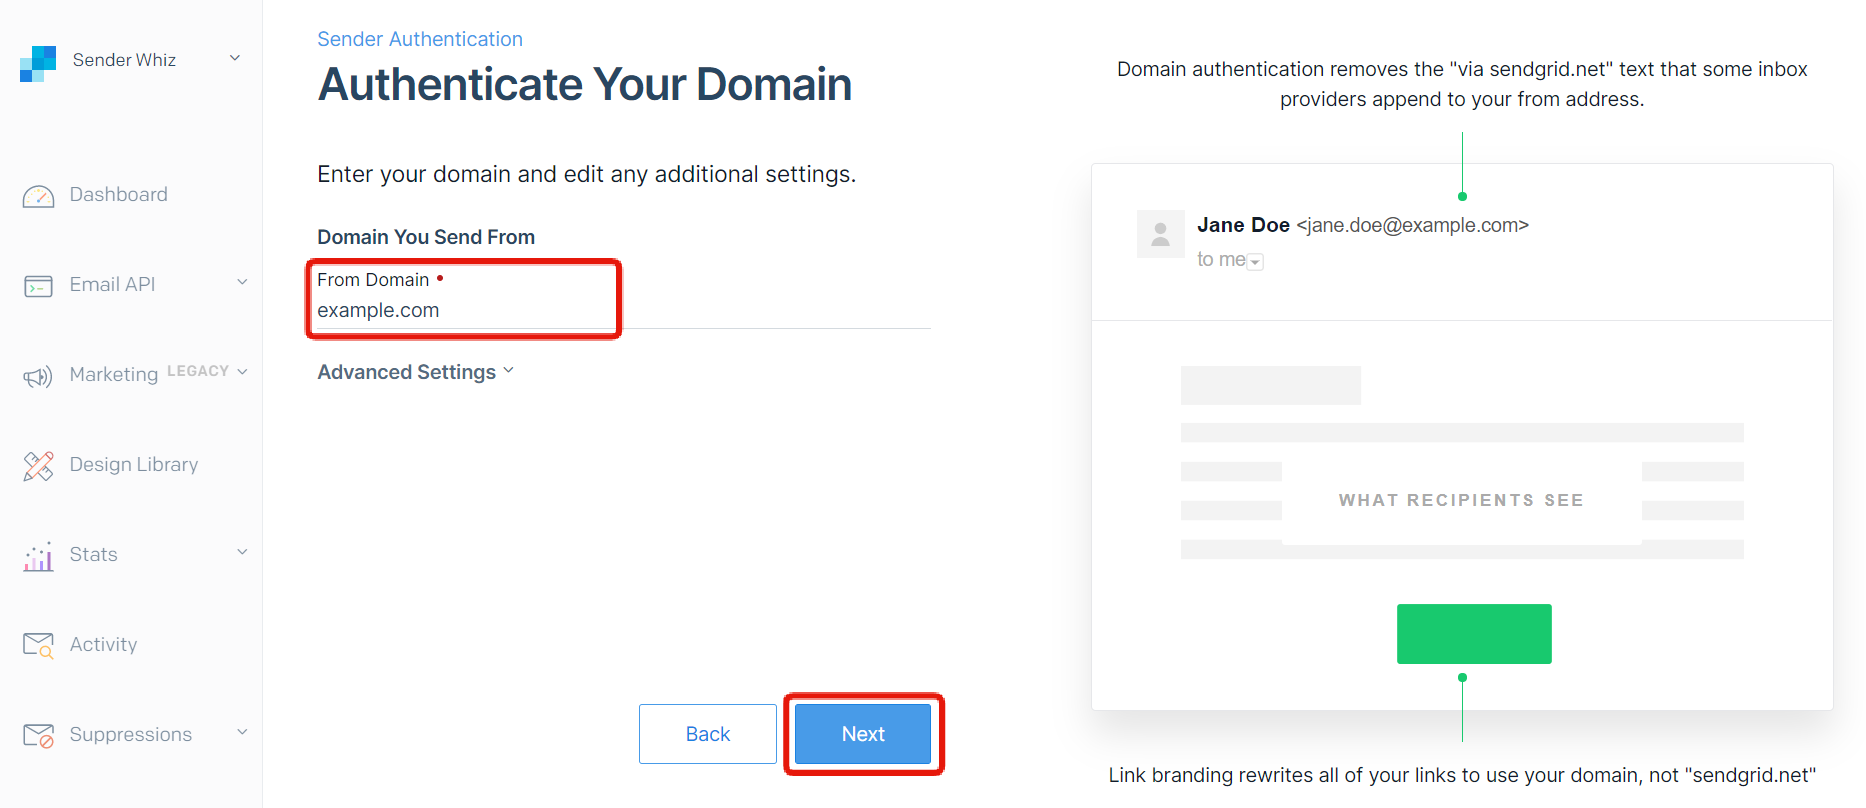
Enter the domain to be authenticated and click [Next].
 The DNS records that need to be set will be displayed.
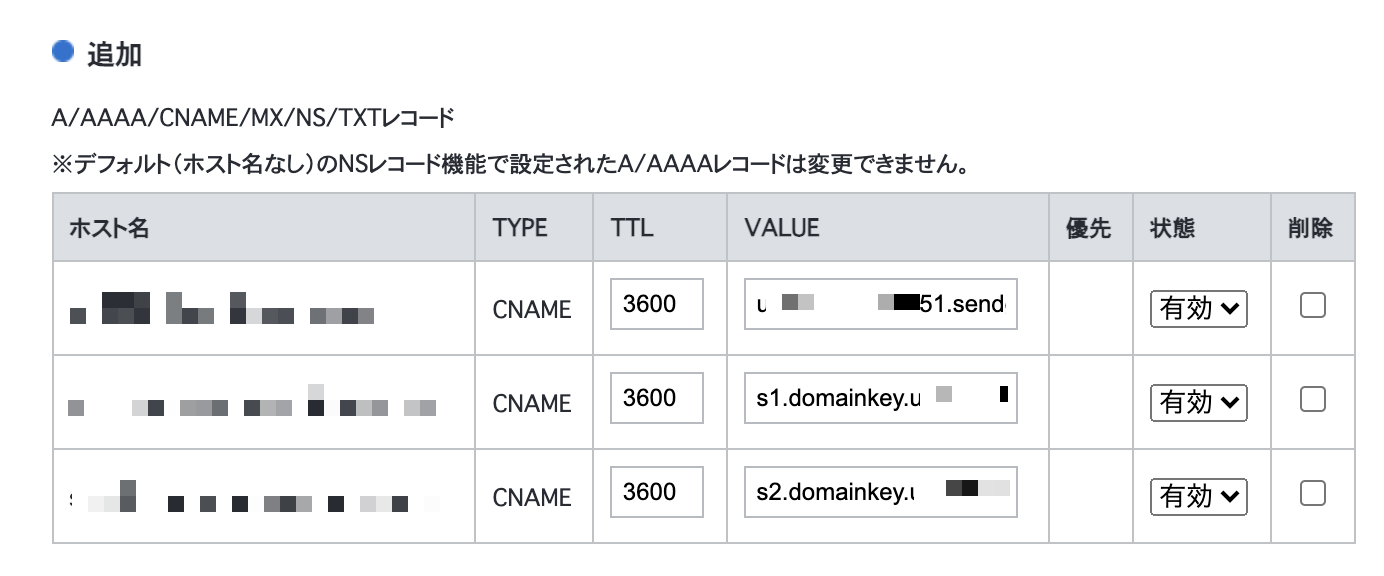
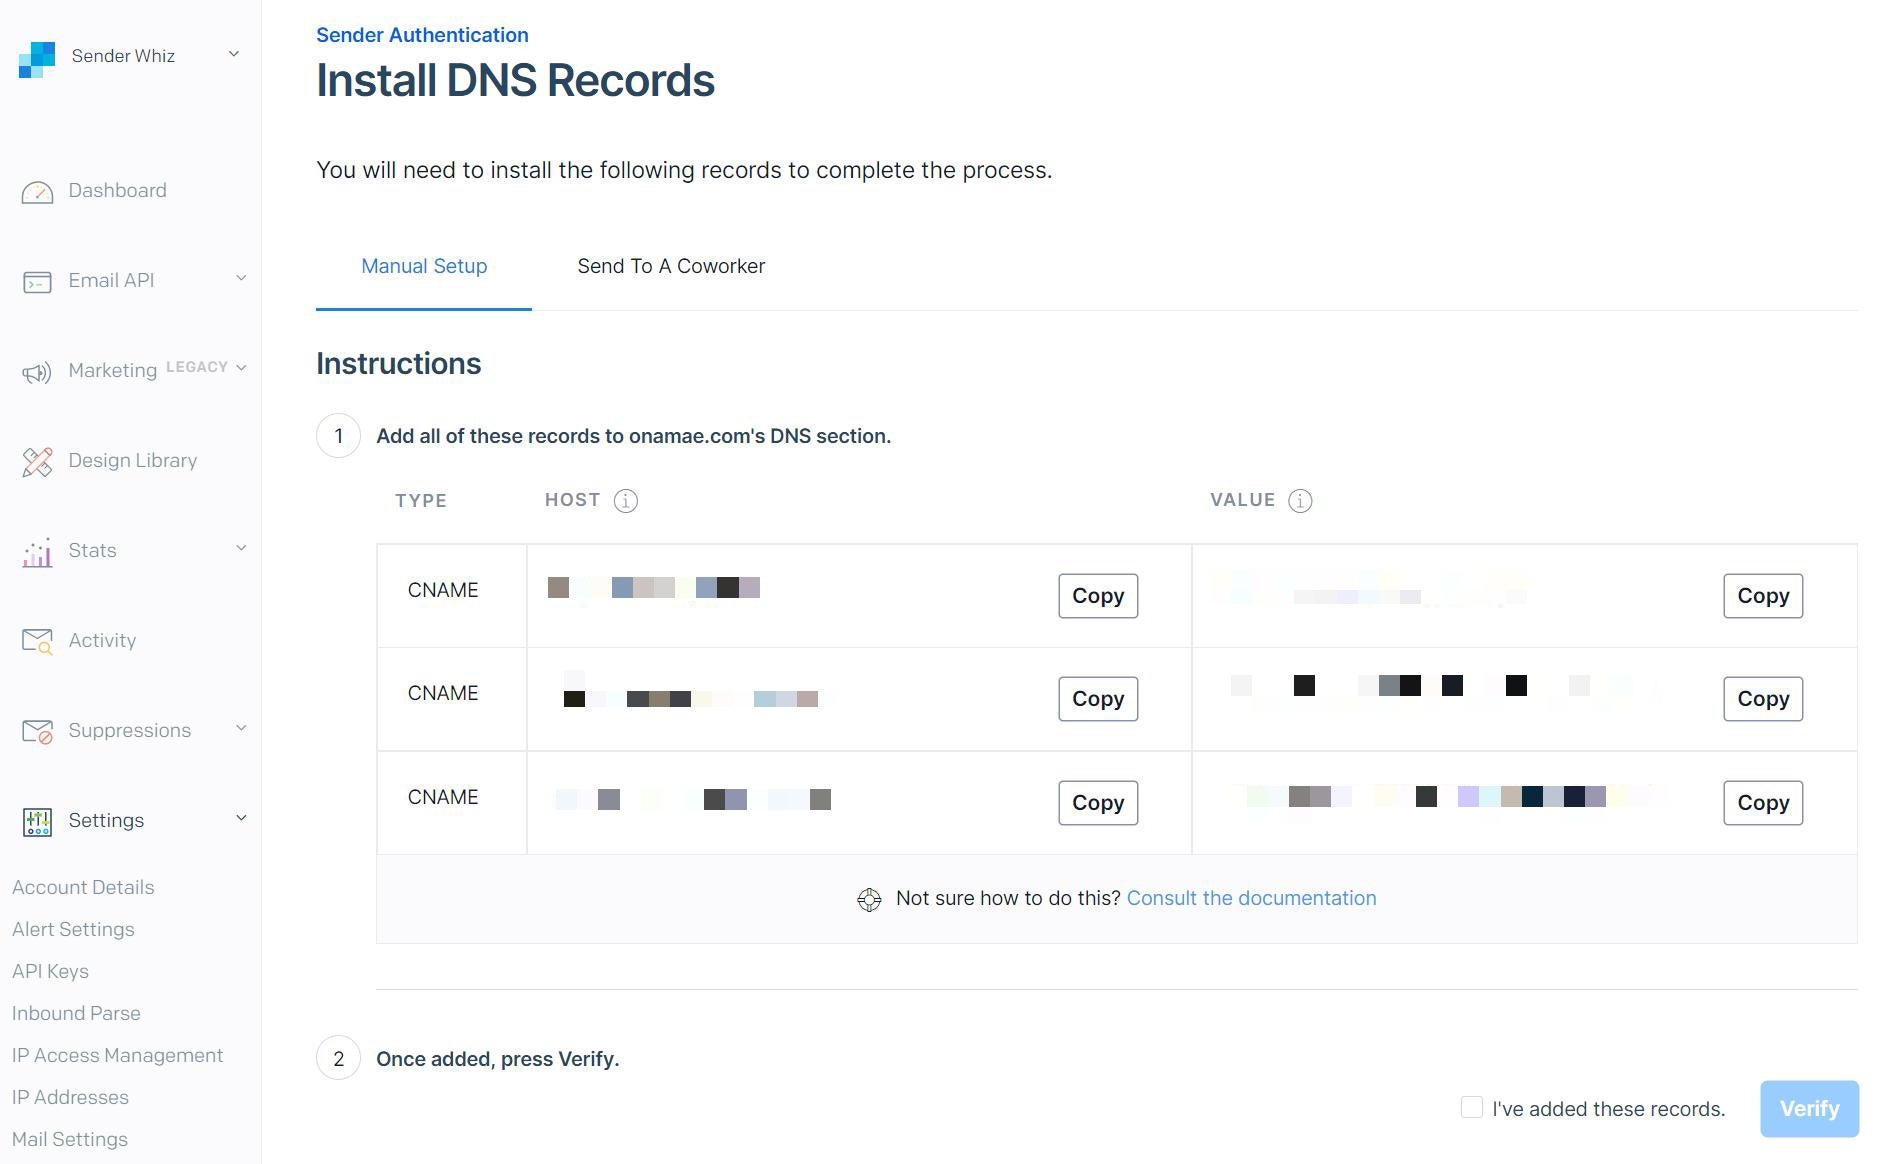 Add these DNS records to your domain's DNS.
 After adding records in DNS, wait until they are reflected. It can take a max of 48 hours.
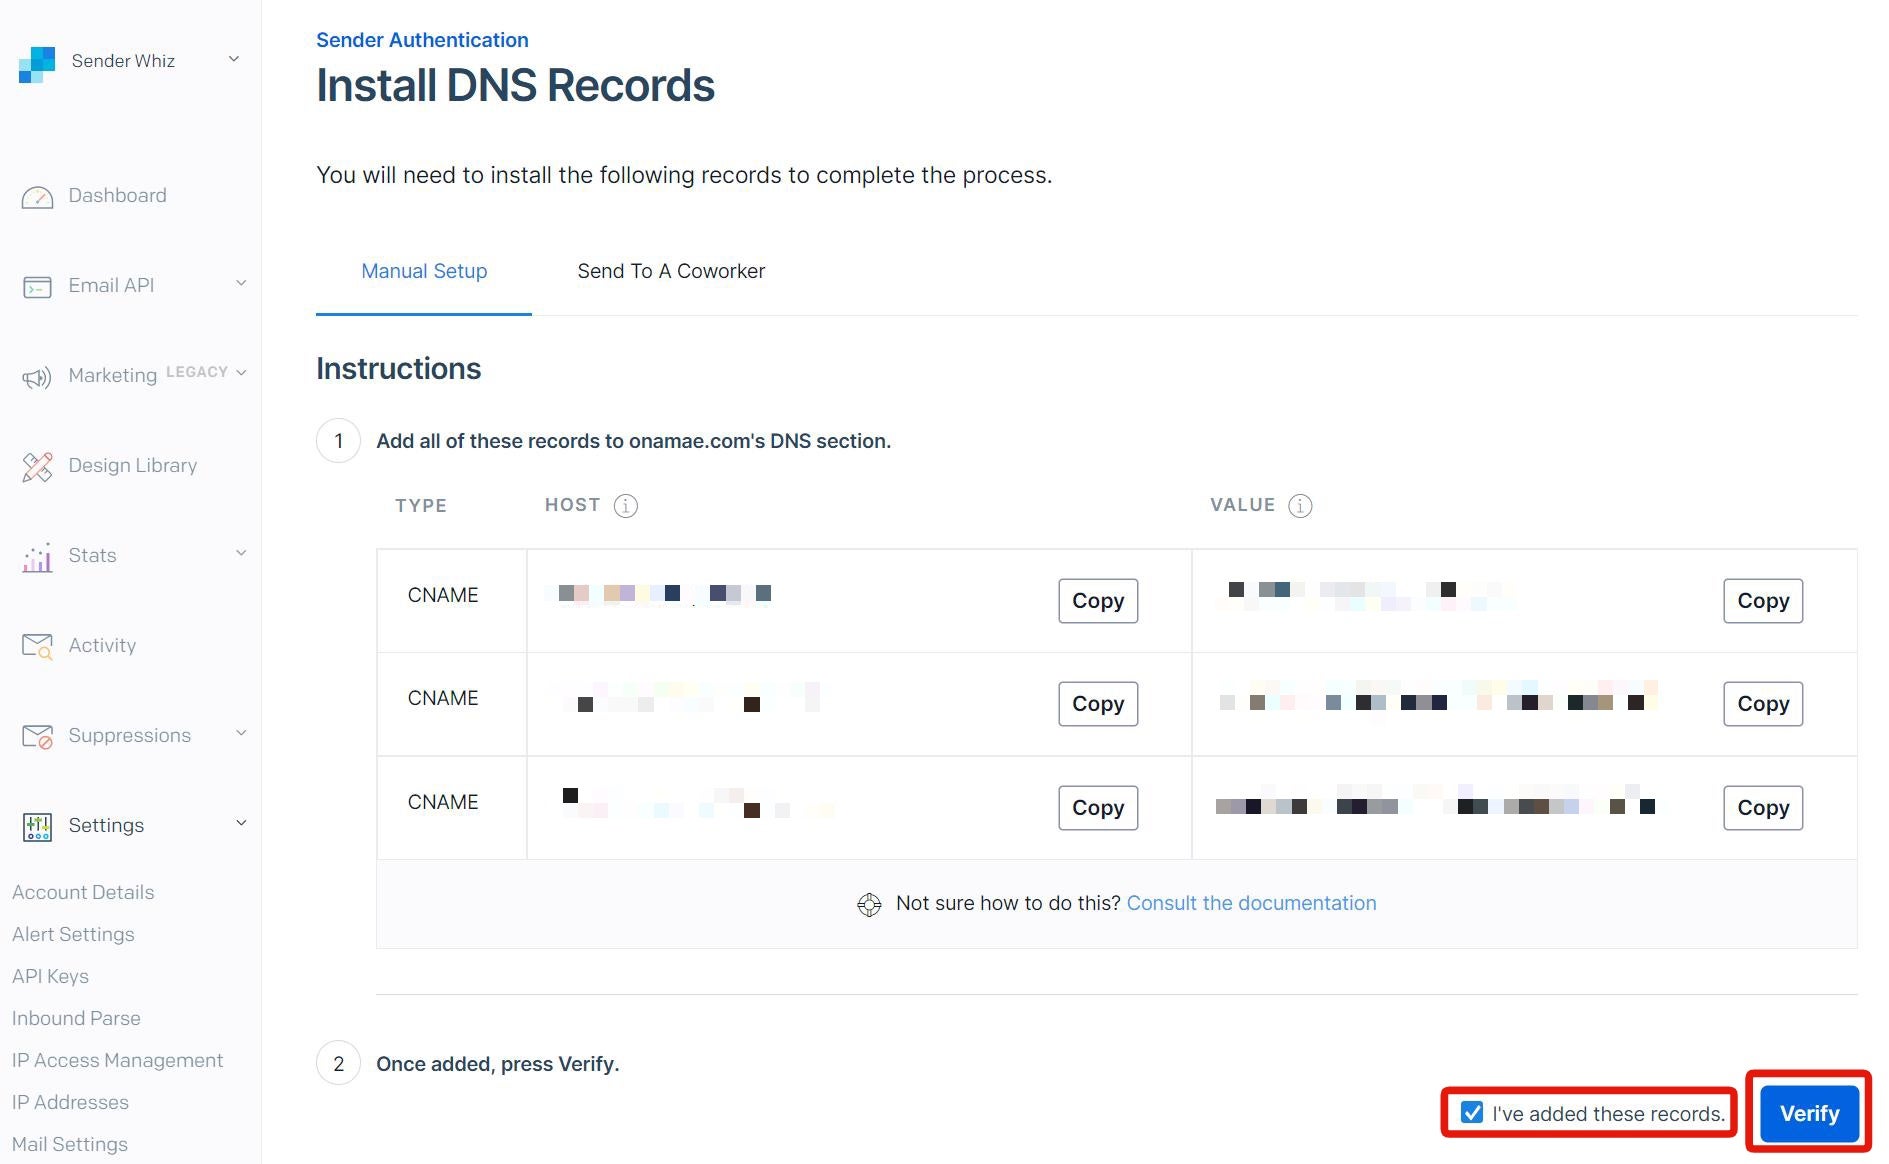
After the DNS setting is reflected, check [I'v added these records.] and click [Verify].
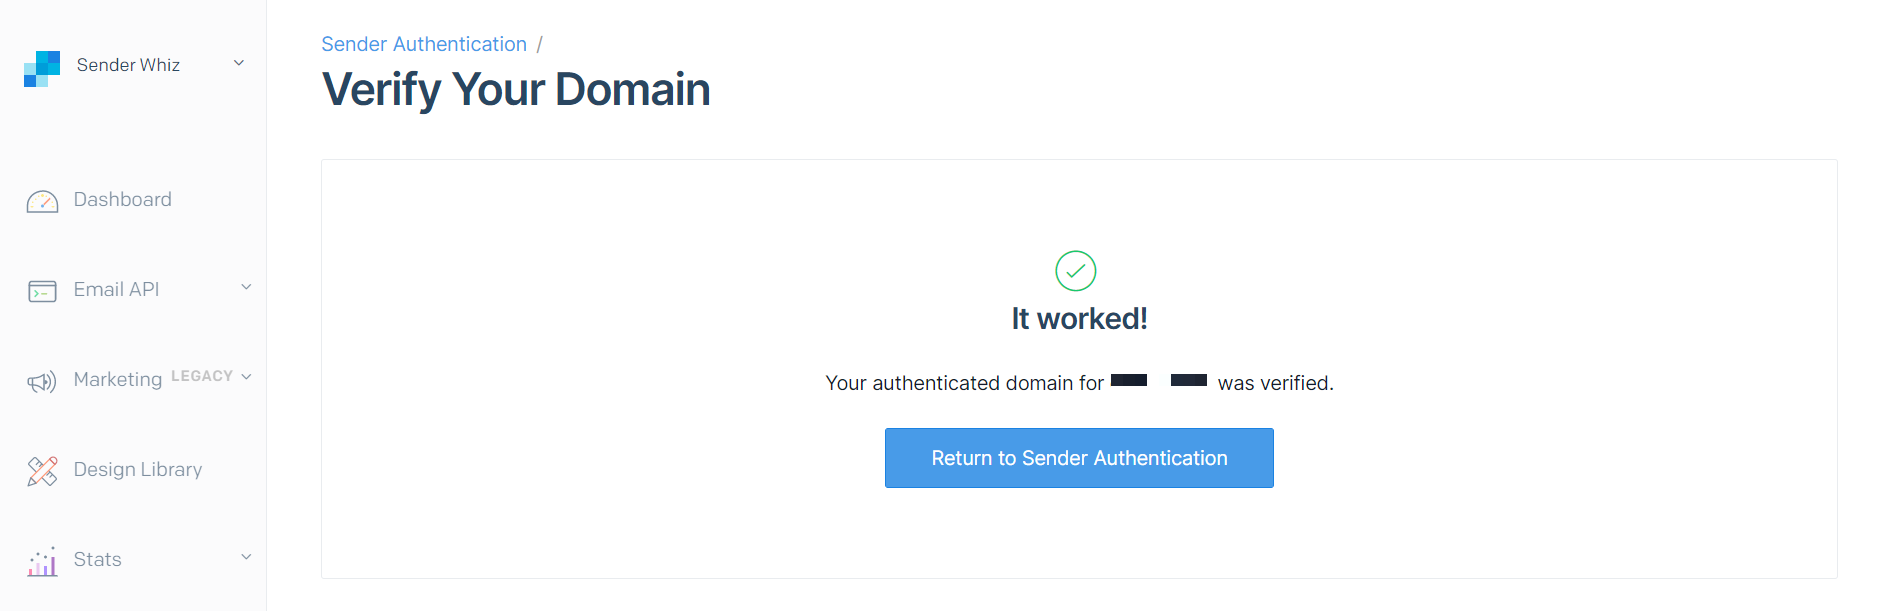
 If the below screen appears the domain authentication is complete.
In the case of SendGrid, authentication for SPF/DKIM is completed by configuring the three CNAME records mentioned above. Since this involves CNAME settings for a subdomain, it does not affect email sending from existing mail systems, and there is no need for modifications to existing SPF codes.
For more details, please refer to Understanding SPF and DKIM Authentication When Sending Emails via SendGrid.
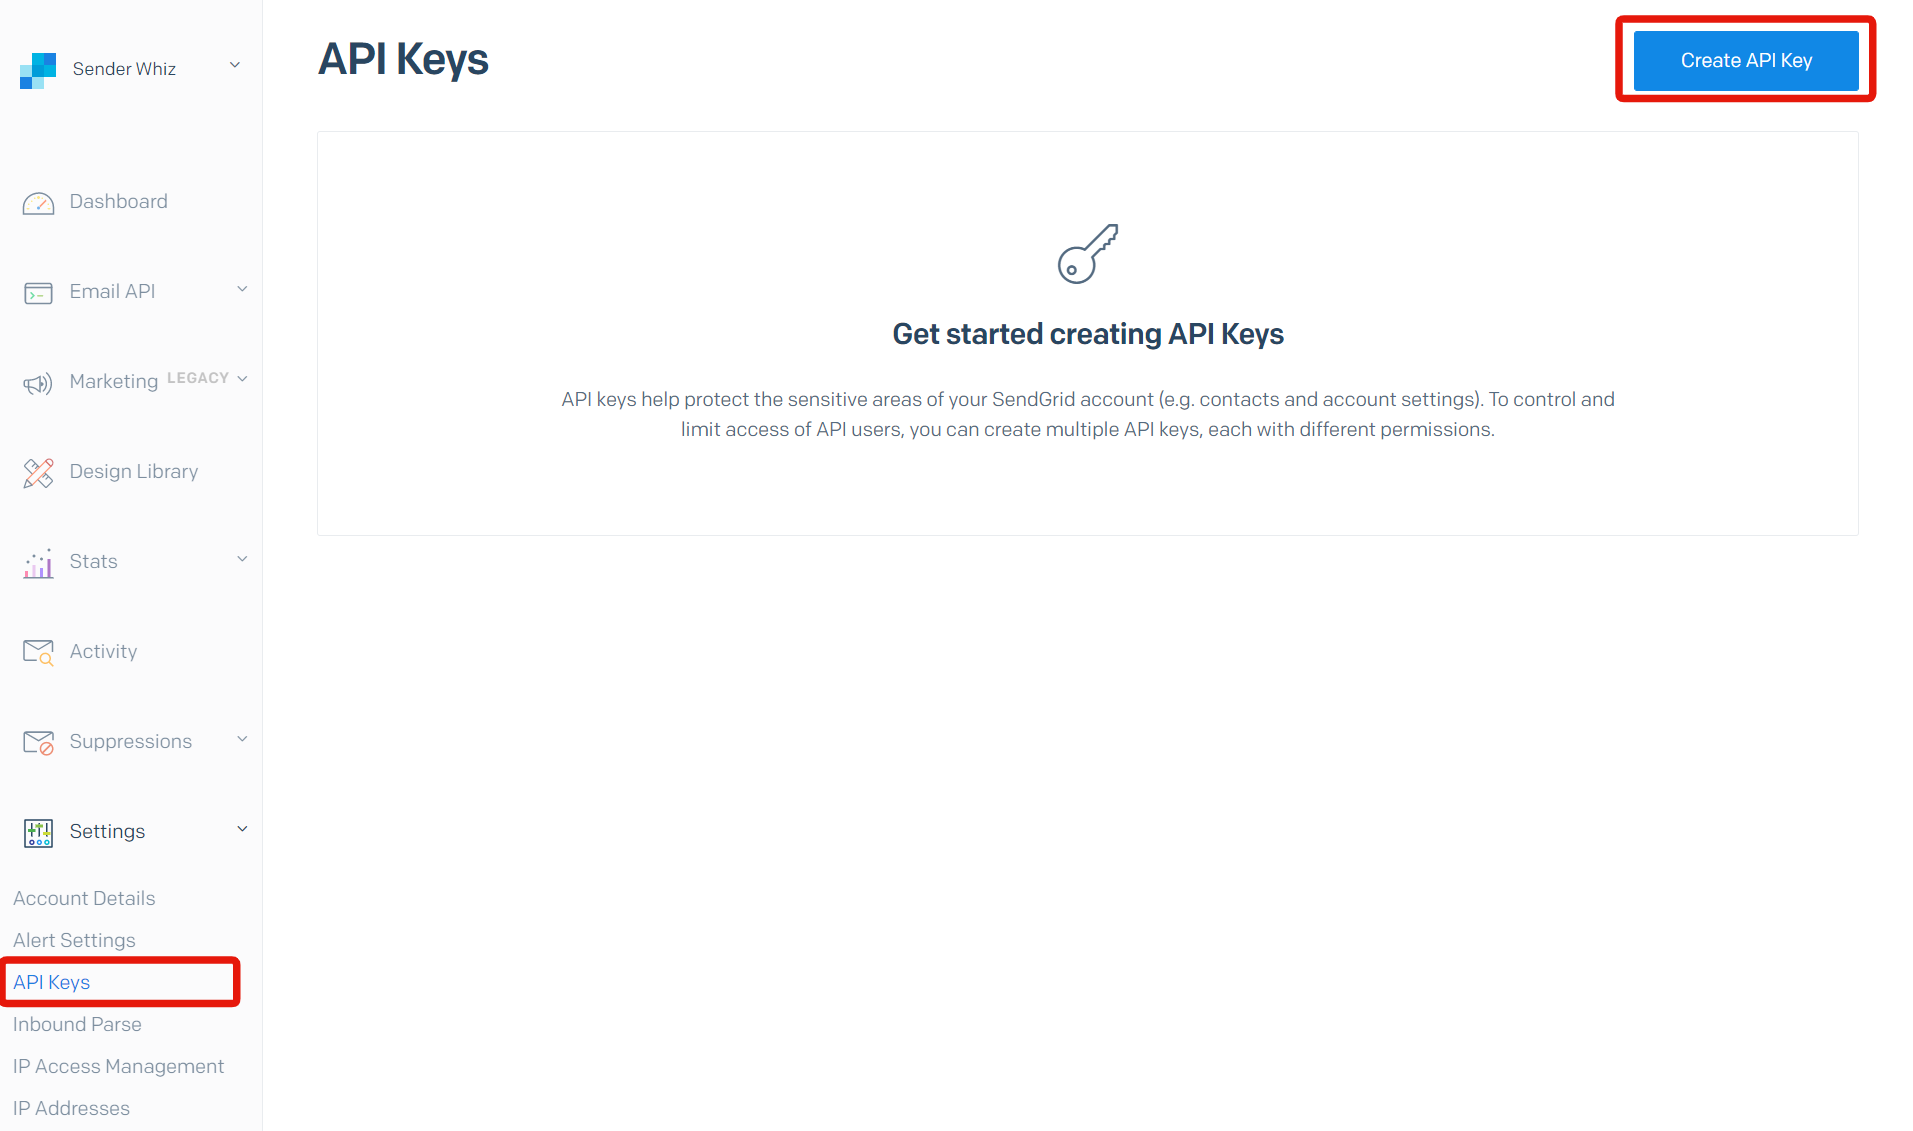
3. Confirm SendGrid APIKEY
Issue an API key referring to SendGrid tutorial.
On the dashboard, click [Settings] -> [API Keys] and click [Create API Key] on the top right of the screen.
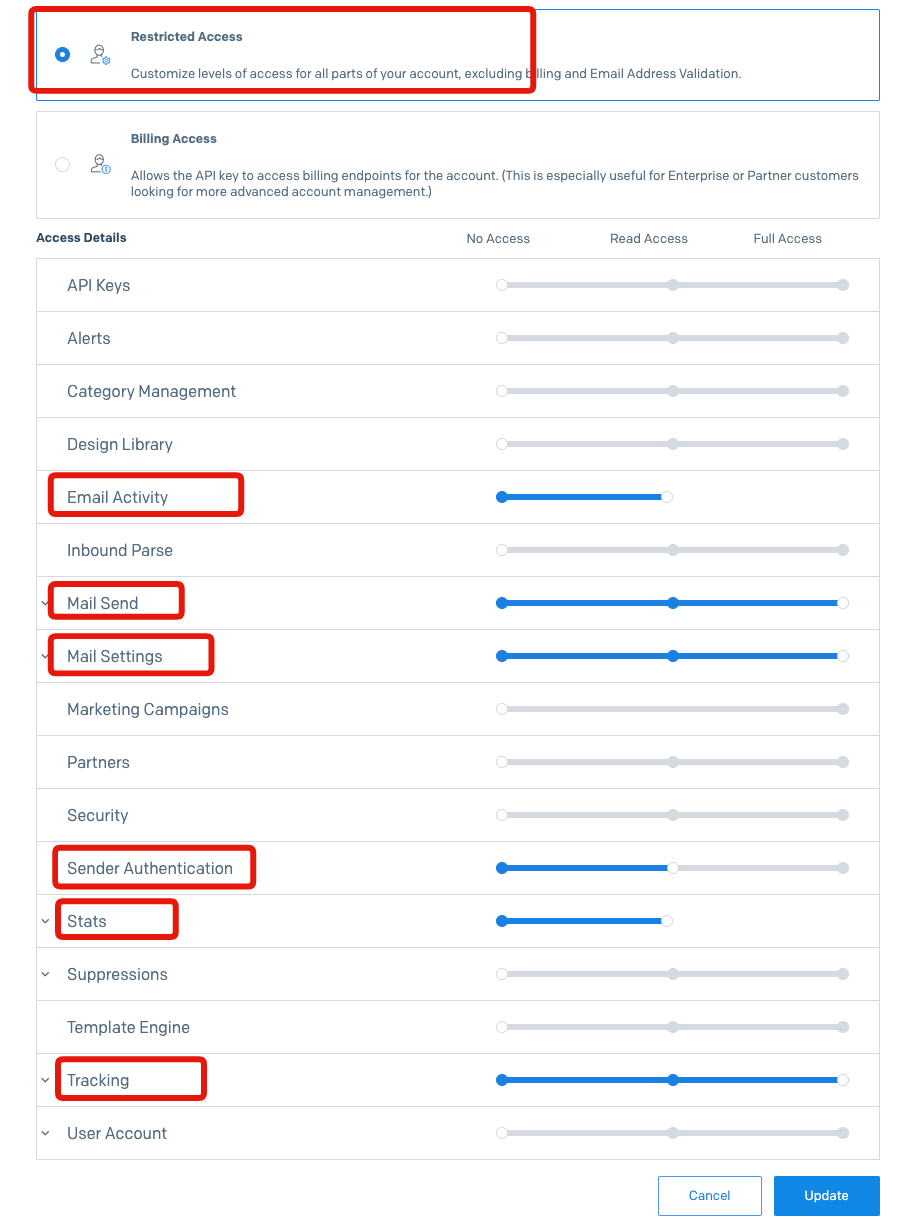
 Enter API Key Name, select
 Restricted Access, and click [Create & View].
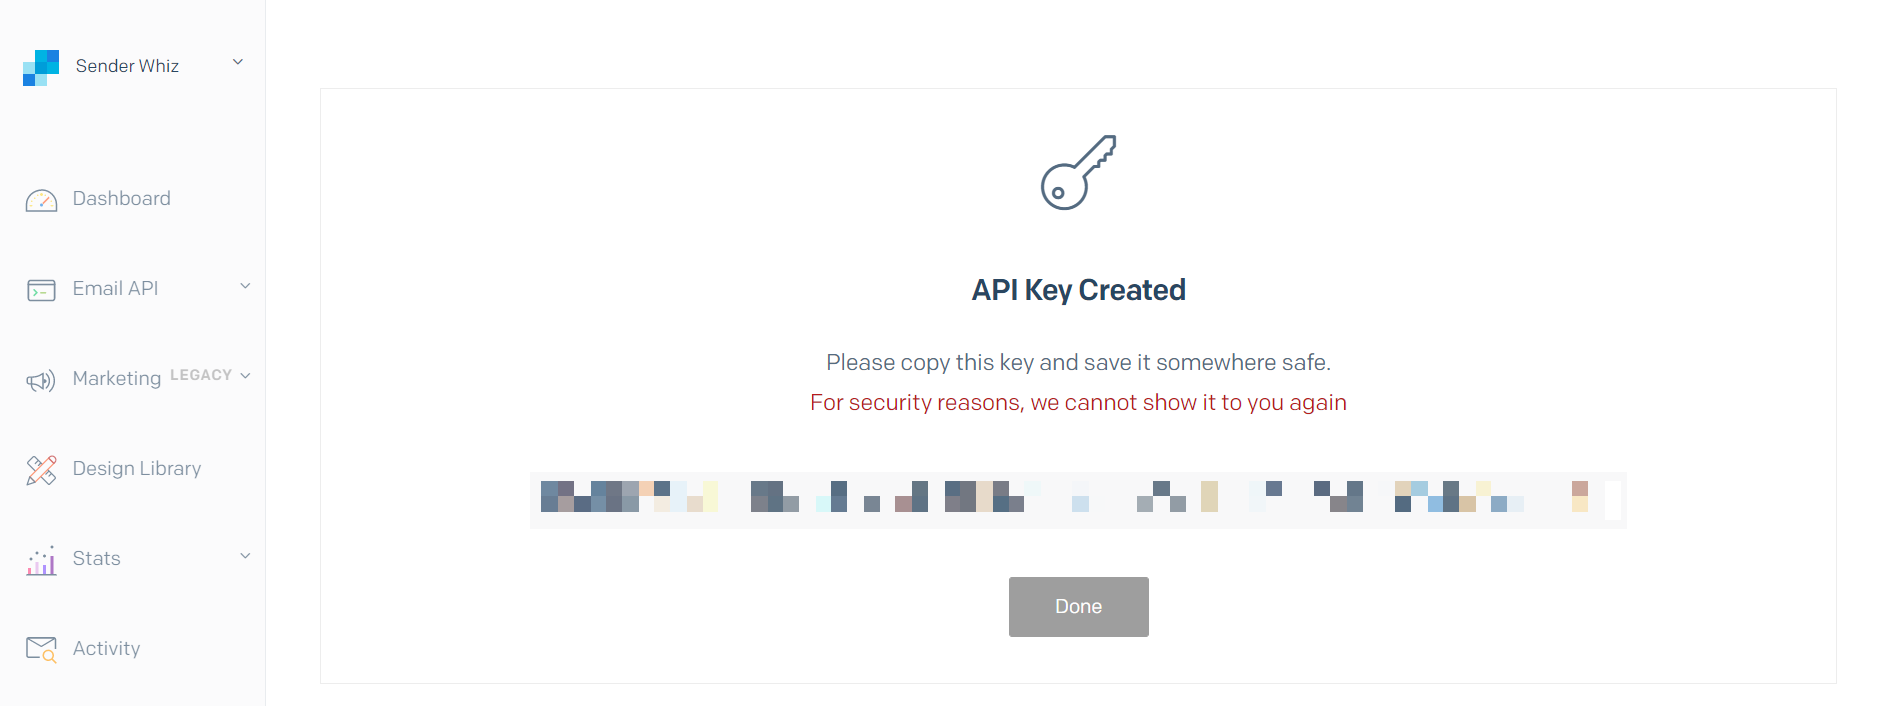
 If the below screen appears, the API key is issued properly.
Save the API Key because you cannot see it again after closing the page.
4. Disable Click Tracking
Access [Settings] -> [Tracking] and click 🖊️ icon next to "Click Tracking".
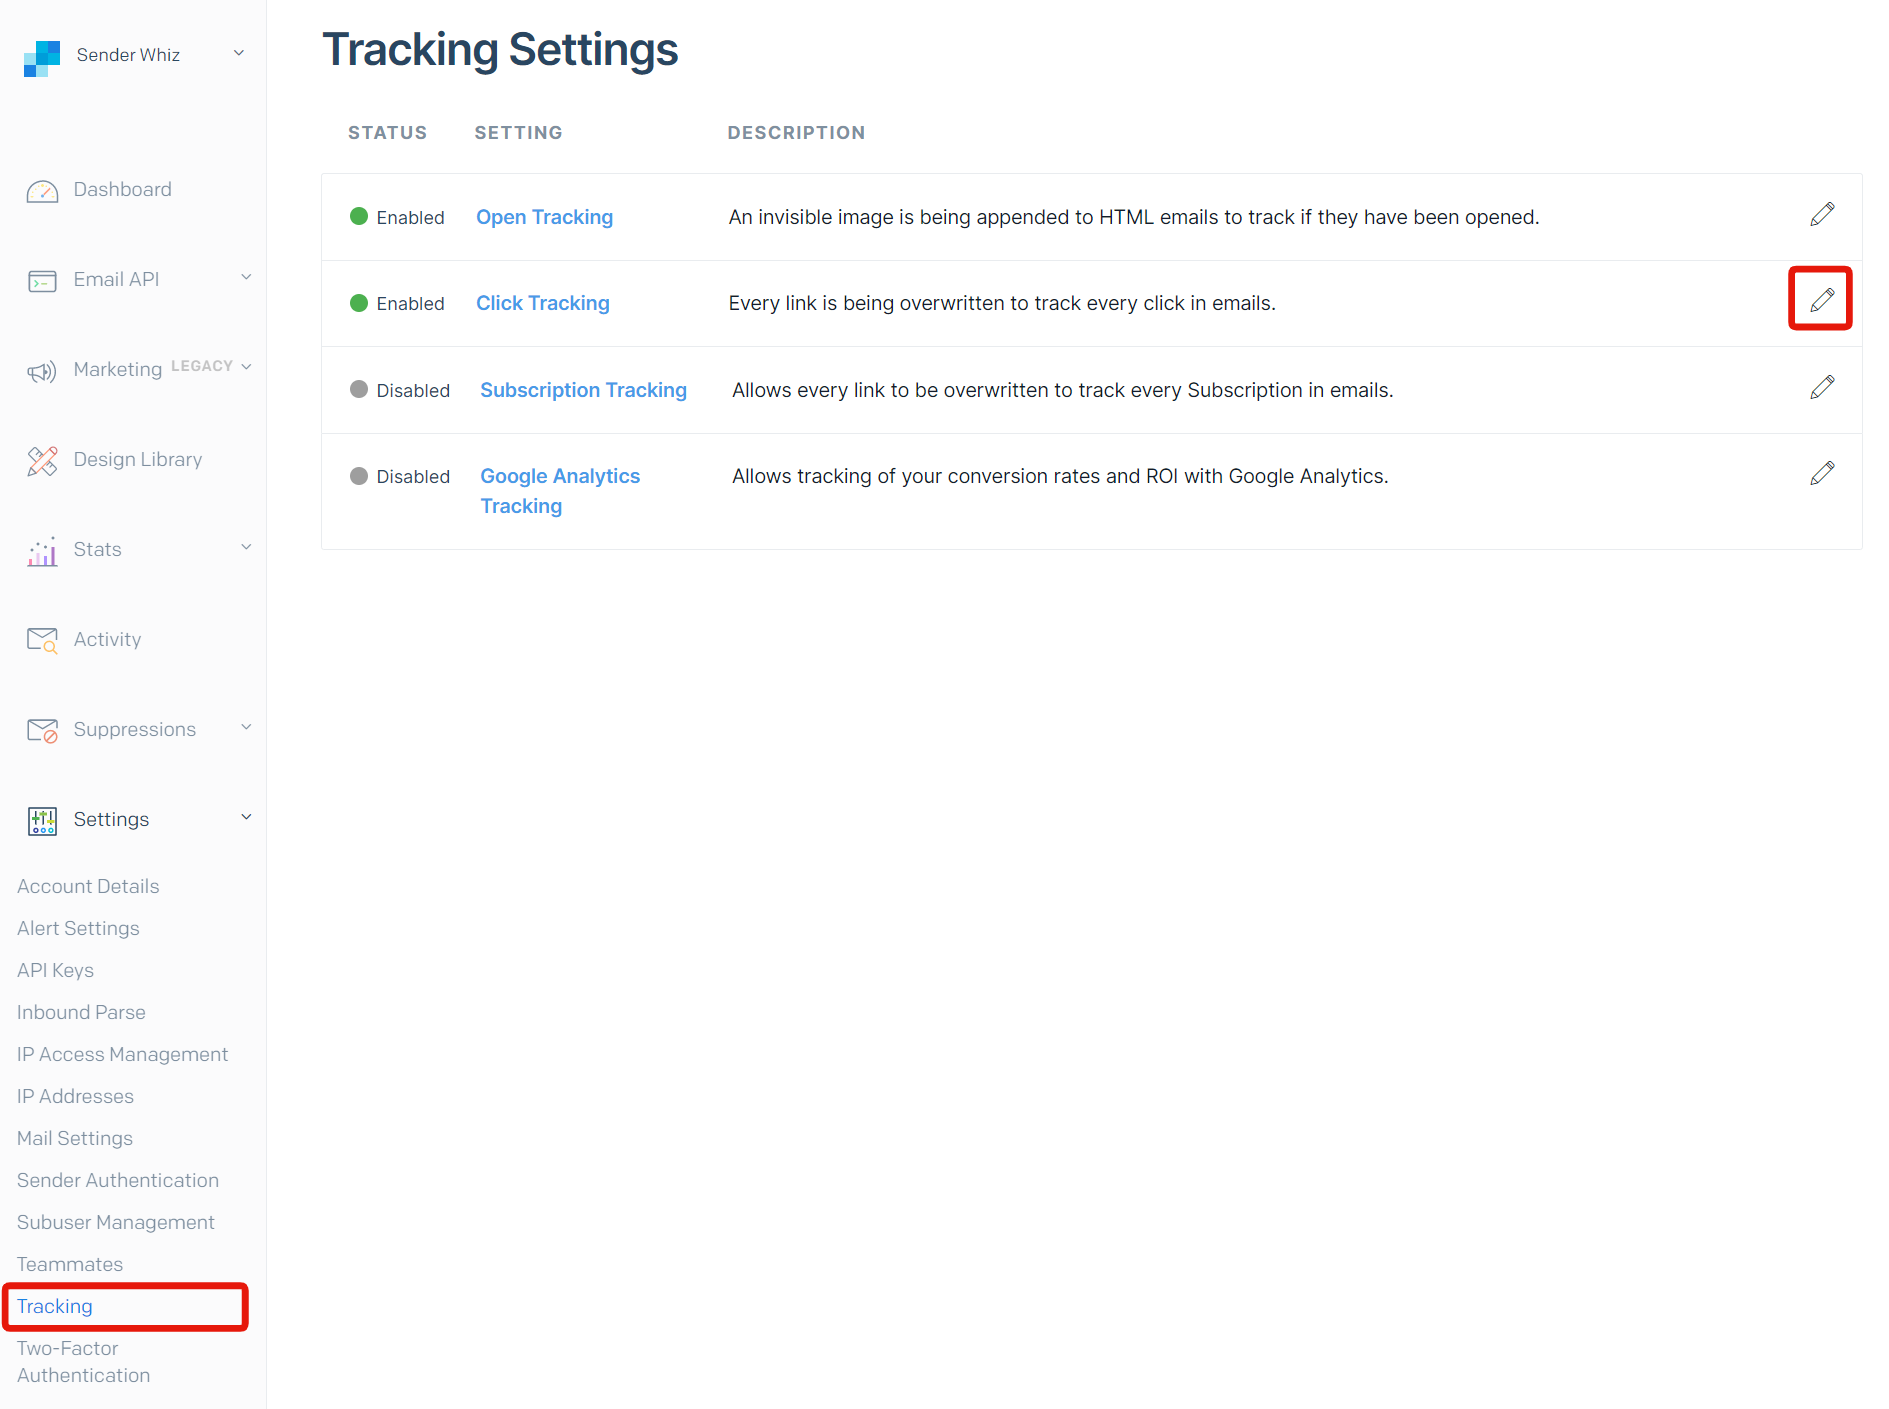 On the setting page, click the [DISABLED ENABLED] slider and set it to [DISABLED], and click [Save].
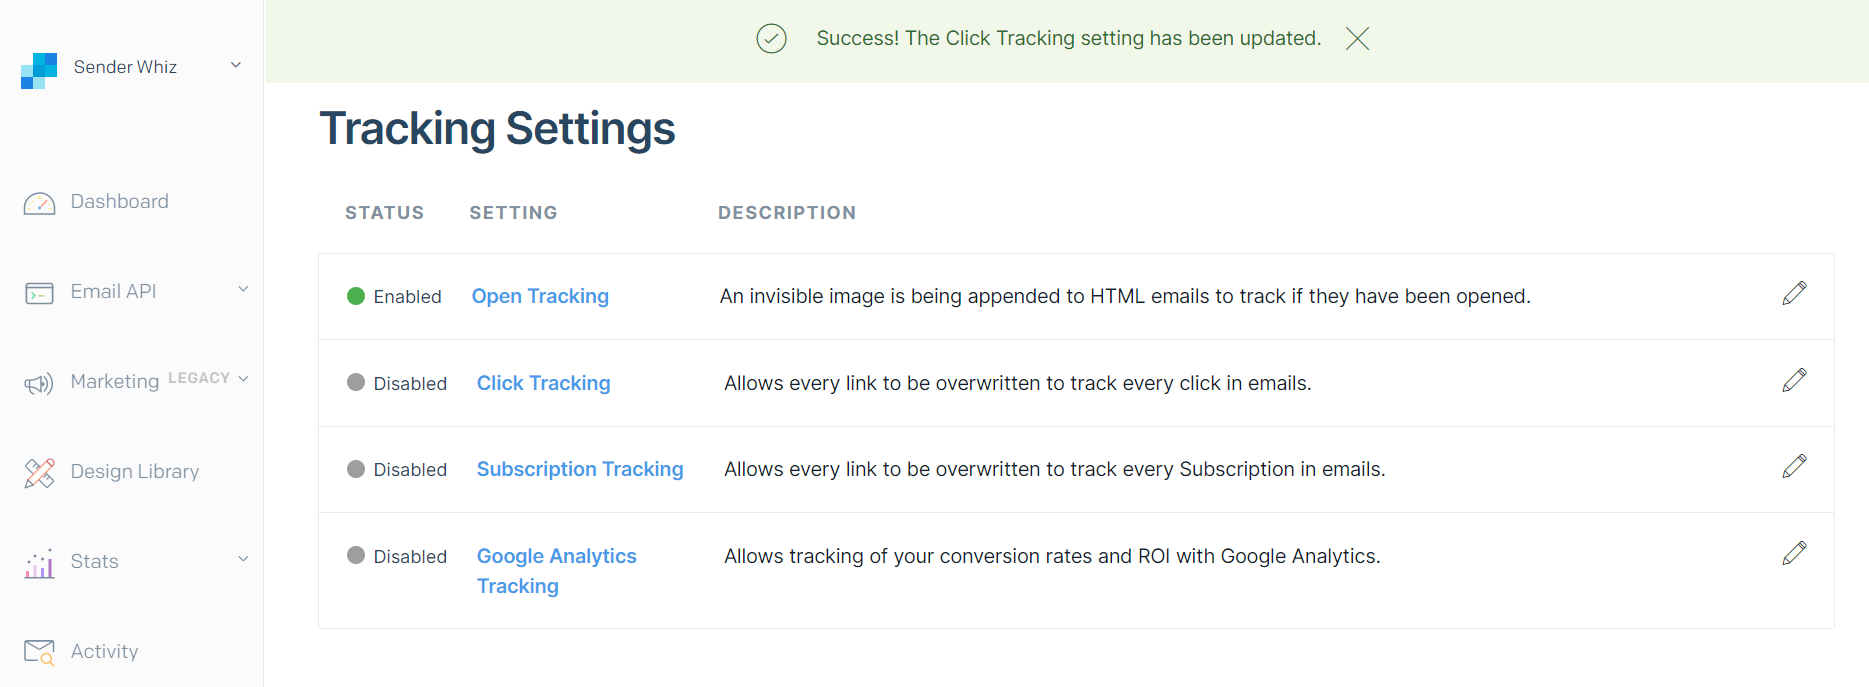
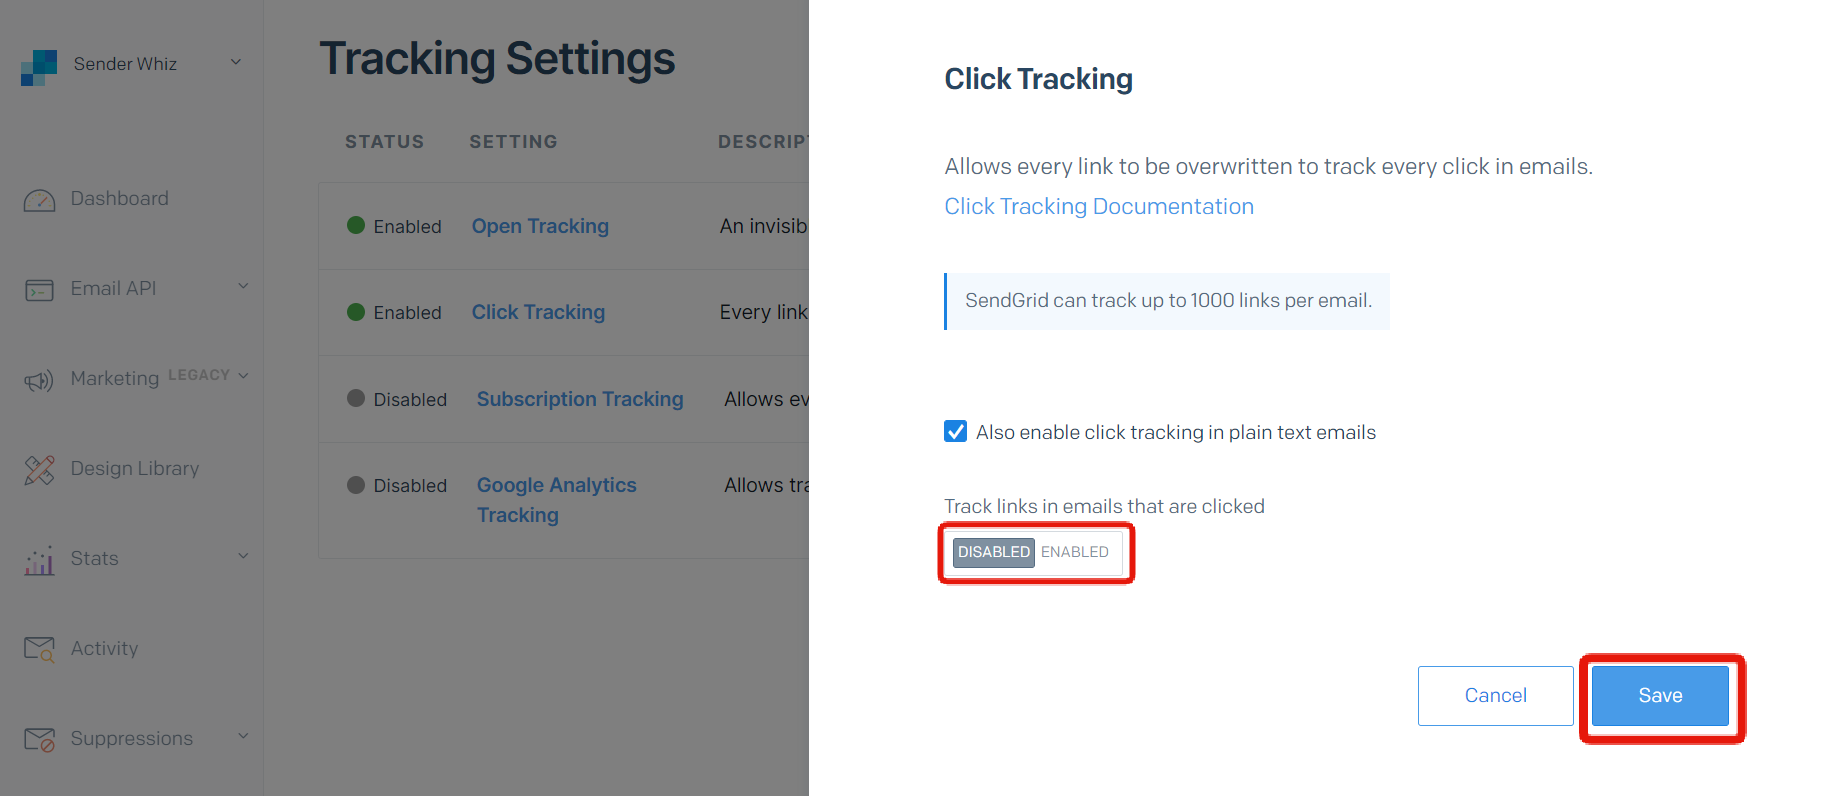 If the message "Success! The Click Tracking setting has been updated." is shown and
 Click Tracking's status changes to Disabled, the setting is complete.
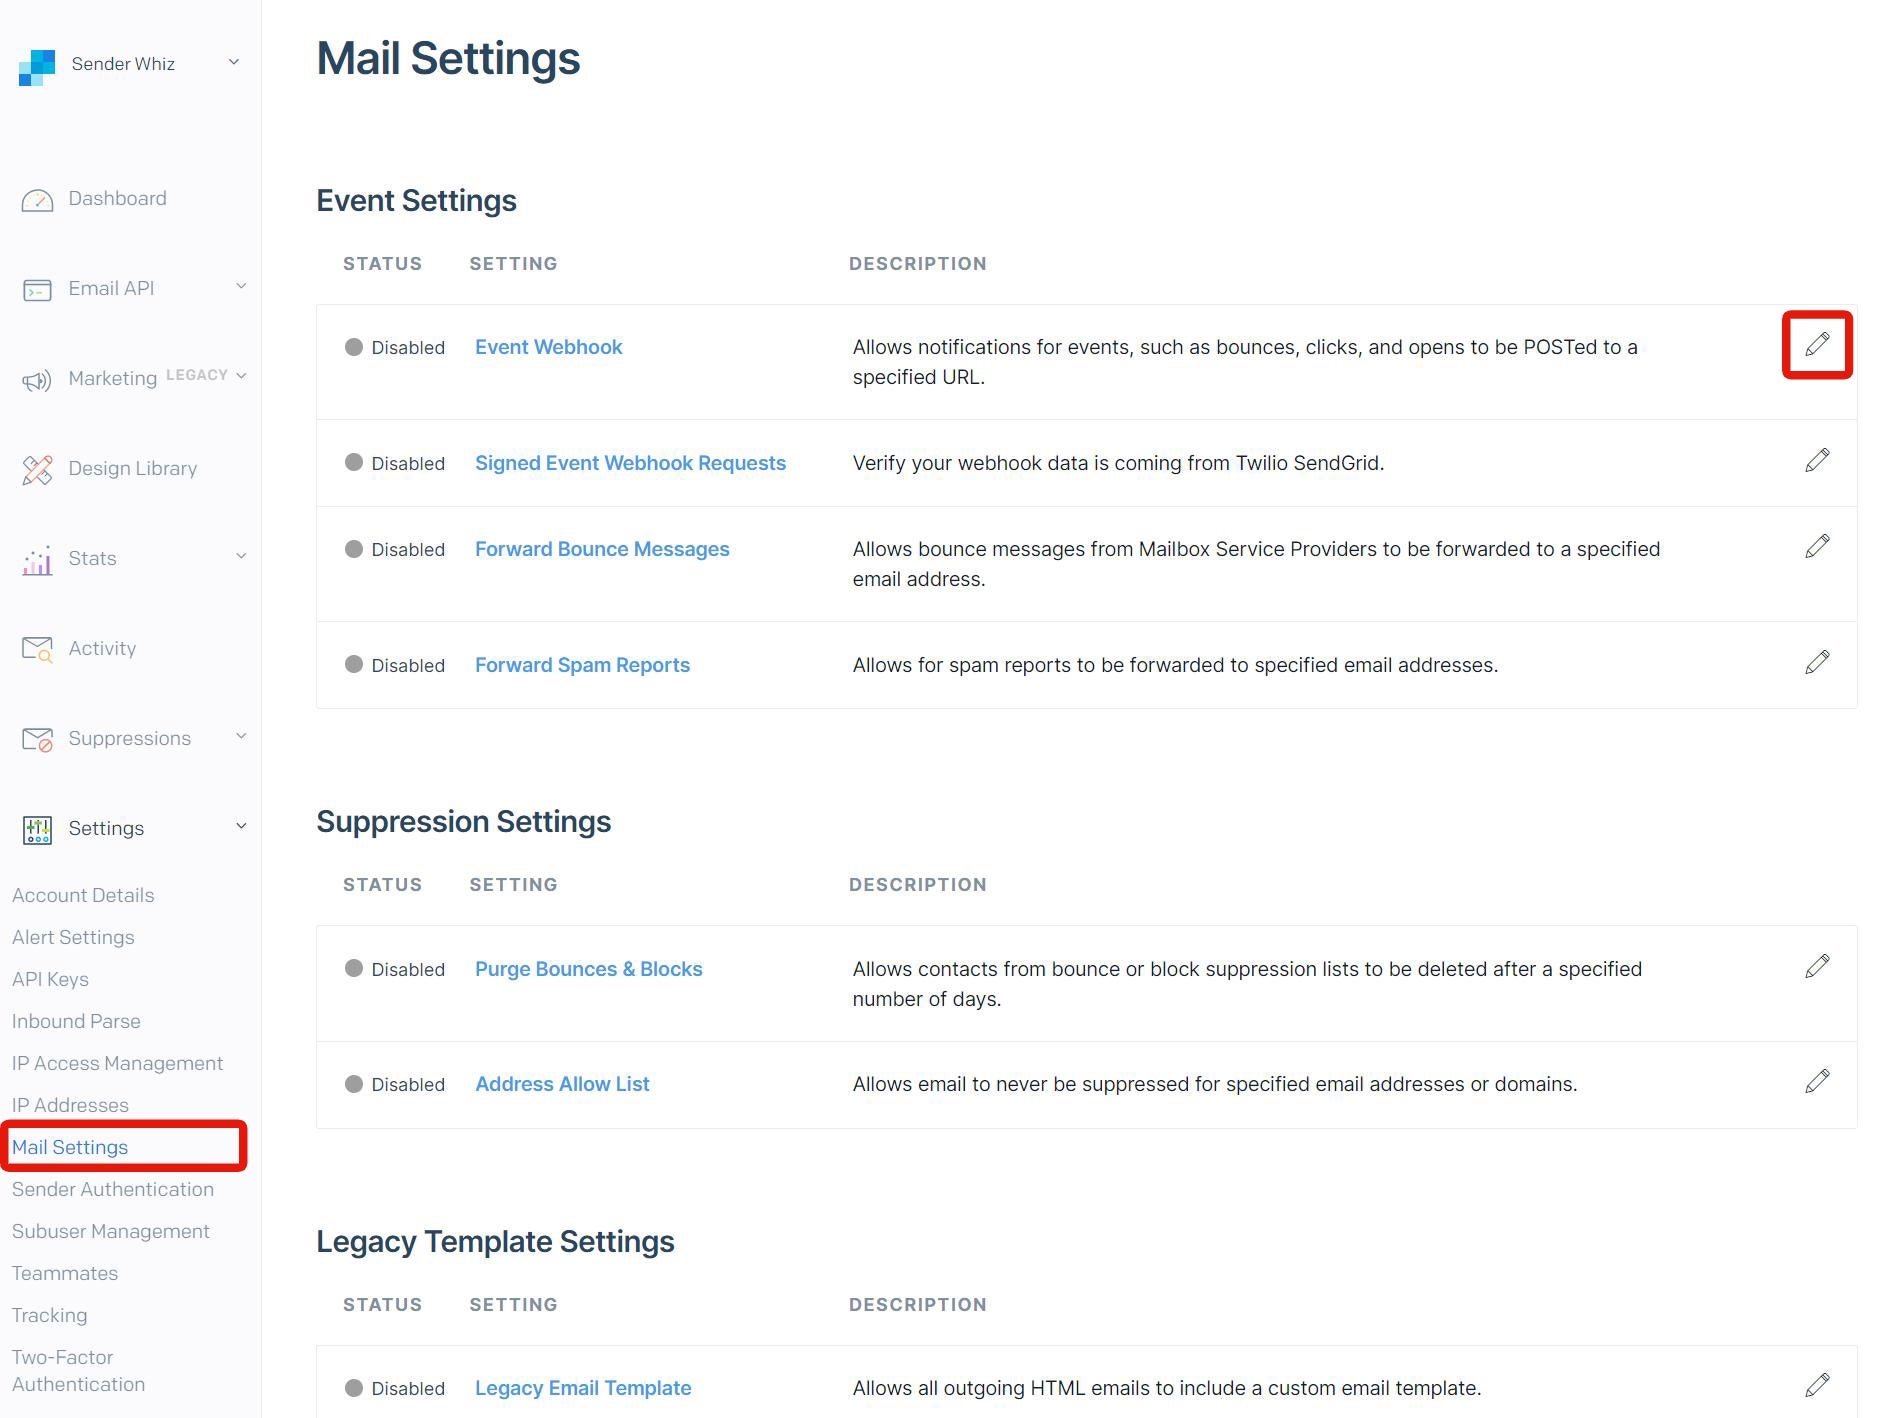
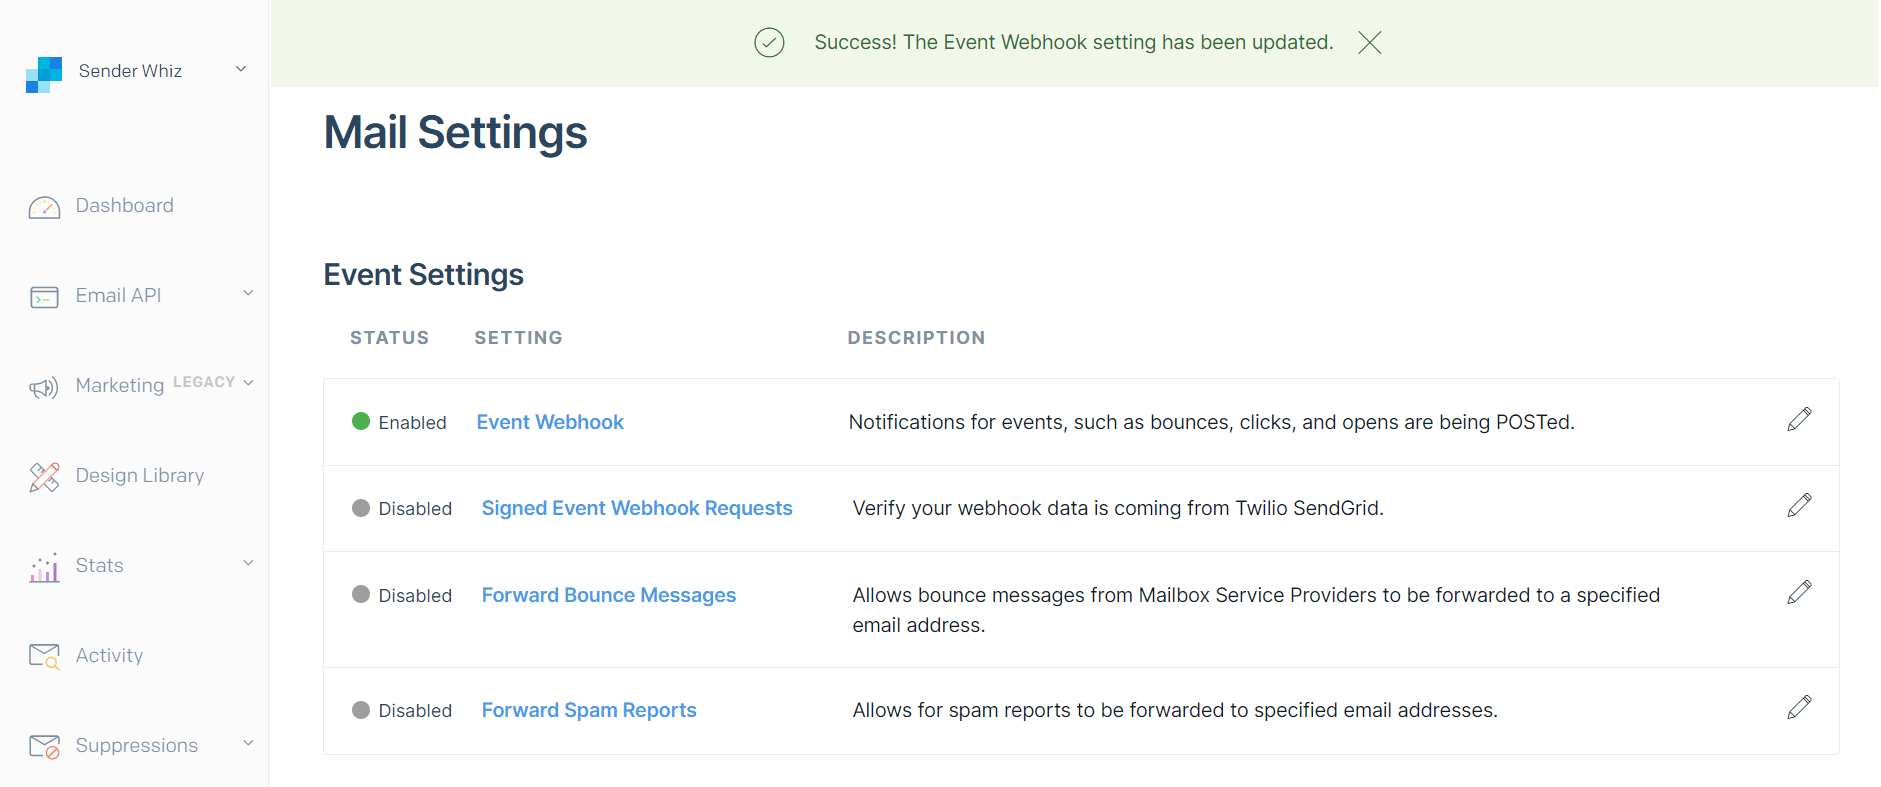
5. Enable Event Webhook
Access [Settings] -> [Mail Settings] and click 🖊️ icon next to "Event Webhook".
On the setting page, set below and click [Save]
| Item | Value |
|---|---|
| Authorization Method | None |
| HTTP Post URL | Webhook URL on the Kuroco's management page |
| DELIVERABILITY DATA | Select All |
| ENGAGEMENT DATA | Select All |
| Event Webhook Status | ENABLED |
HTTP Post URL can be confirmed at [Channels] -> [Mail] -> [SendGrid].
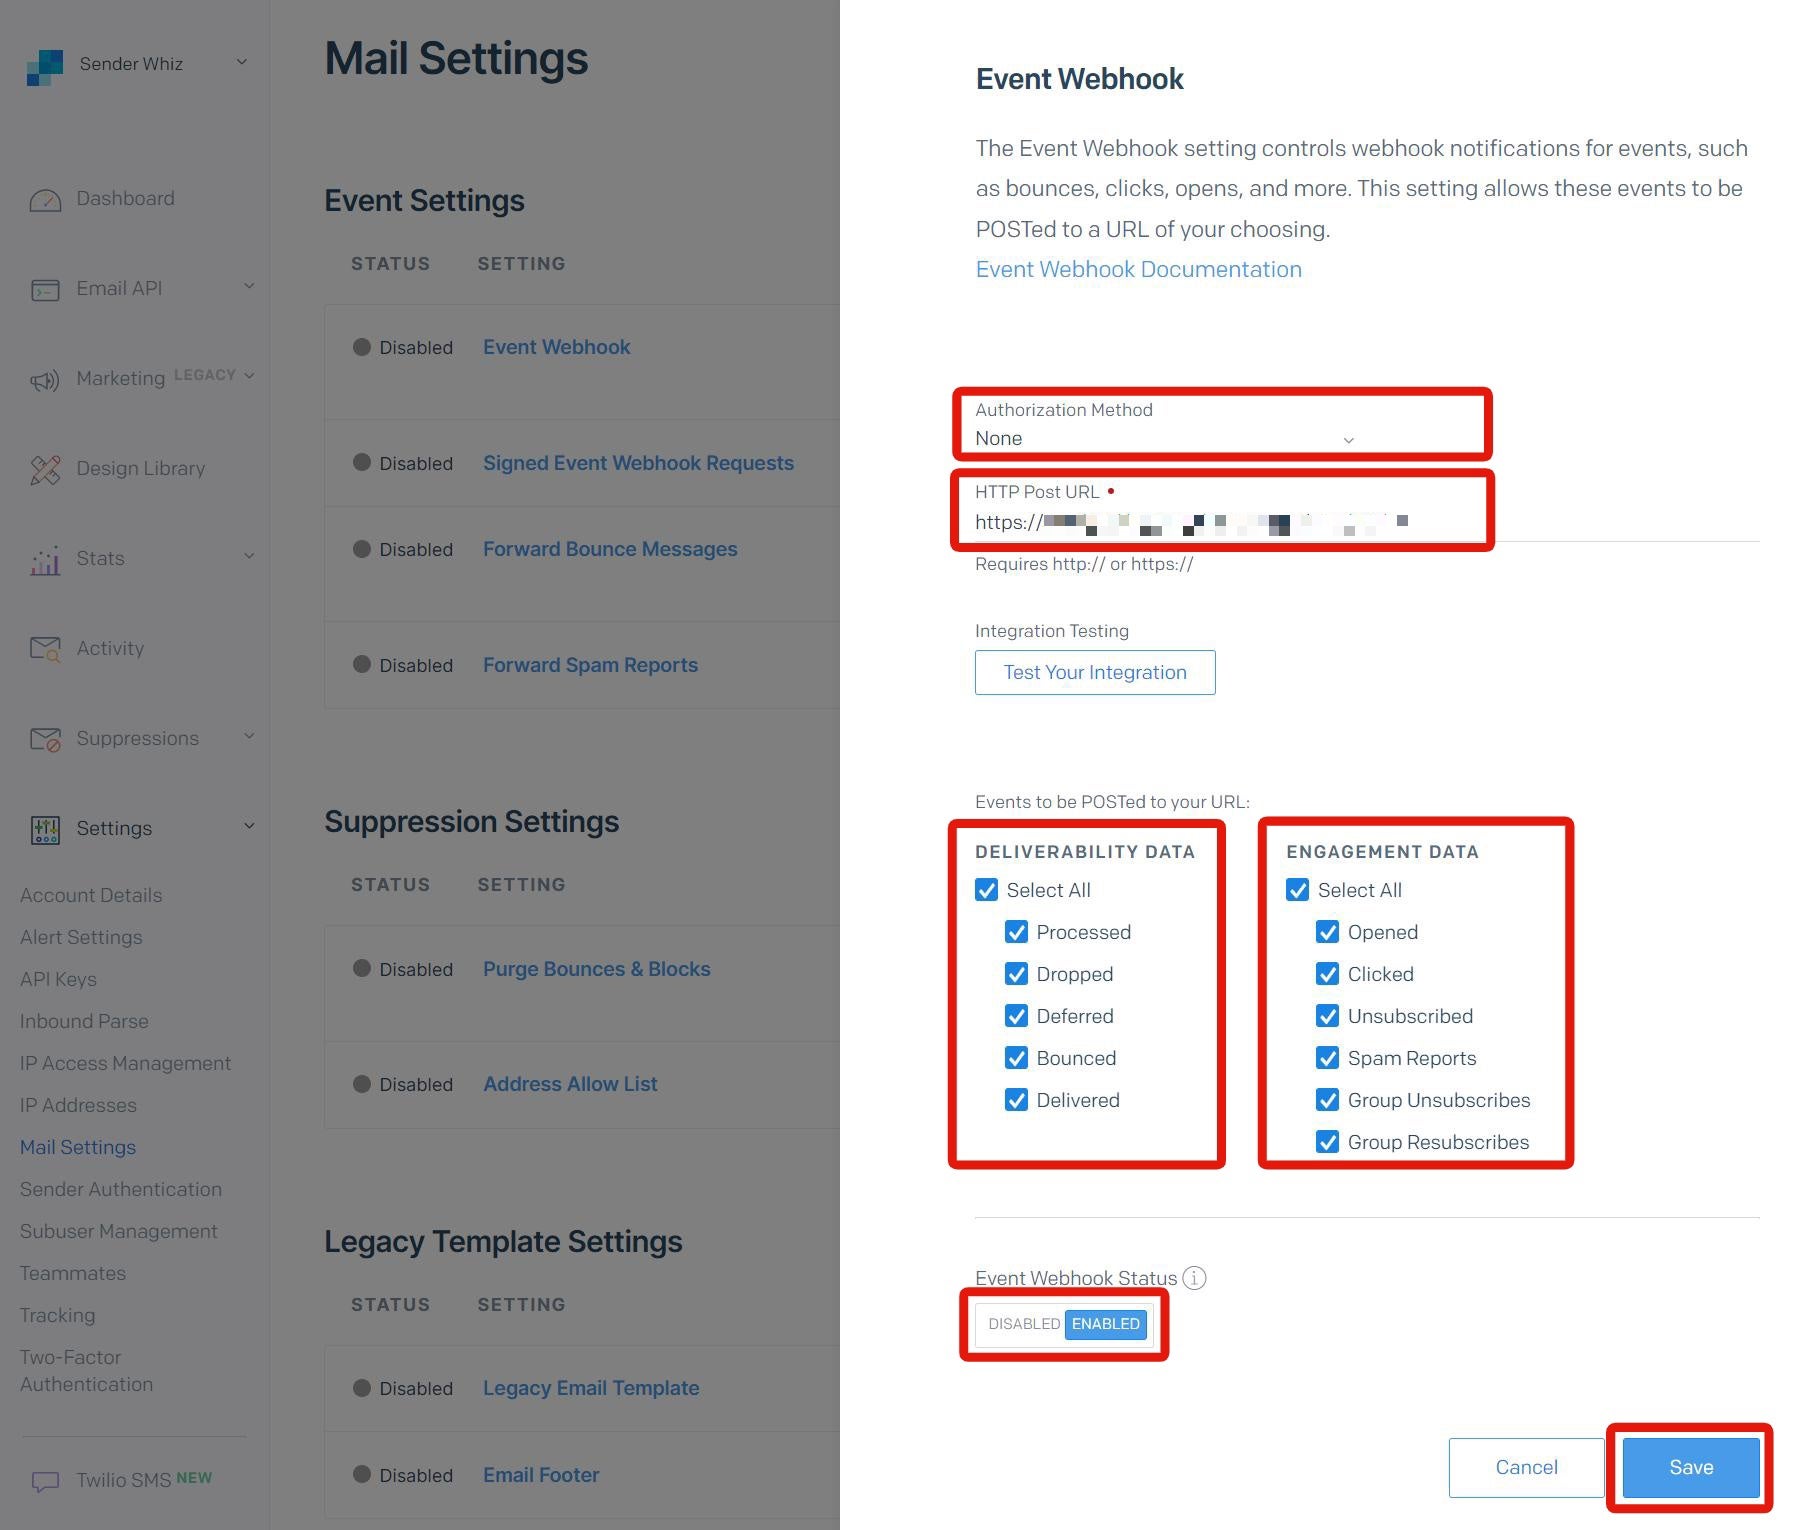
If the message "Success! The Event Webhook setting has been updated." is shown and Event Webhook's status changes to Enabled, the setting is complete.
Kuroco's setting
From here, we will work on Kuroco's management page.
6. Integrate Kuroco with SendGrid
On the Kuroco's management page, click [Channels] -> [Mail] -> [SendGrid] on the side menu.
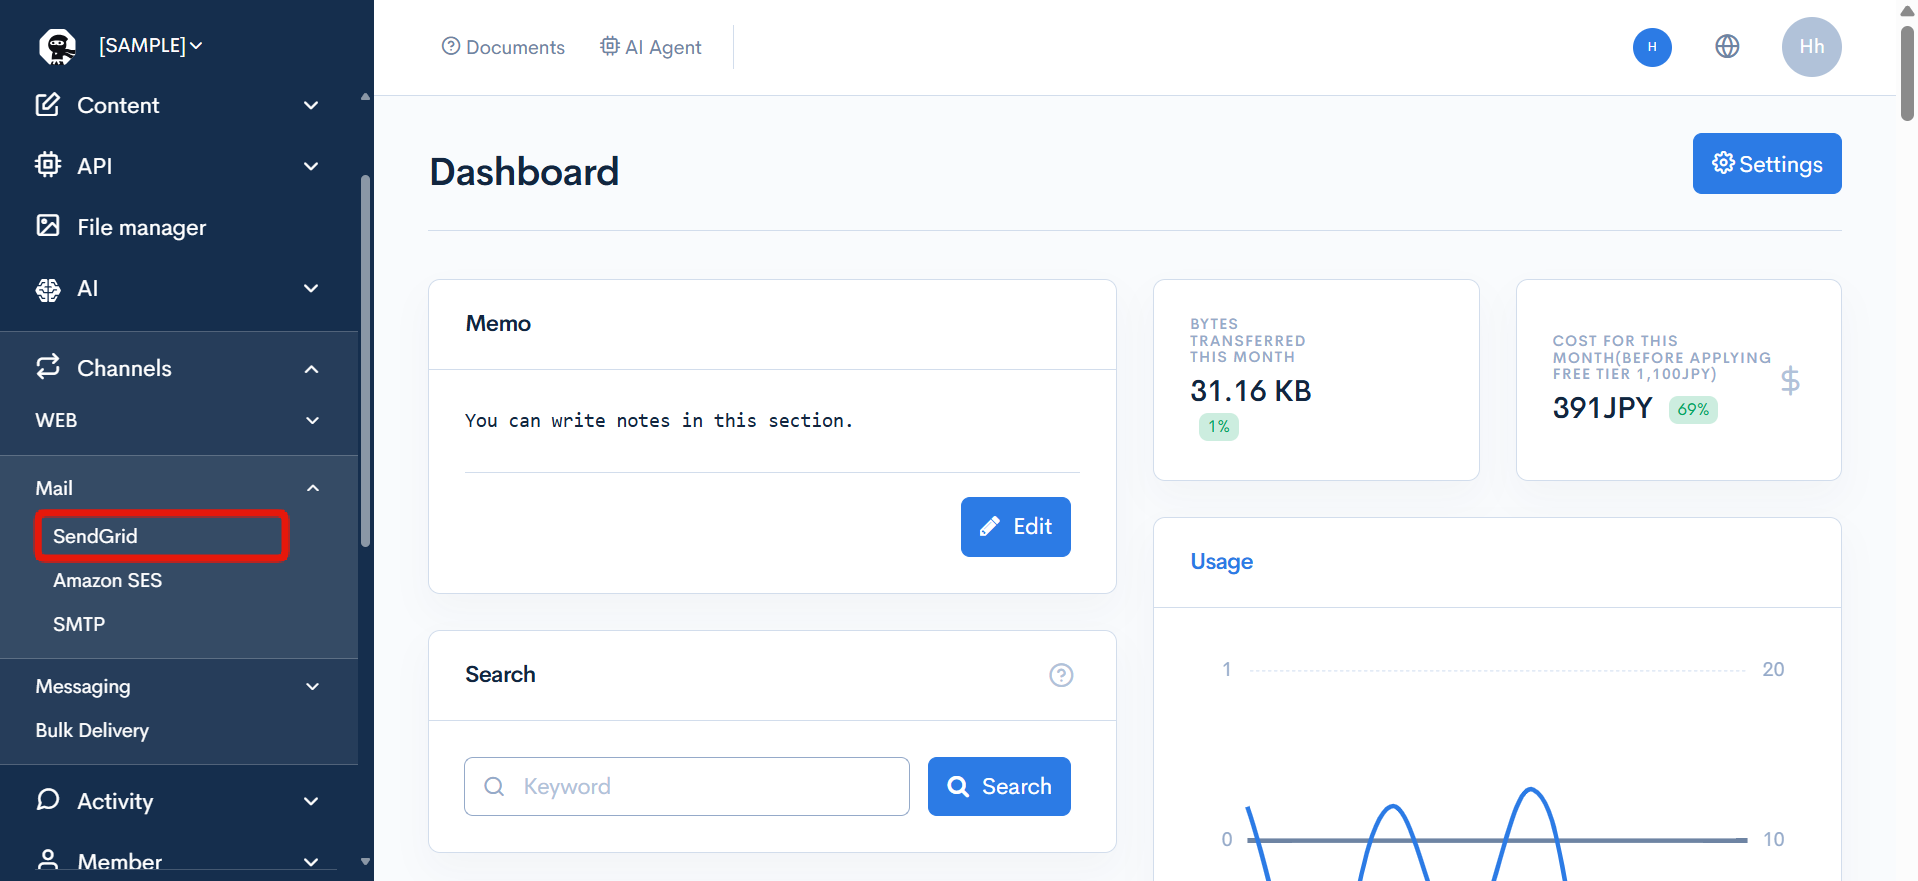
Check [Update], enter the SendGrid API key you obtained in “3. Check the SendGrid APIKEY”, leave the Authorized Domain and Email Address fields blank, and then click [Update].
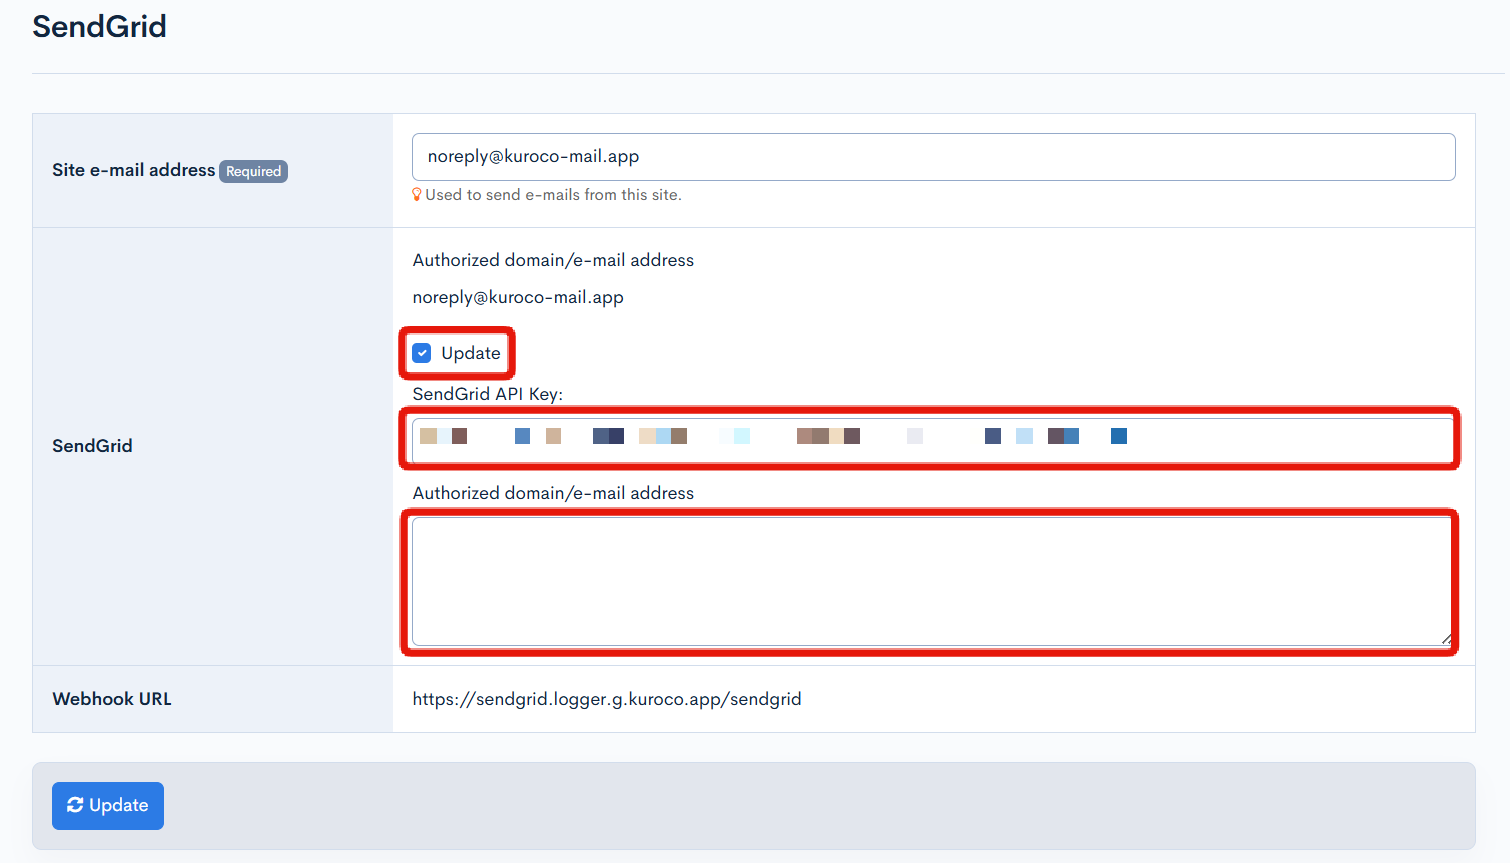
When the linkage with SendGrid is completed, the domain that was authenticated in "2. Authenticate the sending domain" will be displayed.

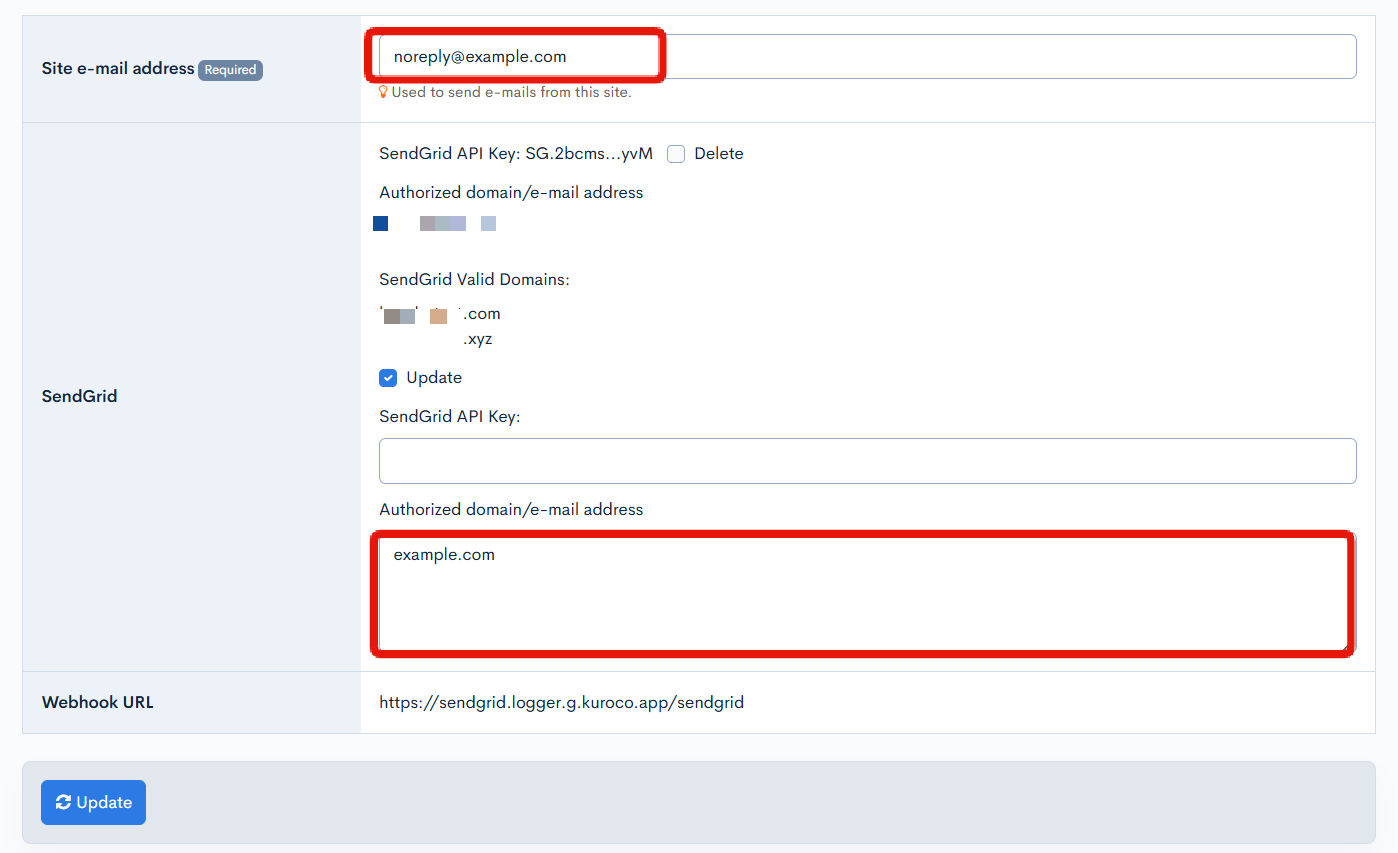
7. Set the website e-mail address
Enter your preferred e-mail address in the "Site e-mail address" field, enter the domain used as the sender in the "Authorized domain/e-mail address", and then update the settings.
Confirm the change of website e-mail address
8. Send an invitation e-mail
Send and invitation e-mail referring to Inviting new members.
9. Check the sender of the e-mail
Confirm that the sender of the e-mail is the website e-mail address that you have set above.

When sending a large volume of emails immediately after integrating with SendGrid, the sent emails may be considered as spam and rejected by the recipients.
To establish a positive reputation (trustworthiness of the email sender) for your IP address, it is recommended to start with a small to moderate volume of emails and gradually increase the quantity.
For more information, please refer to SendGrid's Warming Up an IP Address for details.
Related documents
Support
If you have any other questions, please contact us or check out Our Slack Community.