Displaying Instagram feed using Instagram basic display API in Kuroco
The Instagram Basic Display API has been deprecated. Please use this as a reference when integrating with any custom service.
Overview
Kuroco allows you to create your own custom APIs and also provides plug-ins that send requests to external APIs which allows you to use services that are not listed in the external system integration, this can be done using the custom function or batch process feature in Kuroco. We will be using the Instagram basic display API as an example in this tutorial.
Kuroco has no built-in integration with Instagram in the external system integration menu but you can display the Instagram feed by sending a request to the Instagram basic display API with the {api} plugin.
What you will learn
We will display the Instagram feed with the following steps:
- Instagram settings
- Kuroco settings (setup)
- Implement authorization feature using Kuroco and Nuxt.js
- Periodically get the Instagram feed via Kuroco
- Periodically refresh long-term access tokens in Kuroco
- Display Instagram feed using Kuroco and Nuxt.js
Prerequisites
The following accounts are required before starting this tutorial:
- Facebook developer account
- Instagram account
In addition, this tutorial assumes that you have already built a Nuxt.js project with Kuroco. If you haven't built one yet, see the tutorial below.
The Instagram basic display API is implemented with reference to the official document. If there are any discrepancies, refer to the lastest information in the official document instead.
Instagram settings
Create Facebook app
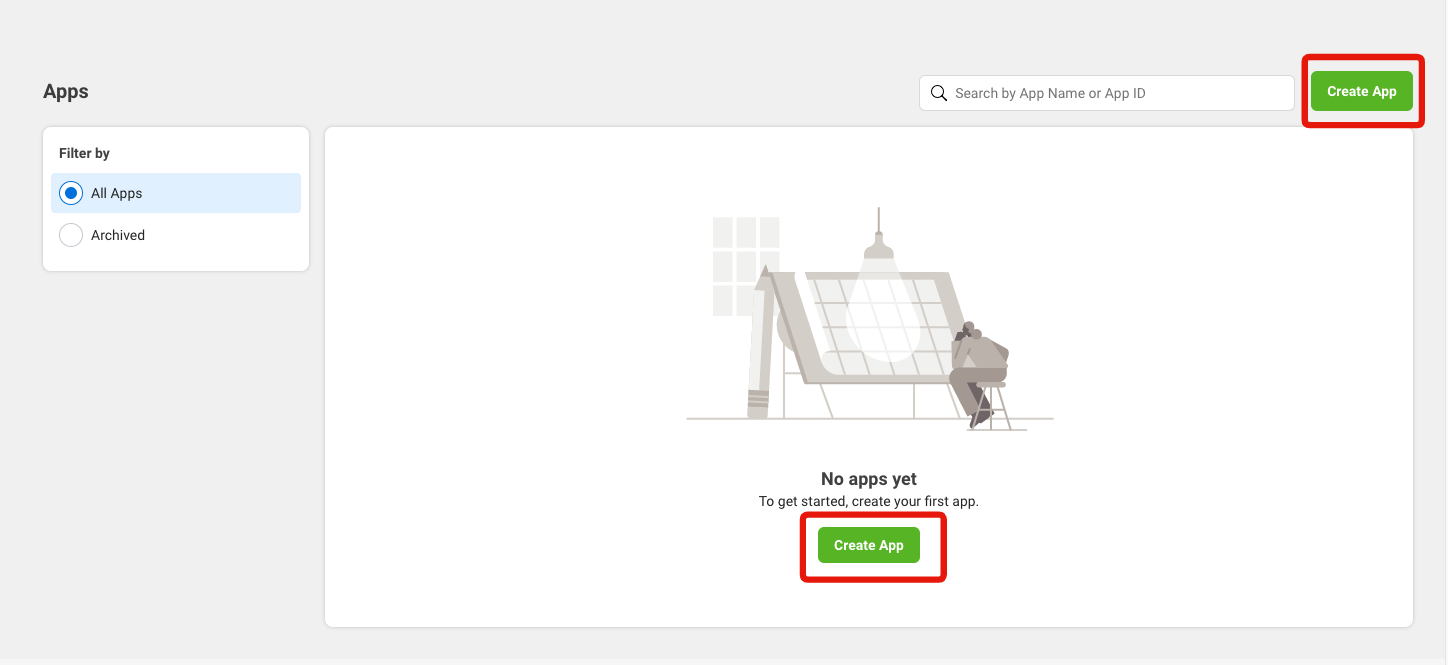
Access developers.facebook.com/apps and click [Create App].
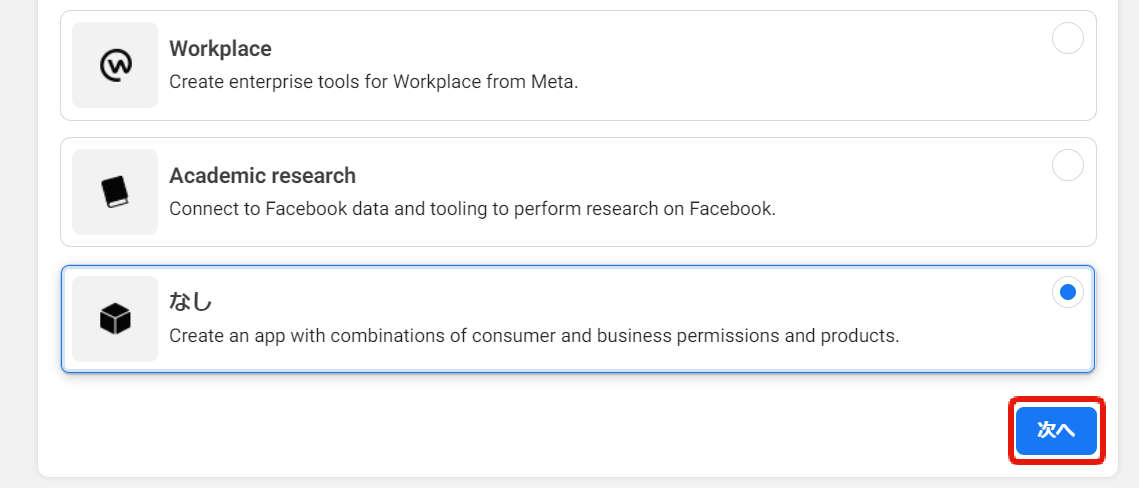
Select [None] for the type.
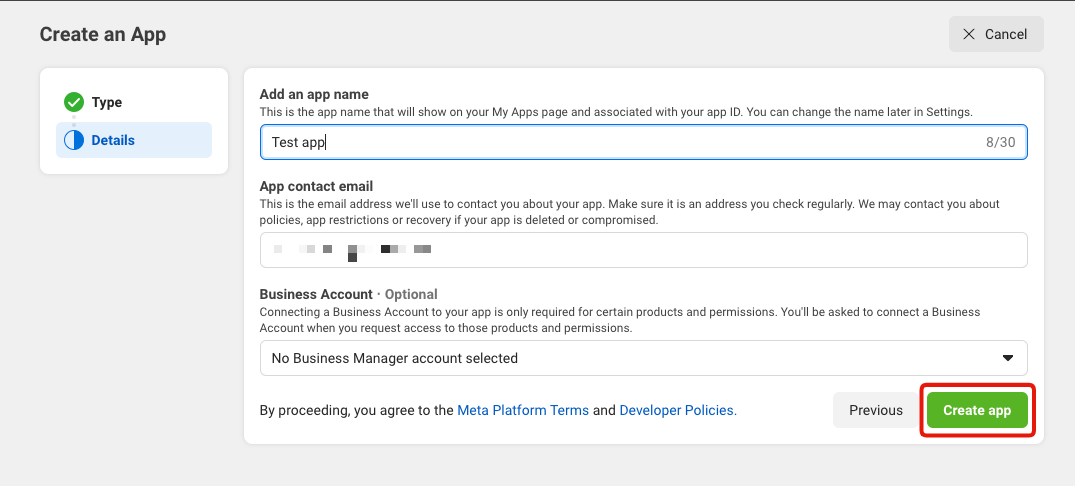
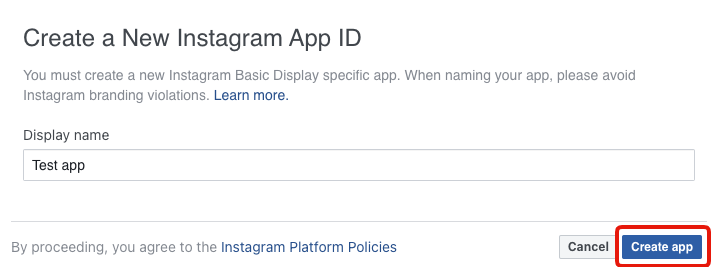
Enter the app name and click [Create app].
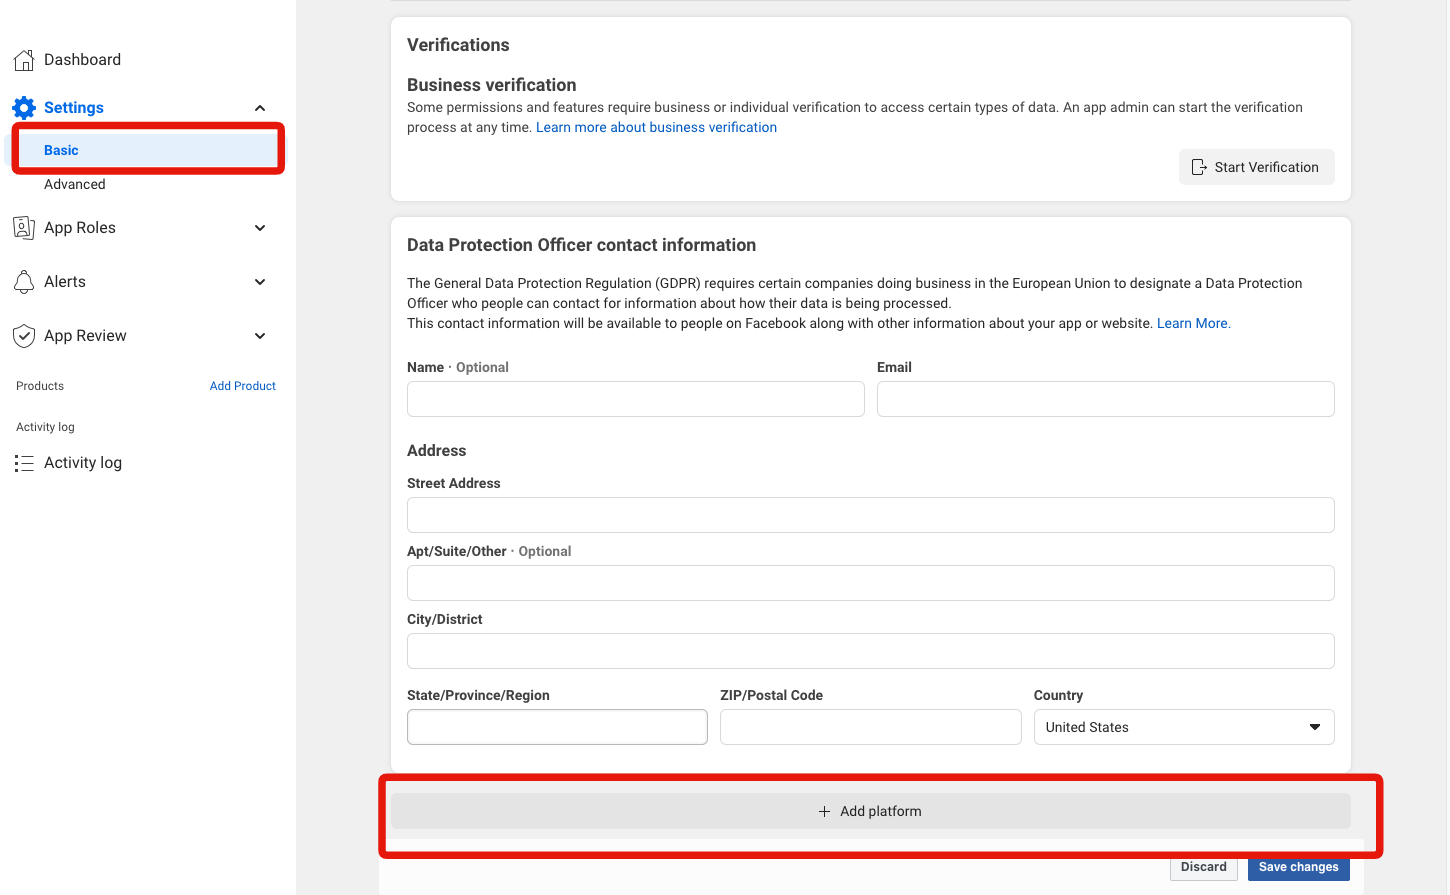
Go to the app dashboard once the app is created, then go to [Settings] > [Basic], scroll to the bottom of the page and click [Add platform].
Select "Website" and click[Next].
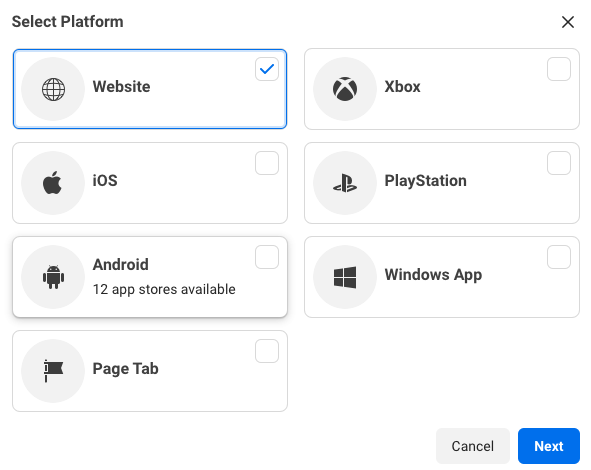
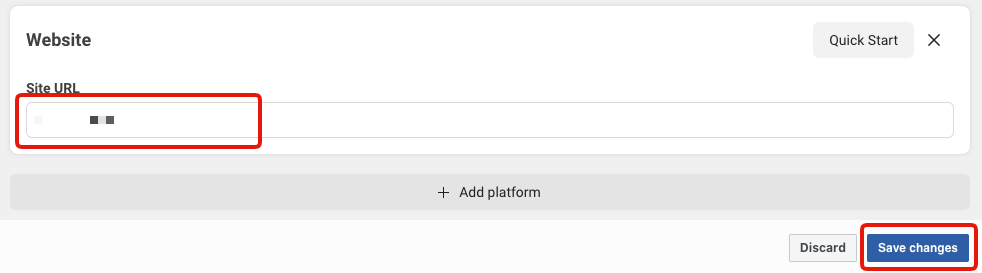
A field for entering the site URL will be displayed.
Enter Kuroco's front-end URL and click [Save changes].
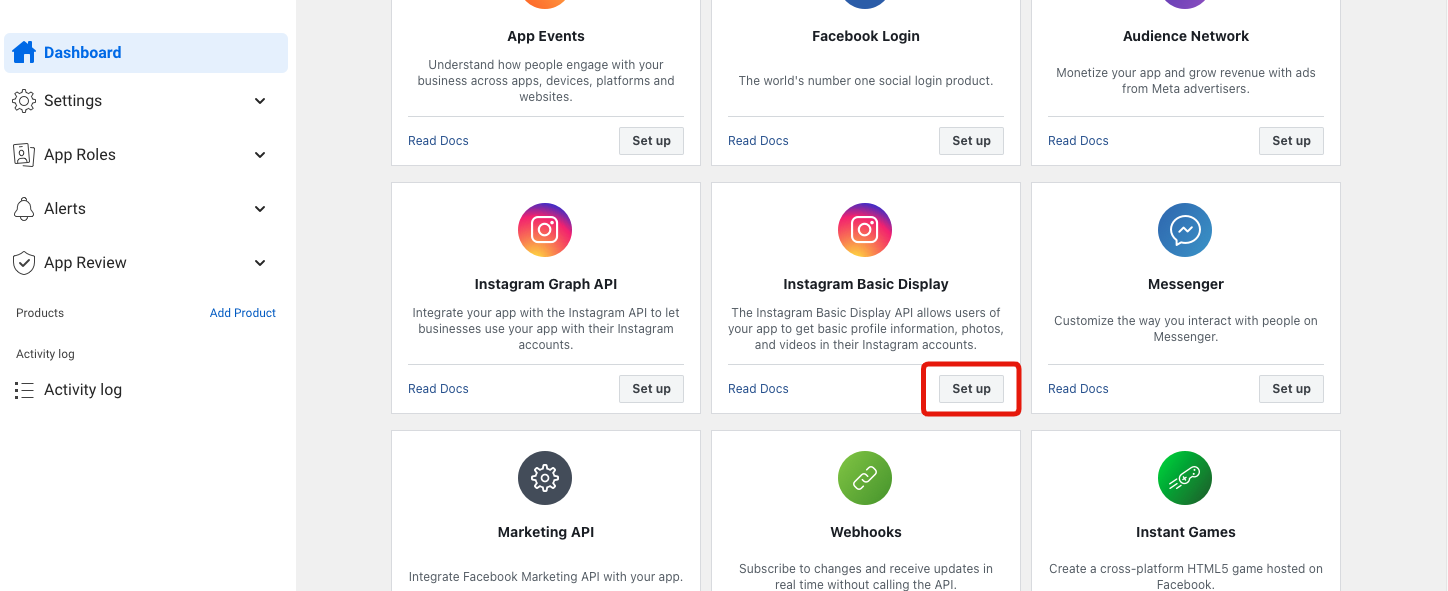
Create Instagram app
Go back to your dashboard, find "Instagram Basic Display" under "Add Products" and click [Set up].
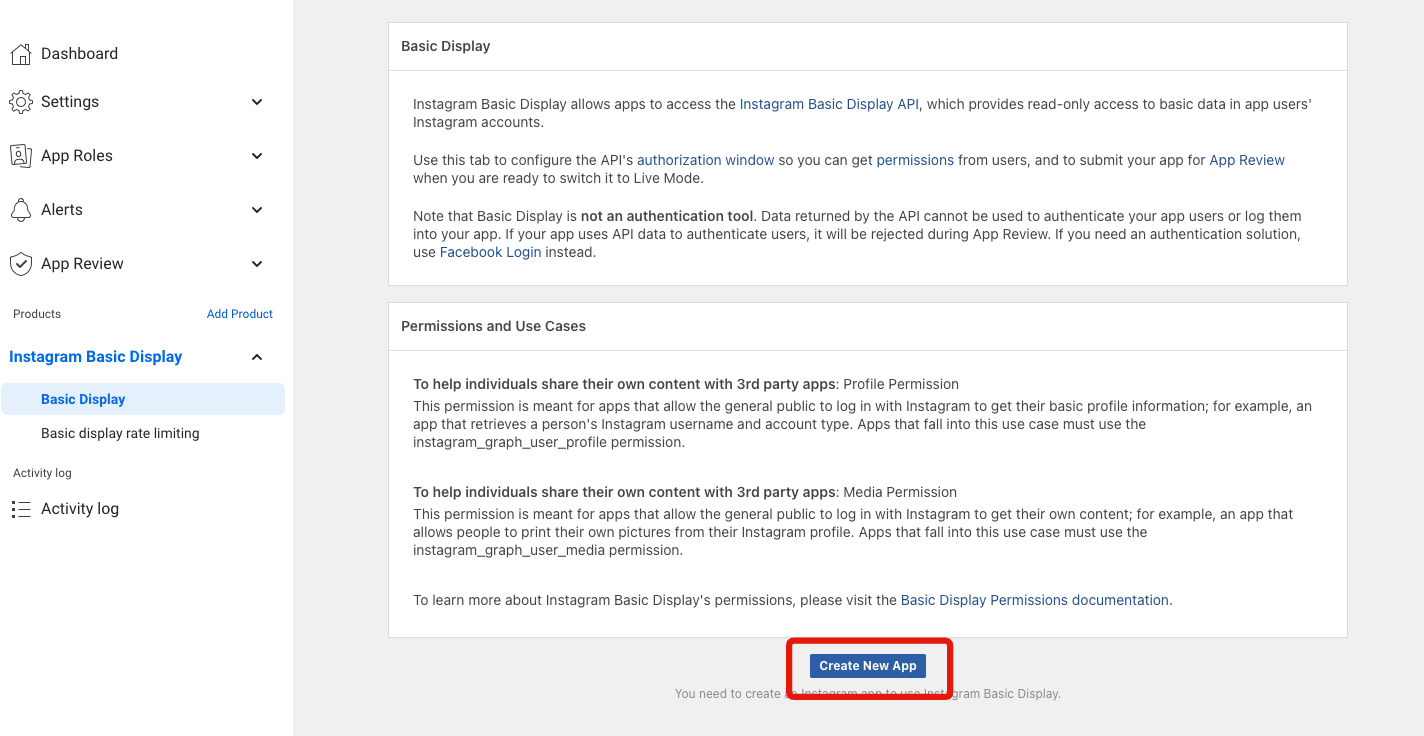
Scroll to the bottom of the page and click [Create New App].
The app name of the Facebook app that was created in the previous step will be displayed. Click [Create app] without changing anything.
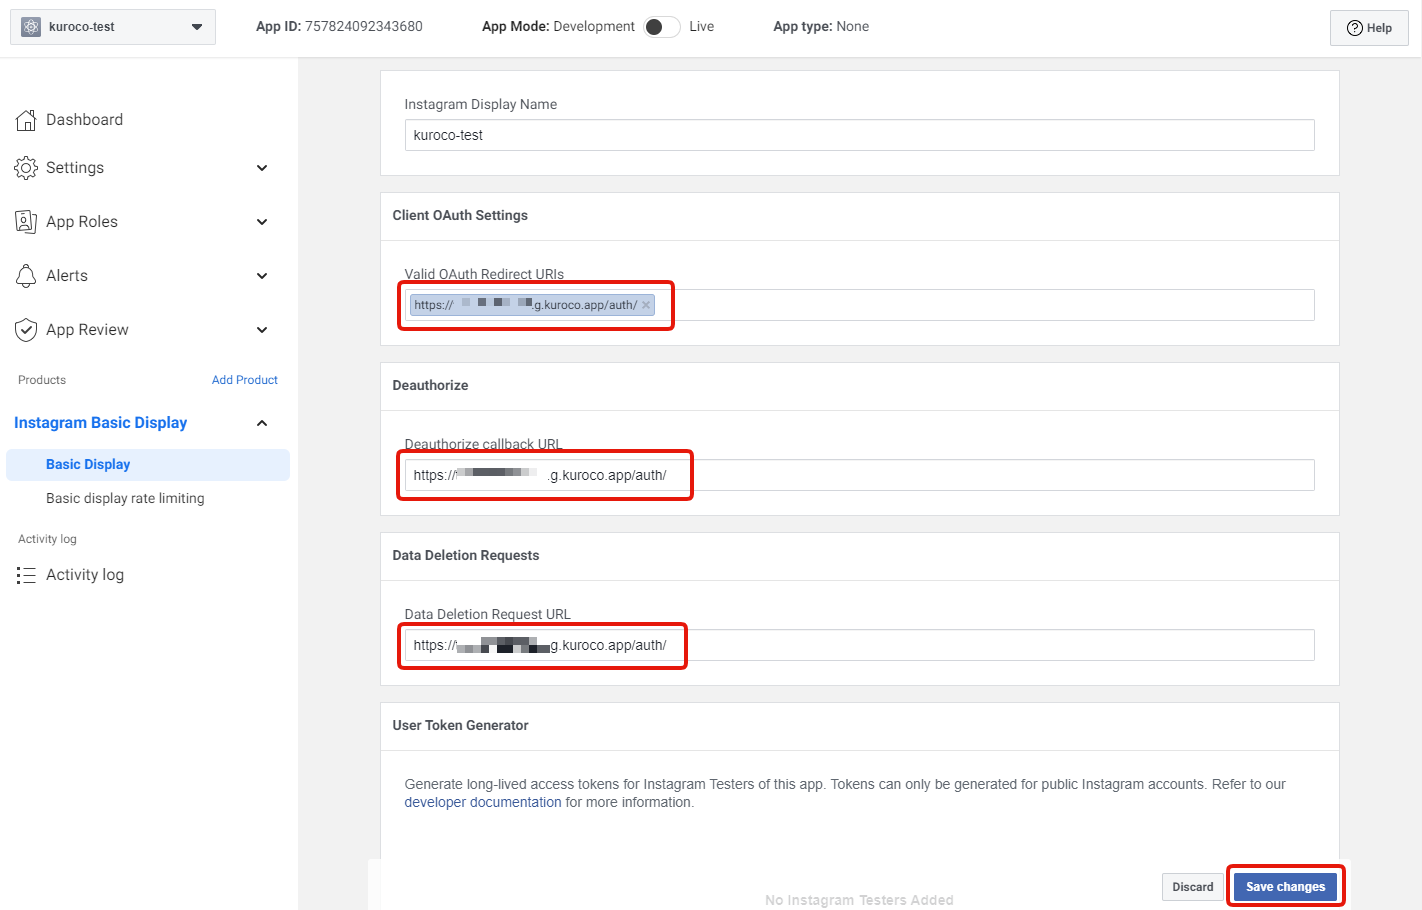
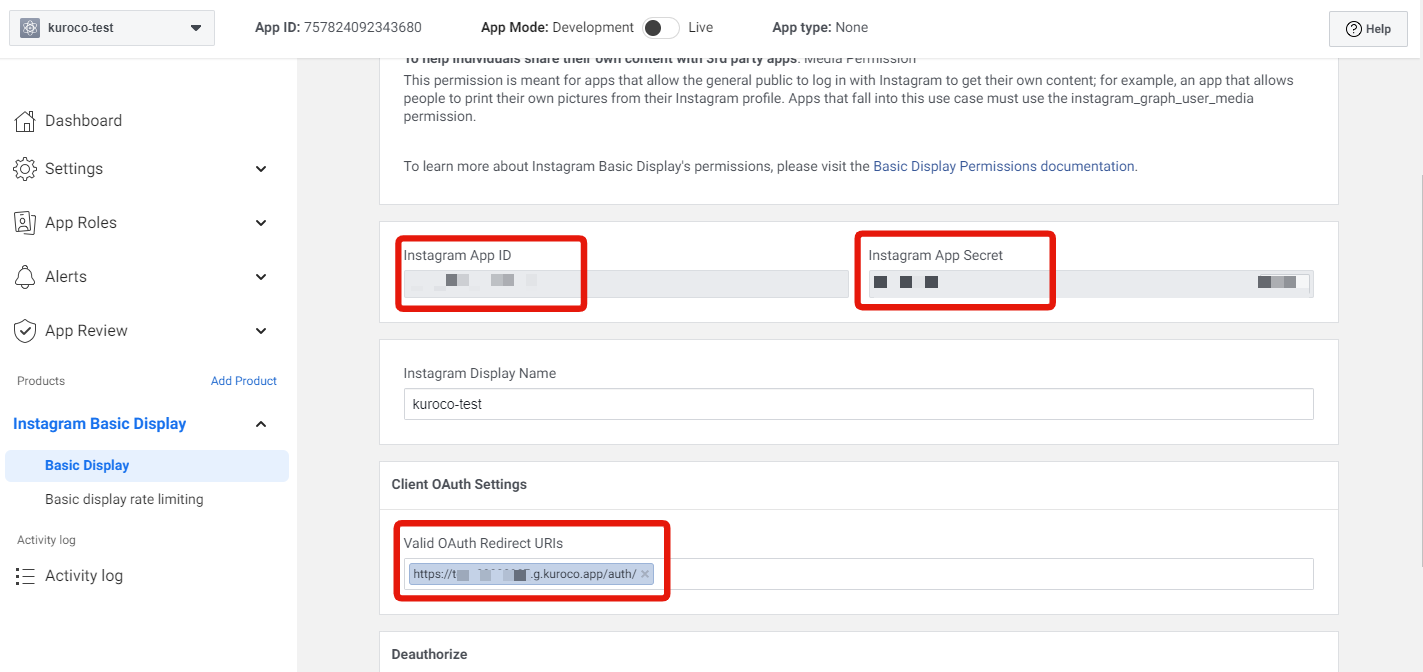
Once the Instagram app has been created, enter the URL https://frontendURL/auth/ into the fields "Valid OAuth Redirect URIs", "Deauthorize Callback URL", and "Data Deletion Request URL", then click "Save Changes".
While "Deauthorize Callback URL" and "Data Deletion Request URL" should ultimately be changed to the appropriate URLs capable of handling those processes, they can initially be set to the same value as the OAuth Redirect URI.
Add Instagram test user
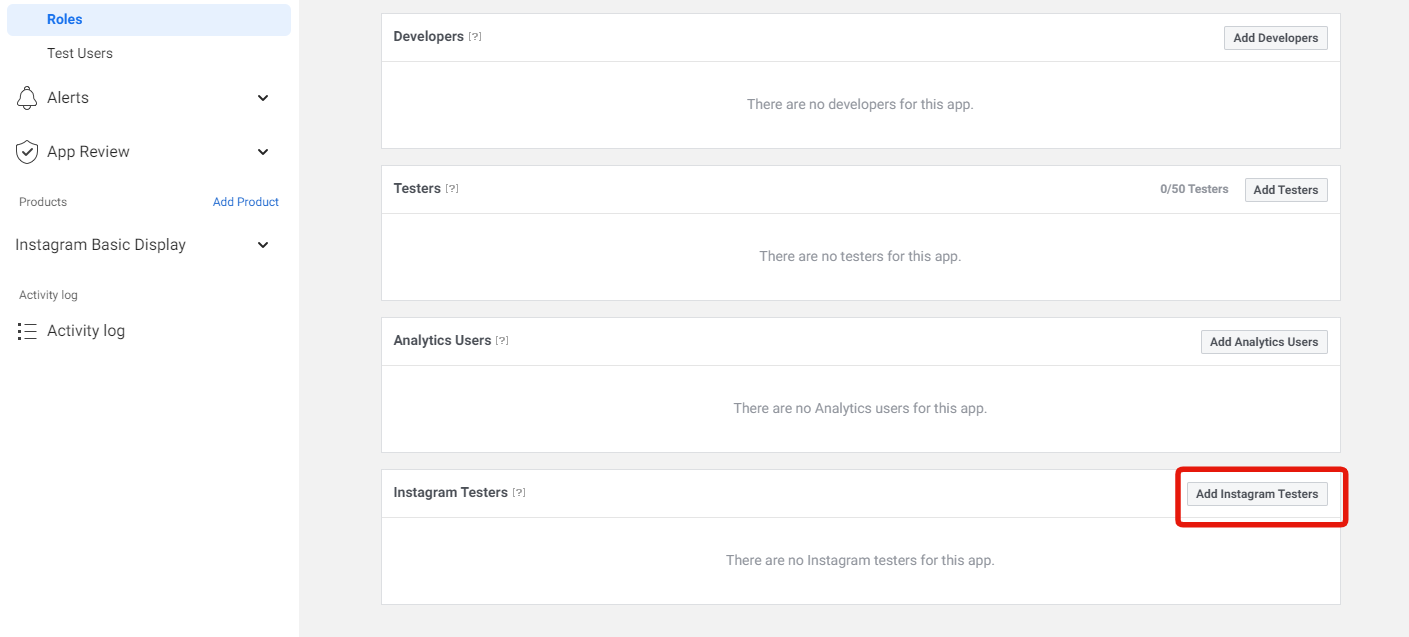
Navigate to [App Roles] -> Roles, scroll down to the Instagram Testers section and click [Add Instagram Tester].
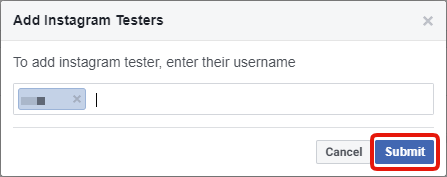
Enter Instagram account username and click [Submit].
Access Instagram and login with the account you have just invited above. Click [Profile icon] > [Edit profile] > [Apps and websites] > [Tester Invites] and click [Accept].
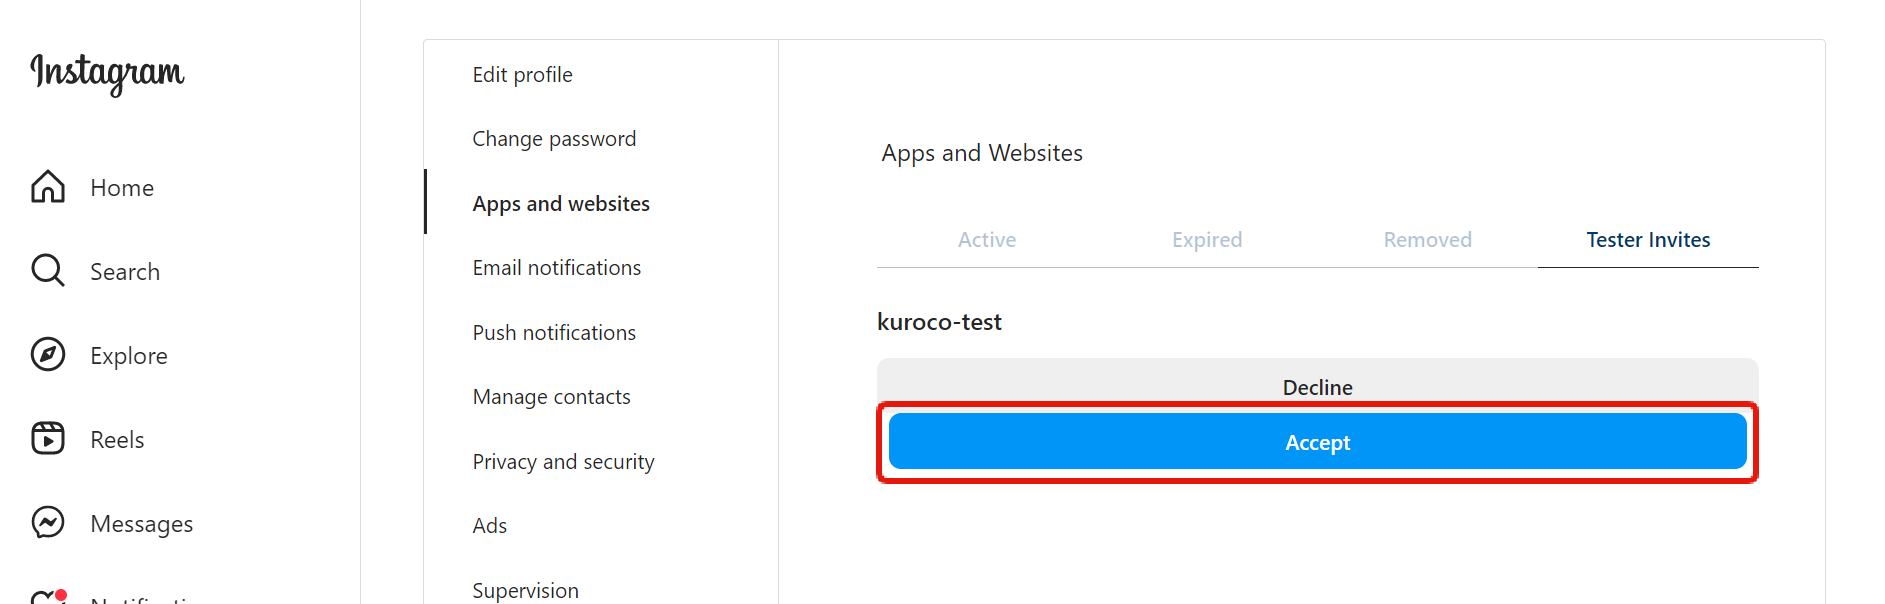
Your Instagram account is now accessible from the Facebook app, even when it's in development mode.
Authentication process verification
We will verify the process of authenticating users and obtaining long-term Instagram user access tokens.
User authentication starts at the following URL:
https://api.instagram.com/oauth/authorize?client_id={app-id}&redirect_uri={redirect-uri}&scope=user_profile,user_media&response_type=code
Replace {app-id} and {redirect-uri} with "Instagram App ID" and "Valid OAuth Redirect URIs" respectively from [Instagram Basic Display]->[Basic Display].
Please note that the Instagram App ID is different from the Facebook App ID.

For example, the full URL can be as below:
https://api.instagram.com/oauth/authorize?client_id=684477648739411&redirect_uri=https://socialsizzle.herokuapp.com/auth/&scope=user_profile,user_media&response_type=code
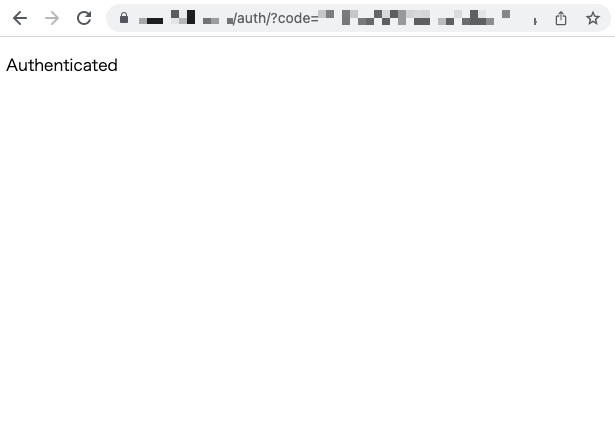
If you access the URL for your own Instagram App, the screen below will be displayed.
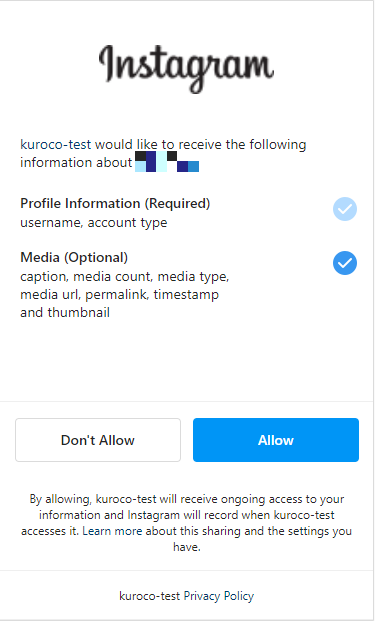
Click [Allow], then you will be redirected to the specified redirect URI and will see the authentication code in the URL.
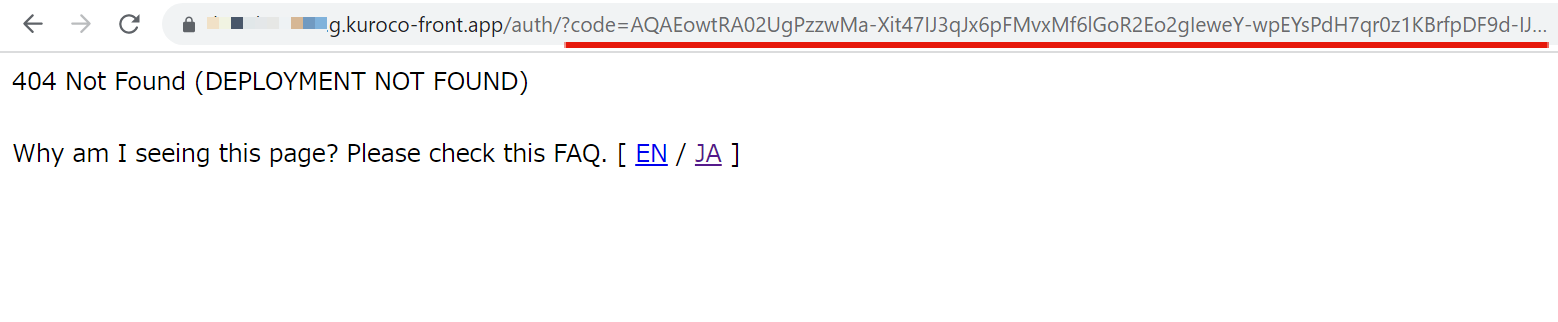
This authentication code is exchanged for an access token by requesting the Instagram API along with the Instagram App ID and Instagram App Secret. In addition, we can get the Instagram feed by requesting the obtained access token and user ID to the Instagram API.
Kuroco settings (setup)
Now we set up the Kuroco settings.
Create content structure
First, create an Instagram long-term access token and a content structure that stores your Instagram feed.
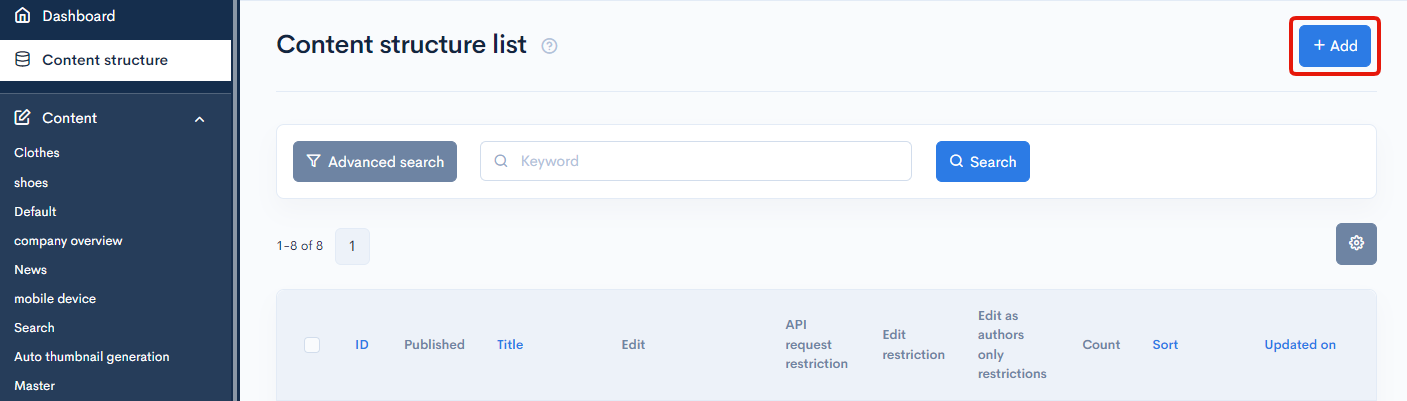
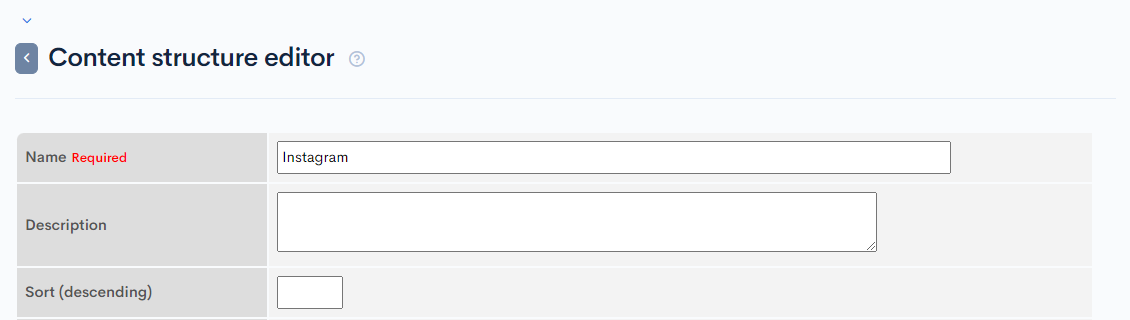
Click [Add] button on Content structure page.
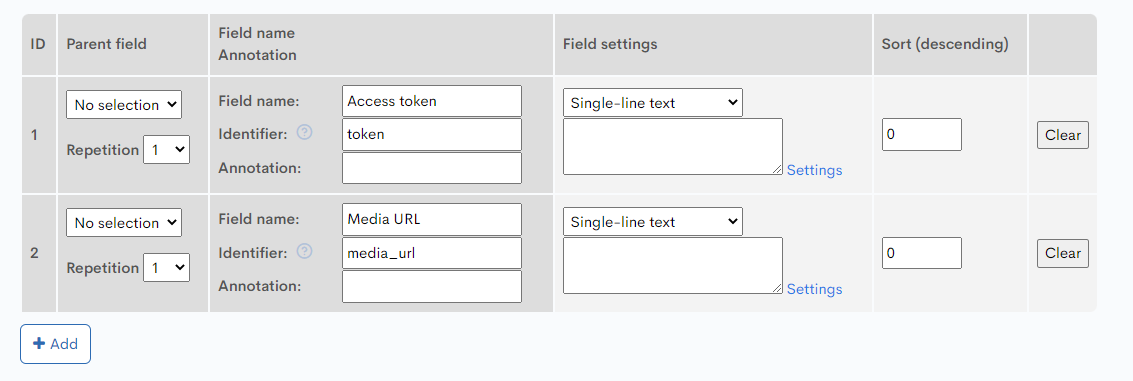
Enter as follows:
| Item | Settings |
|---|---|
| Name | |
| ID=1 | Field settings:Single-line text Field name:Access token Identifier:token Repetition:1 |
| ID=2 | Field settings:Single-line text Field name:Media URL Identifier:media_url Repetition:6 |
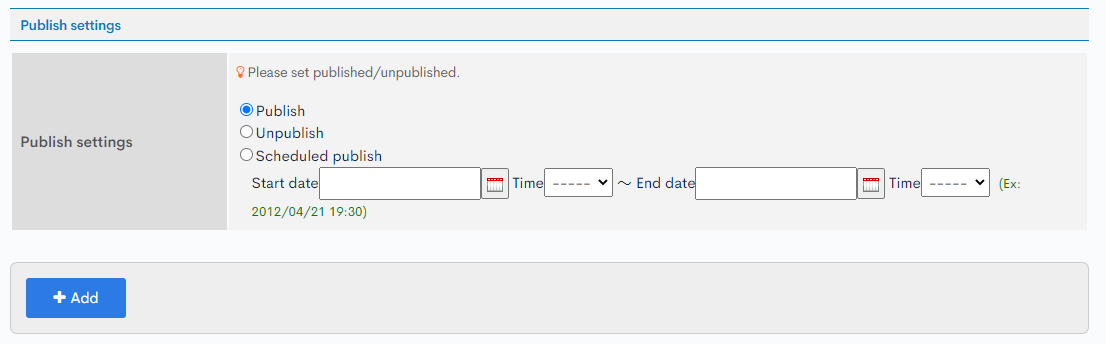
Click [Add] after completing above settings.
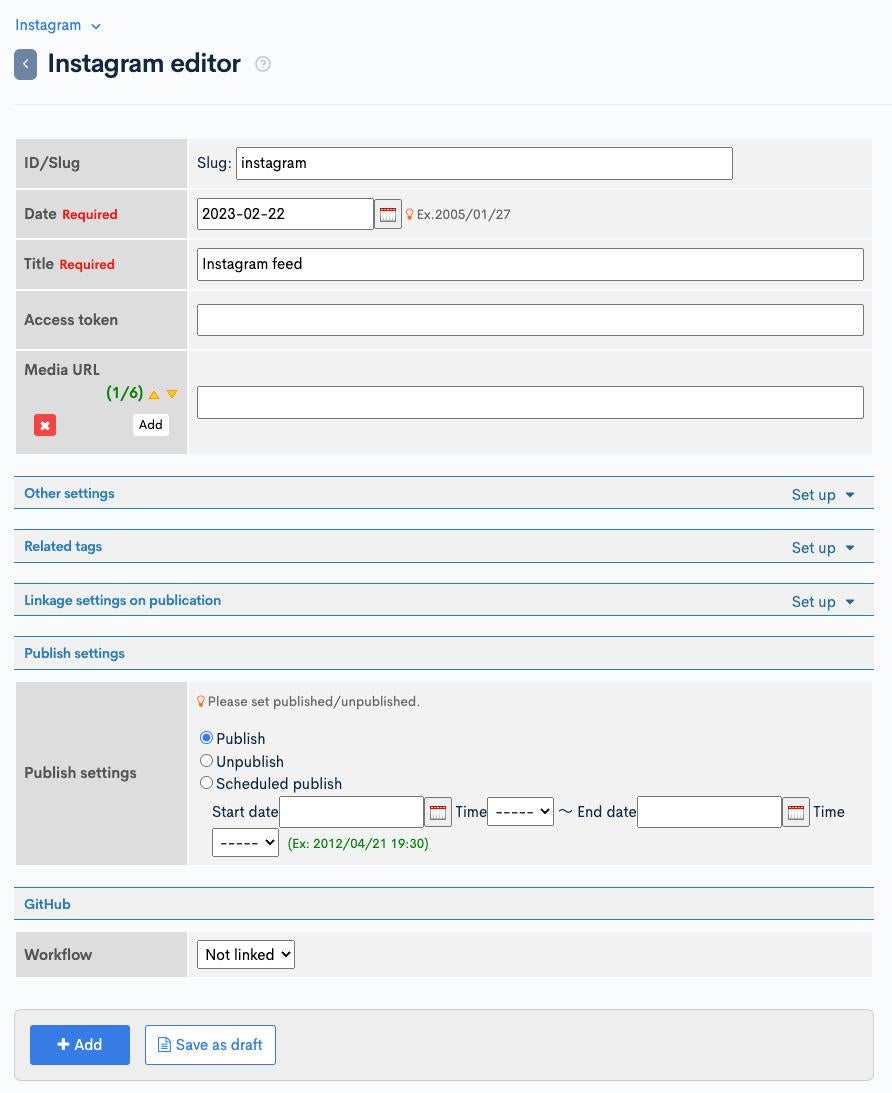
Create content
We will create an empty content to be updated by the custom function that will be implemented later.
Click the [Add] button on the content page.
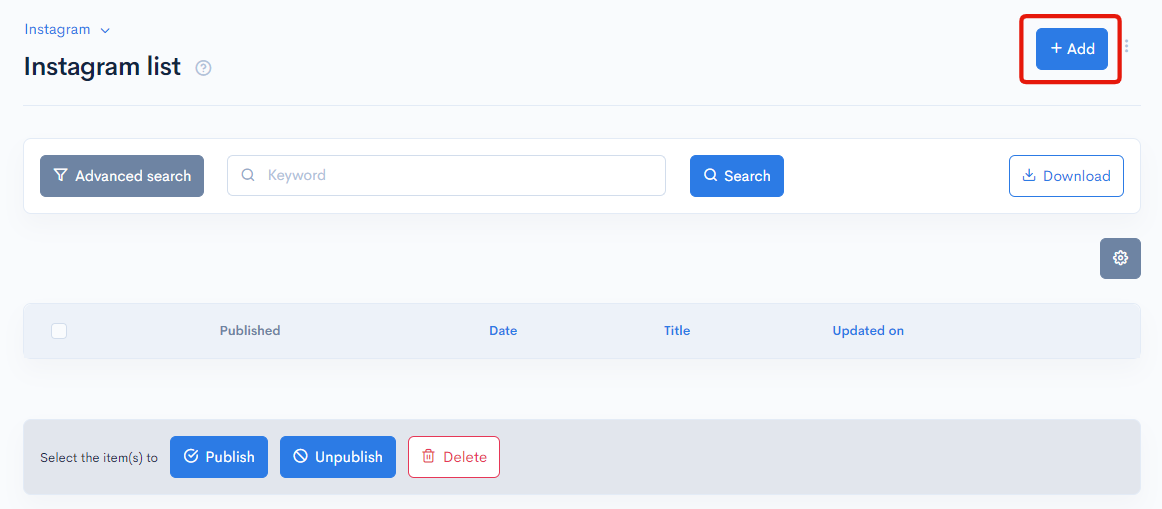
Enter the following and click [Add].
| Item | value |
|---|---|
| Slug | |
| Title | Instagram feed |
Create constants and secret
Since the Instagram App ID and Instagram App Secret will be used several times in Kuroco's custom processing, we will register them as constants and secrets.
It is recommended that highly confidential items be registered as secrets.
Copy the "Instagram App ID" and "Instagram App Secret" from the "Basic" page of the Instagram app.
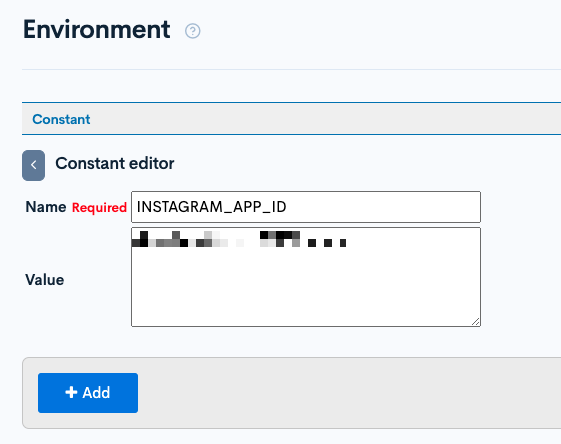
Go back to your Kuroco admin panel, click [Environment] > [Constant] on the side menu and click [Add].

Enter the followings and click [Add].
| Item | Settings |
|---|---|
| Name | INSTAGRAM_APP_ID |
| Value | Paste the "Instagram App ID" that you copied earlier |
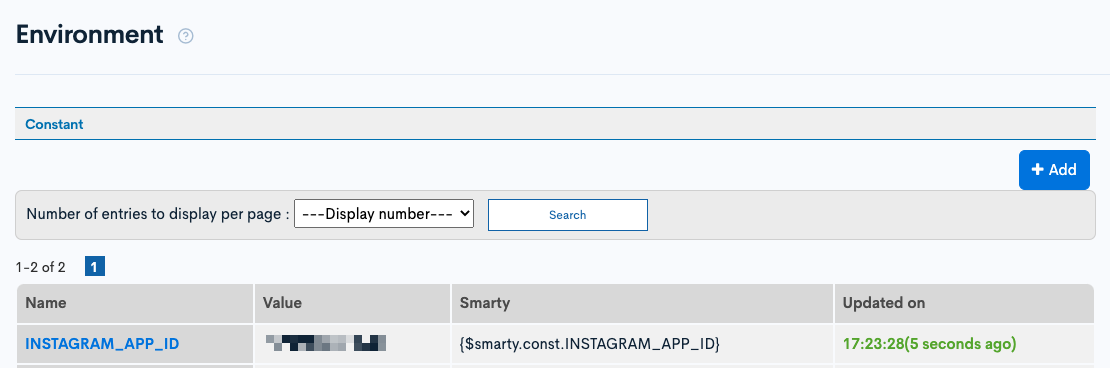
Once added, the Smarty variable syntax will be shown.
Next, click [Environment] > [Secret] and click [Add].
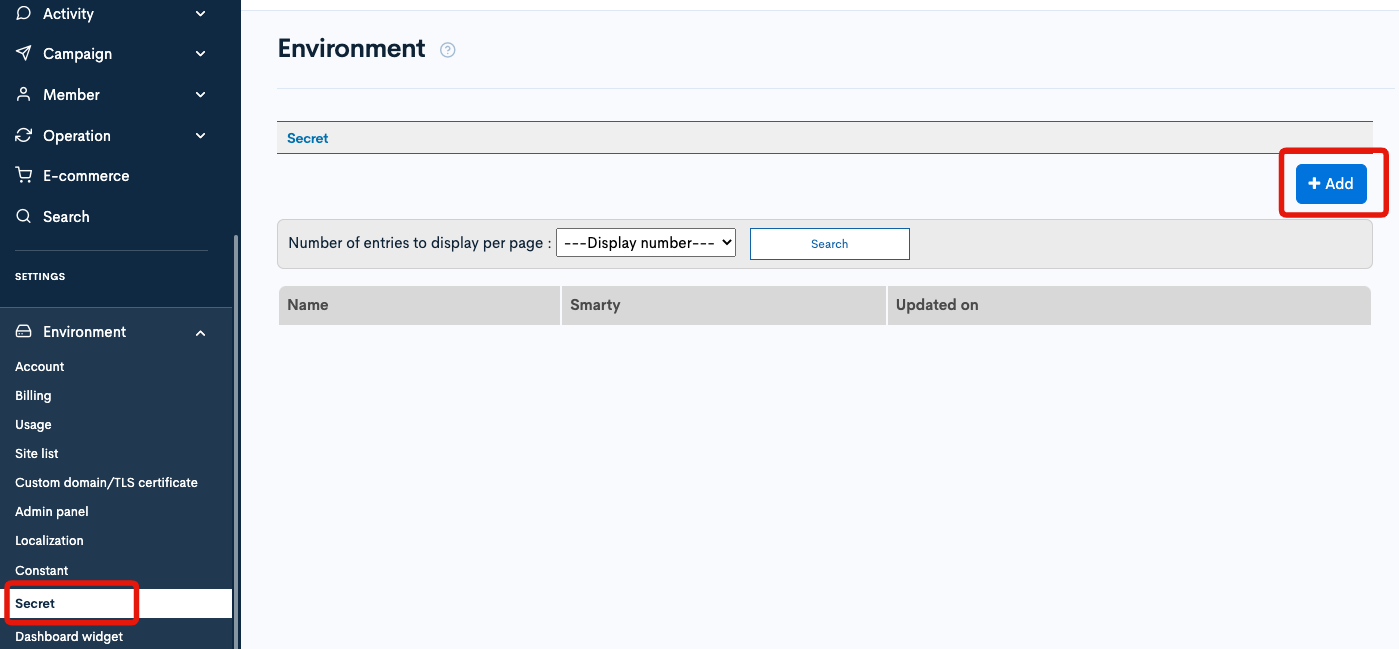
Enter as followings and click [Add].
| Item | Settings |
|---|---|
| Name | INSTAGRAM_APP_SECRET |
| Value | Instagram App Secret |
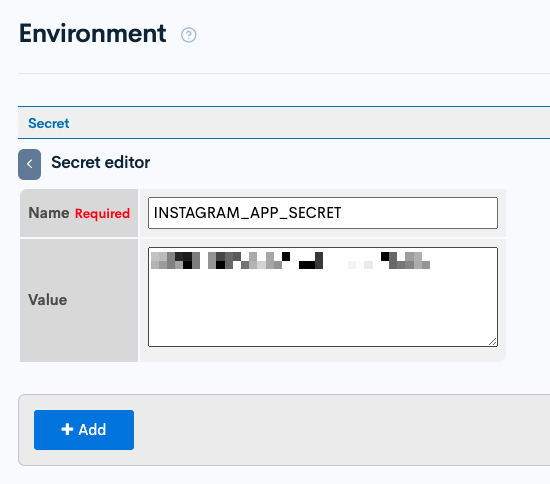
Once added, the Smarty variable syntax will be shown.
Create API
Create API for internal use
It is recommended to separate APIs for endpoints that are only used internally within Kuroco.
First, create a new API for internal use.
If it has already been added, you can proceed to the next step.
Creating APIs
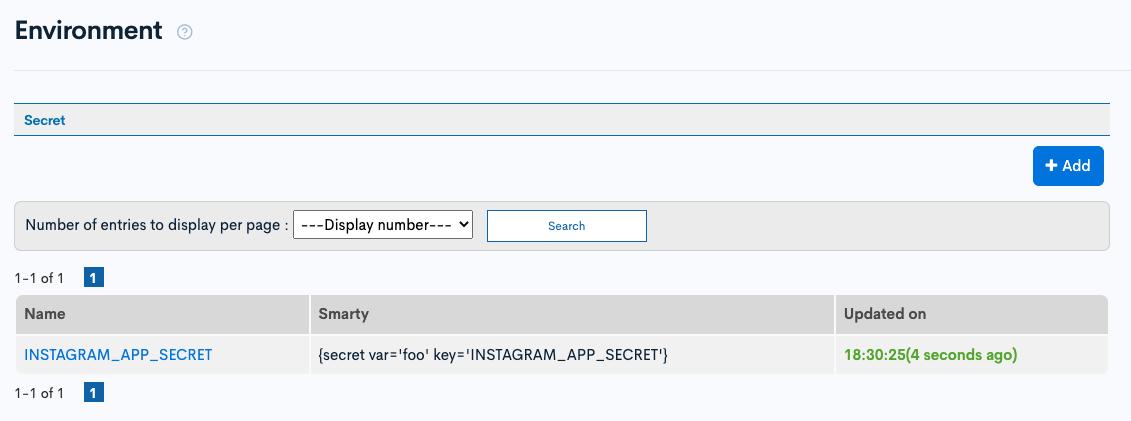
Click [Add] on the API page of the Kuroco admin panel.

Enter the following in the editor and click [Add].
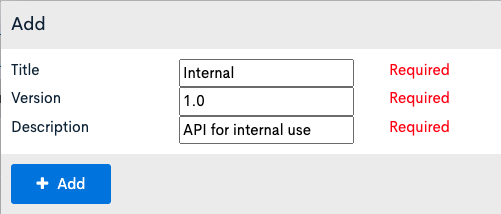
| Item | Settings |
|---|---|
| Title | Internal |
| Version | 1.0 |
| Description | API for internal use |
The new API is now created.
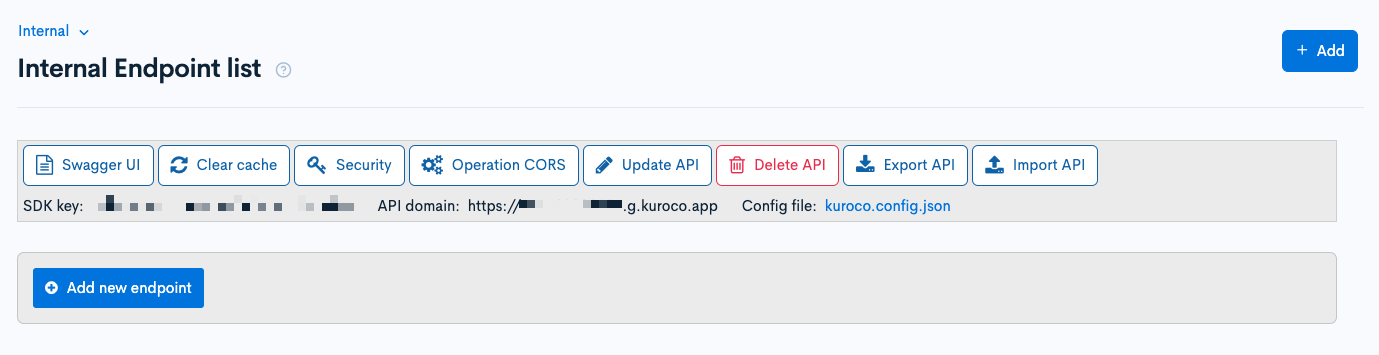
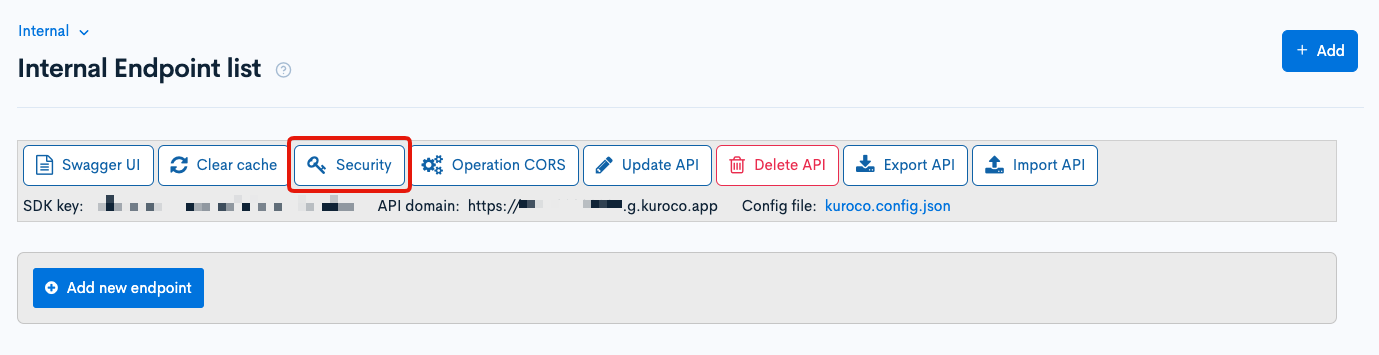
Security settings
Next, we will need to configure the security settings. Click [Security].
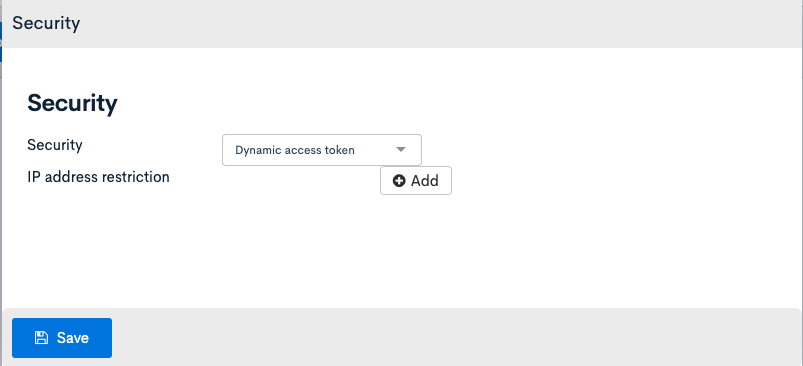
Select [Dynamic access token] and click [Save].
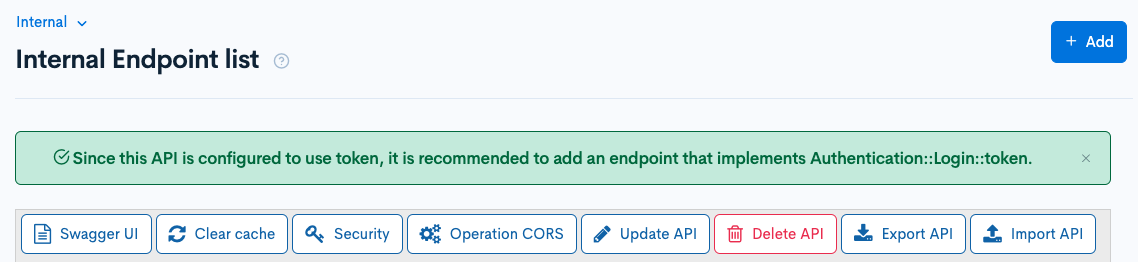
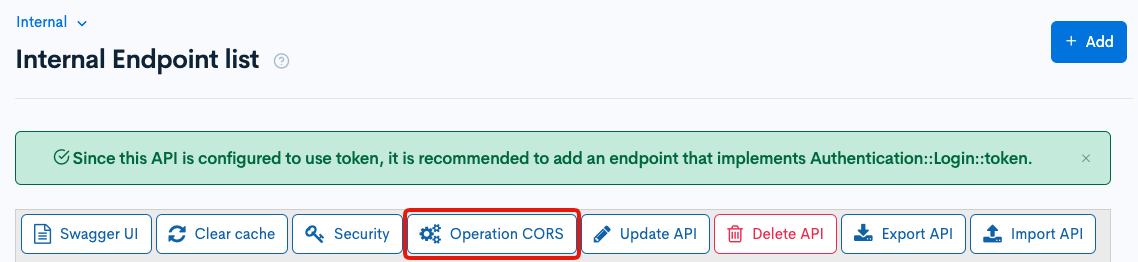
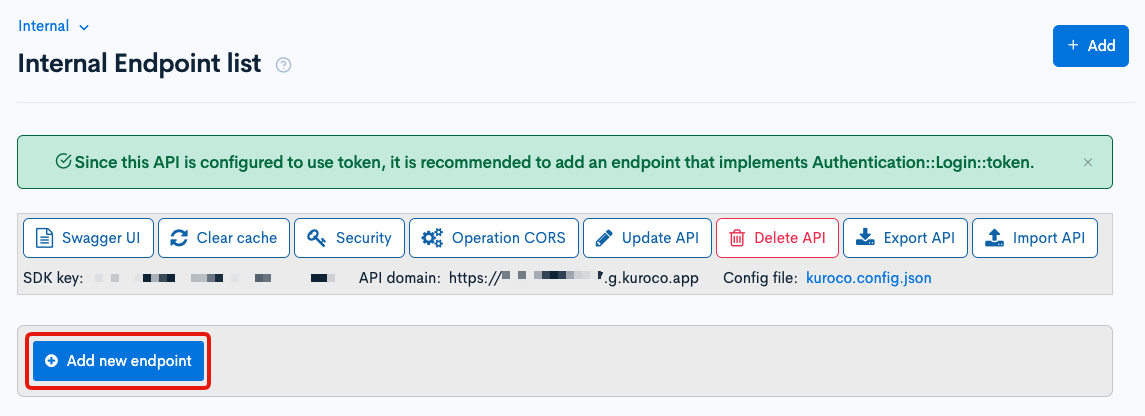
After setting the security to [Dynamic access token], the message "Since this API is configured to use token, it is recommended to add an endpoint that implements Authentication::Login::token." will be shown. We can ignore it for now since this API is only for internal use.
CORS settings
Next, we will configure CORS settings. Click [Operation CORS].
Click [Add origin] of CORS_ALLOW_ORIGINS and enter the following:
- Admin panel URL
Click [Add Method] of CORS_ALLOW_METHODS and enter the followings:
- GET
- POST
- OPTIONS
Confirm that [Allow Credentials] of CORS_ALLOW_CREDENTIALS is checked.
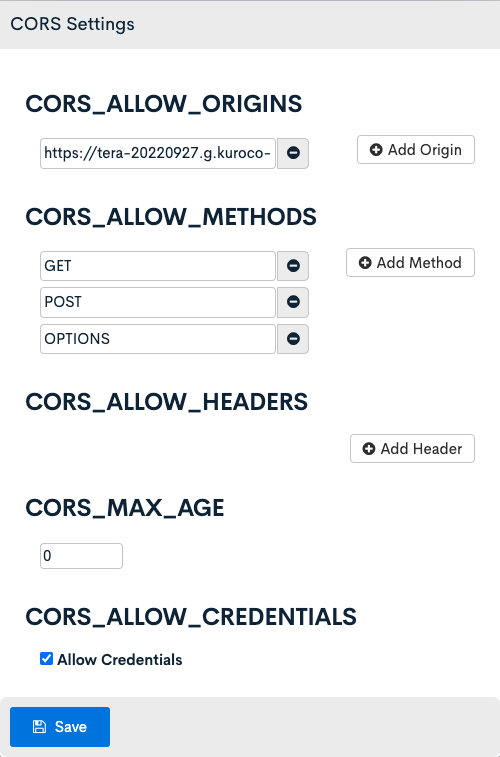
Click [Save] after finishing the above configuration.
Implement authorization feature using Kuroco and Nuxt.js
Create the required endpoints
We will need to create two endpoints
- instagram_auth endpoint: To receive the authentication code from the frontend
- instagram/update endpoint: To store the obtained long-term access token in Kuroco.
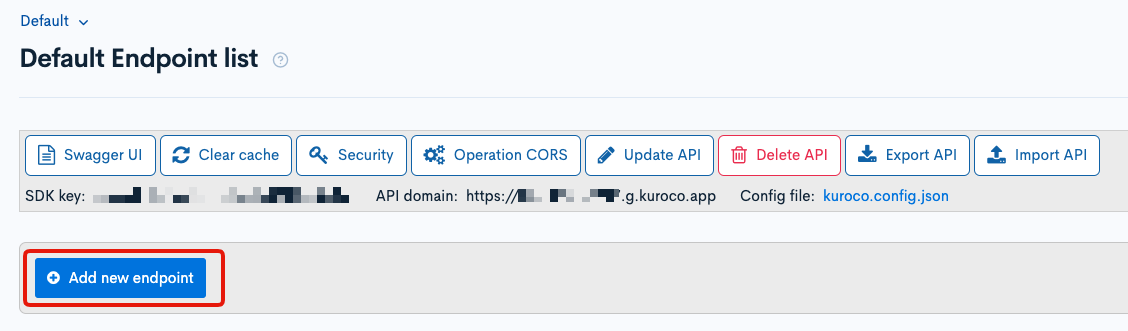
instagram_auth endpoint
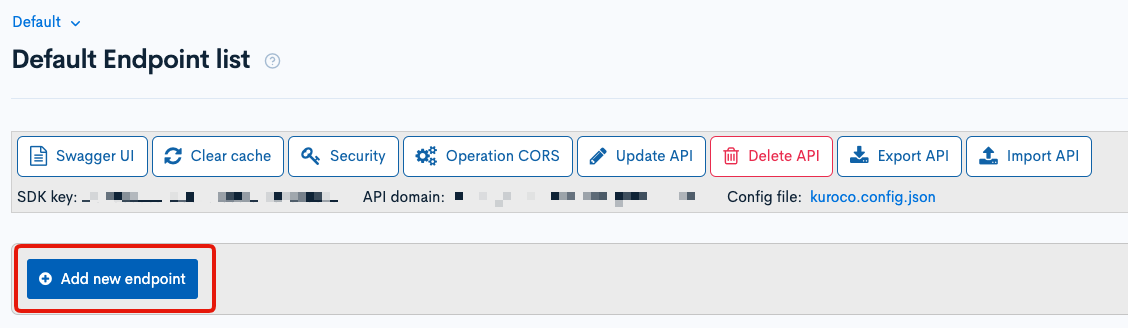
Since the instagram_auth endpoint sends requests from the frontend, click [Add new endpoint] from the "Default" API.
Create an endpoint below:
| Item | Settings |
|---|---|
| Name | instagram_auth |
| Category | API |
| Model | Api |
| Operation | request_api_post |
| name | instagram_auth (This will be the identifier of the custom function we will create later.) |
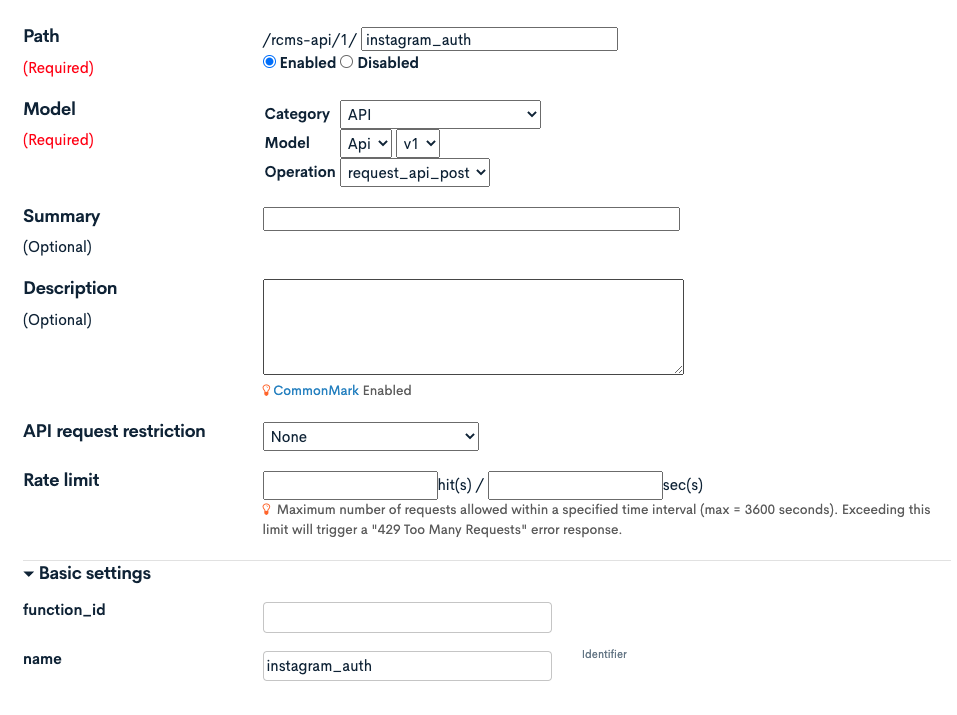
After finishing the above configuraion, click [Add] to add the endpoint.
instagram/update endpoint
Since the instagram/update endpoint is an internal endpoint to be called from custom function, click [Add new endpoint] from the "Internal" API.
Add the following endpoint:
| Item | Settings |
|---|---|
| Name | instagram/update |
| Category | Content |
| Model | Topics |
| Operation | update |
| topics_group_id | ID of the content structure created earlier(8) |

After settings, click [Add] to add the endpoint.
Create custom function
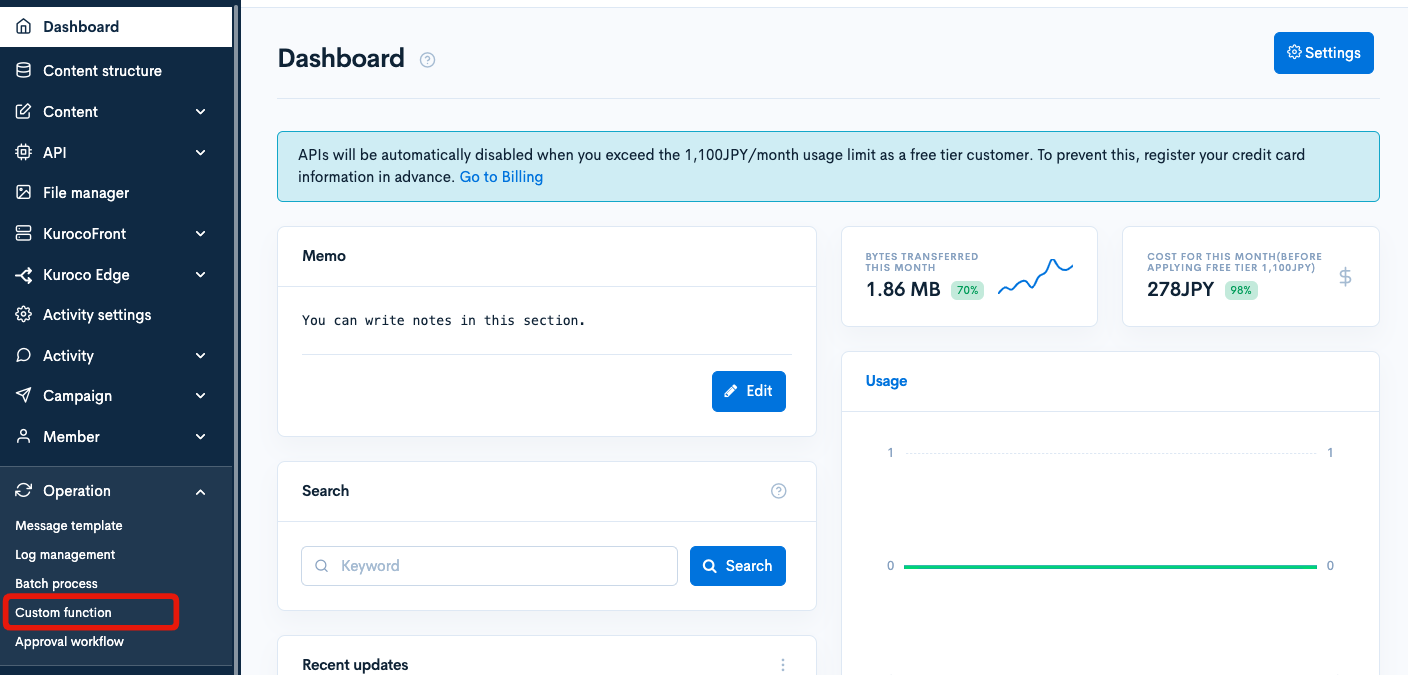
Click [Operation] -> [Custom function].
Click [Add].

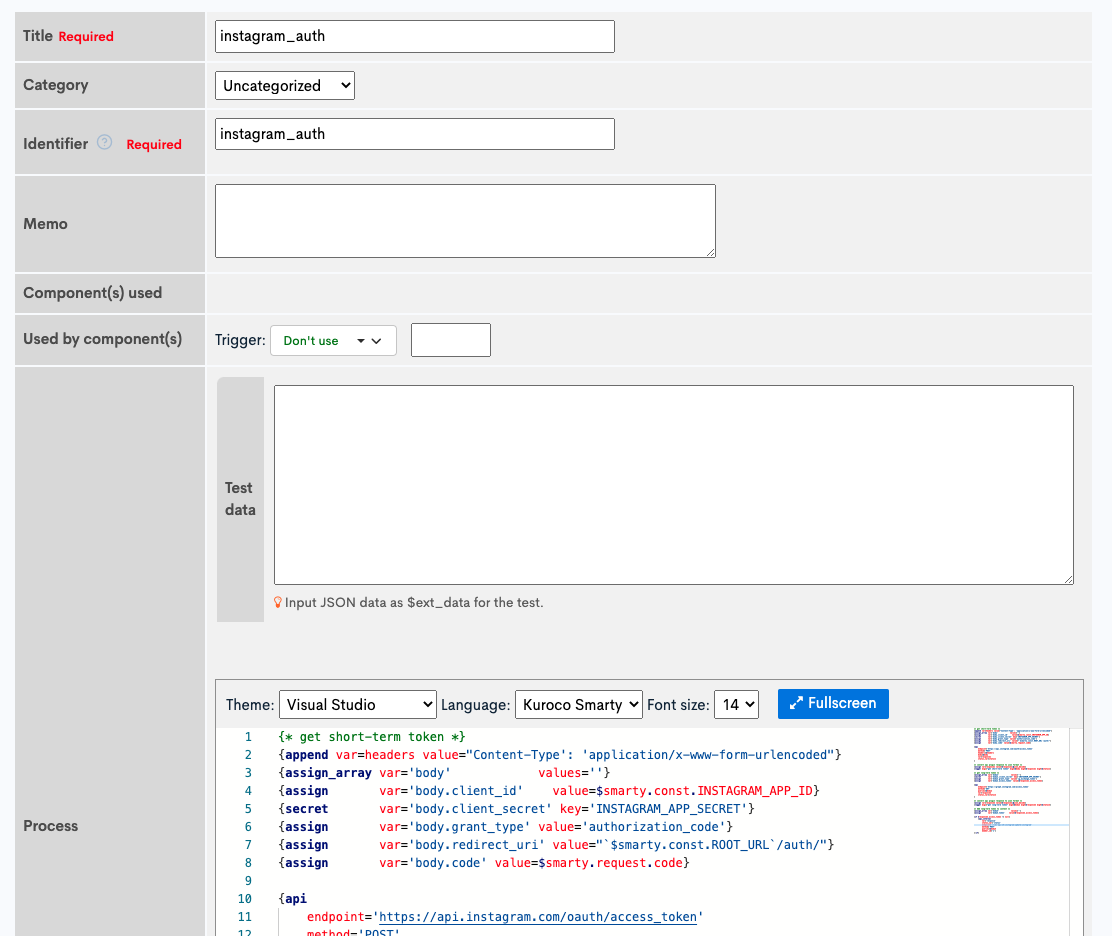
Enter the following:
| Item | Settings |
|---|---|
| Title | instagram_auth |
| Identifier | instagram_auth (This has to be the same name set in the Api::request_api endpoint.) |
| Process | Refer to the code below |
{* get short-term token *}
{append var=headers value="Content-Type': 'application/x-www-form-urlencoded"}
{assign_array var='body'            values=''}
{assign       var='body.client_id'    value=$smarty.const.INSTAGRAM_APP_ID}
{secret       var='body.client_secret' key='INSTAGRAM_APP_SECRET'}
{assign       var='body.grant_type' value='authorization_code'}
{assign       var='body.redirect_uri' value="`$smarty.const.ROOT_URL`/auth/"}
{assign       var='body.code' value=$smarty.request.code}

{api
    endpoint='https://api.instagram.com/oauth/access_token'
    method='POST'
    headers=$headers
    body=$body
    var=response1
    status_var=status1
}

{* convert api plugin response to json format *}
{assign var=response1 value=$response1|@json_decode}
{logger msg1="get short-term token" msg2=$body msg3=$response1 msg4=$status1}

{* get long-term token *}
{assign_array var='body2'            values=''}
{secret       var='body2.client_secret' key='INSTAGRAM_APP_SECRET'}
{assign       var='body2.grant_type' value='ig_exchange_token'}
{assign       var='body2.access_token' value=$response1.access_token}

{api
    endpoint='https://graph.instagram.com/access_token'
    method='GET'
    queries=$body2
    var=response2
    status_var=status2
}

{* convert api plugin response to json format *}
{assign var=response2 value=$response2|@json_decode}
{logger msg1="get long-term token" msg2=$body2 msg3=$response2 msg4=$status2}

{* Add long-term token to content *}
{assign_array var='body3'            values=''}
{assign       var='body3.token'    value=$response2.access_token}

{if $response2.access_token != null}
    {api_internal
        var='response'
        status_var='status'
        endpoint='/rcms-api/4/instagram/update/instagram'
        method='POST'
        queries=$body3
        member_id='1'}
{/if}
Replace /rcms-api/4/ with your own enpoint.
After completing the above configuration, click [Add] to save the custom function.
Frontend implementation
Next, we will implement the authenticaiton process on the frontend which send the authentication code to the Kuroco endpoint and activate the custom function.
Create index.vue file under /pages/auth/ directory.
<template>
  <div>
    <p>Authenticated</p>
  </div>
</template>

<script>
export default {
  validate({ query }) {
        return query.code != null
    },
  methods: {
    async makeAccessToken() {
      const payload = {
        code: this.$route.query.code
      }
      await this.$axios.post('/rcms-api/1/instagram_auth', payload);
    }
  },
  mounted($route) {
    this.makeAccessToken();
  }
}
</script>
Testing
Access the URL below and click [Allow].
https://api.instagram.com/oauth/authorize?client_id={app-id}&redirect_uri={redirect-uri}&scope=user_profile,user_media&response_type=code
Replace {app-id} and {redirect-uri} to "Instagram App ID" and "Valid OAuth Redirect URIs" respectively from [Instagram Basic Display]>[Basic Display].
Confirm that it is redirected to the redirect URI and the access token is saved in the content.
Periodically get the Instagram feed via Kuroco
We will add a Kuroco batch process to retrieve the Instagram feed periodically and update the content with the data retrieved.
Create batch process
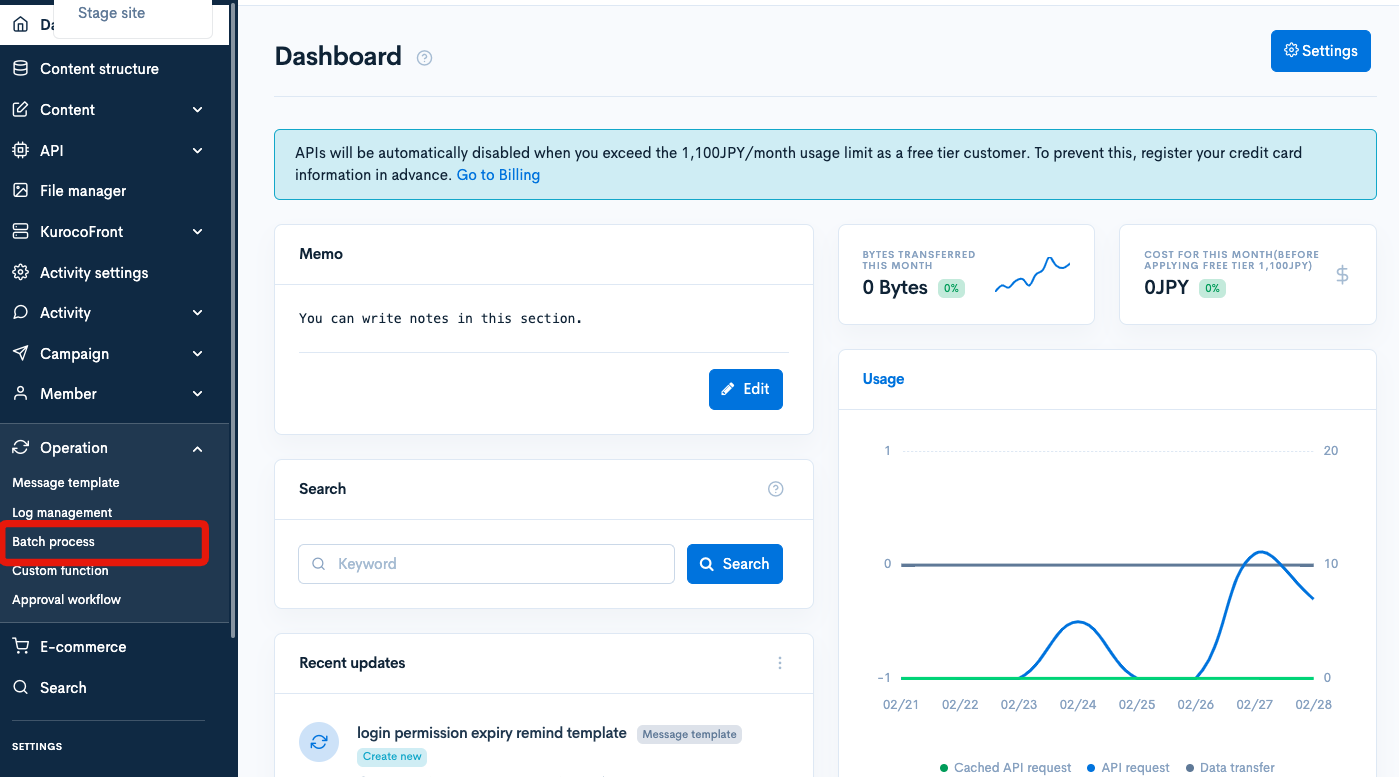
Click [Operation] > [Batch process].
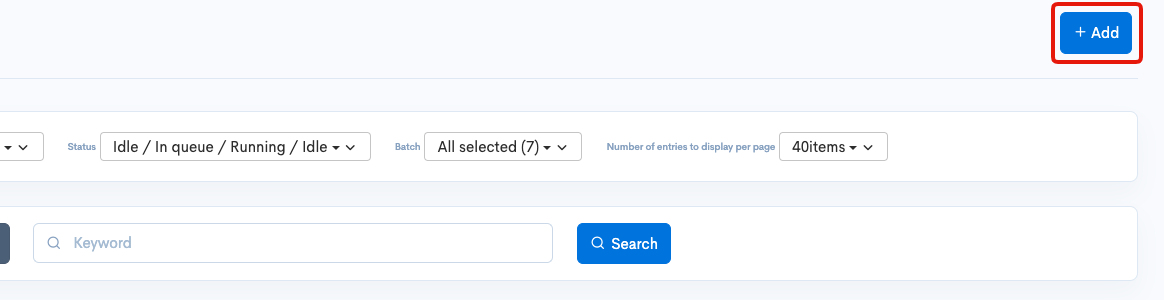
Click [Add].
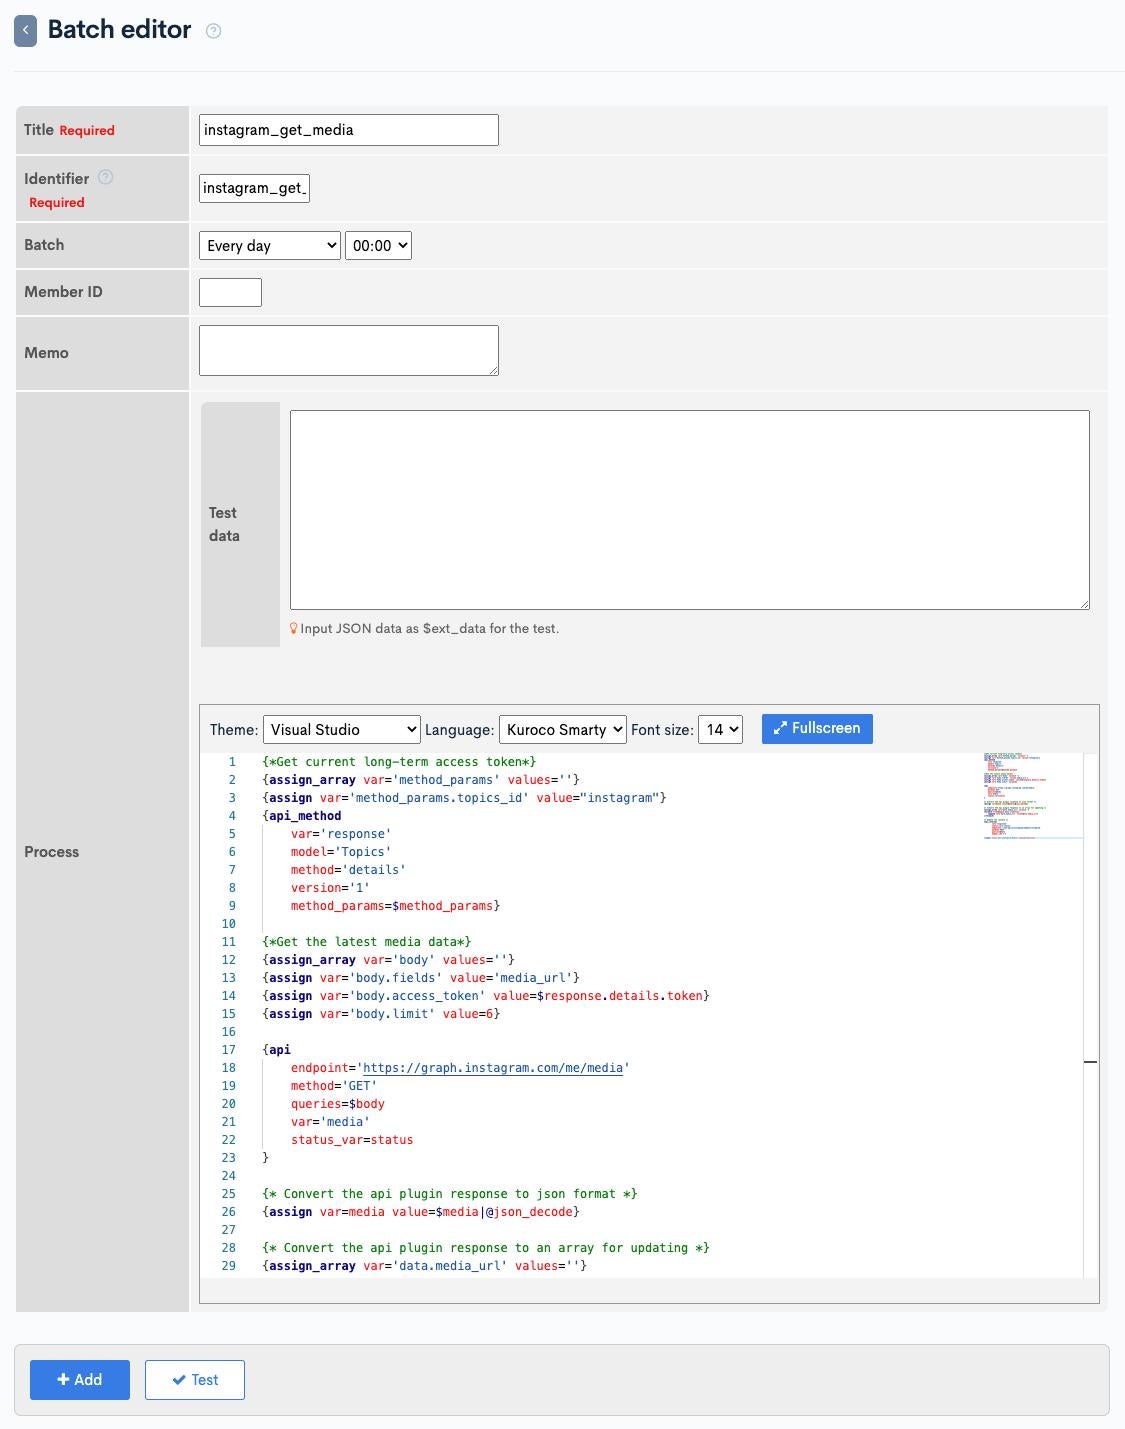
Configure as follows:
| Item | Settings |
|---|---|
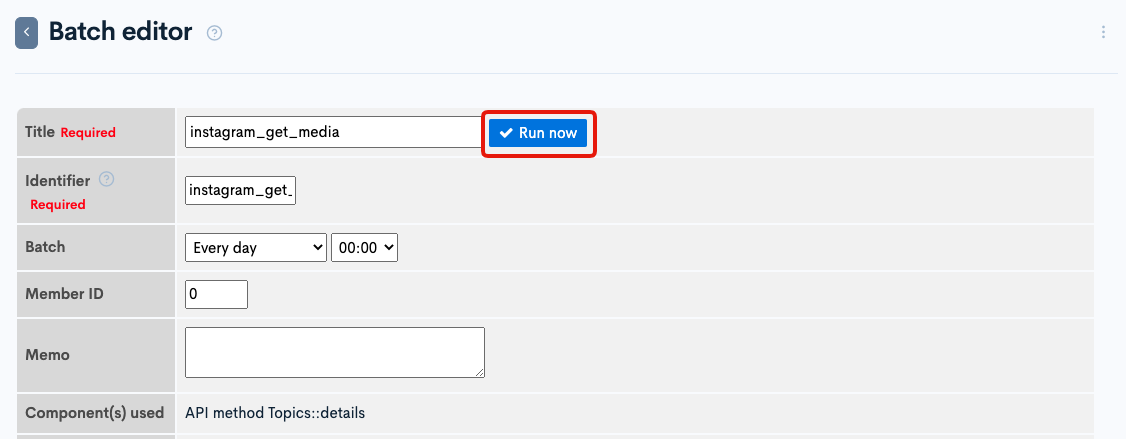
| Title | instagram_get_media |
| Identifier | instagram_get_media |
| Batch | Every day 00:00 |
| Process | Following code |
{*Get current long-term access token*}
{assign_array var='method_params' values=''}
{assign var='method_params.topics_id' value="instagram"}
{api_method
    var='response'
    model='Topics'
    method='details'
    version='1'
    method_params=$method_params}

{*Get the latest media data*}
{assign_array var='body' values=''}
{assign var='body.fields' value='media_url'}
{assign var='body.access_token' value=$response.details.token}
{assign var='body.limit' value=6}

{api
    endpoint='https://graph.instagram.com/me/media'
    method='GET'
    queries=$body
    var='media'
    status_var=status
}

{* Convert the api plugin response to json format *}
{assign var=media value=$media|@json_decode}

{* Convert the api plugin response to an array for updating *}
{assign_array var='data.media_url' values=''}
{foreach from=$media.data item=foo}
    {append var='data.media_url' value=$foo.media_url}
{/foreach}

{* Update the content *}
{api_internal
        var='response2'
        status_var='status'
        endpoint='/rcms-api/4/instagram/update/instagram'
        method='POST'
        queries=$data
        member_id='1'}

{logger msg1="Get Instagram Media" msg2=$response2}
Replace /rcms-api/4/ with your own enpoint.
Once the configuration is complete, click [Add] to create the batch process.
Confirmation of Operation
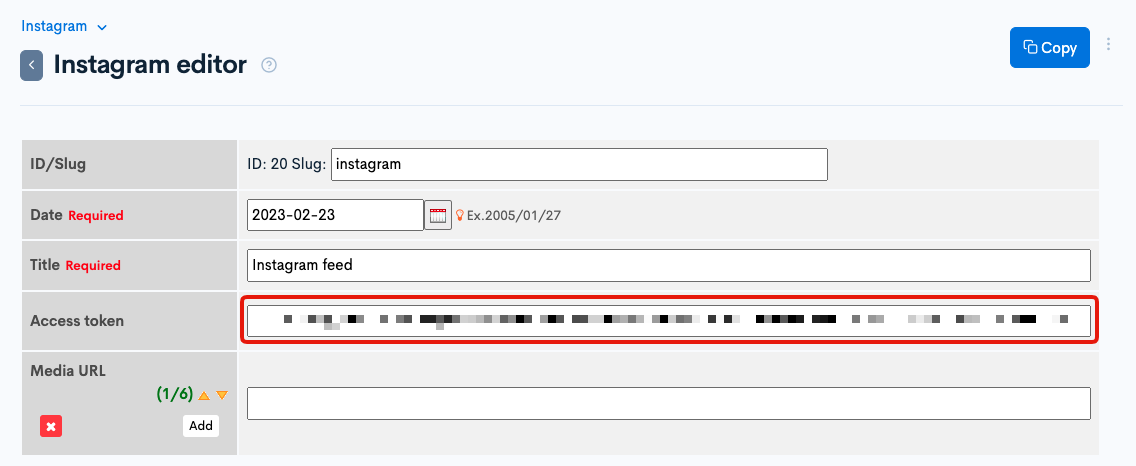
Finally, click [Run now] to confirm the operation.
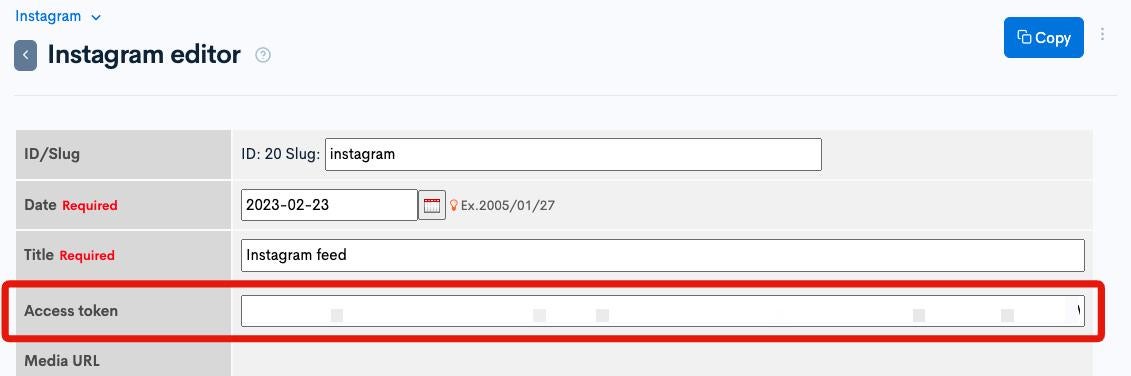
If the settings have been properly configured, the Instagram media URL will be saved in the content as shown below.

Periodically refresh long-term access tokens in Kuroco
The long-term access token for the Instagram Basic Display API has an expiration period of 60 days. An endpoint is provided by Instagram to update the long-term access token, so let's create a batch processing to send a request regularly.
Creating batch process
Click [Operation] > [Batch process].
Click [Add].
Configure as follows:
| Item | Settings |
|---|---|
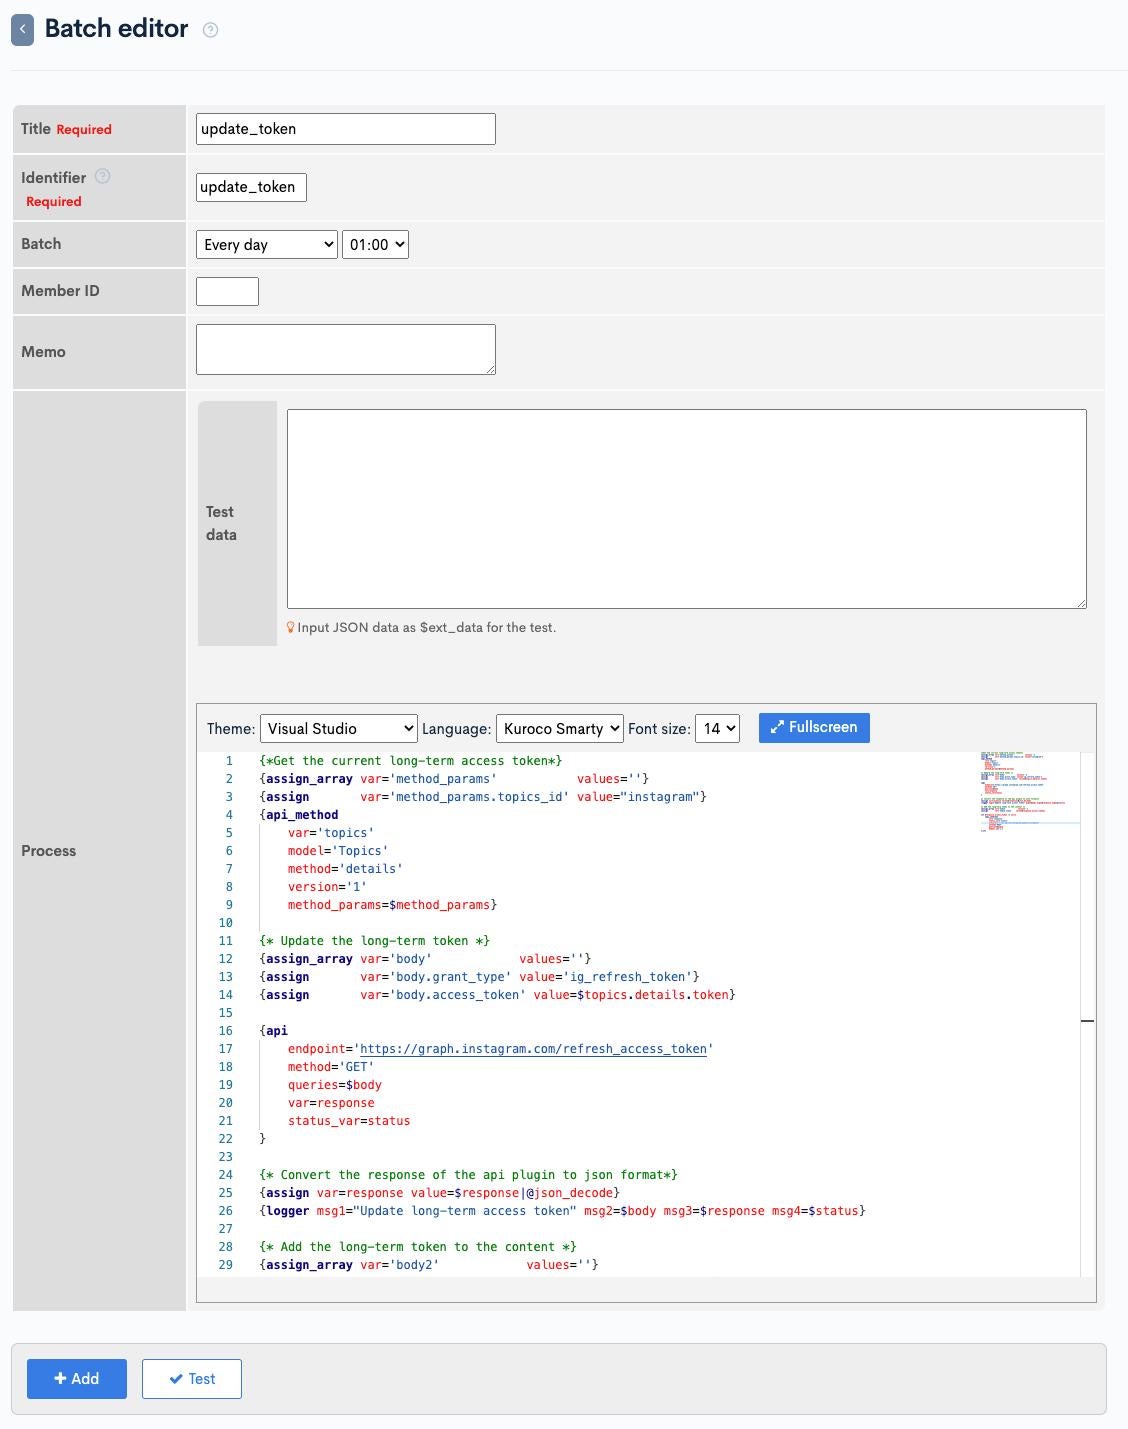
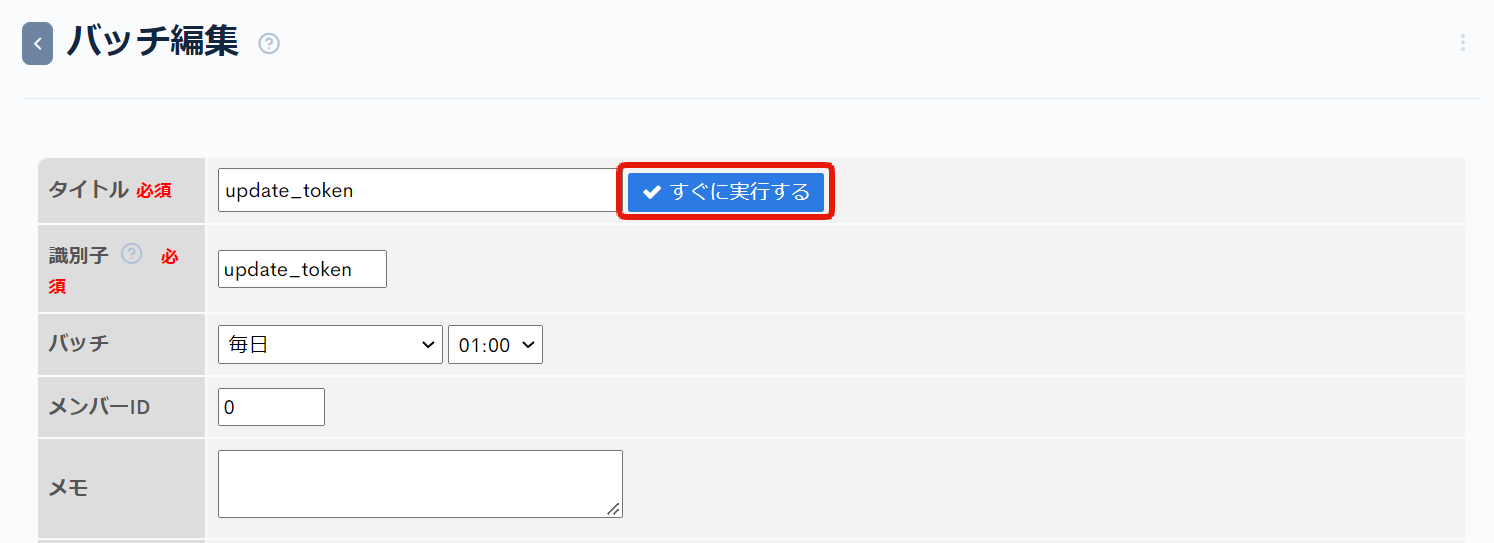
| Title | update_token |
| Identifier | update_token |
| Schedule | Every day 01:00 |
| Process | Code below |
{*Get the current long-term access token*}
{assign_array var='method_params'           values=''}
{assign       var='method_params.topics_id' value="instagram"}
{api_method
    var='topics'
    model='Topics'
    method='details'
    version='1'
    method_params=$method_params}

{* Update the long-term token *}
{assign_array var='body'            values=''}
{assign       var='body.grant_type' value='ig_refresh_token'}
{assign       var='body.access_token' value=$topics.details.token}

{api
    endpoint='https://graph.instagram.com/refresh_access_token'
    method='GET'
    queries=$body
    var=response
    status_var=status
}

{* Convert the response of the api plugin to json format*}
{assign var=response value=$response|@json_decode}
{logger msg1="Update long-term access token" msg2=$body msg3=$response msg4=$status}

{* Add the long-term token to the content *}
{assign_array var='body2'            values=''}
{assign       var='body2.token'    value=$response.access_token}

{if $response.access_token != null}
    {api_internal
        var='response'
        status_var='status'
        endpoint='/rcms-api/4/instagram/update/instagram'
        method='POST'
        queries=$body2
        member_id='1'}
{/if}
Replace /rcms-api/4/ with your own enpoint.
Once you have entered the settings, click [Add] to add the batch process.
Testing
Finally, click [Run now] to confirm the access token is being retrieved.
If the settings are correct, the access token in the content will be updated.
Display Instagram feed using Kuroco and Nuxt.js
Everything has been configured, all that is left is to display the Instagram media URLs you have added to your Kuroco content on the front page.
Creating an endpoint
Click [Add new endpoint] from the Default API.
Create the following endpoint:
| Item | Settings |
|---|---|
| Name | |
| Category | Content |
| Model | Topics |
| Operation | details |
| topics_group_id | Content structure ID(8) |

Click [Add] after configuring the endpoint.
Front-end implementation
Create an index.vue file in the /pages/instagram/ directory for the front-end as follows:
<template>
  <div>
    <h2>Instagram</h2>
    <div class="square_contents">
      <a v-for="(n,i) in response.details.media_url" :key=i href="https://www.instagram.com/" target="_blank">
        <img :src=n>
      </a>
    </div>
  </div>
</template>

<script>
export default {
  async asyncData({ $axios }) {
    return {
      response: await $axios.$get('/rcms-api/1/instagram/instagram'),
    };
  },
};
</script>

<style>
.square_contents {
  display: flex;
  flex-wrap: wrap;
  width:720px;
}
.square_contents a {
  display: block;
  position: relative;
  width: 31%;
  margin: 1%;
}
.square_contents a::before {
  content: "";
  display: block;
  padding-top: 100%;
}
.square_contents img {
  position: absolute;
  width: 100%;
  height: 100%;
  top: 0;
  object-fit: cover;
}
</style>
Testing
Confirm that the Instagram feed is being displayed on the frontend.
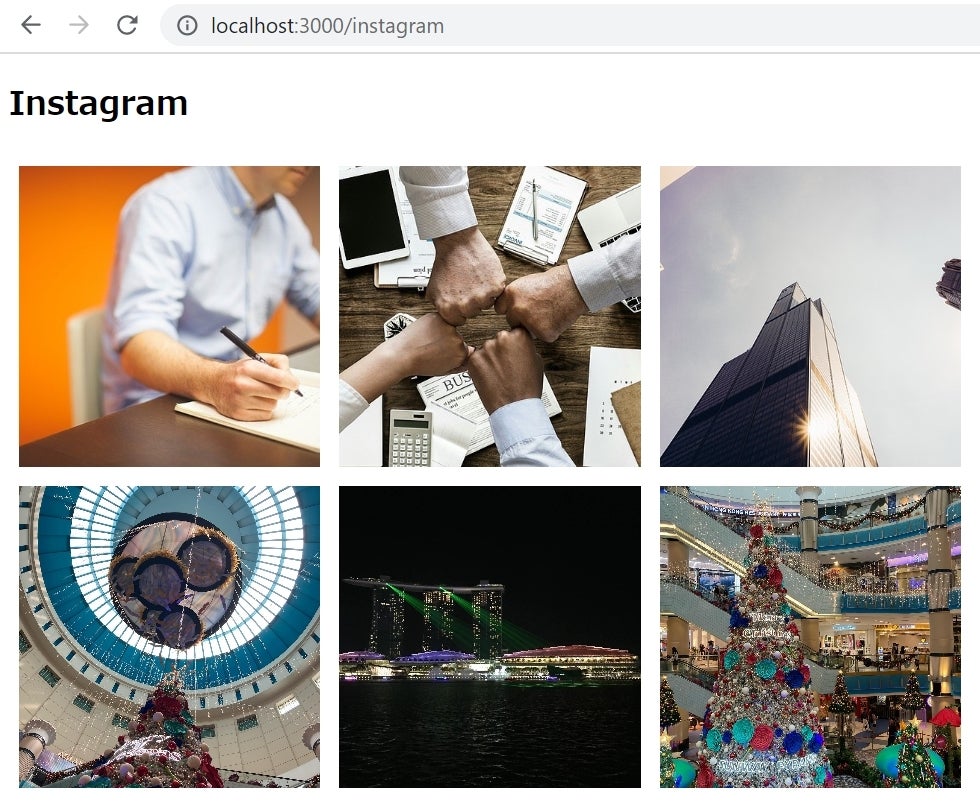
With the above setup and implementation, the Instagram feed is displayed, and in the event of an update, Kucoro's content will be automatically updated as well.
In this tutorial, we used the Instagram basic display API to display the Instagram feed.
You can also use the Instagram graph API for the following cases:
- Identify media with specific @mentions or hashtags.
- Retrieve data about other Instagram users.
- Get Instagram stories.
Points to check when it doesn't work as expected
- Is frontend repository deployed successfully? (Is the
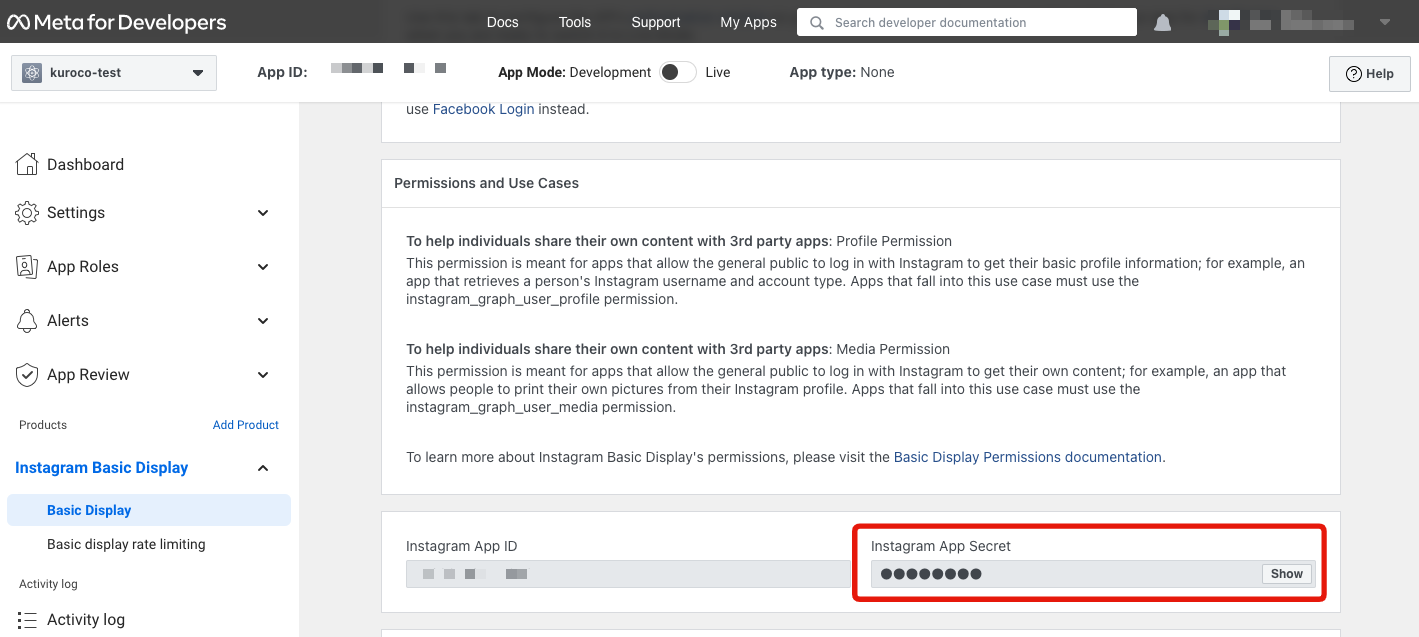
auth/?code=1234page shown properly?) - Check that the Kuroco constant
INSTAGRAM_APP_IDis set toInstagram App IDinstead ofApp IDtoINSTAGRAM_APP_ID.
CORRECT(Instagram App ID):

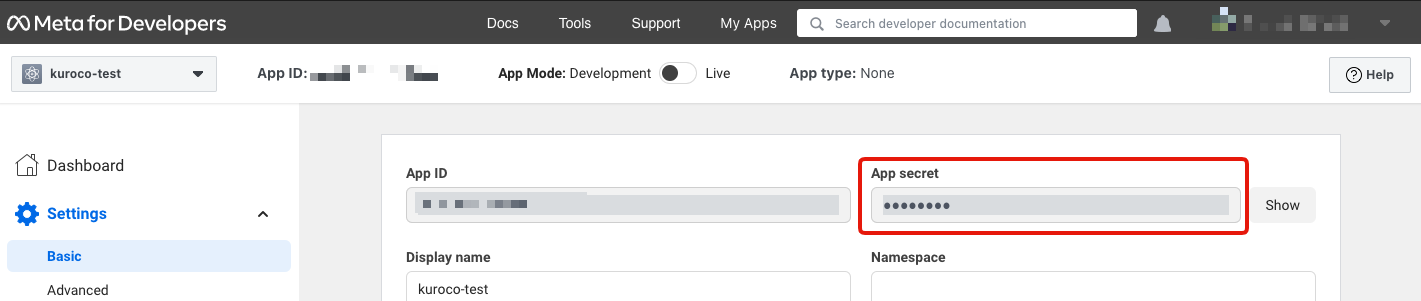
WRONG(App ID):

- Check that the Kuroco secret
INSTAGRAM_APP_SECRETis set toInsagram App Secretinstead ofApp Secret.
CORRECT(Instagram App Secret):
WRONG(App secret):
Related documents
Support
If you have any other questions, please contact us or check out Our Slack Community.